This is an automated email from the ASF dual-hosted git repository.

zky pushed a commit to branch main
in repository https://gitbox.apache.org/repos/asf/incubator-devlake-website.git
The following commit(s) were added to refs/heads/main by this push:
new f5d401fc docs: update data source manuals
f5d401fc is described below
commit f5d401fc4778a0bcca2d15827fb25e0223688c5b
Author: Startrekzky <[email protected]>
AuthorDate: Sat Jul 23 05:01:25 2022 +0800
docs: update data source manuals
---
docs/DeveloperManuals/DeveloperSetup.md | 8 +-
docs/Plugins/github.md | 35 +------
docs/Plugins/gitlab.md | 51 +---------
docs/Plugins/jenkins.md | 13 ---
docs/Plugins/jira.md | 59 +----------
docs/QuickStart/DockerComposeSetup.md | 17 +---
docs/UserManuals/ConfigUI/GitHub.md | 9 +-
docs/UserManuals/ConfigUI/GitLab.md | 53 ++++++++++
docs/UserManuals/ConfigUI/Jenkins.md | 33 ++++++
docs/UserManuals/ConfigUI/Jira.md | 67 ++++++++++++
docs/UserManuals/ConfigUI/Tutorial.md | 2 +-
docs/UserManuals/GitHubUserGuide.md | 113 ---------------------
.../img/ConfigUI/gitlab-add-data-connections.png | Bin 0 -> 233722 bytes
.../img/ConfigUI/jenkins-add-data-connections.png | Bin 0 -> 208576 bytes
static/img/ConfigUI/jira-add-data-connections.png | Bin 0 -> 243145 bytes
.../jira-add-transformation-rules-list.png | Bin 0 -> 192375 bytes
.../img/ConfigUI/jira-add-transformation-rules.png | Bin 0 -> 141564 bytes
static/img/ConfigUI/jira-set-data-scope.png | Bin 0 -> 211665 bytes
18 files changed, 170 insertions(+), 290 deletions(-)
diff --git a/docs/DeveloperManuals/DeveloperSetup.md
b/docs/DeveloperManuals/DeveloperSetup.md
index d75c6e26..1373523f 100644
--- a/docs/DeveloperManuals/DeveloperSetup.md
+++ b/docs/DeveloperManuals/DeveloperSetup.md
@@ -73,13 +73,7 @@ sidebar_position: 1
```
8. Visit config UI at `localhost:4000` to configure data connections.
- - Navigate to desired plugins pages on the Integrations page
- - Enter the required information for the plugins you intend to use.
- - Refer to the following for more details on how to configure each one:
- - [Jira](../Plugins/jira.md)
- - [GitLab](../Plugins/gitlab.md)
- - [Jenkins](../Plugins/jenkins.md)
- - [GitHub](../Plugins/github.md): For users who'd like to collect
GitHub data, we recommend reading our [GitHub data collection
guide](../UserManuals/GitHubUserGuide.md) which covers the following steps in
detail.
+ - Please follow the [tutorial](./UserManuals/ConfigUI/Tutorial.md)
- Submit the form to update the values by clicking on the **Save
Connection** button on each form page
9. Visit `localhost:4000/pipelines/create` to RUN a Pipeline and trigger data
collection.
diff --git a/docs/Plugins/github.md b/docs/Plugins/github.md
index 25a4e99b..815bc145 100644
--- a/docs/Plugins/github.md
+++ b/docs/Plugins/github.md
@@ -27,38 +27,9 @@ Here are some examples metrics using `GitHub` data:
## Configuration
-
-### Provider (Datasource) Connection
-The connection section of the configuration screen requires the following key
fields to connect to the **GitHub API**.
-
-
-
-- **Connection Name** [`READONLY`]
- - ⚠️ Defaults to "**Github**" and may not be changed. As GitHub is a
_single-source data provider_ at the moment, the connection name is read-only
as there is only one instance to manage. As we advance on our development
roadmap we may enable _multi-source_ connections for GitHub in the future.
-- **Endpoint URL** (REST URL, starts with `https://` or `http://`)
- - This should be a valid REST API Endpoint eg. `https://api.github.com/`
- - ⚠️ URL should end with`/`
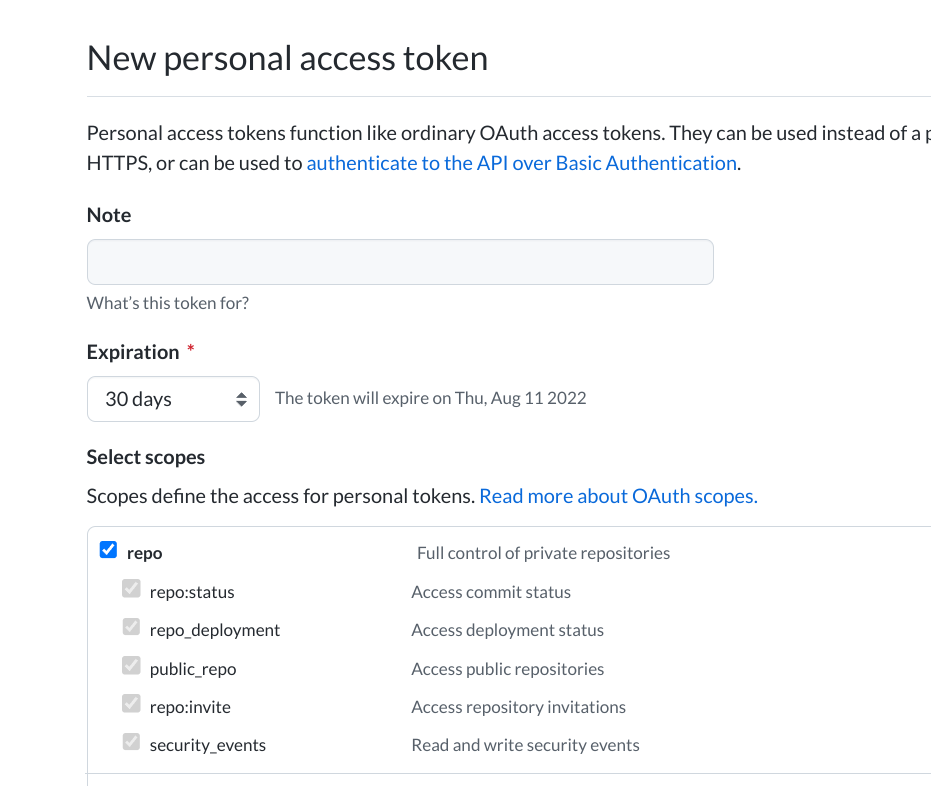
-- **Auth Token(s)** (Personal Access Token)
- - For help on **Creating a personal access token**, please see official
[GitHub Docs on Personal
Tokens](https://docs.github.com/en/authentication/keeping-your-account-and-data-secure/creating-a-personal-access-token)
- - Provide at least one token for Authentication.
- - This field accepts a comma-separated list of values for multiple tokens.
The data collection will take longer for GitHub since they have a **rate limit
of [5,000
requests](https://docs.github.com/en/rest/overview/resources-in-the-rest-api#rate-limiting)
per hour** (15,000 requests/hour if you pay for `GitHub` enterprise). You can
accelerate the process by configuring _multiple_ personal access tokens.
- - In order to collect data from your Private Repositories, the token must be
granted with `repo` scope
- 
-
-Click **Save Connection** to update connection settings.
-
-
-### Provider (Datasource) Settings
-Manage additional settings and options for the GitHub Datasource Provider.
Currently there is only one **optional** setting, *Proxy URL*. If you are
behind a corporate firewall or VPN you may need to utilize a proxy server.
-
-- **GitHub Proxy URL [`Optional`]**
-Enter a valid proxy server address on your Network, e.g.
`http://your-proxy-server.com:1080`
-
-Click **Save Settings** to update additional settings.
-
-### Regular Expression Configuration
-Define regex pattern in .env
-- GITHUB_PR_BODY_CLOSE_PATTERN: Define key word to associate issue in PR body,
please check the example in .env.example
+- Configuring GitHub via [config-ui](/UserManuals/ConfigUI/GitHub.md).
+- Configuring GitHub via `.env`
+ - GITHUB_PR_BODY_CLOSE_PATTERN: Define key word to associate issue in PR
body, please check the example in .env.example
## Sample Request
To collect data, select `Advanced Mode` on the `Create Pipeline Run` page and
paste a JSON config like the following:
diff --git a/docs/Plugins/gitlab.md b/docs/Plugins/gitlab.md
index 21a86d7f..be5e1842 100644
--- a/docs/Plugins/gitlab.md
+++ b/docs/Plugins/gitlab.md
@@ -20,36 +20,7 @@ description: >
| Pull Request Review Rounds | Number of cycles of commits followed by
comments/final merge |
## Configuration
-
-### Provider (Datasource) Connection
-The connection section of the configuration screen requires the following key
fields to connect to the **GitLab API**.
-
-
-
-- **Connection Name** [`READONLY`]
- - ⚠️ Defaults to "**GitLab**" and may not be changed. As GitLab is a
_single-source data provider_ at the moment, the connection name is read-only
as there is only one instance to manage. As we advance on our development
roadmap we may enable _multi-source_ connections for GitLab in the future.
-- **Endpoint URL** (REST URL, starts with `https://` or `http://`)
- - This should be a valid REST API Endpoint eg.
`https://gitlab.example.com/api/v4/`
- - ⚠️ URL should end with`/`
-- **Personal Access Token** (HTTP Basic Auth)
- - Login to your GitLab Account and create a **Personal Access Token** to
authenticate with the API using HTTP Basic Authentication. The token must be 20
characters long. Save the personal access token somewhere safe. After you leave
the page, you no longer have access to the token.
-
- 1. In the top-right corner, select your **avatar**.
- 2. Click on **Edit profile**.
- 3. On the left sidebar, select **Access Tokens**.
- 4. Enter a **name** and optional **expiry date** for the token.
- 5. Select the desired **scopes**.
- 6. Click on **Create personal access token**.
-
- For help on **Creating a personal access token**, please see official
[GitLab Docs on Personal
Tokens](https://docs.gitlab.com/ee/user/profile/personal_access_tokens.html).
- For an overview of the **GitLab REST API**, please see official [GitLab
Docs on
REST](https://docs.gitlab.com/ee/development/documentation/restful_api_styleguide.html#restful-api)
-
-Click **Save Connection** to update connection settings.
-
-### Provider (Datasource) Settings
-There are no additional settings for the GitLab Datasource Provider at this
time.
-
-> NOTE: `GitLab Project ID` Mappings feature has been deprecated.
+Configuring GitLab via [config-ui](/UserManuals/ConfigUI/GitLab.md).
## Gathering Data with GitLab
@@ -71,24 +42,4 @@ curl --location --request POST 'localhost:8080/pipelines' \
'
```
-## Finding Project Id
-
-To get the project id for a specific `GitLab` repository:
-- Visit the repository page on GitLab
-- Find the project id just below the title
-
- 
-
-> Use this project id in your requests, to collect data from this project
-
-## ⚠️ (WIP) Create a GitLab API Token <a id="gitlab-api-token"></a>
-
-1. When logged into `GitLab` visit
`https://gitlab.com/-/profile/personal_access_tokens`
-2. Give the token any name, no expiration date and all scopes (excluding write
access)
-
- 
-
-3. Click the **Create Personal Access Token** button
-4. Save the API token into `.env` file via `cofnig-ui` or edit the file
directly.
-
<br/><br/><br/>
diff --git a/docs/Plugins/jenkins.md b/docs/Plugins/jenkins.md
index 792165dd..0b165acf 100644
--- a/docs/Plugins/jenkins.md
+++ b/docs/Plugins/jenkins.md
@@ -25,19 +25,6 @@ In order to fully use this plugin, you will need to set
various configurations v
The connection section of the configuration screen requires the following key
fields to connect to the Jenkins API.
-- Connection Name [READONLY]
- - ⚠️ Defaults to "Jenkins" and may not be changed. As Jenkins is a
_single-source data provider_ at the moment, the connection name is read-only
as there is only one instance to manage. As we advance on our development
roadmap we may enable multi-source connections for Jenkins in the future.
-- Endpoint URL (REST URL, starts with `https://` or `http://`i, ends with `/`)
- - This should be a valid REST API Endpoint eg. `https://ci.jenkins.io/`
-- Username (E-mail)
- - Your User ID for the Jenkins Instance.
-- Password (Secret Phrase or API Access Token)
- - Secret password for common credentials.
- - For help on Username and Password, please see official Jenkins Docs on
Using Credentials
- - Or you can use **API Access Token** for this field, which can be generated
at `User` -> `Configure` -> `API Token` section on Jenkins.
-
-Click Save Connection to update connection settings.
-
## Collect Data From Jenkins
To collect data, select `Advanced Mode` on the `Create Pipeline Run` page and
paste a JSON config like the following:
diff --git a/docs/Plugins/jira.md b/docs/Plugins/jira.md
index 8ac28d62..7ac79ad0 100644
--- a/docs/Plugins/jira.md
+++ b/docs/Plugins/jira.md
@@ -27,49 +27,7 @@ This plugin collects Jira data through Jira Cloud REST API.
It then computes and
| Incident Count per 1k Lines of Code | Amount of incidents per 1000 lines of
code |
## Configuration
-
-In order to fully use this plugin, you will need to set various configurations
via Dev Lake's `config-ui` service. Open `config-ui` on browser, by default the
URL is http://localhost:4000, then go to **Data Integrations / JIRA** page.
JIRA plugin currently supports multiple data connections, Here you can **add**
new connection to your JIRA connection or **update** the settings if needed.
-
-For each connection, you will need to set up following items first:
-
-
-
-- Connection Name: This allow you to distinguish different connections.
-- Endpoint URL: The JIRA instance API endpoint, for JIRA Cloud Service:
`https://<mydomain>.atlassian.net/rest`. DevLake officially supports JIRA Cloud
Service on atlassian.net, but may or may not work for JIRA Server Instance.
-- Basic Auth Token: First, generate a **JIRA API TOKEN** for your JIRA account
on the JIRA console (see [Generating API token](#generating-api-token)), then,
in `config-ui` click the KEY icon on the right side of the input to generate a
full `HTTP BASIC AUTH` token for you.
-- Proxy Url: Just use when you want collect through VPN.
-
-### More custom configuration
-If you want to add more custom config, you can click "settings" to change
these config
-
-- Issue Type Mapping: JIRA is highly customizable, each JIRA instance may have
a different set of issue types than others. In order to compute and visualize
metrics for different instances, you need to map your issue types to standard
ones. See [Issue Type Mapping](#issue-type-mapping) for detail.
-- Epic Key: unfortunately, epic relationship implementation in JIRA is based
on `custom field`, which is vary from instance to instance. Please see [Find
Out Custom Fields](#find-out-custom-fields).
-- Story Point Field: same as Epic Key.
-- Remotelink Commit SHA:A regular expression that matches commit links to
determine whether an external link is a link to a commit. Taking gitlab as an
example, to match all commits similar to
https://gitlab.com/merico-dev/ce/example-repository/-/commit/8ab8fb319930dbd8615830276444b8545fd0ad24,
you can directly use the regular expression **/commit/([0-9a-f]{40})$**
-
-
-### Generating API token
-1. Once logged into Jira, visit the url
`https://id.atlassian.com/manage-profile/security/api-tokens`
-2. Click the **Create API Token** button, and give it any label name
-
-
-
-### Issue Type Mapping
-
-Devlake supports 3 standard types, all metrics are computed based on these
types:
-
- - `Bug`: Problems found during the `test` phase, before they can reach the
production environment.
- - `Incident`: Problems that went through the `test` phase, got deployed into
production environment.
- - `Requirement`: Normally, it would be `Story` on your instance if you
adopted SCRUM.
-
-You can map arbitrary **YOUR OWN ISSUE TYPE** to a single **STANDARD ISSUE
TYPE**. Normally, one would map `Story` to `Requirement`, but you could map
both `Story` and `Task` to `Requirement` if that was your case. Unspecified
types are copied directly for your convenience, so you don't need to map your
`Bug` to standard `Bug`.
-
-Type mapping is critical for some metrics, like **Requirement Count**, make
sure to map your custom type correctly.
-
-### Find Out Custom Field
-
-Please follow this guide: [How to find the custom field ID in
Jira?](https://github.com/apache/incubator-devlake/wiki/How-to-find-the-custom-field-ID-in-Jira)
-
+Configuring Jira via [config-ui](/UserManuals/ConfigUI/Jira.md).
## Collect Data From JIRA
@@ -97,21 +55,6 @@ To collect data, select `Advanced Mode` on the `Create
Pipeline Run` page and pa
- `since`: optional, download data since a specified date only.
-### Find Board Id
-
-1. Navigate to the Jira board in the browser
-2. in the URL bar, get the board id from the parameter `?rapidView=`
-
-**Example:**
-
-`https://{your_jira_endpoint}/secure/RapidBoard.jspa?rapidView=51`
-
-
-
-Your board id is used in all REST requests to Apache DevLake. You do not need
to configure this at the data connection level.
-
-
-
## API
### Data Connections
diff --git a/docs/QuickStart/DockerComposeSetup.md
b/docs/QuickStart/DockerComposeSetup.md
index 76679859..b8bfd3f7 100644
--- a/docs/QuickStart/DockerComposeSetup.md
+++ b/docs/QuickStart/DockerComposeSetup.md
@@ -19,19 +19,12 @@ sidebar_position: 1
2. Rename `env.example` to `.env`. For Mac/Linux users, please run `mv
env.example .env` in the terminal.
3. Run `docker-compose up -d` to launch DevLake.
-## Configure data connections and collect data
-
-1. Visit `config-ui` at `http://localhost:4000` in your browser to configure
data connections.
- - Navigate to desired plugins on the Integrations page
- - Please reference the following for more details on how to configure each
one:<br/>
- - [Jira](../Plugins/jira.md)
- - [GitHub](../Plugins/github.md): For users who'd like to collect GitHub
data, we recommend reading our [GitHub data collection
guide](../UserManuals/GitHubUserGuide.md) which covers the following steps in
detail.
- - [GitLab](../Plugins/gitlab.md)
- - [Jenkins](../Plugins/jenkins.md)
- - Submit the form to update the values by clicking on the **Save
Connection** button on each form page
+## Configure and collect data
+
+1. Visit `config-ui` at `http://localhost:4000` in your browser to configure
and collect data.
+ - Please follow the [turorial](./UserManuals/ConfigUI/Tutorial.md)
- `devlake` takes a while to fully boot up. if `config-ui` complaining
about api being unreachable, please wait a few seconds and try refreshing the
page.
-2. Create pipelines to trigger data collection in `config-ui`
-3. Click *View Dashboards* button in the top left when done, or visit
`localhost:3002` (username: `admin`, password: `admin`).
+2. Click *View Dashboards* button in the top left when done, or visit
`localhost:3002` (username: `admin`, password: `admin`).
- We use [Grafana](https://grafana.com/) as a visualization tool to build
charts for the [data](../DataModels/DataSupport.md) stored in our database.
- Using SQL queries, we can add panels to build, save, and edit customized
dashboards.
- All the details on provisioning and customizing a dashboard can be found
in the [Grafana Doc](../UserManuals/Dashboards/GrafanaUserGuide.md).
diff --git a/docs/UserManuals/ConfigUI/GitHub.md
b/docs/UserManuals/ConfigUI/GitHub.md
index 76c7a402..d775f7b1 100644
--- a/docs/UserManuals/ConfigUI/GitHub.md
+++ b/docs/UserManuals/ConfigUI/GitHub.md
@@ -4,6 +4,7 @@ sidebar_position: 2
description: Config UI instruction for GitHub
---
+Visit config-ui: `http://localhost:4000`.
### Step 1 - Add Data Connections

@@ -15,10 +16,10 @@ This should be a valid REST API endpoint, eg.
`https://api.github.com/`. The url
#### Auth Token(s)
GitHub personal access tokens are required to add a connection.
-- Learn about [how to create a personal access
token](https://docs.github.com/en/authentication/keeping-your-account-and-data-secure/creating-a-personal-access-token)
+- Learn about [how to create a GitHub personal access
token](https://docs.github.com/en/authentication/keeping-your-account-and-data-secure/creating-a-personal-access-token)
- The data collection speed is relatively slow for GitHub since they have a
**rate limit of [5,000
requests](https://docs.github.com/en/rest/overview/resources-in-the-rest-api#rate-limiting)
per hour** (15,000 requests/hour if you pay for GitHub enterprise). You can
accelerate the process by configuring _multiple_ personal access tokens. Please
note that multiple tokens should be created by different GitHub accounts.
Tokens belonging to the same GitHub account share the rate limit.
-#### GitHub Proxy URL (Optional)
+#### Proxy URL (Optional)
If you are behind a corporate firewall or VPN you may need to utilize a proxy
server. Enter a valid proxy server address on your network, e.g.
`http://your-proxy-server.com:1080`
#### Test and Save Connection
@@ -33,9 +34,9 @@ Enter the GitHub repos to collect. If you want to collect
more than 1 repo, plea
#### Data Entities
Usually, you don't have to modify this part. However, if you don't want to
collect certain GitHub entities, you can unselect some entities to accerlerate
the collection speed.
-- Source Code Management: repos, refs, commits, etc.
- Issue Tracking: GitHub issues, issue comments, issue labels, etc.
-- Code Review: PRs, PR comments and reviews, PR commits, etc.
+- Source Code Management: GitHub repos, refs, commits, etc.
+- Code Review: GitHub PRs, PR comments and reviews, etc.
- Cross Domain: GitHub accounts, etc.
### Step 3 - Adding Transformation Rules (Optional)
diff --git a/docs/UserManuals/ConfigUI/GitLab.md
b/docs/UserManuals/ConfigUI/GitLab.md
new file mode 100644
index 00000000..74c9e41f
--- /dev/null
+++ b/docs/UserManuals/ConfigUI/GitLab.md
@@ -0,0 +1,53 @@
+---
+title: "Configuring GitLab"
+sidebar_position: 3
+description: Config UI instruction for GitLab
+---
+
+Visit config-ui: `http://localhost:4000`.
+### Step 1 - Add Data Connections
+
+
+#### Connection Name
+Name your connection.
+
+#### Endpoint URL
+This should be a valid REST API endpoint.
+ - If you are using gitlab.com, the endpoint will be
`https://gitlab.com/api/v4/`
+ - If you are self-hosting GitLab, the endpoint will look like
`https://gitlab.example.com/api/v4/`
+The endpoint url should end with `/`.
+
+#### Auth Token(s)
+GitLab personal access tokens are required to add a connection. Learn about
[how to create a GitLab personal access
token](https://docs.gitlab.com/ee/user/profile/personal_access_tokens.html).
+
+
+#### Proxy URL (Optional)
+If you are behind a corporate firewall or VPN you may need to utilize a proxy
server. Enter a valid proxy server address on your network, e.g.
`http://your-proxy-server.com:1080`
+
+#### Test and Save Connection
+Click `Test Connection`, if the connection is successful, click `Save
Connection` to add the connection.
+
+
+### Step 2 - Setting Data Scope
+
+#### Projects
+Enter the GitLab repos to collect. How to get `GitLab` repos?
+- Visit the repository page on GitLab
+- Find the project id below the title
+
+
+
+If you want to collect more than 1 repo, please separate repos with comma. For
example, "apache/incubator-devlake,apache/incubator-devlake-website".
+
+#### Data Entities
+Usually, you don't have to modify this part. However, if you don't want to
collect certain GitLab entities, you can unselect some entities to accerlerate
the collection speed.
+- Issue Tracking: GitLab issues, issue comments, issue labels, etc.
+- Source Code Management: GitLab repos, refs, commits, etc.
+- Code Review: GitLab MRs, MR comments and reviews, etc.
+- Cross Domain: GitLab accounts, etc.
+
+### Step 3 - Adding Transformation Rules (Optional)
+There are no transformation rules for GitLab repos.
+
+### Step 4 - Setting Sync Frequency
+You can choose how often you would like to sync your data in this step by
selecting a sync frequency option or enter a cron code to specify your prefered
schedule.
diff --git a/docs/UserManuals/ConfigUI/Jenkins.md
b/docs/UserManuals/ConfigUI/Jenkins.md
new file mode 100644
index 00000000..07d1ed29
--- /dev/null
+++ b/docs/UserManuals/ConfigUI/Jenkins.md
@@ -0,0 +1,33 @@
+---
+title: "Configuring Jenkins"
+sidebar_position: 5
+description: Config UI instruction for Jenkins
+---
+
+Visit config-ui: `http://localhost:4000`.
+### Step 1 - Add Data Connections
+
+
+#### Connection Name
+Name your connection.
+
+#### Endpoint URL
+This should be a valid REST API endpoint. Eg. `https://ci.jenkins.io/`. The
endpoint url should end with `/`.
+
+#### Username (E-mail)
+Your User ID for the Jenkins Instance.
+
+#### Password
+For help on Username and Password, please see Jenkins docs on [using
credentials](https://www.jenkins.io/doc/book/using/using-credentials/). You can
also use "API Access Token" for this field, which can be generated at `User` ->
`Configure` -> `API Token` section on Jenkins.
+
+#### Test and Save Connection
+Click `Test Connection`, if the connection is successful, click `Save
Connection` to add the connection.
+
+### Step 2 - Setting Data Scope
+There is no data cope setting for Jenkins.
+
+### Step 3 - Adding Transformation Rules (Optional)
+There are no transformation rules for Jenkins.
+
+### Step 4 - Setting Sync Frequency
+You can choose how often you would like to sync your data in this step by
selecting a sync frequency option or enter a cron code to specify your prefered
schedule.
diff --git a/docs/UserManuals/ConfigUI/Jira.md
b/docs/UserManuals/ConfigUI/Jira.md
new file mode 100644
index 00000000..952ecdde
--- /dev/null
+++ b/docs/UserManuals/ConfigUI/Jira.md
@@ -0,0 +1,67 @@
+---
+title: "Configuring Jira"
+sidebar_position: 4
+description: Config UI instruction for Jira
+---
+
+Visit config-ui: `http://localhost:4000`.
+### Step 1 - Add Data Connections
+
+
+#### Connection Name
+Name your connection.
+
+#### Endpoint URL
+This should be a valid REST API endpoint
+ - If you are using Jira Cloud, the endpoint will be
`https://<mydomain>.atlassian.net/rest/`
+ - If you are self-hosting Jira v8+, the endpoint will look like
`https://jira.<mydomain>.com/rest/`
+The endpoint url should end with `/`.
+
+#### Username / Email
+Input the username or email of your Jira account.
+
+
+#### Password
+- If you are using Jira Cloud, please input the [Jira personal access
token](https://confluence.atlassian.com/enterprise/using-personal-access-tokens-1026032365.html).
+- If you are using Jira Server v8+, please input the password of your Jira
account.
+
+#### Proxy URL (Optional)
+If you are behind a corporate firewall or VPN you may need to utilize a proxy
server. Enter a valid proxy server address on your network, e.g.
`http://your-proxy-server.com:1080`
+
+#### Test and Save Connection
+Click `Test Connection`, if the connection is successful, click `Save
Connection` to add the connection.
+
+
+### Step 2 - Setting Data Scope
+
+
+#### Projects
+Choose the Jira boards to collect.
+
+#### Data Entities
+Usually, you don't have to modify this part. However, if you don't want to
collect certain Jira entities, you can unselect some entities to accerlerate
the collection speed.
+- Issue Tracking: Jira issues, issue comments, issue labels, etc.
+- Cross Domain: Jira accounts, etc.
+
+### Step 3 - Adding Transformation Rules (Optional)
+
+
+Without adding transformation rules, you can not view all charts in "Jira" or
"Engineering Throughput and Cycle Time" dashboards.<br/>
+
+Each Jira board has at most ONE set of transformation rules.
+
+
+
+#### Issue Tracking
+
+- Requirement: choose the issue types to be transformed to "REQUIREMENT".
+- Bug: choose the issue types to be transformed to "BUG".
+- Incident: choose the issue types to be transformed to "INCIDENT".
+- Epic Key: choose the custom field that represents Epic key. In most cases,
it is "Epic Link".
+- Story Point: choose the custom field that represents story points. In most
cases, it is "Story Points".
+
+#### Additional Settings
+- Remotelink Commit SHA: parse the commits from an issue's remote links by the
given regular expression so that the relationship between `issues` and
`commits` can be created. You can directly use the regular expression
`/commit/([0-9a-f]{40})$`.
+
+### Step 4 - Setting Sync Frequency
+You can choose how often you would like to sync your data in this step by
selecting a sync frequency option or enter a cron code to specify your prefered
schedule.
diff --git a/docs/UserManuals/ConfigUI/Tutorial.md
b/docs/UserManuals/ConfigUI/Tutorial.md
index 9bed49d2..f31698c9 100644
--- a/docs/UserManuals/ConfigUI/Tutorial.md
+++ b/docs/UserManuals/ConfigUI/Tutorial.md
@@ -5,7 +5,7 @@ description: Config UI instruction
---
## Overview
-The Apache DevLake Config UI allows you to configure the data you wish to
collect through a graphical user interface.
+The Apache DevLake Config UI allows you to configure the data you wish to
collect through a graphical user interface. Visit config-ui at
`http://localhost:4000`.
## Creating a Blueprint
diff --git a/docs/UserManuals/GitHubUserGuide.md
b/docs/UserManuals/GitHubUserGuide.md
deleted file mode 100644
index e58fb967..00000000
--- a/docs/UserManuals/GitHubUserGuide.md
+++ /dev/null
@@ -1,113 +0,0 @@
----
-title: "GitHub User Guide"
-sidebar_position: 5
-description: >
- GitHub User Guide
----
-
-## Summary
-
-GitHub has a rate limit of 5,000 API calls per hour for their REST API.
-As a result, it may take hours to collect commits data from GitHub API for a
repo that has 10,000+ commits.
-To accelerate the process, DevLake introduces GitExtractor, a new plugin that
collects git data by cloning the git repo instead of by calling GitHub APIs.
-
-Starting from v0.10.0, DevLake will collect GitHub data in 2 separate plugins:
-
-- GitHub plugin (via GitHub API): collect repos, issues, pull requests
-- GitExtractor (via cloning repos): collect commits, refs
-
-Note that GitLab plugin still collects commits via API by default since GitLab
has a much higher API rate limit.
-
-This doc details the process of collecting GitHub data in v0.10.0. We're
working on simplifying this process in the next releases.
-
-Before start, please make sure all services are started.
-
-## GitHub Data Collection Procedure
-
-There're 3 steps.
-
-1. Configure GitHub connection
-2. Create a pipeline to run GitHub plugin
-3. Create a pipeline to run GitExtractor plugin
-
-### Step 1 - Configure GitHub connection
-
-1. Visit `config-ui` at `http://localhost:4000` and click the GitHub icon
-
-2. Click the default connection 'Github' in the list
-

-
-3. Configure connection by providing your GitHub API endpoint URL and your
personal access token(s).
-

-
-- Endpoint URL: Leave this unchanged if you're using github.com. Otherwise
replace it with your own GitHub instance's REST API endpoint URL. This URL
should end with '/'.
-- Auth Token(s): Fill in your personal access tokens(s). For how to generate
personal access tokens, please see GitHub's [official
documentation](https://docs.github.com/en/authentication/keeping-your-account-and-data-secure/creating-a-personal-access-token).
-You can provide multiple tokens to speed up the data collection process,
simply concatenating tokens with commas.
-- GitHub Proxy URL: This is optional. Enter a valid proxy server address on
your Network, e.g. http://your-proxy-server.com:1080
-
-4. Click 'Test Connection' and see it's working, then click 'Save Connection'.
-
-5. [Optional] Help DevLake understand your GitHub data by customizing data
enrichment rules shown below.
-

-
- 1. Pull Request Enrichment Options
-
- 1. `Type`: PRs with label that matches given Regular Expression, their
properties `type` will be set to the value of first sub match. For example,
with Type being set to `type/(.*)$`, a PR with label `type/bug`, its `type`
would be set to `bug`, with label `type/doc`, it would be `doc`.
- 2. `Component`: Same as above, but for `component` property.
-
- 2. Issue Enrichment Options
-
- 1. `Severity`: Same as above, but for `issue.severity` of course.
-
- 2. `Component`: Same as above.
-
- 3. `Priority`: Same as above.
-
- 4. **Requirement** : Issues with label that matches given Regular
Expression, their properties `type` will be set to `REQUIREMENT`. Unlike
`PR.type`, submatch does nothing, because for Issue Management Analysis,
people tend to focus on 3 kinds of types (Requirement/Bug/Incident), however,
the concrete naming varies from repo to repo, time to time, so we decided to
standardize them to help analysts make general purpose metrics.
-
- 5. **Bug**: Same as above, with `type` setting to `BUG`
-
- 6. **Incident**: Same as above, with `type` setting to `INCIDENT`
-
-6. Click 'Save Settings'
-
-### Step 2 - Create a pipeline to collect GitHub data
-
-1. Select 'Pipelines > Create Pipeline Run' from `config-ui`
-
-
-
-2. Toggle on GitHub plugin, enter the repo you'd like to collect data from.
-
-
-
-3. Click 'Run Pipeline'
-
-You'll be redirected to newly created pipeline:
-
-
-
-
-See the pipeline finishes (progress 100%):
-
-
-
-### Step 3 - Create a pipeline to run GitExtractor plugin
-
-1. Enable the `GitExtractor` plugin, and enter your `Git URL` and, select the
`Repository ID` from dropdown menu.
-
-
-
-2. Click 'Run Pipeline' and wait until it's finished.
-
-3. Click `View Dashboards` on the top left corner of `config-ui`, the default
username and password of Grafana are `admin`.
-
-
-
-4. See dashboards populated with GitHub data.
-
-
-
-
-
-
diff --git a/static/img/ConfigUI/gitlab-add-data-connections.png
b/static/img/ConfigUI/gitlab-add-data-connections.png
new file mode 100644
index 00000000..d1c7caec
Binary files /dev/null and
b/static/img/ConfigUI/gitlab-add-data-connections.png differ
diff --git a/static/img/ConfigUI/jenkins-add-data-connections.png
b/static/img/ConfigUI/jenkins-add-data-connections.png
new file mode 100644
index 00000000..529f30bc
Binary files /dev/null and
b/static/img/ConfigUI/jenkins-add-data-connections.png differ
diff --git a/static/img/ConfigUI/jira-add-data-connections.png
b/static/img/ConfigUI/jira-add-data-connections.png
new file mode 100644
index 00000000..e1b84470
Binary files /dev/null and b/static/img/ConfigUI/jira-add-data-connections.png
differ
diff --git a/static/img/ConfigUI/jira-add-transformation-rules-list.png
b/static/img/ConfigUI/jira-add-transformation-rules-list.png
new file mode 100644
index 00000000..984e43ca
Binary files /dev/null and
b/static/img/ConfigUI/jira-add-transformation-rules-list.png differ
diff --git a/static/img/ConfigUI/jira-add-transformation-rules.png
b/static/img/ConfigUI/jira-add-transformation-rules.png
new file mode 100644
index 00000000..dab19ac0
Binary files /dev/null and
b/static/img/ConfigUI/jira-add-transformation-rules.png differ
diff --git a/static/img/ConfigUI/jira-set-data-scope.png
b/static/img/ConfigUI/jira-set-data-scope.png
new file mode 100644
index 00000000..c2db77aa
Binary files /dev/null and b/static/img/ConfigUI/jira-set-data-scope.png differ