This is an automated email from the ASF dual-hosted git repository.

awasum pushed a commit to branch development
in repository https://gitbox.apache.org/repos/asf/fineract-cn-mobile.git
The following commit(s) were added to refs/heads/development by this push:
new bcd3848 FINCN-60: Update Readme
new 1951d55 Merge pull request #114 from Cadreia/patch-1
bcd3848 is described below
commit bcd3848c6b34ec8d8be8c9af74b667b177ad4a0b
Author: Audrey <[email protected]>
AuthorDate: Tue Oct 20 08:59:10 2020 +0100
FINCN-60: Update Readme
This pull request updates the readme file, making it easier for a beginner
to successfully build and start making changes to the project. It also includes
a screenshot of the application
---
README.md | 32 +++++++++++++++++++++++++++++---
1 file changed, 29 insertions(+), 3 deletions(-)
diff --git a/README.md b/README.md
index 531ca06..7bf848c 100644
--- a/README.md
+++ b/README.md
@@ -4,13 +4,33 @@
# Android Client of Apache Fineract CN
-Android Client is built on top of the Apache Fineract CN platform.
+Android Client is built on top of the Apache Fineract CN platform. It is the
mobile field agent application for its web counterpart
## Building the Project
1. Install [Java Development Kit
(JDK)](http://www.oracle.com/technetwork/java/javase/downloads/index.html)
2. Download, install, and run the latest version of [Android
Studio](http://developer.android.com/sdk/installing/studio.html).
-3. Clone this repository and import it to Android Studio.
-4. Once the gradle build is finished, click on the green play button to build
and run the app.
+3. Fork our repo from `https://github.com/apache/fineract-cn-mobile`
+4. From your terminal, download a copy of the forked repo with `git clone
https://github.com/your_username/fineract-cn-mobile.git` where `your_username`
is your GitHub username.
+5. Enter the new **fineract-cn-mobile** directory with `cd fineract-cn-mobile`.
+6. Set the upstream remote to the original repository url so that git knows
where to fetch updates from in future: `git remote add upstream
https://github.com/apache/fineract-cn-mobile.git`
+7. Import the project to Android Studio.
+ - Launch the Android Studio application
+ - Click on `File>Open...>{$FOLDER NAME}`
+5. Once the gradle build is finished, add a virtual device
+ - Click on the dropdown on the toolbar beside the green play button that has
"No Devices" selected
+

+ - Select the "AVD MANAGER" option
+ - Click on the "Create Virtual Device" button
+ - Select a hardware device and choose "Next"
+ - Select a system image and choose "Next". You will need to download it first
if it's your first time running android studio.
+ - Configure the settings for your virtual device and choose "Finish" (Default
settings are recommended)
+6. Launch the created AVD in the emulator
+ - Click on the play button on the newly opened window (Android Virtual Device
Manager) to launch the virtual device.
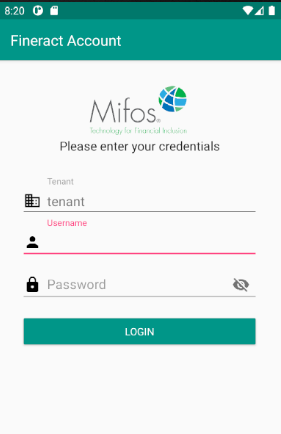
+7. Once the application has been built successfully, the login screen should
appear:
+
+
+
+
### Demo Credentials
You can use these credentials to log in.
```
@@ -18,6 +38,12 @@ Tenant: playground
Username: apache.demo
Password: ven3t1@n
```
+### Common Errors and Fixes
+1. /dev/kvm permission denied
+ - When choosing a system image, you may come accross this issue. You can find
a solution to this
[here](https://stackoverflow.com/questions/37300811/android-studio-dev-kvm-device-permission-denied)
+2. System UI isn't responding
+ - Some time after launching the virtual device, you might encounter this
error. This can be solved by choosing a virtual device of lower resolution such
as the Nexus 4
+
## Contributing
We love Pull Requests, Bug Reports, ideas, code reviews or any other kind of
positive contribution.