This is an automated email from the ASF dual-hosted git repository.

rclabo pushed a commit to branch asf-site
in repository https://gitbox.apache.org/repos/asf/lucenenet-site.git
The following commit(s) were added to refs/heads/asf-site by this push:
new bd507bd Added How to Setup Java Debugging Page
bd507bd is described below
commit bd507bda7fc269a9262cb3bd5518ec226ff4cb06
Author: Ron Clabo <[email protected]>
AuthorDate: Fri Jan 7 17:29:27 2022 -0500
Added How to Setup Java Debugging Page
---
.../how-to-setup-java-lucene-debugging.html | 402 +++++++++++++++++++++
contributing/toc.html | 3 +
styles/main.css | 6 +-
3 files changed, 410 insertions(+), 1 deletion(-)
diff --git a/contributing/how-to-setup-java-lucene-debugging.html
b/contributing/how-to-setup-java-lucene-debugging.html
new file mode 100644
index 0000000..b136866
--- /dev/null
+++ b/contributing/how-to-setup-java-lucene-debugging.html
@@ -0,0 +1,402 @@
+<!DOCTYPE html>
+<!--[if IE]><![endif]-->
+<html>
+
+ <head>
+ <meta charset="utf-8">
+ <meta http-equiv="X-UA-Compatible" content="IE=edge,chrome=1">
+ <title>How to Setup Java Lucene 4.8 Debugging | Apache Lucene.NET 4.8.0
</title>
+ <meta name="viewport" content="width=device-width">
+ <meta name="title" content="How to Setup Java Lucene 4.8 Debugging |
Apache Lucene.NET 4.8.0 ">
+ <meta name="generator" content="docfx 2.50.0.0">
+
+ <link rel="shortcut icon" href="../logo/favicon.ico">
+ <link rel="stylesheet" href="../styles/docfx.vendor.css">
+ <link rel="stylesheet" href="../styles/docfx.css">
+ <link rel="stylesheet" href="../styles/main.css">
+ <meta property="docfx:navrel" content="../toc.html">
+ <meta property="docfx:tocrel" content="toc.html">
+
+
+
+
+ <link rel="stylesheet"
href="//fonts.googleapis.com/css?family=Lato:400,700%7CMerriweather%7CRoboto+Mono">
+ <link rel="stylesheet" href="/styles/site.css">
+
+ </head>
+ <body data-spy="scroll" data-target="#affix" data-offset="120">
+ <span id="forkongithub"><a href="https://github.com/apache/lucenenet";
target="_blank">Fork me on GitHub</a></span>
+ <div id="wrapper">
+ <header>
+
+ <nav id="autocollapse" class="navbar ng-scope" role="navigation">
+ <div class="container">
+ <div class="navbar-header">
+ <button type="button" class="navbar-toggle"
data-toggle="collapse" data-target="#navbar">
+ <span class="sr-only">Toggle navigation</span>
+ <span class="icon-bar"></span>
+ <span class="icon-bar"></span>
+ <span class="icon-bar"></span>
+ </button>
+
+ <a class="navbar-brand" href="../index.html">
+ <img id="logo" class="svg" src="../logo/lucene-net-color.png"
alt="">
+ </a>
+ </div>
+ <div class="collapse navbar-collapse" id="navbar">
+ <form class="navbar-form navbar-right" role="search" id="search">
+ <div class="form-group">
+ <input type="text" class="form-control" id="search-query"
placeholder="Search" autocomplete="off">
+ </div>
+ </form>
+ </div>
+ </div>
+ </nav>
+
+ <div class="subnav navbar navbar-default">
+ <div class="container hide-when-search" id="breadcrumb">
+ <ul class="breadcrumb">
+ <li></li>
+ </ul>
+ </div>
+ </div>
+ </header>
+ <div role="main" class="container body-content hide-when-search">
+
+ <div class="sidenav hide-when-search">
+ <a class="btn toc-toggle collapse" data-toggle="collapse"
href="#sidetoggle" aria-expanded="false" aria-controls="sidetoggle">Show / Hide
Table of Contents</a>
+ <div class="sidetoggle collapse" id="sidetoggle">
+ <div id="sidetoc"></div>
+ </div>
+ </div>
+ <div class="article row grid-right">
+ <div class="col-md-10">
+ <article class="content wrap" id="_content" data-uid="">
+<h1 id="how-to-setup-java-lucene-48-debugging">How to Setup Java Lucene 4.8
Debugging</h1>
+
+<hr>
+<h2 id="introduction">Introduction</h2>
+<p>Sometimes when porting Lucene 4.8 to Lucene.NET 4.8 it is helpful, or even
necessary, to be able to watch Java Lucene 4.8 run in a development
environment. The goal of this document is to help walk you through the process
of setting up such a development environment on Windows 10.</p>
+<p>The Java Lucene 4.8 repository indicates that the following development
environments are supported:</p>
+<ul>
+<li>Eclipse - Basic support (help/IDEs.txt).</li>
+<li>IntelliJ - IntelliJ idea can import the project out of the box.</li>
+<li>Netbeans - Not tested.</li>
+</ul>
+<p>In this document however, we will be using Eclipse because it’s open source
and widely used. Because Java Lucene 4.8 uses an old version of the Java JDK
that has known security issues, the approach we take here is to setup a virtual
machine vis VirtualBox to quarantine our use of the insecure JDK.</p>
+<h2 id="setting-up-virtualbox">Setting up VirtualBox</h2>
+<h3 id="introduction-and-background">Introduction and Background</h3>
+<p>We don’t need to setup network access for VirtualBox for our needs and
since the old JVM required to run Lucene 4.8 has security issues, it’s safer
not to give VirtualBox network access. And since VirtualBox can run in a
window, it means that when running it that way you will still have access to
the internet and a browser on your main OS for doing coding research and
such.</p>
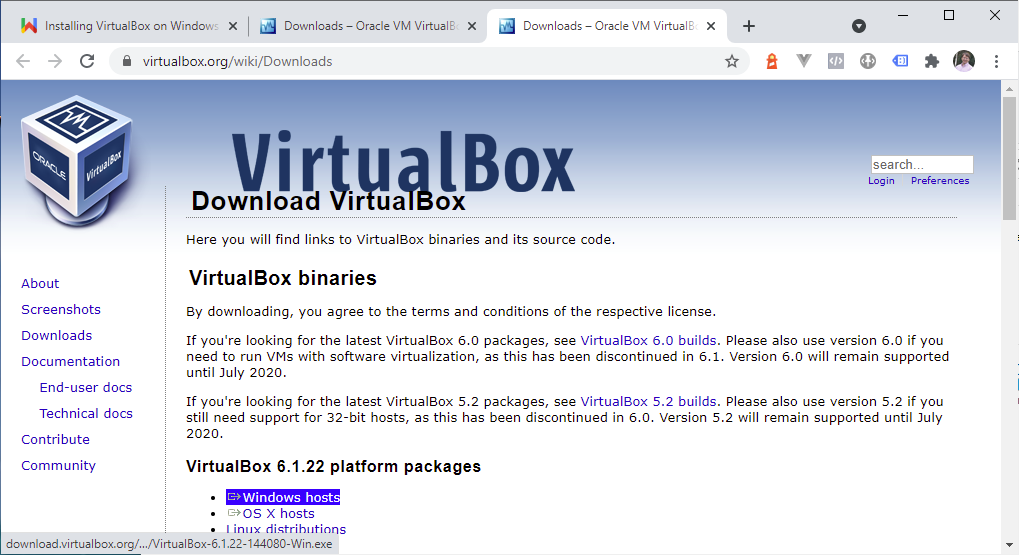
+<h3 id="download-virtual-box">Download Virtual Box</h3>
+<p>You can get the installer from <a
href="https://www.virtualbox.org/wiki/Downloads";>https://www.virtualbox.org/wiki/Downloads</a>
. On that page download the binary version for <strong>Windows
hosts</strong>.</p>
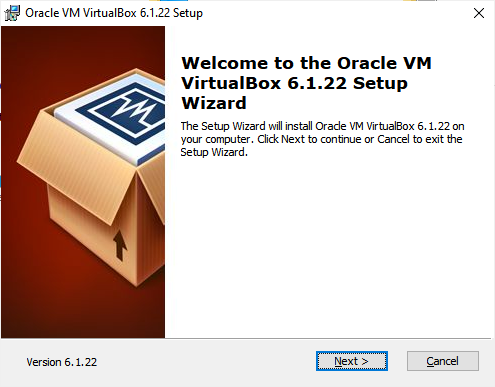
+<p>After downloading the installer, run it.</p>
+<img
src='https://lucenenet.apache.org/images/contributing/java-lucene-4_8-setup/virtual-box-install01.png'>
+<p>Then you will get the dialog below where you can specify the location where
you want to install the VM on your machine.</p>
+<img
src='https://lucenenet.apache.org/images/contributing/java-lucene-4_8-setup/virtual-box-install02.png'>
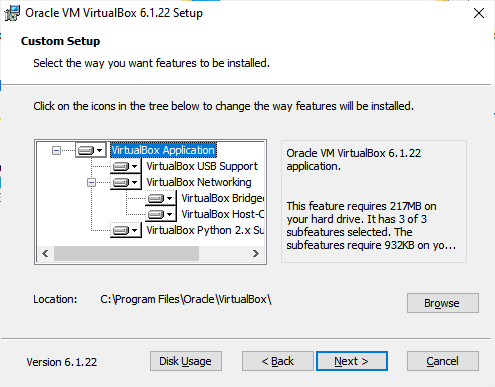
+<p>Then you will get the dialog below where you can specify the location where
you want to install the VM on your machine.</p>
+ <img
src='https://lucenenet.apache.org/images/contributing/java-lucene-4_8-setup/virtual-box-install03.png'>
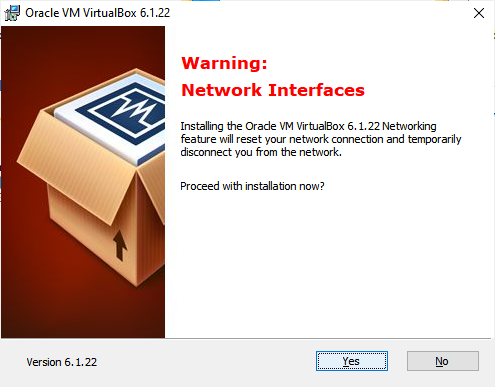
+<p>Then as you click next you will eventually come to this dialog:</p>
+ <img
src='https://lucenenet.apache.org/images/contributing/java-lucene-4_8-setup/virtual-box-install04.png'>
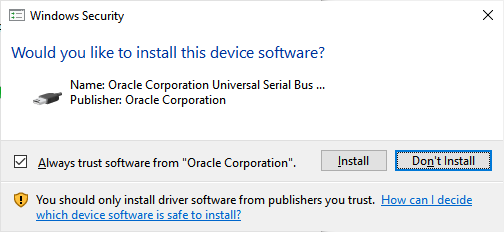
+<p>You may get some security warnings. If so, click Install.</p>
+ <img
src='https://lucenenet.apache.org/images/contributing/java-lucene-4_8-setup/virtual-box-install05.png'>
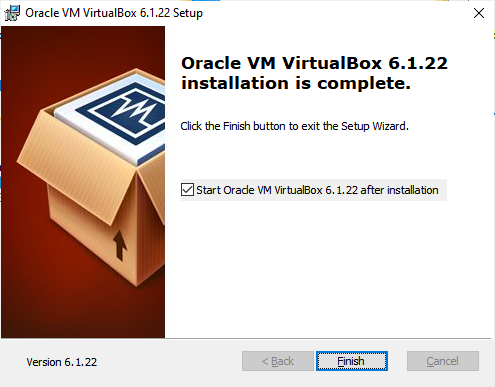
+<p>Then when the install is done you will see a dialog similar to the one
below.</p>
+ <img
src='https://lucenenet.apache.org/images/contributing/java-lucene-4_8-setup/virtual-box-install06.png'>
+<h3 id="configuring-virtualbox">Configuring VirtualBox</h3>
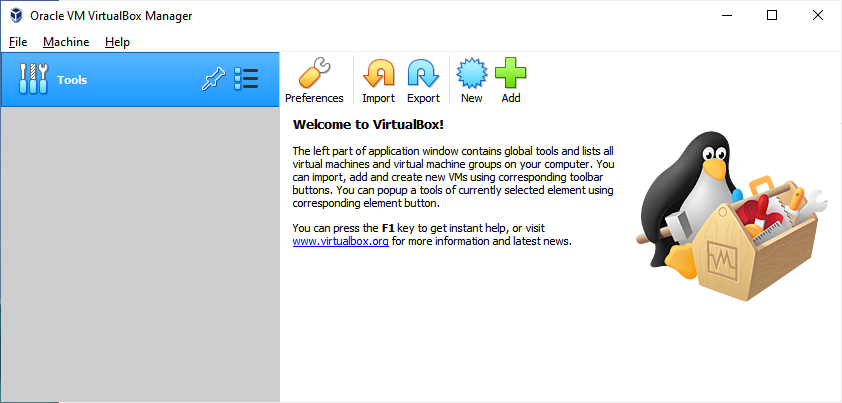
+<p>Clicking the Finished button in the prior dialog will launch VirtualBox, or
you can launch it manually via the programs menu in Windows 10 as you would
with any other “application.”</p>
+ <img
src='https://lucenenet.apache.org/images/contributing/java-lucene-4_8-setup/virtual-box02.png'>
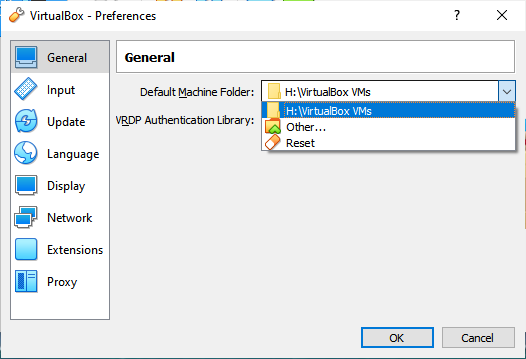
+<h3 id="default-machine-folder">Default Machine Folder</h3>
+<p>To change the location where the machine will be stored, click the
Preferences icon in the main window or go to File menu and select Preferences.
Then in the dialog that opens in the General tab you can change the Default
Machine Folder by selecting Other… in the drop down as I have done here.</p>
+ <img
src='https://lucenenet.apache.org/images/contributing/java-lucene-4_8-setup/virtual-box03.png'>
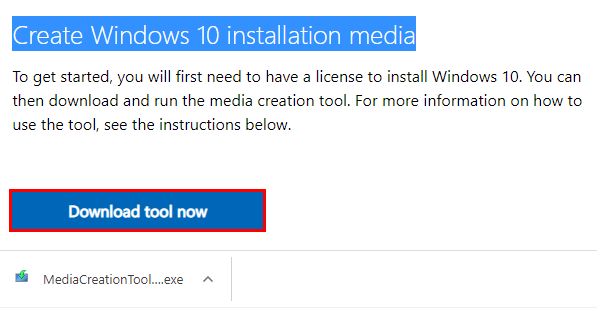
+<h3 id="create-windows-10-installation-media">Create Windows 10 Installation
Media</h3>
+<p>In this walkthrough we will be running Windows 10 in the VM. Note that to
do this one needs a 2nd Windows 10 license other then the one installed on the
physical machine. So two licenses are needed, one for the physical machine OS
install and one for the VM OS install. If you don’t have a spare Windows 10
license to use in the VM you can consider installing ubuntu or other open
source OS. Next to run Windows 10 in the VM we much download and create
Windows 10 installation media. [...]
+ <img
src='https://lucenenet.apache.org/images/contributing/java-lucene-4_8-setup/virtual-box04.png'>
+<p>Then run the exe that is downloaded. You need to agree to the terms if they
are acceptable to you. Our goal here is to create an iso file that we can use
to install Windows in the VM. We don’t need that iso file burned to a cd, just
having it saved to the computer is fine.</p>
+<p>In this dialog select “Create installation media”</p>
+ <img
src='https://lucenenet.apache.org/images/contributing/java-lucene-4_8-setup/virtual-box05.png'>
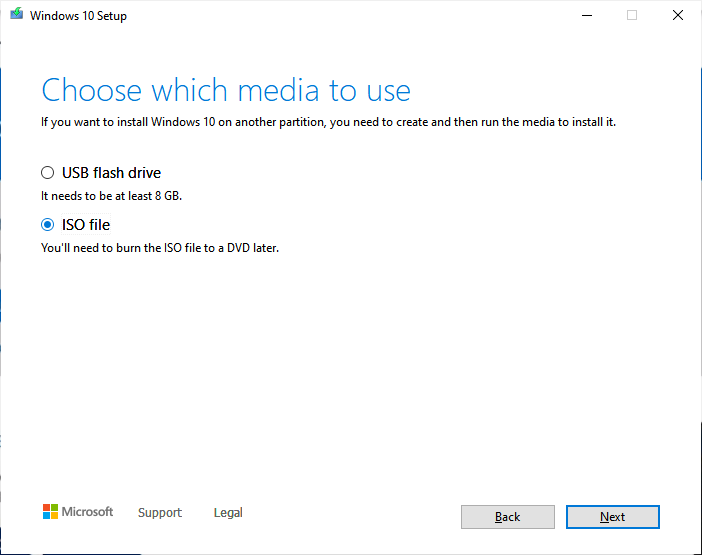
+<p>On this dialog select “ISO file”</p>
+ <img
src='https://lucenenet.apache.org/images/contributing/java-lucene-4_8-setup/virtual-box06.png'>
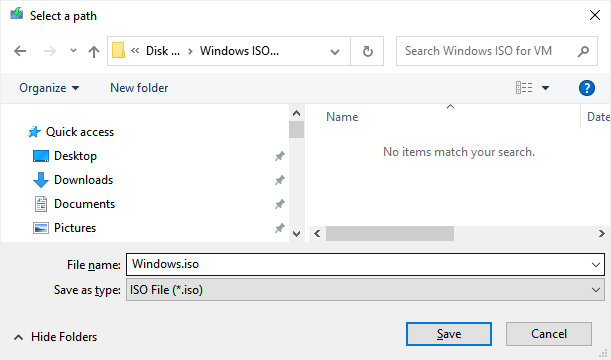
+<p>Then in the dialog that comes up pick a place on the computer to save the
ISO file</p>
+ <img
src='https://lucenenet.apache.org/images/contributing/java-lucene-4_8-setup/virtual-box07.png'>
+<p>And then it will begin downloading the file and displaying a progress
indicator. Once the file is downloaded, we have now have the ISO file we need
for installing the OS inside of VirtualBox.</p>
+<p>Once that’s done, you can click Finished in the dialog that comes up since
we don’t need to burn this ISO file to a dvd. Having it on the hard drive is
fine.</p>
+ <img
src='https://lucenenet.apache.org/images/contributing/java-lucene-4_8-setup/virtual-box08.png'>
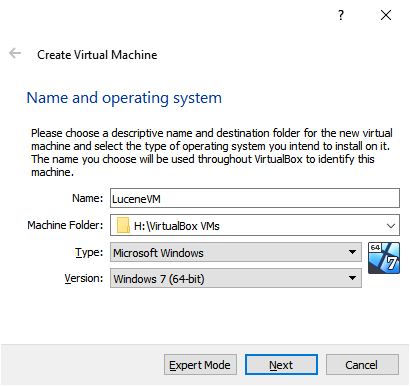
+<h3 id="creating-a-virtual-machine">Creating a Virtual Machine</h3>
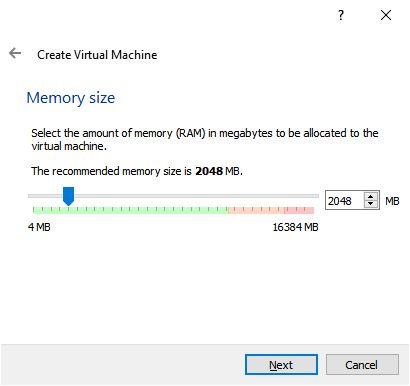
+<p>Click the New button in the main dialog of VirtualBox Manager.
+Fill out the info in this dialog:</p>
+<p><img
src='https://lucenenet.apache.org/images/contributing/java-lucene-4_8-setup/virtual-box09.png'><br>
+And this one:<br>
+<img
src='https://lucenenet.apache.org/images/contributing/java-lucene-4_8-setup/virtual-box10.png'><br>
+And this one:<br>
+<img
src='https://lucenenet.apache.org/images/contributing/java-lucene-4_8-setup/virtual-box11.png'><br>
+ <br>
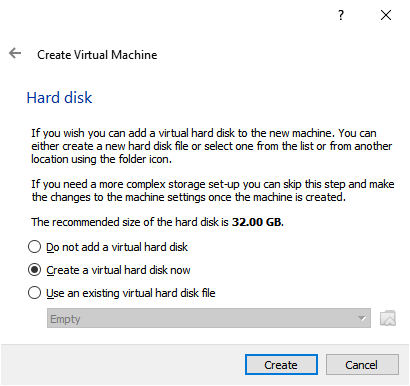
+The default choice below is fine:<br>
+<br>
+<img
src='https://lucenenet.apache.org/images/contributing/java-lucene-4_8-setup/virtual-box12.png'></p>
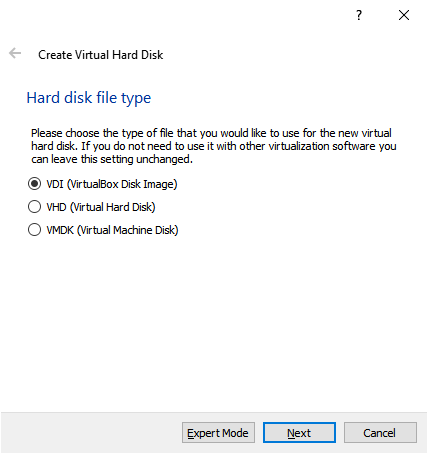
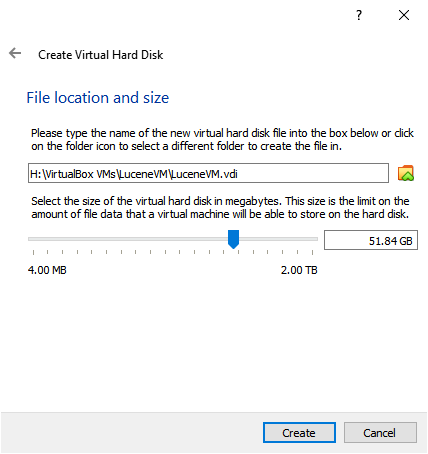
+<p>In the following dialog “Dynamically allocated” is fine. Then in the
dialog after that set the max size.</p>
+ <img
src='https://lucenenet.apache.org/images/contributing/java-lucene-4_8-setup/virtual-box13.png'>
+ <br>
+ Then it will look something like this:
+ <br>
+ <img
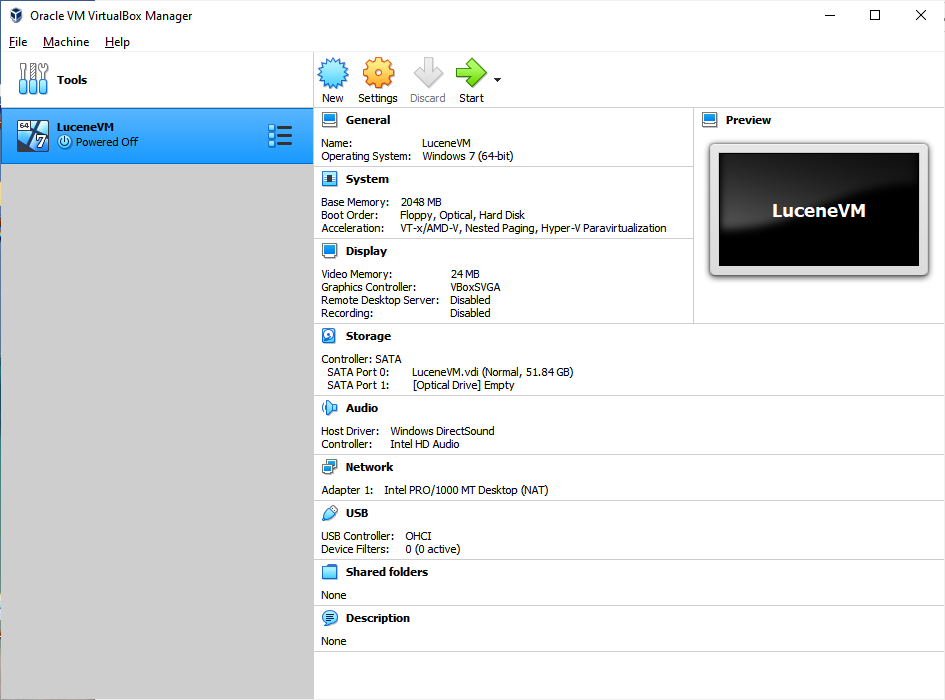
src='https://lucenenet.apache.org/images/contributing/java-lucene-4_8-setup/virtual-box14.png'>
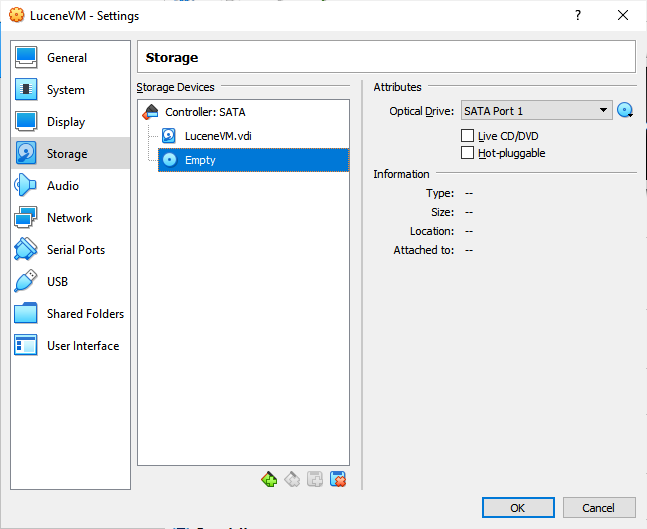
+<p>Back in settings click on storage, on the left, then click on Empty in the
storage devices, this represents the CD rom.</p>
+ <img
src='https://lucenenet.apache.org/images/contributing/java-lucene-4_8-setup/virtual-box15.png'>
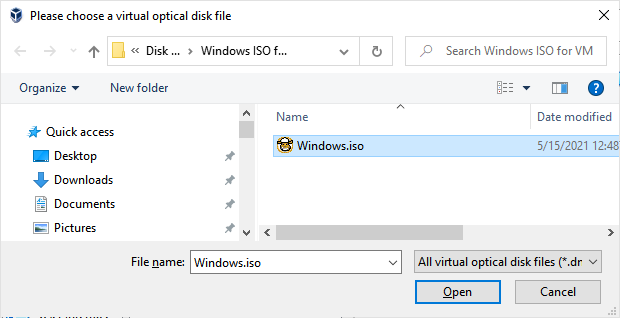
+<p>Now click the little disk drop down next to the Optical Drive label. From
that menu select “Chose a Disk File…” and select the windows ISO file you
previously downloaded.</p>
+ <img
src='https://lucenenet.apache.org/images/contributing/java-lucene-4_8-setup/virtual-box16.png'>
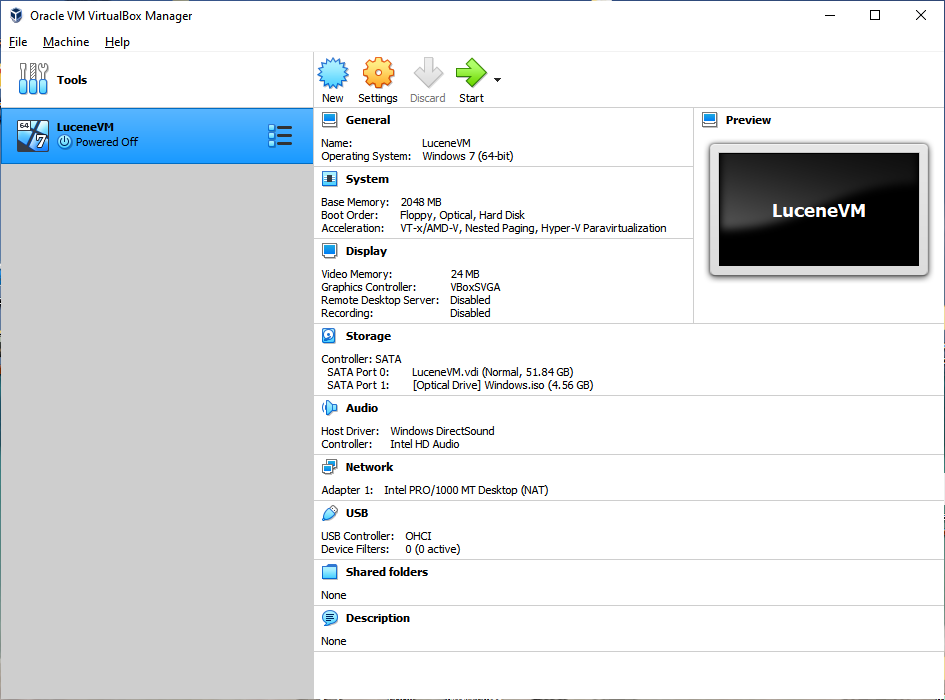
+<p>Now it’s like that Windows Install DVD is installed on our virtual
computer. (See below)</p>
+ <img
src='https://lucenenet.apache.org/images/contributing/java-lucene-4_8-setup/virtual-box17.png'>
+<p>Since by default the VM is setup to boot from the virtual optical drive (as
well as the virtual hd) we can click start in the VirtualBox Manager to begin
the Windows 10 Install into the VM.</p>
+ <img
src='https://lucenenet.apache.org/images/contributing/java-lucene-4_8-setup/virtual-box18.png'>
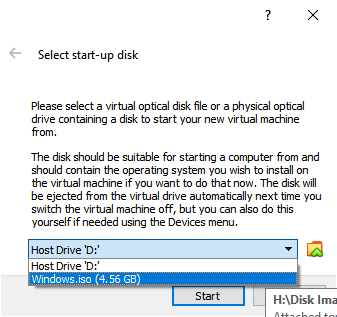
+<p>Then select the startup disk:</p>
+ <img
src='https://lucenenet.apache.org/images/contributing/java-lucene-4_8-setup/virtual-box19.png'>
+ <img
src='https://lucenenet.apache.org/images/contributing/java-lucene-4_8-setup/windows-install01.png'>
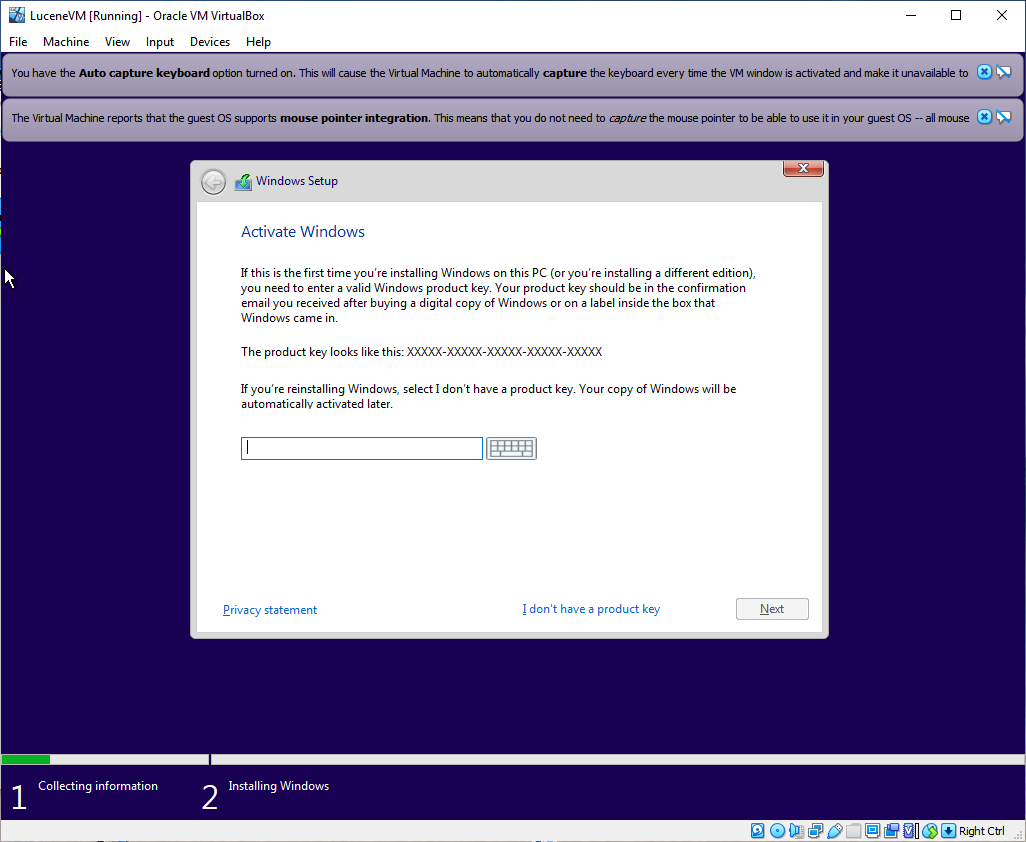
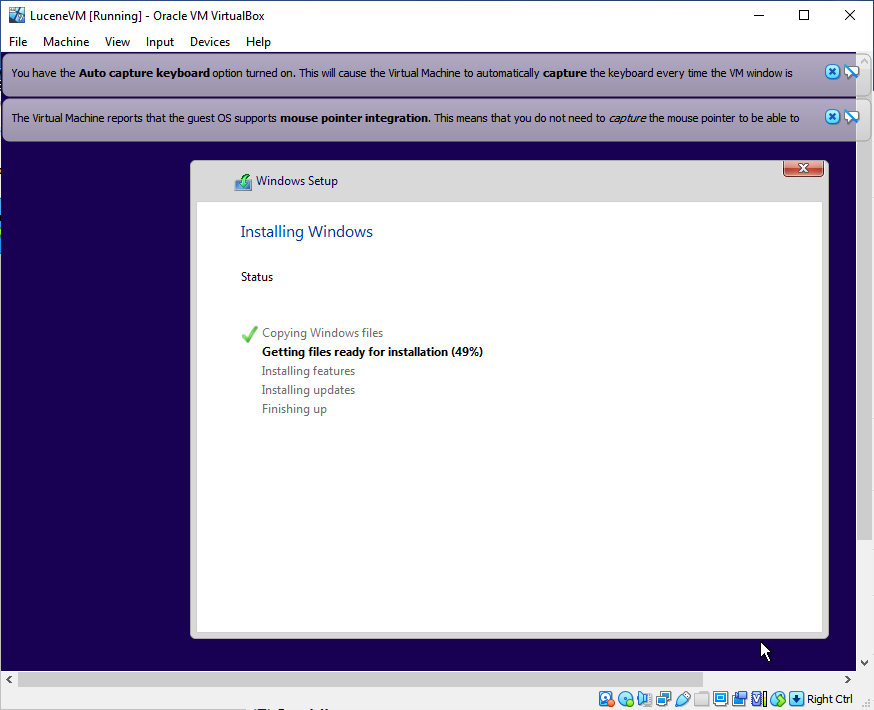
+<p>Click next in the dialog above, then install now. Then in the window below
key in your product key or click I don’t have a product key.</p>
+ <img
src='https://lucenenet.apache.org/images/contributing/java-lucene-4_8-setup/windows-install02.png'>
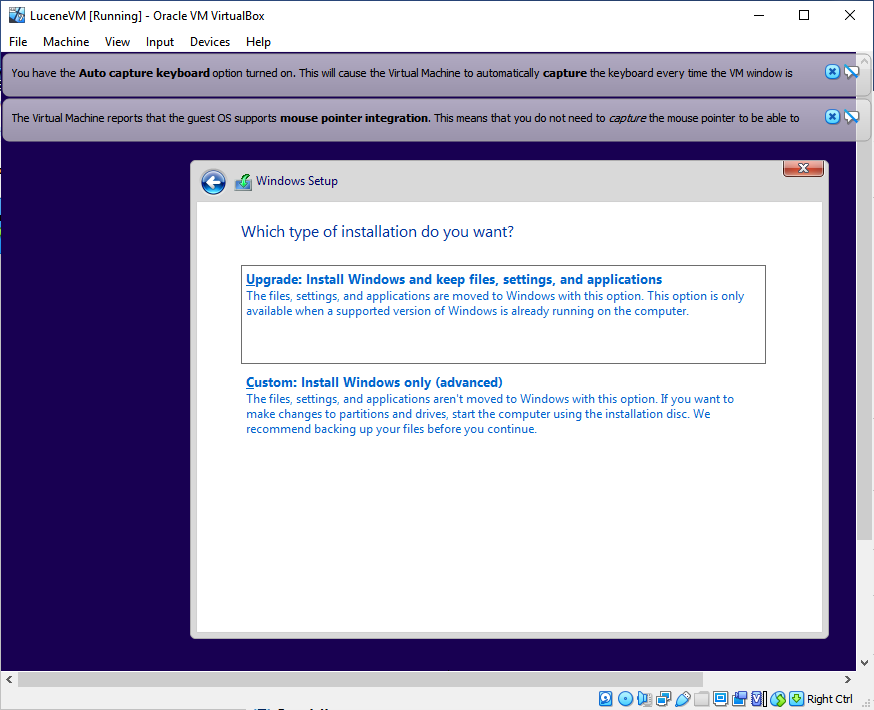
+<p>Click agree on the license terms if you agree.
+Then in the dialog below click “Custom” since this is a new install not an
upgrade.</p>
+ <img
src='https://lucenenet.apache.org/images/contributing/java-lucene-4_8-setup/windows-install03.png'>
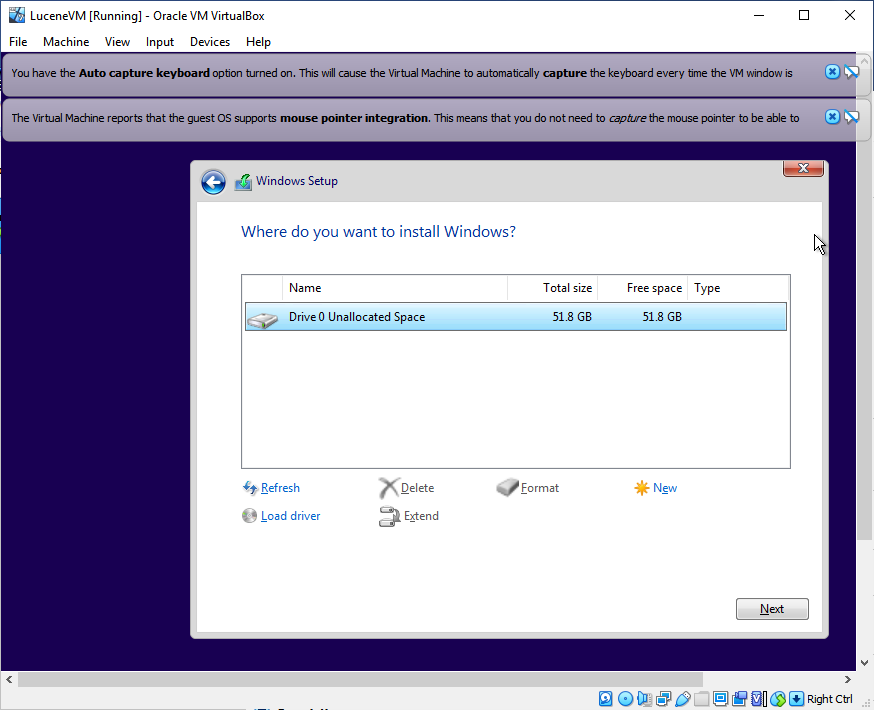
+<p>It will then show the unallocated space of the virtual drive we setup
earlier. Select that as the place to install the OS and click next</p>
+ <img
src='https://lucenenet.apache.org/images/contributing/java-lucene-4_8-setup/windows-install04.png'>
+ <img
src='https://lucenenet.apache.org/images/contributing/java-lucene-4_8-setup/windows-install05.png'>
+<p>And then:</p>
+ <img
src='https://lucenenet.apache.org/images/contributing/java-lucene-4_8-setup/windows-install06.png'>
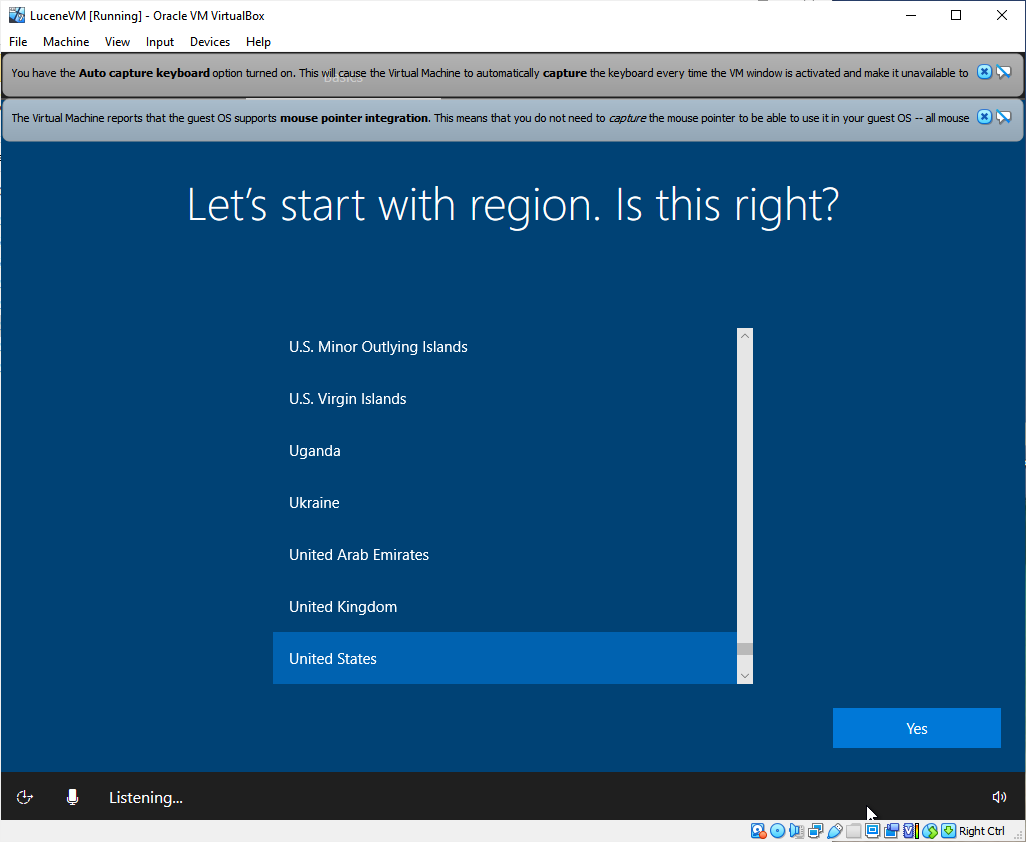
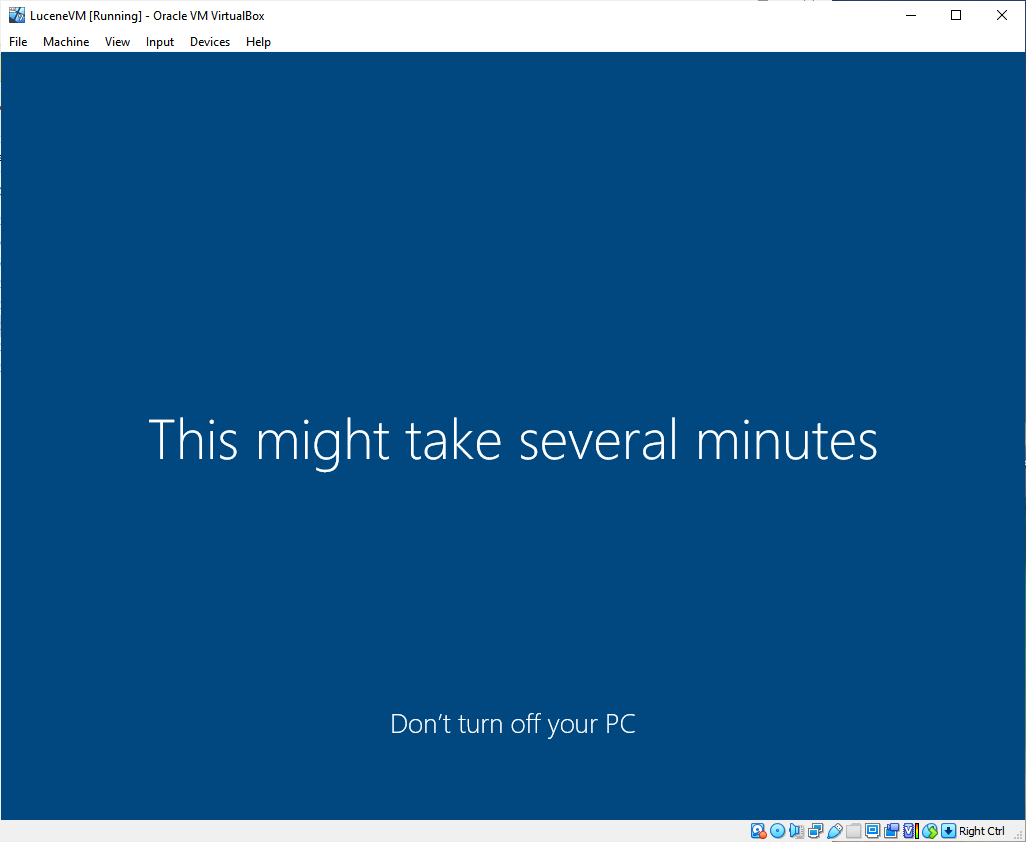
+<p>Then go through all the screens for the standard Windows setup and after
that you will probably see the screen below.</p>
+ <img
src='https://lucenenet.apache.org/images/contributing/java-lucene-4_8-setup/windows-install07.png'>
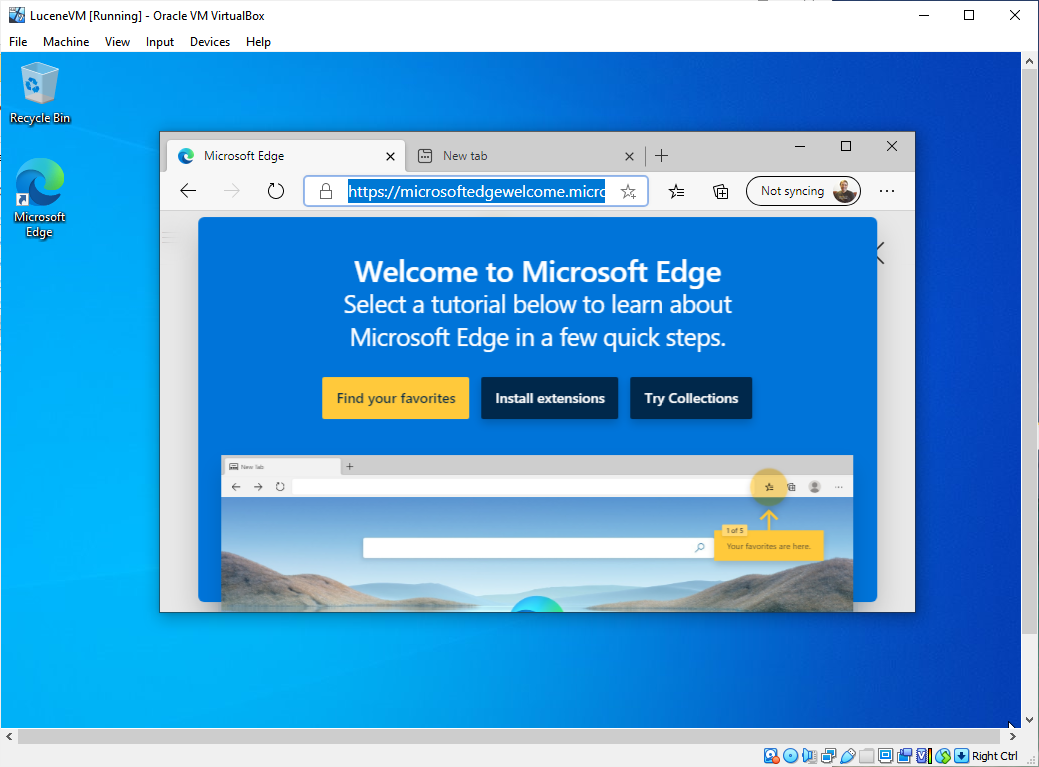
+<p>And then finally we have windows running in the vm, and in the screenshot
below I launched edge to show that networking is working in the VM too.</p>
+ <img
src='https://lucenenet.apache.org/images/contributing/java-lucene-4_8-setup/windows-install08.png'>
+<h2 id="installing-eclipse-46">Installing Eclipse 4.6</h2>
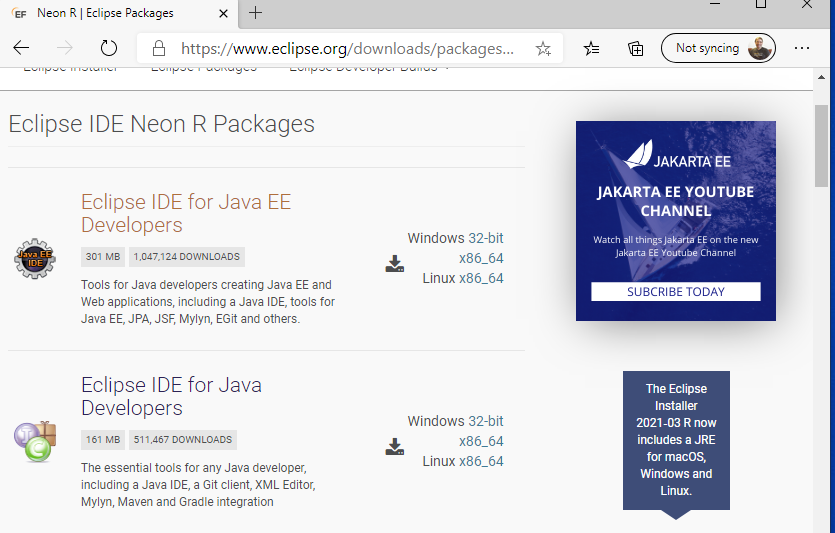
+<p>Source of download <a
href="https://wiki.eclipse.org/Older_Versions_Of_Eclipse";>https://wiki.eclipse.org/Older_Versions_Of_Eclipse</a>.
We want “Eclipse Neon Packages (2016 - v 4.6.0)” This version goes by the
name “neon r” and it’s page is here: <a
href="https://www.eclipse.org/downloads/packages/release/neon/r";>https://www.eclipse.org/downloads/packages/release/neon/r</a>
+
+We want the 2nd package below, “Eclipse IDE for Java Developers” so download
that, in my case the x86_64 link.</p>
+ <img
src='https://lucenenet.apache.org/images/contributing/java-lucene-4_8-setup/eclipse01.png'>
+<p>Once that zip file downloads, then extract the contents into a folder.</p>
+<h2 id="installing-java-8">Installing Java 8</h2>
+<p>Lucene 4.8.0 uses Java 8 to run according to the build.xml file but Eclipse
needs Java 8. And Eclipse can use Java 8 to emulate Java 7 when running Lucene.
+So we will need to install “<strong>Java SE Development Kit 8u25</strong>”
into our VM which can be downloaded from <a
href="https://www.oracle.com/java/technologies/javase/javase8-archive-downloads.html";>https://www.oracle.com/java/technologies/javase/javase8-archive-downloads.html</a>
You will notice the following warning on that page. This is why we chose to
work inside a VirtualBox.</p>
+<blockquote>
+<p><strong>WARNING</strong>: These older versions of the JRE and JDK are
provided to help developers debug issues in older systems. <strong>They are not
updated with the latest security patches and are not recommended for use in
production.</strong></p>
+</blockquote>
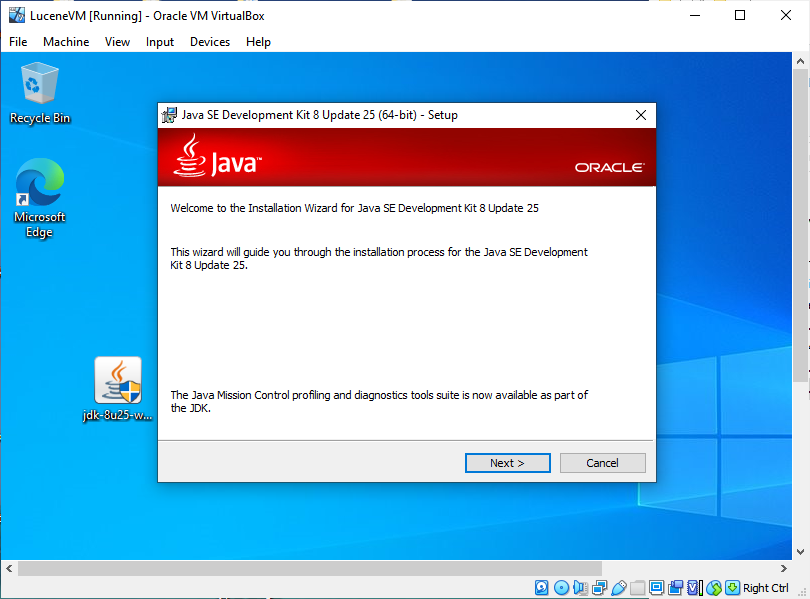
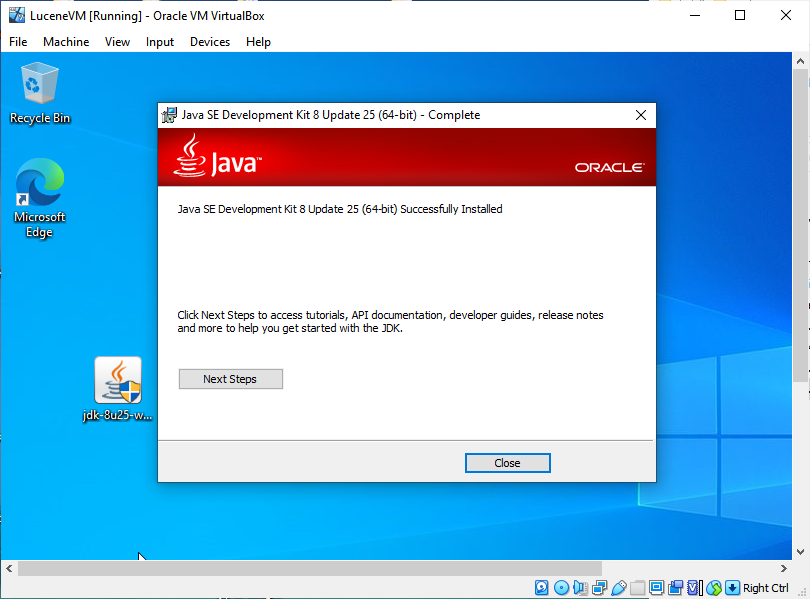
+<p>You will need to scroll down a ways on the page to find “<strong>Java SE
Development Kit 8u25</strong>” or better yet search the page for 8u25. Then
download the Windows x64 one jre-8u25-windows-x64.exe
+Download and run that jdk-8u25-windows-x64.exe file that in the VM.</p>
+ <img
src='https://lucenenet.apache.org/images/contributing/java-lucene-4_8-setup/install-java8-01.png'>
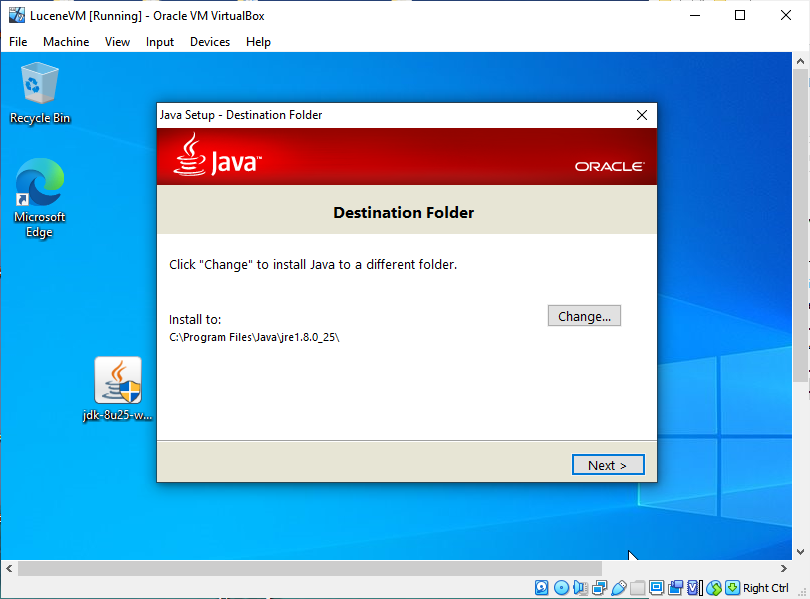
+<p>I just took all the default options and had it do the install.</p>
+ <img
src='https://lucenenet.apache.org/images/contributing/java-lucene-4_8-setup/install-java8-02.png'>
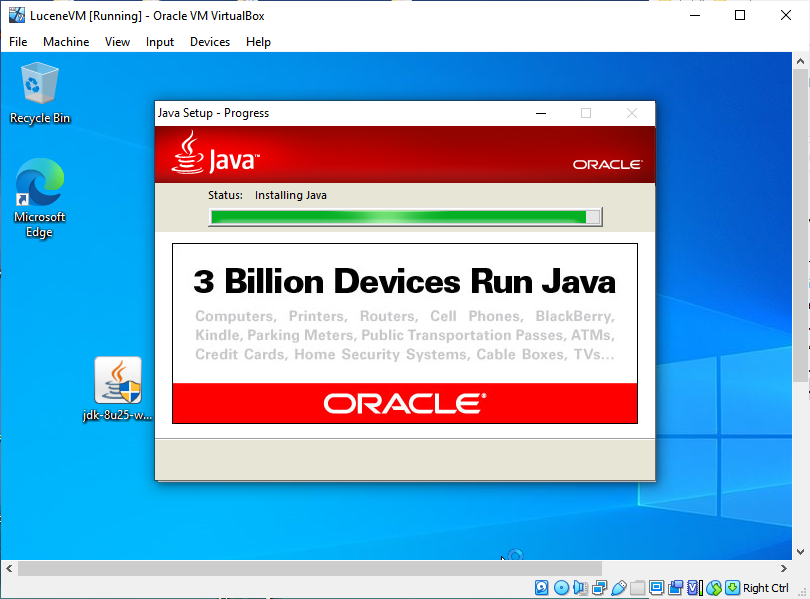
+<p>And then:</p>
+ <img
src='https://lucenenet.apache.org/images/contributing/java-lucene-4_8-setup/install-java8-03.png'>
+<p>And then:</p>
+ <img
src='https://lucenenet.apache.org/images/contributing/java-lucene-4_8-setup/install-java8-04.png'>
+<p>Eclipse will now run but we have more to install before can load Lucene
4.8.</p>
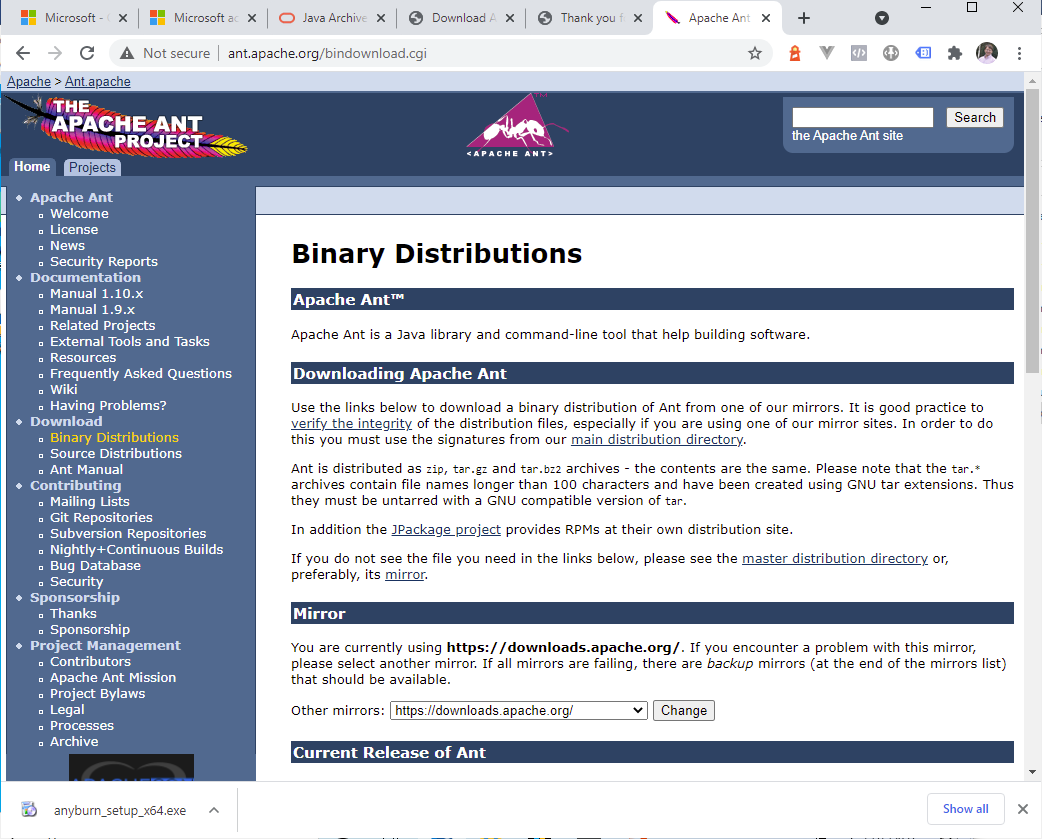
+<h2 id="installing-apache-ant">Installing Apache Ant</h2>
+<p>Use version 1.9.7 if you can find it, but 1.9.15 should work. But you MUST
the 1.9 branch of Apache Ant, not a newer one. Ant is currently running two
branches, 1.9.X and 1.10.X.</p>
+ <img
src='https://lucenenet.apache.org/images/contributing/java-lucene-4_8-setup/install-apache-ant01.png'>
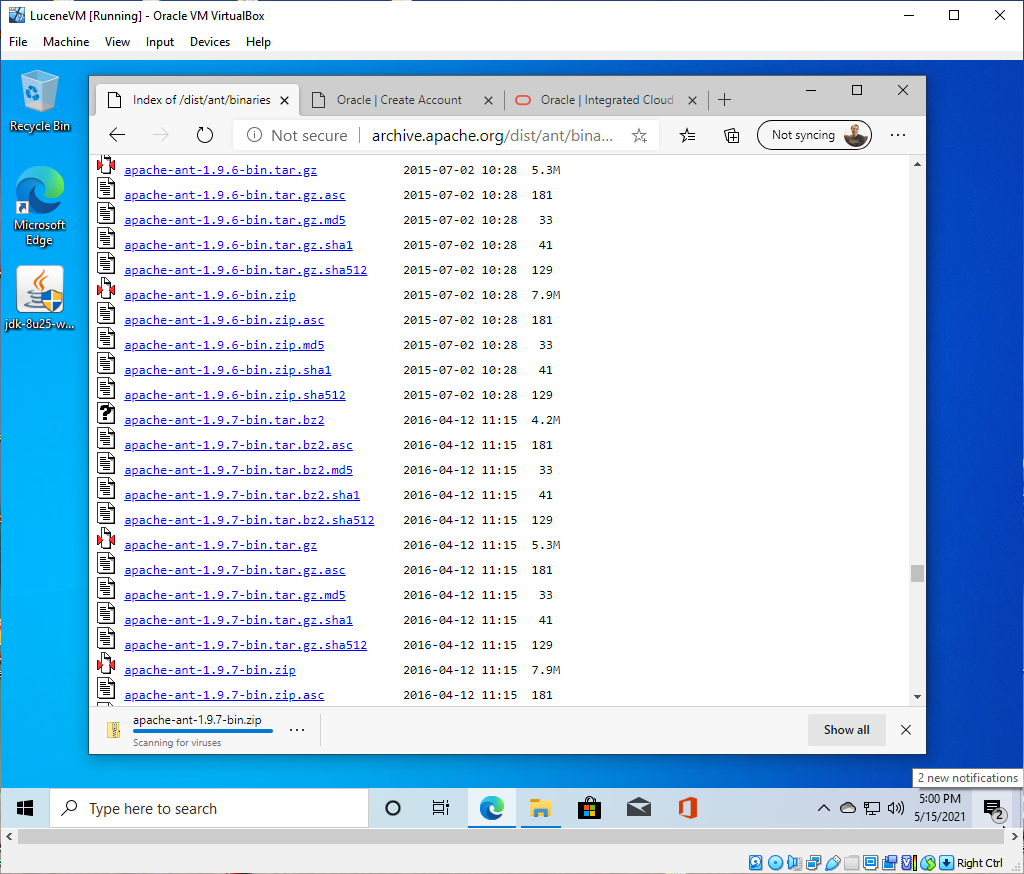
+<p>You can get version 1.9.7 here: <a
href="https://archive.apache.org/dist/ant/binaries/";>https://archive.apache.org/dist/ant/binaries/</a>
The actual download link for the zip version from that page is <a
href="https://archive.apache.org/dist/ant/binaries/apache-ant-1.9.7-bin.zip";>https://archive.apache.org/dist/ant/binaries/apache-ant-1.9.7-bin.zip</a></p>
+ <img
src='https://lucenenet.apache.org/images/contributing/java-lucene-4_8-setup/install-apache-ant02.png'>
+<p>You’ll have to unzip the downloaded <code>apache-ant-1.9.7-bin.zip</code>
file.</p>
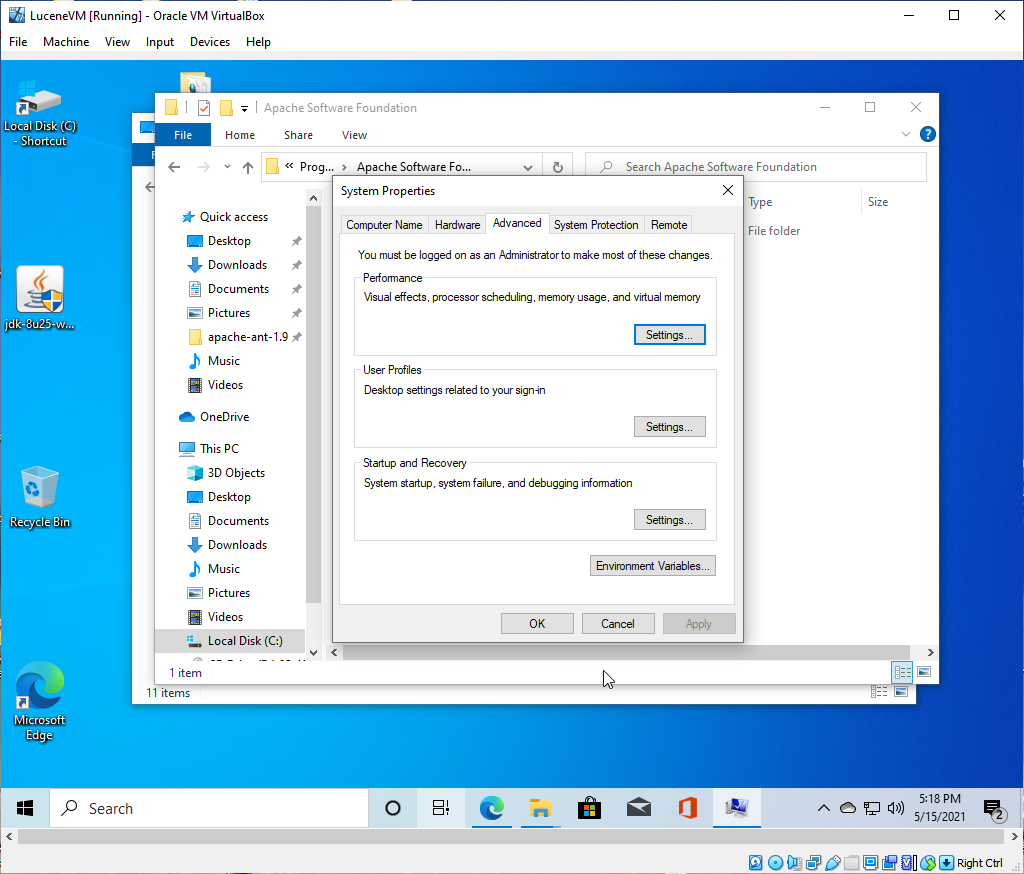
+<p>The unzipped folder will need to be moved to a place of your choosing where
you want ant to live. In my case I created a folder called “Apache Software
Foundation” inside the “Program Files” folder and placed it there. So my path
was <code>c:\Program Files\Apache Software Foundation\apache-ant-1.9.7</code>
Directions for installing Ant are on this page under “The Short Story” <a
href="https://ant.apache.org/manual/install.html";>https://ant.apache.org/manual/install.html</a></p>
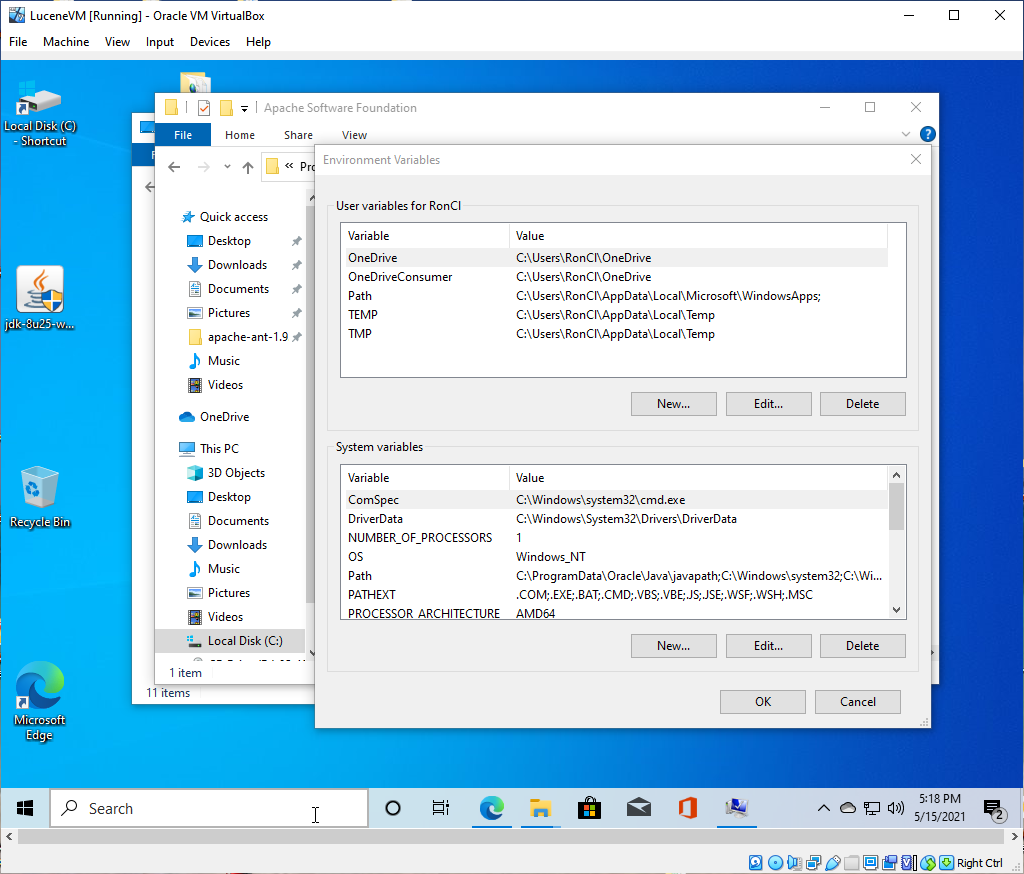
+<p>I typed “Environment Variables” into windows search and used that to open
the System Properties window. Then clicked the Environment Variables button.</p>
+ <img
src='https://lucenenet.apache.org/images/contributing/java-lucene-4_8-setup/install-apache-ant03.png'>
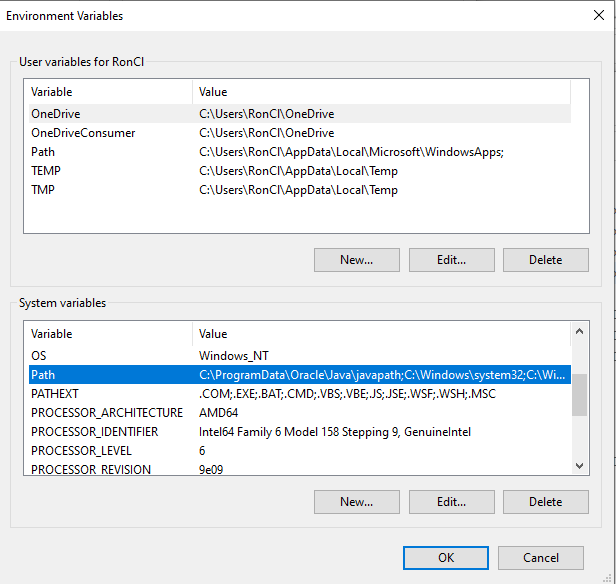
+<p>And then:</p>
+ <img
src='https://lucenenet.apache.org/images/contributing/java-lucene-4_8-setup/install-apache-ant04.png'>
+<p>In here we can set the Environment Variables we need.
+See this page for more details of what we need to do:
+<a
href="https://ant.apache.org/manual/install.html#setup";>https://ant.apache.org/manual/install.html#setup</a></p>
+<p>From that Page:</p>
+<ol>
+<li>Add the bin directory to your path.</li>
+<li>Set the ANT_HOME environment variable to the directory where you installed
Ant. On some operating systems, Ant's startup scripts can guess ANT_HOME (Unix
dialects and Windows NT descendants), but it is better to not rely on this
behavior.</li>
+<li>Optionally, set the JAVA_HOME environment variable (see the Advanced
section below). This should be set to the directory where your JDK is
installed.</li>
+</ol>
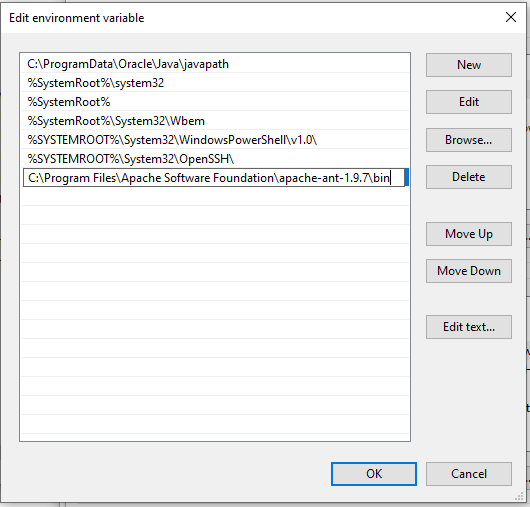
+<p>Adding the Bin directory to my path environment variable:</p>
+ <img
src='https://lucenenet.apache.org/images/contributing/java-lucene-4_8-setup/install-apache-ant05.png'>
+<p>And then:</p>
+ <img
src='https://lucenenet.apache.org/images/contributing/java-lucene-4_8-setup/install-apache-ant06.png'>
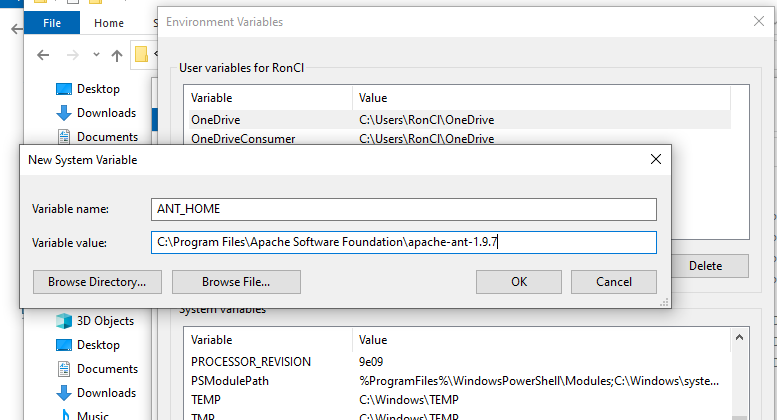
+<p>Then adding the ANT_HOME environment variable</p>
+ <img
src='https://lucenenet.apache.org/images/contributing/java-lucene-4_8-setup/install-apache-ant07.png'>
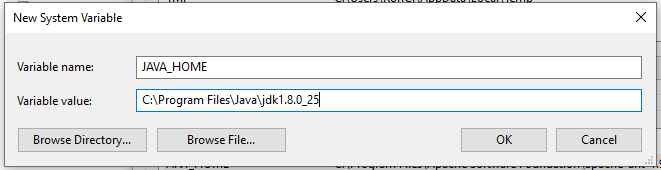
+<p>Then adding the JAVA_HOME environment variable</p>
+ <img
src='https://lucenenet.apache.org/images/contributing/java-lucene-4_8-setup/install-apache-ant08.png'>
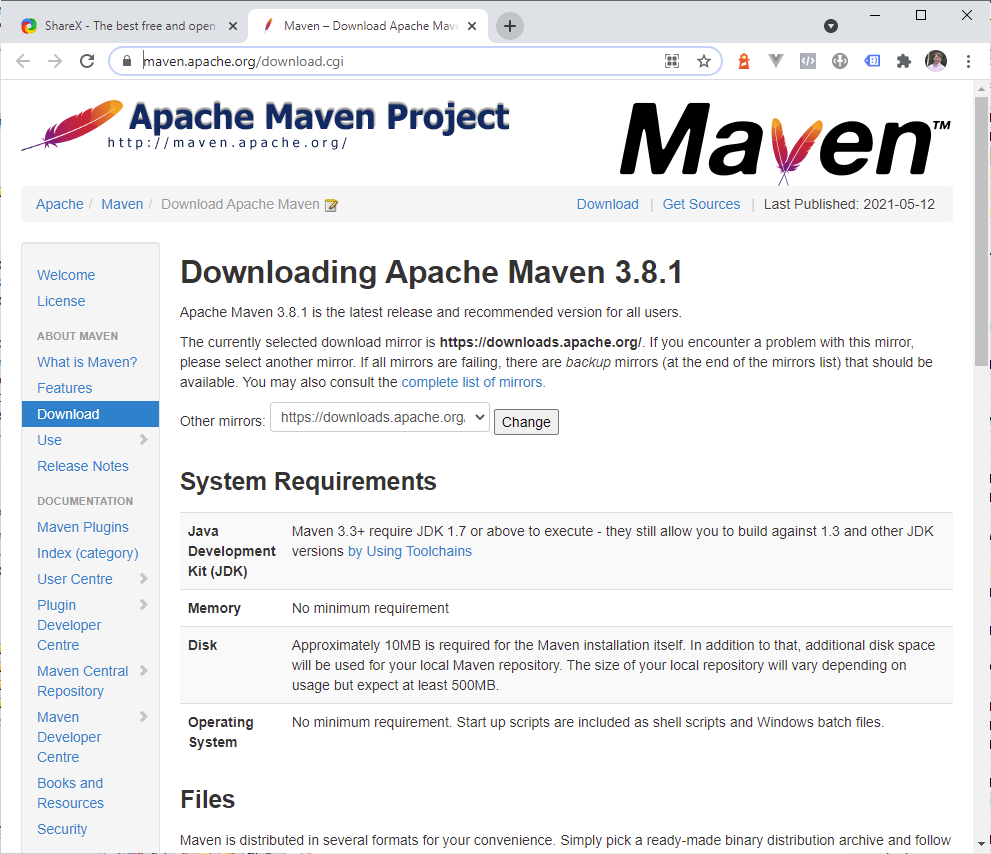
+<h2 id="installing-apache-maven">Installing Apache Maven</h2>
+<p>Use version 3.8.1. <a
href="https://maven.apache.org/download.cgi";>https://maven.apache.org/download.cgi</a>
The installation process is basically the same as Apache Ant. This is the
Java equivalent of NuGet.</p>
+ <img
src='https://lucenenet.apache.org/images/contributing/java-lucene-4_8-setup/install-apache-maven01.png'>
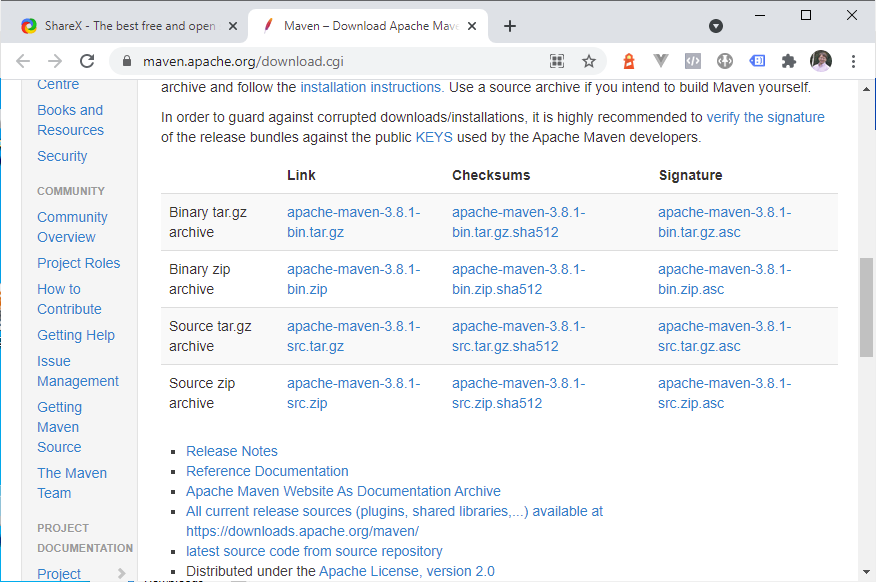
+<p>Then scrolling down the page:</p>
+ <img
src='https://lucenenet.apache.org/images/contributing/java-lucene-4_8-setup/install-apache-maven02.png'>
+<p>We are going to download <code>apache-maven-3.8.1-bin.zip</code>
+Move the folder out of the zip and into the location by the apache ant
folder.</p>
+<p>“install” instructions are here: <a
href="https://maven.apache.org/install.html";>https://maven.apache.org/install.html</a></p>
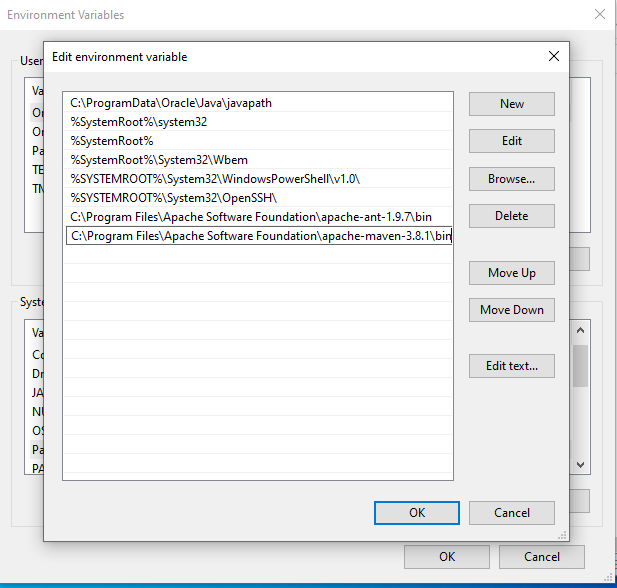
+<p>Add the <code>bin</code> directory of <code>apache-maven-3.8.1 to</code>
the <code>PATH</code> environment variable</p>
+ <img
src='https://lucenenet.apache.org/images/contributing/java-lucene-4_8-setup/install-apache-maven03.png'>
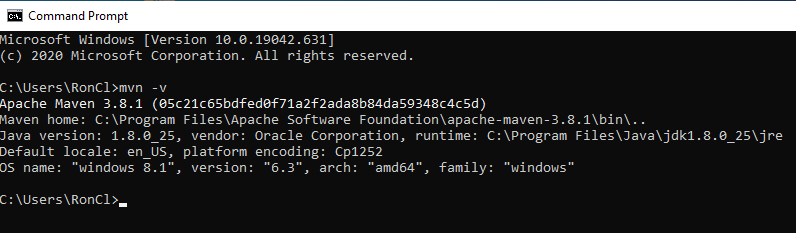
+<p>Then open a command prompt via cmd.exe and type mvn –v to confirm that the
path is setup correct. Output should look something like:</p>
+ <img
src='https://lucenenet.apache.org/images/contributing/java-lucene-4_8-setup/install-apache-maven04.png'>
+<p> </p>
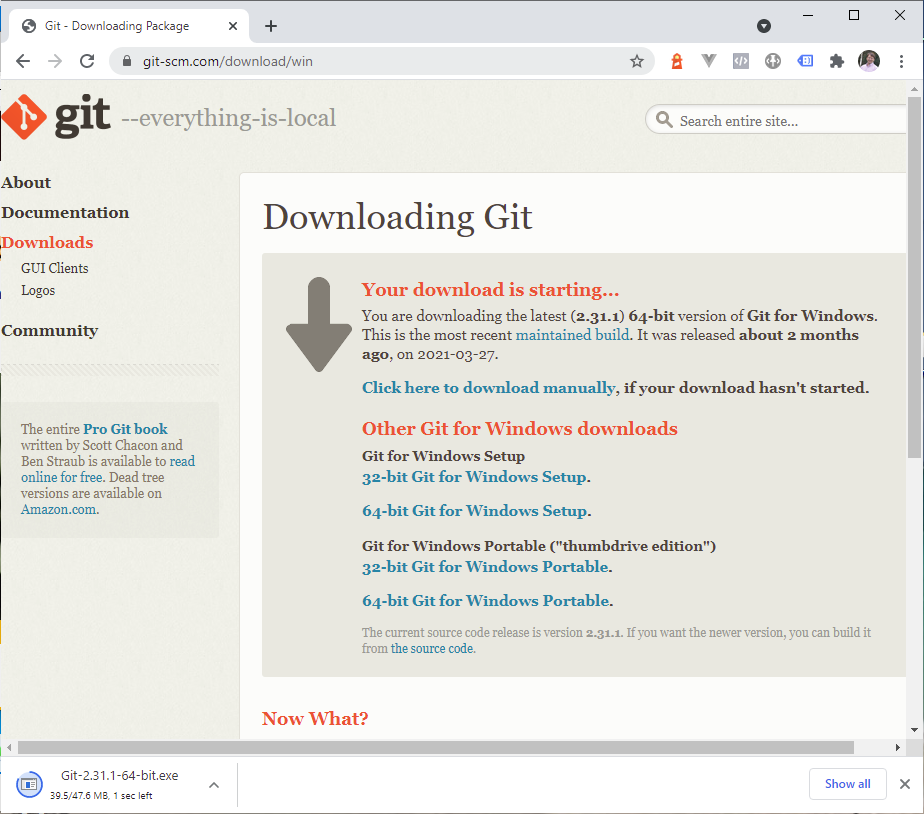
+<h2 id="installing-git">Installing Git</h2>
+<p><a
href="https://git-scm.com/download/win";>https://git-scm.com/download/win</a></p>
+ <img
src='https://lucenenet.apache.org/images/contributing/java-lucene-4_8-setup/install-git01.png'>
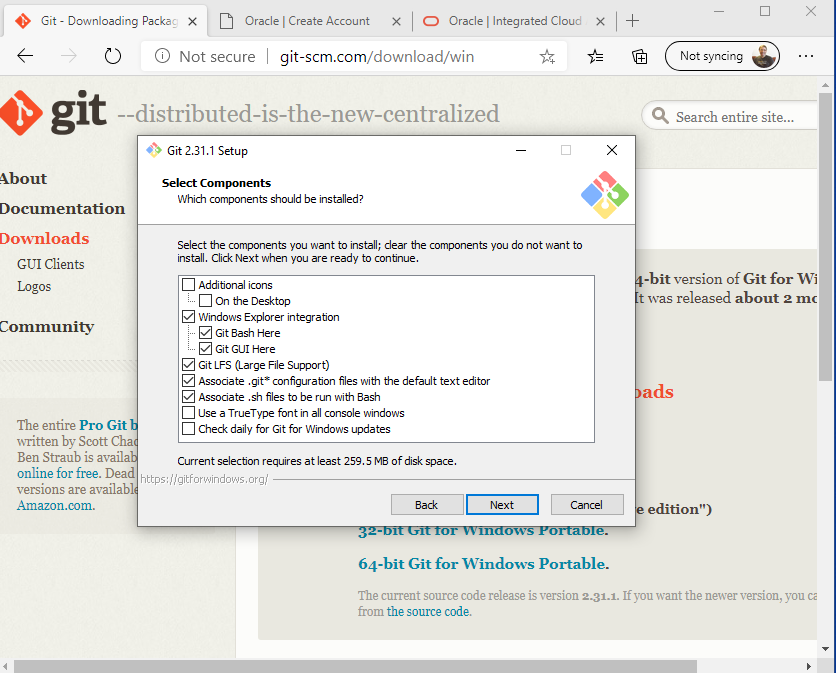
+<p>Of the choices above I chose “64-bit Git for Windows Setup.” Download and
run the installer. Agree to the license, pick a directory to install it in, I
kept the default, I also kept the default components in the dialog below:</p>
+ <img
src='https://lucenenet.apache.org/images/contributing/java-lucene-4_8-setup/install-git02.png'>
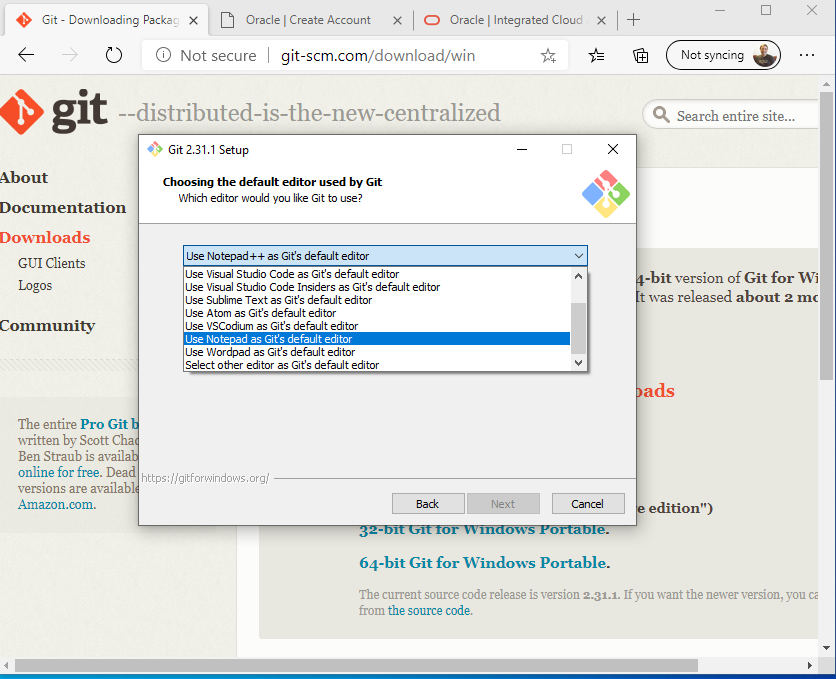
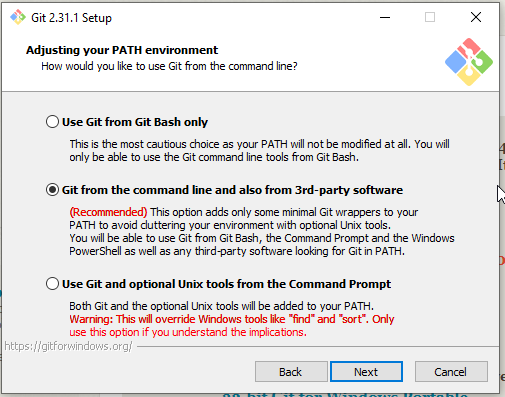
+<p>Next:</p>
+ <img
src='https://lucenenet.apache.org/images/contributing/java-lucene-4_8-setup/install-git03.png'>
+<p>In the dialog avove I ched the default Git editor from vim to Notepad.
Pick whatever you like. In general for the other dialogs I kept the defaults
including on this one</p>
+ <img
src='https://lucenenet.apache.org/images/contributing/java-lucene-4_8-setup/install-git04.png'>
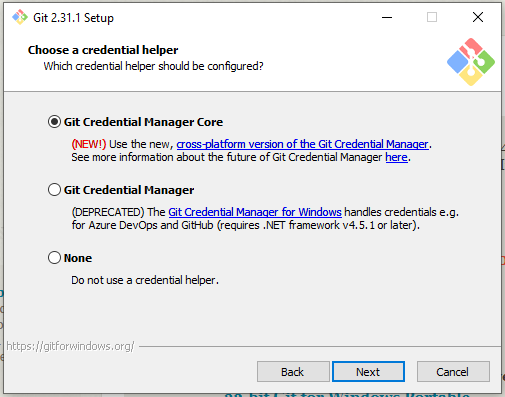
+<p>Next:</p>
+ <img
src='https://lucenenet.apache.org/images/contributing/java-lucene-4_8-setup/install-git05.png'>
+<h2 id="clone-lucene-48-repo-to-vm-drive">Clone Lucene 4.8 Repo to VM
Drive</h2>
+<p>Shad says: The top level thing in Java Eclipse is called a workspace. I
haven't really researched exactly what a workspace is, but it can have more
than one java project in it. When you clone the repo, you will put it in your
repos folder. But there needs to be another folder for Java to consider a
workspace. Maybe in reality it can be the same folder, but I haven't worked out
how to do that.</p>
+<p>So create two folders one for the cloned repo and one for the Eclipse
workspace. In my case I created these directories to satisfy that:</p>
+<p>C:\Users\Ron\source\eclipse_workspaces\lucene_workspace
+C:\Users\Ron\source\repos\lucene</p>
+<h3 id="why-not-clone-the-code-directly-from-java-lucene-repo">Why not clone
the code directly from Java Lucene Repo?</h3>
+<p>It turns out that it’s no longer possible to directly compile the Lucene
4.8 code obtained from the Java Lucene Repo without modification. Unlike NuGet
which makes old versions available forever and is always online, Maven has lots
of mirrors that may cease to exist at some point, and that is what’s happed, so
the configuration in the Java Lucene 4.8 Repo is out of date and no longer
builds.</p>
+<p>In addition, Java 8 (which we need for Eclipse) detects an error in the
code that Java 7 did not, so the build doesn't complete. It is due to some
fields that are marked final that are disposed at the end of the constructor
(so they really don't need to be fields). Taking the final keyword off of the
field removes the error. So, the project has to be modified slightly so all of
this can happen.</p>
+<h3 id="where-can-we-get-java-lucene-48-code-that-compiles">Where can we get
Java Lucene 4.8 code that compiles?</h3>
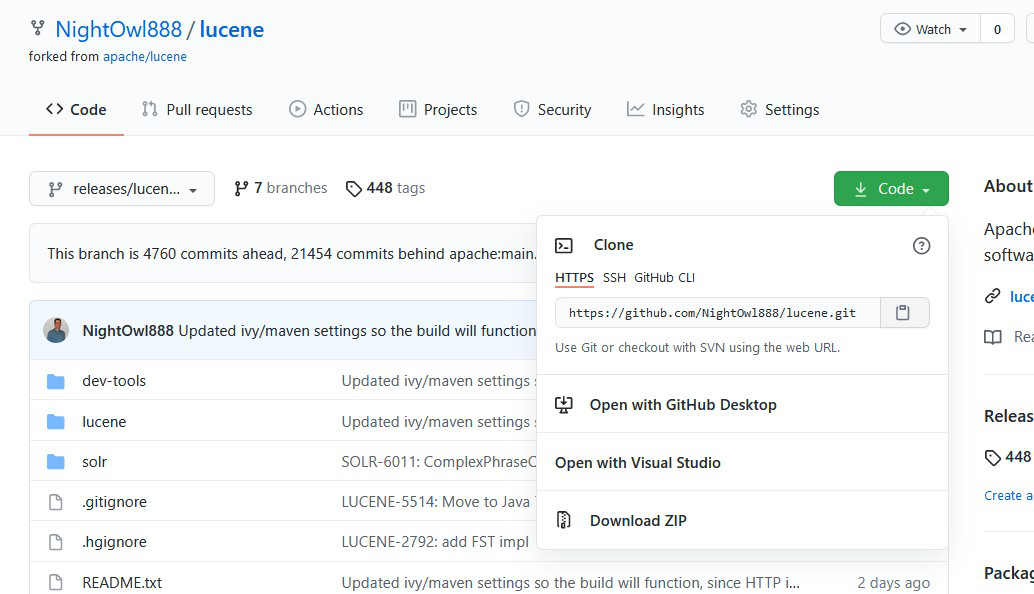
+<p>There is a fork of the Java Lucene Repo at <a
href="https://github.com/NightOwl888/lucene";>https://github.com/NightOwl888/lucene</a>
that includes modifications to update the Maven and ant files so that the code
will still compile.</p>
+ <img
src='https://lucenenet.apache.org/images/contributing/java-lucene-4_8-setup/where-can-we-get-the-code01.png'>
+<p>Steps to Clone it into the VM</p>
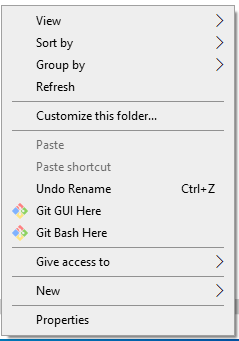
+<p>Open the folder that will contain the clone folder and then right click in
there and select “Git Bash Here” from the content menu.</p>
+ <img
src='https://lucenenet.apache.org/images/contributing/java-lucene-4_8-setup/where-can-we-get-the-code02.png'>
+<p>Then in the Bash window type the following (where lucene-4.8.0 is the name
we want it to use for the destination folder):</p>
+<p><code>git clone https://github.com/NightOwl888/lucene.git
lucene-4.8.0</code></p>
+ <img
src='https://lucenenet.apache.org/images/contributing/java-lucene-4_8-setup/where-can-we-get-the-code03.png'>
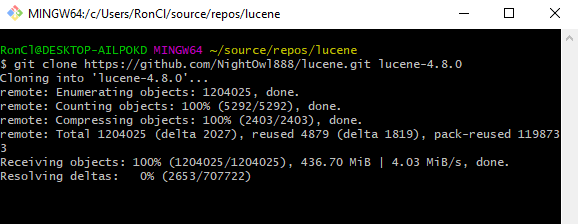
+<p>This process will take several minutes because the repo it over 1GB in
size. Here is a view of the Bash window in the middle of the clone
operations:</p>
+ <img
src='https://lucenenet.apache.org/images/contributing/java-lucene-4_8-setup/where-can-we-get-the-code04.png'>
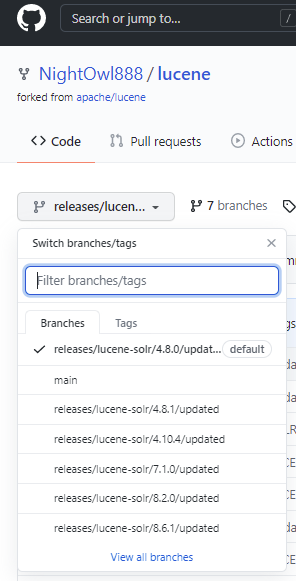
+<p>Once that completes Lets checkout the branch, in the Bash window type:</p>
+<p><code>cd lucene-4.8.0</code></p>
+<p>followed by</p>
+<p><code>git checkout releases/lucene-solr/4.8.0/update</code></p>
+<p>You can see the name of the branches here:</p>
+ <img
src='https://lucenenet.apache.org/images/contributing/java-lucene-4_8-setup/where-can-we-get-the-code05.png'>
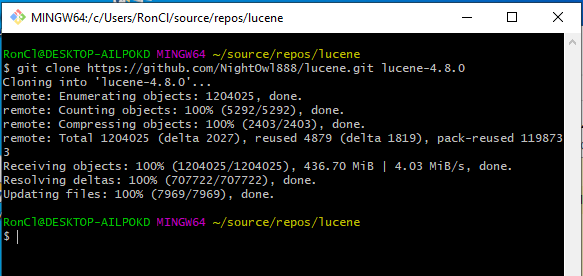
+<p>Here’s what I looked like when the clone was done;</p>
+ <img
src='https://lucenenet.apache.org/images/contributing/java-lucene-4_8-setup/where-can-we-get-the-code06.png'>
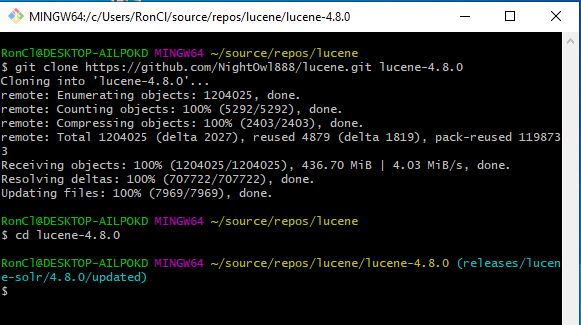
+<p>Now cd into the directory that was created as part of the clone operation
by typing the following Base command: cd lucene-4.8.</p>
+ <img
src='https://lucenenet.apache.org/images/contributing/java-lucene-4_8-setup/where-can-we-get-the-code07.png'>
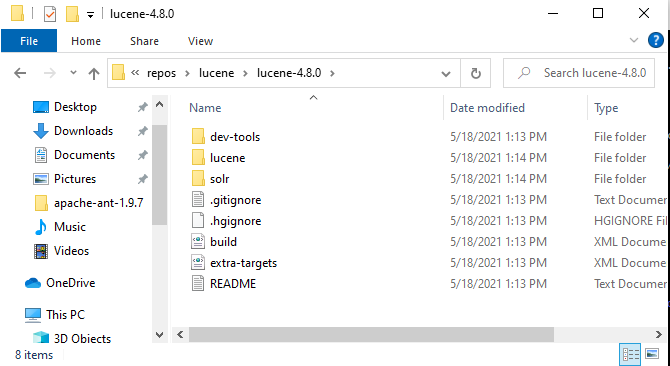
+<p>In windows, this is what the directory looks like:</p>
+ <img
src='https://lucenenet.apache.org/images/contributing/java-lucene-4_8-setup/where-can-we-get-the-code08.png'>
+<h2 id="downloading-the-projects-dependencies">Downloading the Project’s
Dependencies</h2>
+<h3 id="boostrap-ant">Boostrap ant</h3>
+<p>First we need to get ant bootstrapped.
+Here is some background on Maven and Ivy from the web:</p>
+<blockquote>
+<p>Apache Maven is a software project management and comprehension tool,
whereas Apache Ivy is only a dependency management tool, highly integrated with
Apache Ant™, the popular build management tool. Source: <a
href="https://ant.apache.org/ivy/m2comparison.html";>https://ant.apache.org/ivy/m2comparison.html</a></p>
+</blockquote>
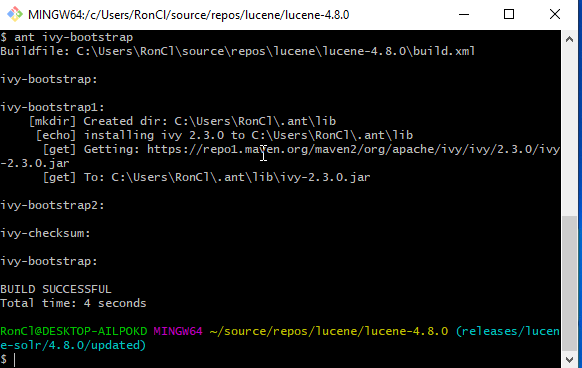
+<p>From inside of the lucene-4.8.0 directory, run this Bash command</p>
+<p><code>ant ivy-bootstrap</code></p>
+ <img
src='https://lucenenet.apache.org/images/contributing/java-lucene-4_8-setup/download-dependencies01.png'>
+<p>What it just did is downloaded the ~/.ant/lib/ivy-2.3.0 file</p>
+<h3 id="use-ant-to-download-project-dependencies">Use Ant to Download Project
Dependencies</h3>
+<p>Apache Lucene has a ton of 3rd party dependencies. The next step is to have
maven download all those dependencies. This can take a while depending on your
machine and internet connections.<br>
+To see a list of the dependencies look at
<strong>lucene/ivy-versions.properties</strong> file.</p>
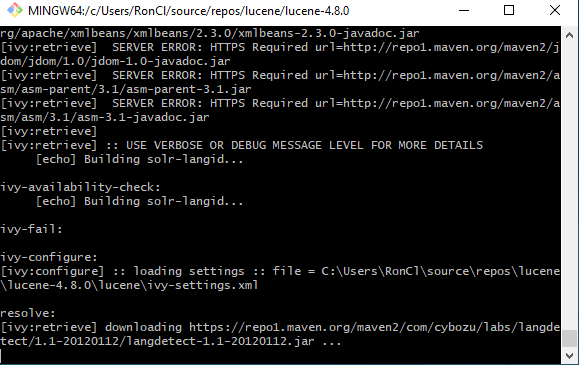
+<p>We should now be setup to build. So run the following Bash command:</p>
+<p><code>ant eclipse</code></p>
+<p>Example screenshot while ant is doing it’s work:</p>
+ <img
src='https://lucenenet.apache.org/images/contributing/java-lucene-4_8-setup/download-dependencies02.png'>
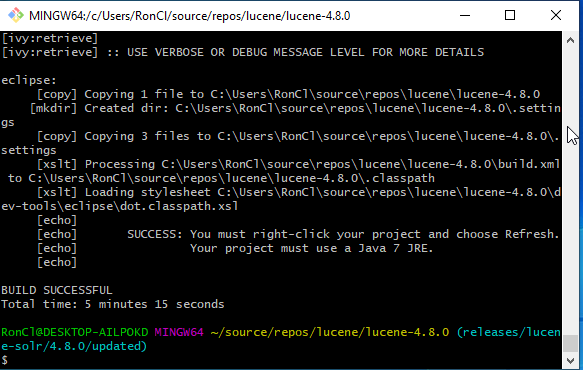
+<p>In my case it took about 10 minutes for ant to download all the
dependencies. The bash window then looked like this:</p>
+ <img
src='https://lucenenet.apache.org/images/contributing/java-lucene-4_8-setup/download-dependencies03.png'>
+<h2 id="using-eclipse">Using Eclipse</h2>
+<h3 id="getting-stared-with-eclipse">Getting Stared with Eclipse</h3>
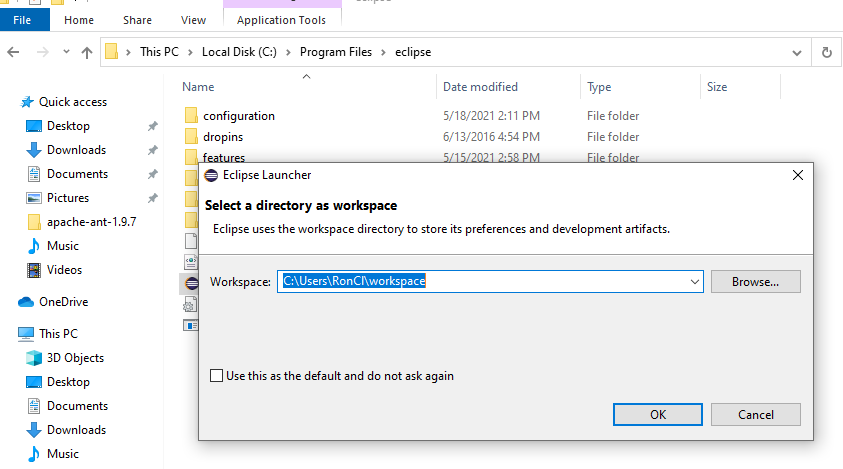
+<p>Now we need to open eclipse and create a workspace. So we use windows to
go to the eclipse folder which in my case is here C:\Program Files\eclipse and
we double click on eclipse to run it.
+Eclipse will prompt you to create a workspace.</p>
+ <img
src='https://lucenenet.apache.org/images/contributing/java-lucene-4_8-setup/using-eclipse01.png'>
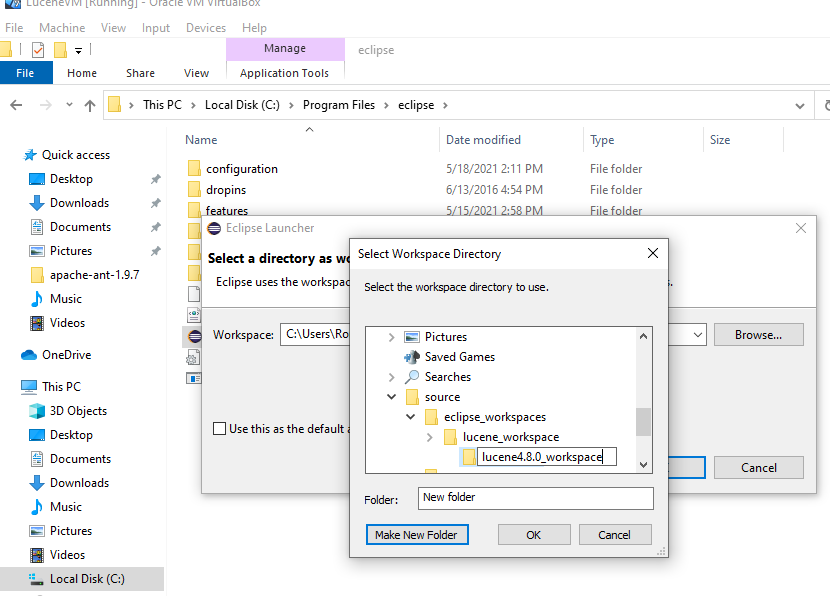
+<p>Browse to find the location we created earlier to house our lucene
workspace folders and create a folder in there for this version of lucene. I
called my lucene4.8.0_workspace as you can see in the screenshot below.</p>
+ <img
src='https://lucenenet.apache.org/images/contributing/java-lucene-4_8-setup/using-eclipse02.png'>
+<p>And after a few more seconds Eclipse will open in a window:</p>
+ <img
src='https://lucenenet.apache.org/images/contributing/java-lucene-4_8-setup/using-eclipse03.png'>
+<p>We can zoom to take up the whole VM screen space.</p>
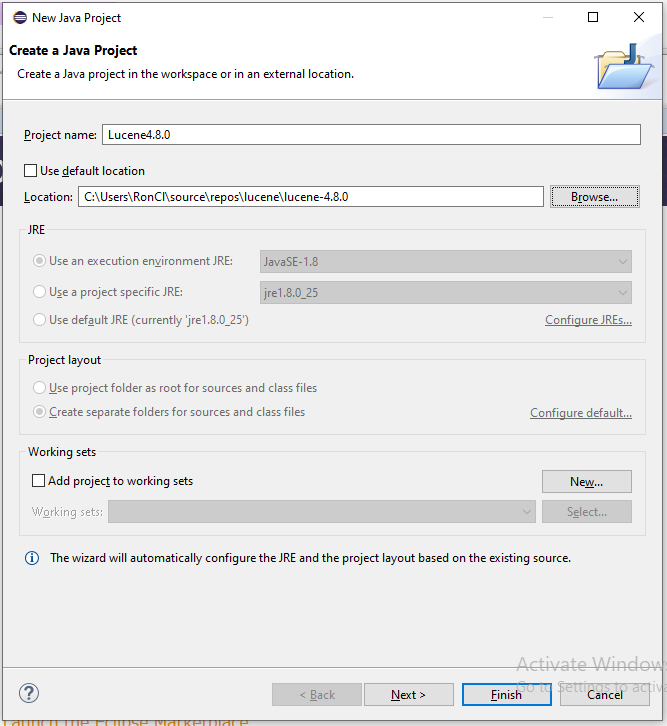
+<p>Then click the <strong>Create new Java project</strong> in the welcome
screen.</p>
+<ol>
+<li>Provide a Project name, in my case Lucene4.8.0,</li>
+<li>Then uncheck the “Use default location” check box.</li>
+<li>Then use the browse button to specify the <strong>location of the git repo
clone.</strong></li>
+</ol>
+<p>So the dialog will then look something like this:</p>
+ <img
src='https://lucenenet.apache.org/images/contributing/java-lucene-4_8-setup/using-eclipse04.png'>
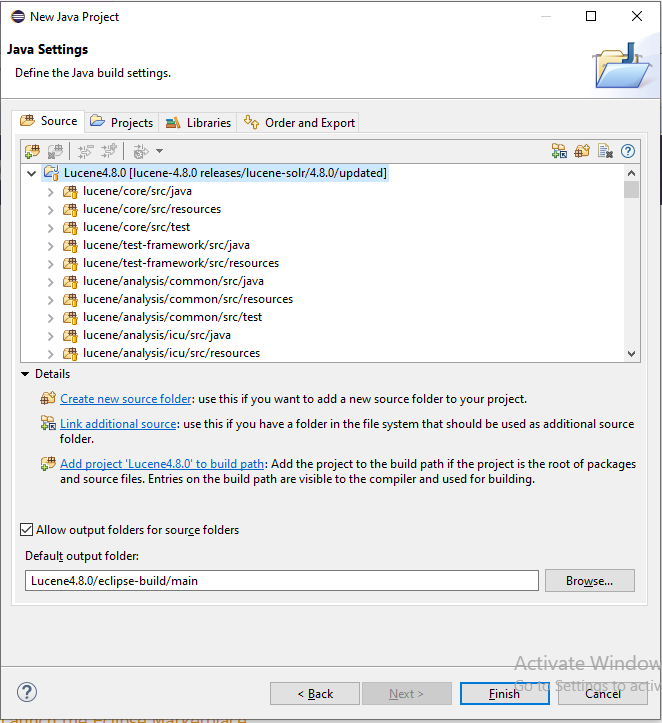
+<p>Click the Next button.</p>
+ <img
src='https://lucenenet.apache.org/images/contributing/java-lucene-4_8-setup/using-eclipse05.png'>
+<p>Then click the Libraries Tab and scroll down and select the JRE System
Library</p>
+ <img
src='https://lucenenet.apache.org/images/contributing/java-lucene-4_8-setup/using-eclipse06.png'>
+<p>Then click the Edit button.</p>
+ <img
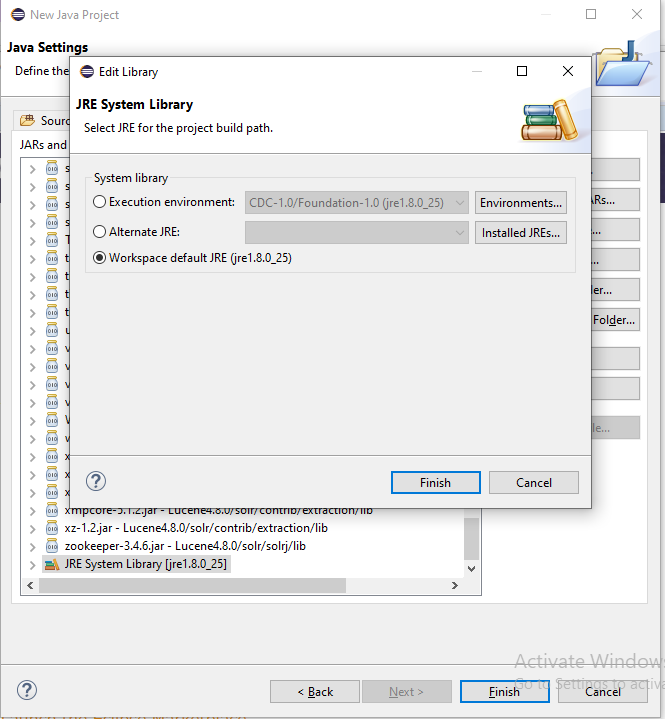
src='https://lucenenet.apache.org/images/contributing/java-lucene-4_8-setup/using-eclipse07.png'>
+<p>Then set the System Library radio button to “Workspace default JRE” if it’s
not selected already. Then clicked the Finish button on that dialog, and then
click the Finish button on the other dialog.</p>
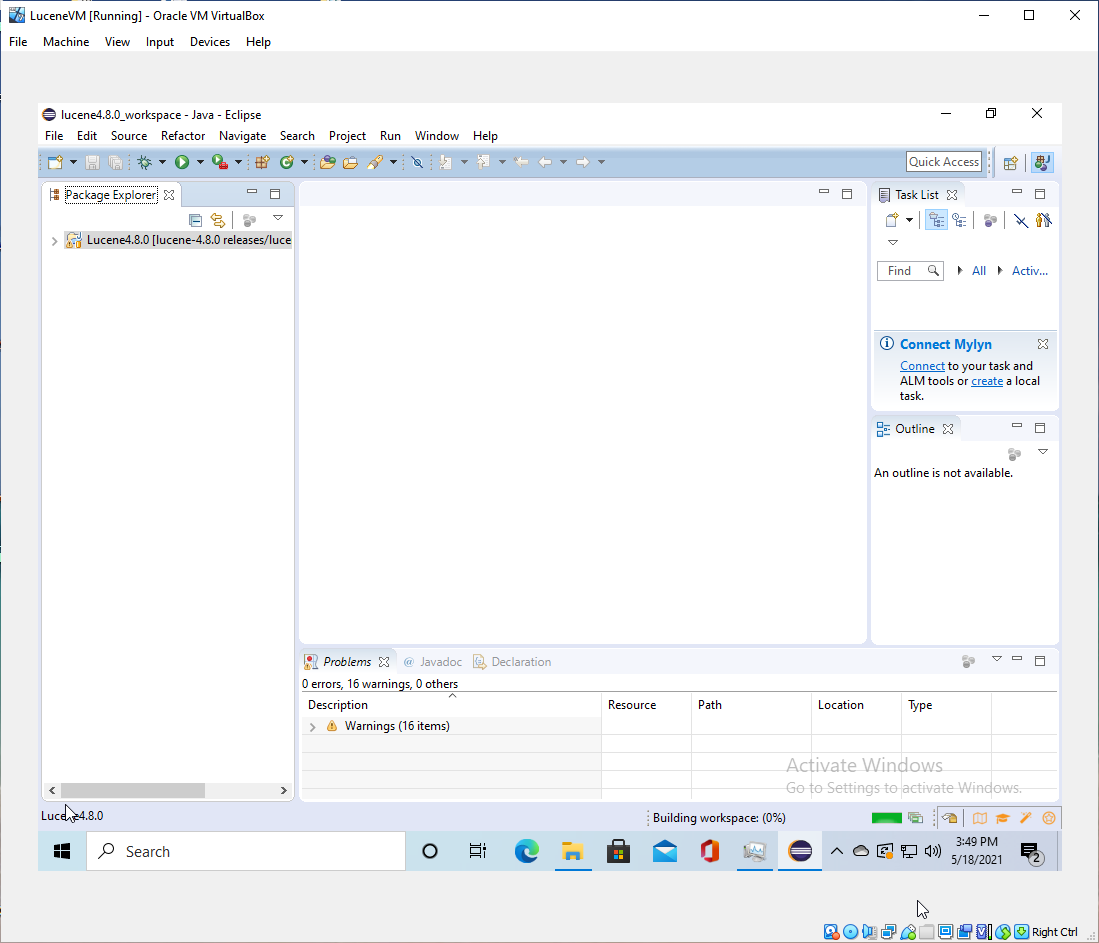
+<p>Then expand the window to take up the whole VM and you will see a build
progress indicator in the lower status bar. The project is now building in the
background.</p>
+ <img
src='https://lucenenet.apache.org/images/contributing/java-lucene-4_8-setup/using-eclipse08.png'>
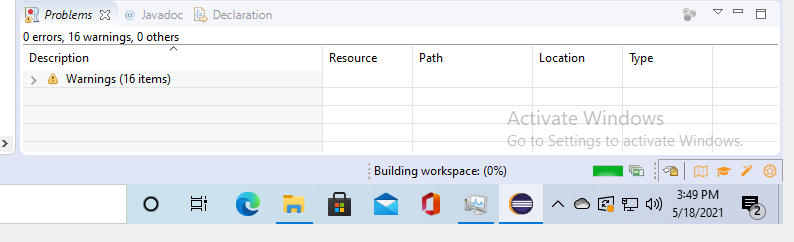
+<p>Zoomed in to see the Building workspace message better in the status bar</p>
+ <img
src='https://lucenenet.apache.org/images/contributing/java-lucene-4_8-setup/using-eclipse09.png'>
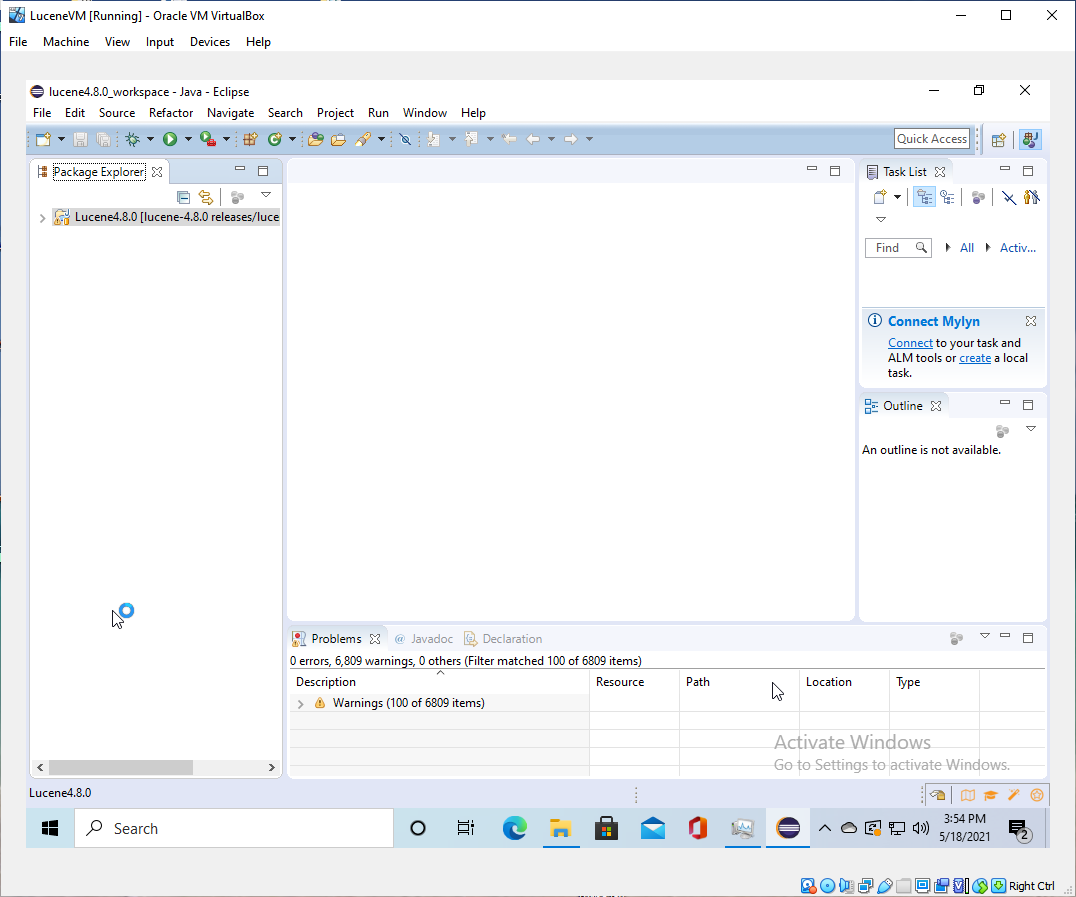
+<p>Once the build complete my screen looked like the screenshot below. There
were a lot of code warnings but no errors.</p>
+<h3 id="debugging-with-eclipse">Debugging With Eclipse</h3>
+ <img
src='https://lucenenet.apache.org/images/contributing/java-lucene-4_8-setup/debugging-with-eclipse01.png'>
+<p>Now Click the little icon to expand the packages under Lucne4.8.0 in the
package explorer</p>
+ <img
src='https://lucenenet.apache.org/images/contributing/java-lucene-4_8-setup/debugging-with-eclipse02.png'>
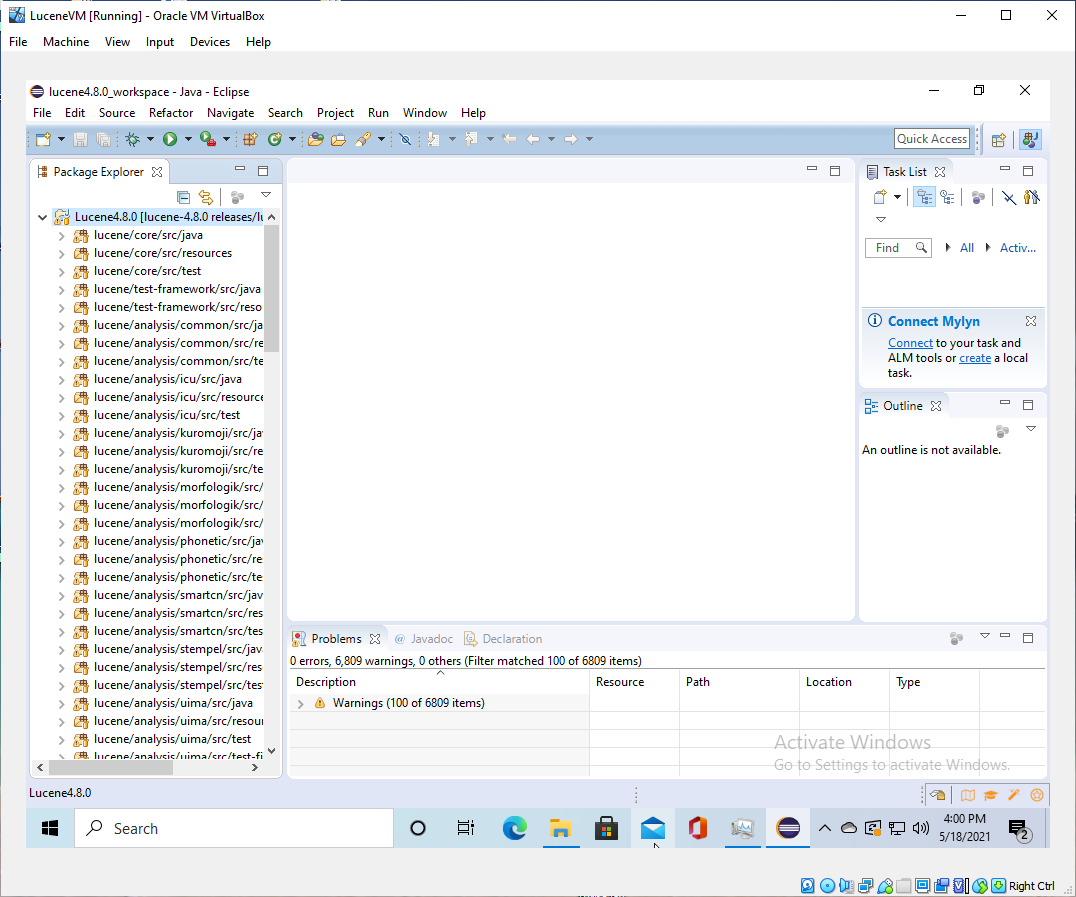
+<p>Then scroll down to <strong>lucene/analysis/phonetic/src/test</strong> and
select it</p>
+ <img
src='https://lucenenet.apache.org/images/contributing/java-lucene-4_8-setup/debugging-with-eclipse03.png'>
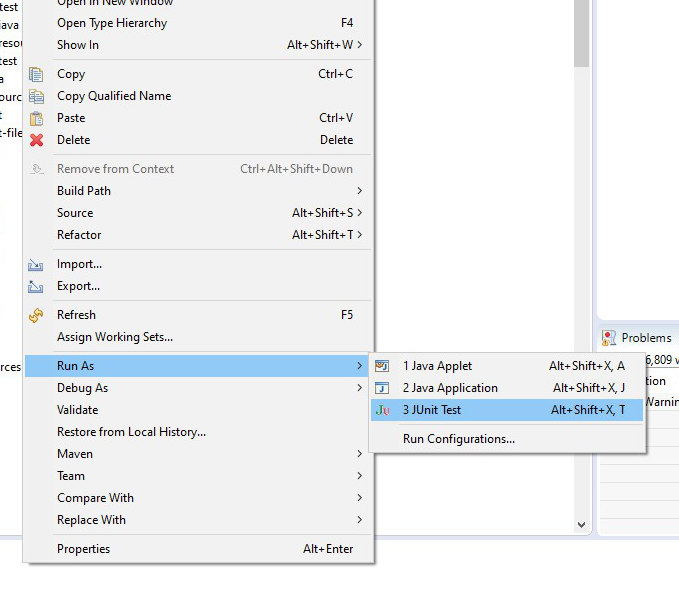
+<p>Then right click it and select Run As Junit Test</p>
+ <img
src='https://lucenenet.apache.org/images/contributing/java-lucene-4_8-setup/debugging-with-eclipse04.png'>
+<p>Then</p>
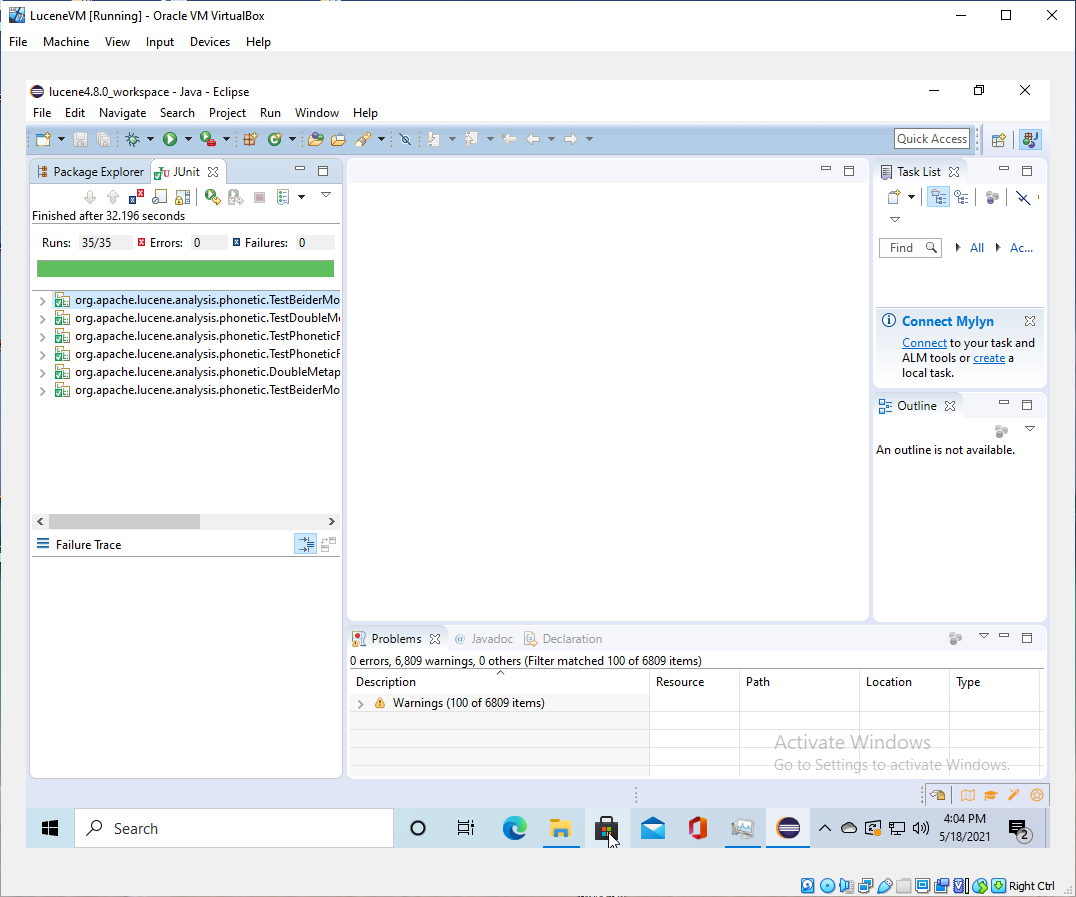
+ <img
src='https://lucenenet.apache.org/images/contributing/java-lucene-4_8-setup/debugging-with-eclipse05.png'>
+<p>The above screen shows it ran the 35 tests in 32.196 seconds and all of
them passed. Yea.</p>
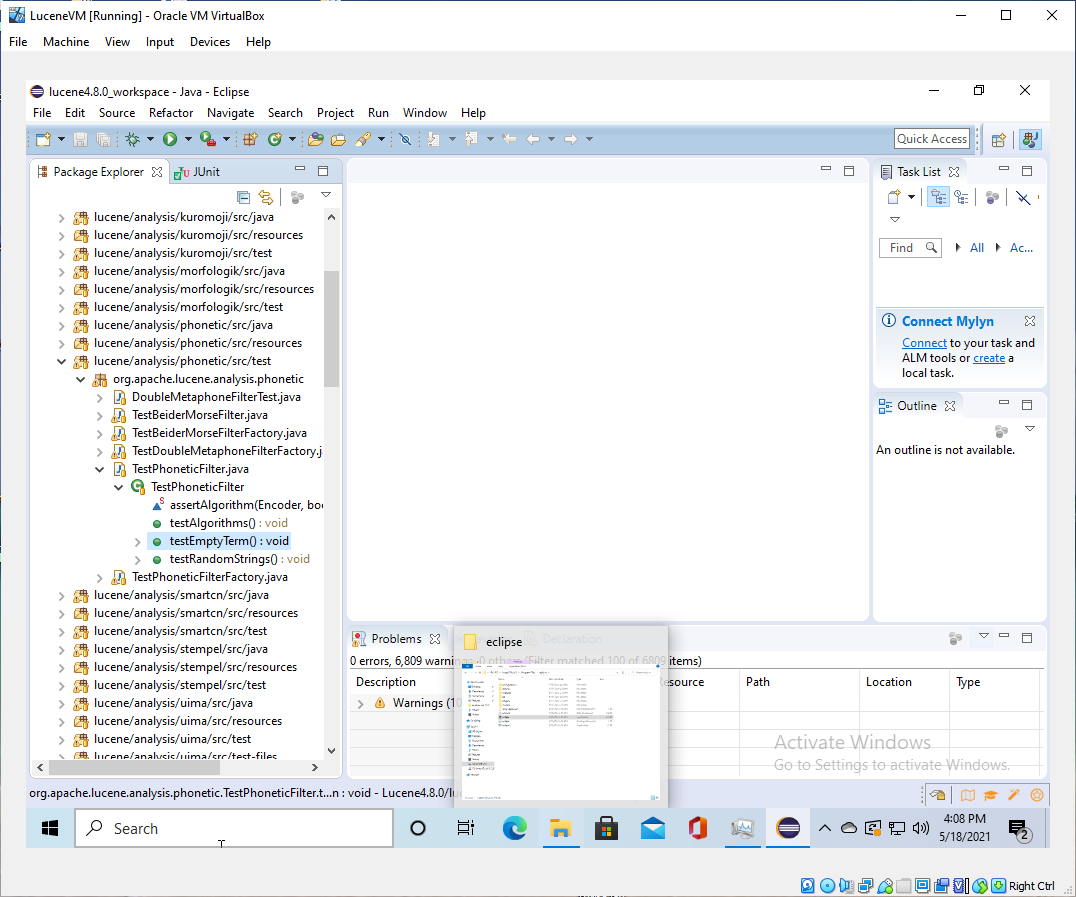
+<p>Click on Package Explorer tab (by the Junit tab) and expand the
phonetics/src/test item.</p>
+ <img
src='https://lucenenet.apache.org/images/contributing/java-lucene-4_8-setup/debugging-with-eclipse06.png'>
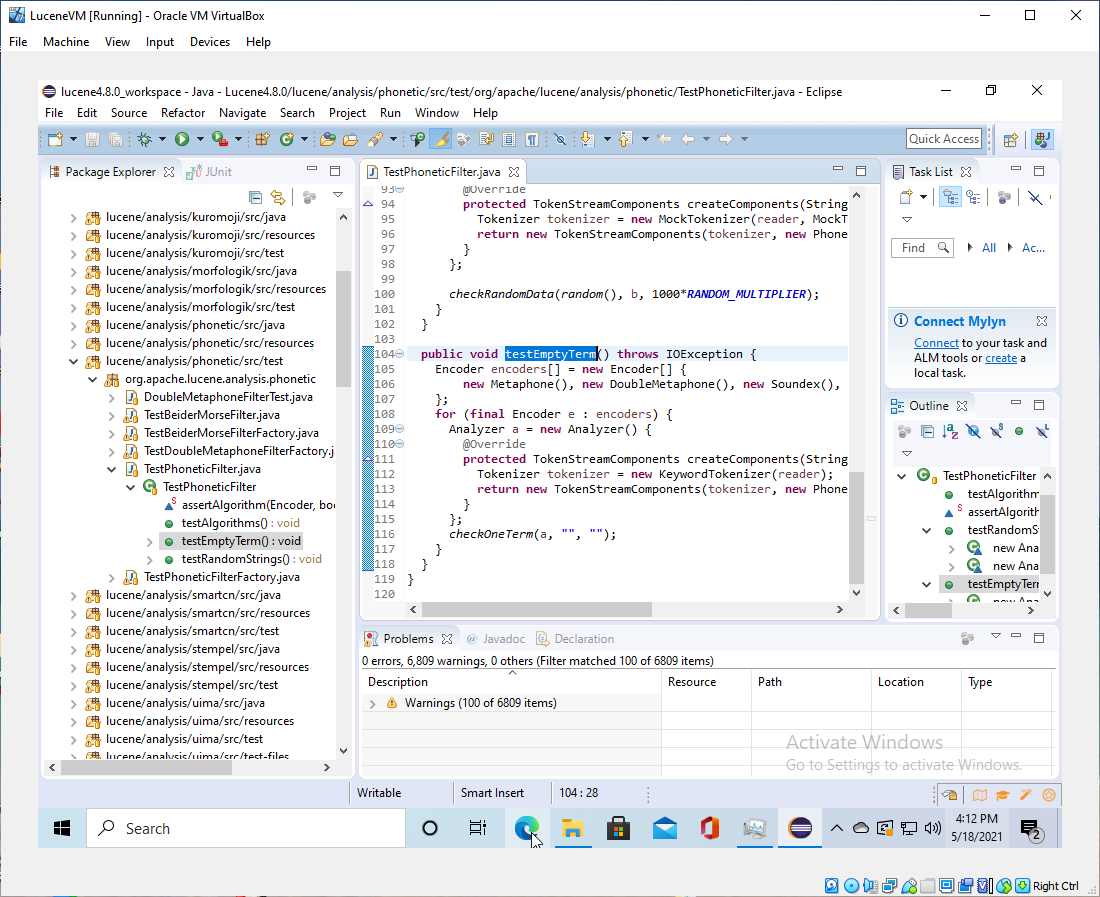
+<p>Double click the line highlighted above and it will open the code for that
test.</p>
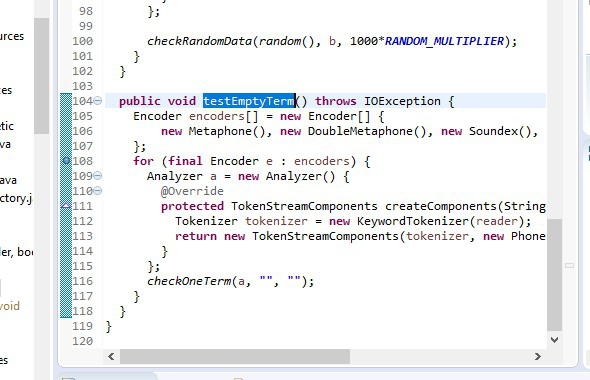
+ <img
src='https://lucenenet.apache.org/images/contributing/java-lucene-4_8-setup/debugging-with-eclipse07.png'>
+<p>Then double click on line 108 and it will set a breakpoint.</p>
+ <img
src='https://lucenenet.apache.org/images/contributing/java-lucene-4_8-setup/debugging-with-eclipse08.png'>
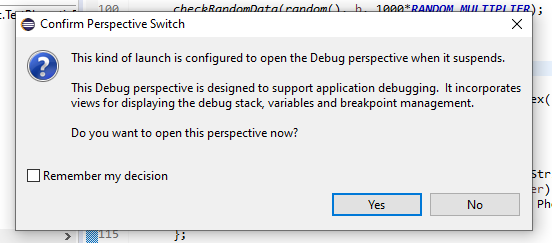
+<p>Now right-click on testEmptyTerm (make sure it is still highlighted) and
click Debug As > JUnit Test</p>
+<p>You will get this dialog:</p>
+ <img
src='https://lucenenet.apache.org/images/contributing/java-lucene-4_8-setup/debugging-with-eclipse09.png'>
+<p>Eclipse has a different "perspective" for debugging than for
browsing projects, similar to in VisualStudo. However, it gives you a choice
whether you want to use it or not. Click yes, but don’t choose to remember the
setting, because it’s not clear where to find it again.</p>
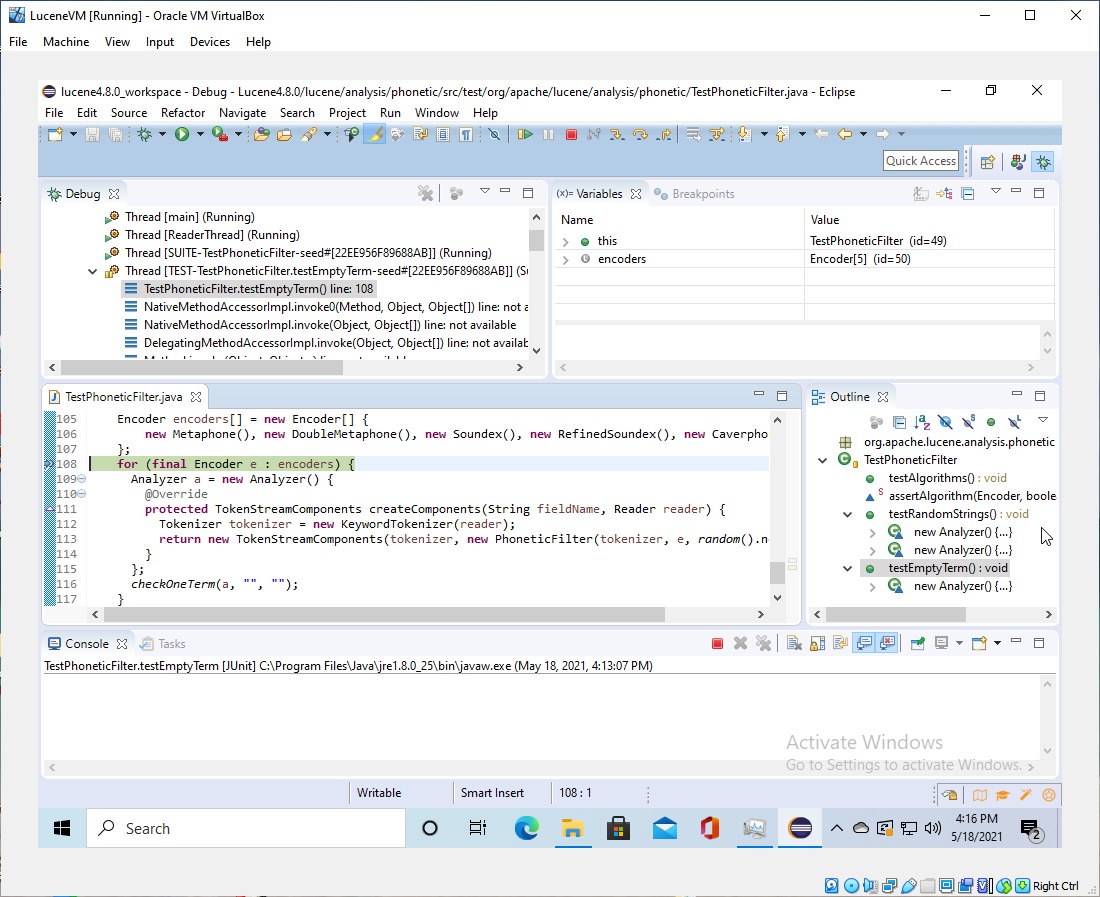
+<p>And it will launch into the debugger layout and be waiting on the
breakpoint.</p>
+ <img
src='https://lucenenet.apache.org/images/contributing/java-lucene-4_8-setup/debugging-with-eclipse10.png'>
+<p>If you hover the debugger icons you will see that</p>
+<p>Resume is F8<br>
+Step Into is F5<br>
+Step Over is F6<br>
+Step Return is F7<br></p>
+<p>So it works much like VisualStudio but the F key configuration is
different. You can of course just click the icons at the top of the window, or
goggle and there is probably a way to change the F key configuration for the
debugger actions.</p>
+<p><font style="font-weight:bold; font-size: 17px">There ya go. You are now
in Eclipse, and able to run the debugger for Lucene 4.8 Java code.</font></p>
+<p><font style="font-weight:bold; font-size: 20px">How cool is
that?!</font></p>
+<p>You’re welcome, and a big shout out to NightOwl888 who blazed this trail
for us all.</p>
+<h2 id="two-more-helpful-tips">Two More Helpful Tips</h2>
+<h3 id="cloning-the-local-repo">Cloning the Local Repo</h3>
+<p>It is sometimes useful to create a clone in another versioned directory and
then checkout the corresponding branch.</p>
+<p>Basically, it is cloning the whole repo again in the subdirectory
lucene-4.8.1. Then to match that version number, we checkout the branch that
matches it. Now, if we were doing that from the original lucene repository we
would typically checkout the tag that corresponds to the release rather than a
versioned branch. But since the maven dependencies are all broken, we have our
own branches that patches the release that we have ported changes from.</p>
+ <img
src='https://lucenenet.apache.org/images/contributing/java-lucene-4_8-setup/clone-local-repo01.png'>
+<p>Zommed in a bit more:</p>
+ <img
src='https://lucenenet.apache.org/images/contributing/java-lucene-4_8-setup/clone-local-repo02.png'>
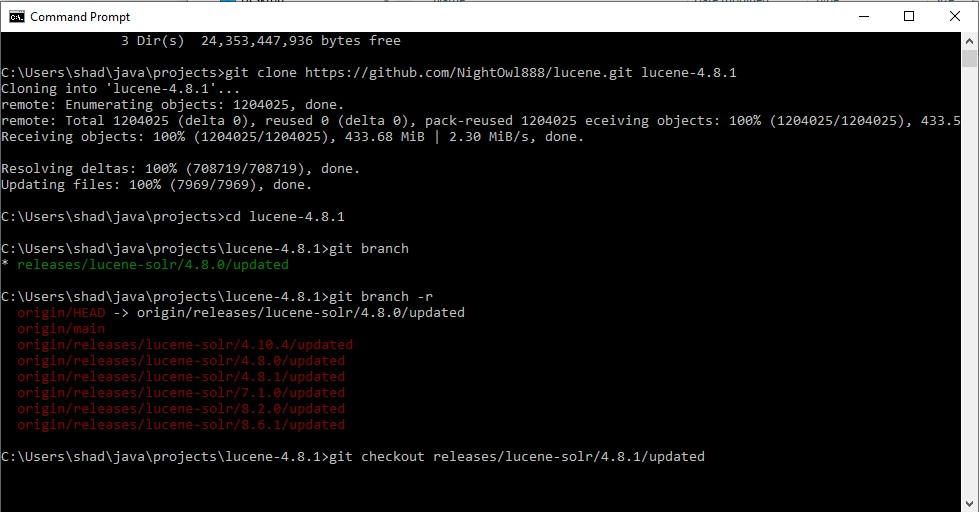
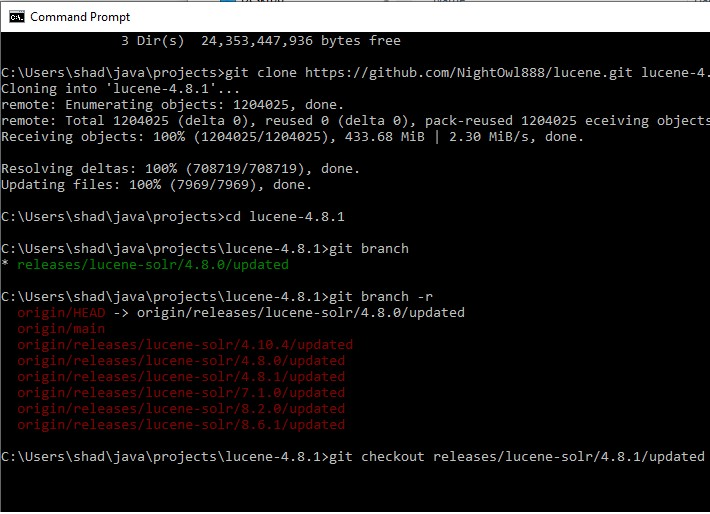
+<p>When you clone the repository locally, it only shows the default branch
that you have pulled (unless you use the switch to pull all of them). But Git
keeps track of the remote branches as well as the local ones on your local copy
(that is, all of the remote branches that you have called git fetch or git pull
on).</p>
+<p>"git branch -r" shows a list of all of the remote branches that
you have pulled. "git checkout releases/lucene-solr/4.8.1/updated"
command is a shortcut for creating a branch based off of the remote. It won't
work if you have 2 remotes that have a branch with the same name - in that case
you would need to specify the remote name, too. <a
href="https://stackoverflow.com/questions/24301914/how-to-create-a-local-branch-from-an-existing-remote-branch";>https://stackove
[...]
+<h3 id="disable-java-update-checker">Disable Java Update Checker</h3>
+<p>One more thing you might want to do is to disable the Java update check so
it doesn't accidentally get rid of Java 8. See: <a
href="https://thegeekpage.com/turn-off-java-update-notification-in-windows-10/";>https://thegeekpage.com/turn-off-java-update-notification-in-windows-10/</a></p>
+</article>
+ </div>
+
+ <div class="hidden-sm col-md-2" role="complementary">
+ <div class="sideaffix">
+ <div class="contribution">
+ <ul class="nav">
+ <li>
+ <a
href="https://github.com/apache/lucenenet/blob/master/websites/site/contributing/how-to-setup-java-lucene-debugging.md/#L1";
class="contribution-link">Improve this Doc</a>
+ </li>
+ </ul>
+ </div>
+ <nav class="bs-docs-sidebar hidden-print hidden-xs hidden-sm
affix" id="affix">
+ <!-- <p><a class="back-to-top" href="#top">Back to top</a><p> -->
+ </nav>
+ </div>
+ </div>
+ </div>
+ </div>
+
+ <footer>
+ <div class="grad-bottom"></div>
+ <div class="footer">
+ <div class="container">
+ <span class="pull-right">
+ <a href="#top">Back to top</a>
+ </span>
+ Copyright © 2021 The Apache Software Foundation, Licensed
under the <a href='http://www.apache.org/licenses/LICENSE-2.0'
target='_blank'>Apache License, Version 2.0</a><br> <small>Apache Lucene.Net,
Lucene.Net, Apache, the Apache feather logo, and the Apache Lucene.Net project
logo are trademarks of The Apache Software Foundation. <br>All other marks
mentioned may be trademarks or registered trademarks of their respective
owners.</small>
+
+ </div>
+ </div>
+ </footer>
+ </div>
+
+ <script type="text/javascript" src="../styles/docfx.vendor.js"></script>
+ <script type="text/javascript" src="../styles/docfx.js"></script>
+ <script type="text/javascript" src="../styles/main.js"></script>
+ </body>
+</html>
diff --git a/contributing/toc.html b/contributing/toc.html
index d6e48ba..086a21a 100644
--- a/contributing/toc.html
+++ b/contributing/toc.html
@@ -34,6 +34,9 @@
<a href="make-release.html" name="" title="Making a
release">Making a release</a>
</li>
<li>
+ <a href="how-to-setup-java-lucene-debugging.html" name=""
title="How to Setup Java Debugging">How to Setup Java Debugging</a>
+ </li>
+ <li>
<a href="wiki.html" name="" title="Wiki">Wiki</a>
</li>
</ul>
diff --git a/styles/main.css b/styles/main.css
index 52cb883..af4967f 100644
--- a/styles/main.css
+++ b/styles/main.css
@@ -1,4 +1,4 @@
-/*
+/*
* Licensed to the Apache Software Foundation (ASF) under one
* or more contributor license agreements. See the NOTICE file
* distributed with this work for additional information
@@ -80,6 +80,10 @@ header ul.navbar-nav {
}
}
+.article img {
+ margin:15px 0 30px 0;
+}
+
.sidefilter {
top: 120px;
}