This is an automated email from the ASF dual-hosted git repository.

rclabo pushed a commit to branch master
in repository https://gitbox.apache.org/repos/asf/lucenenet.git
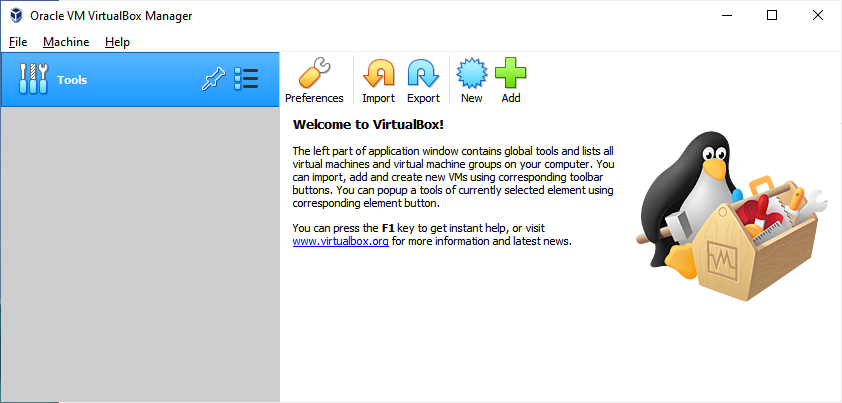
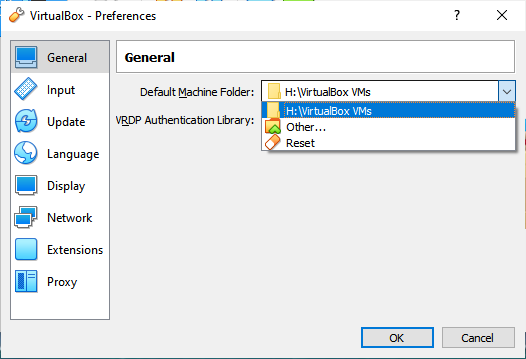
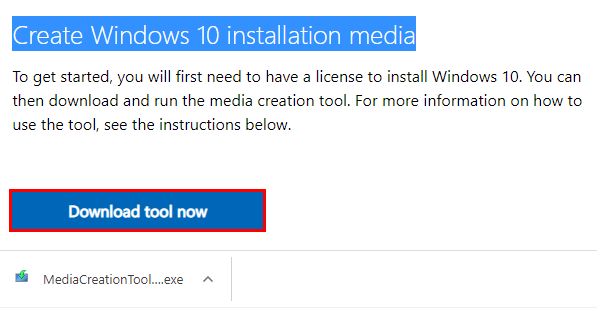
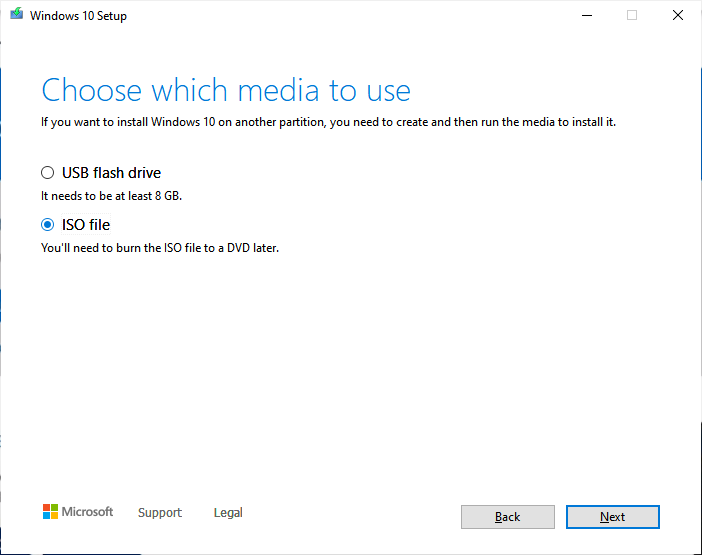
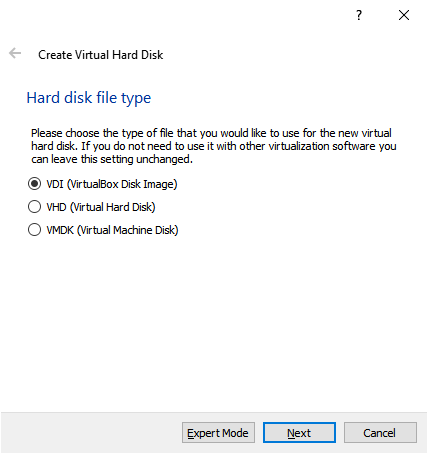
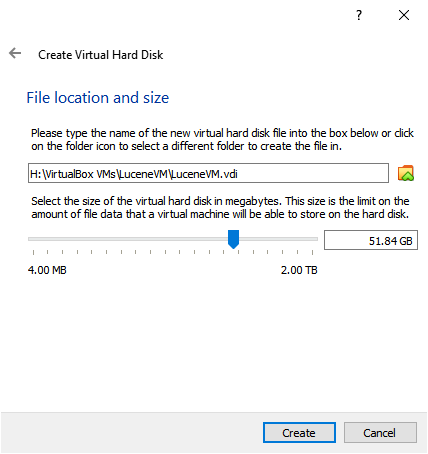
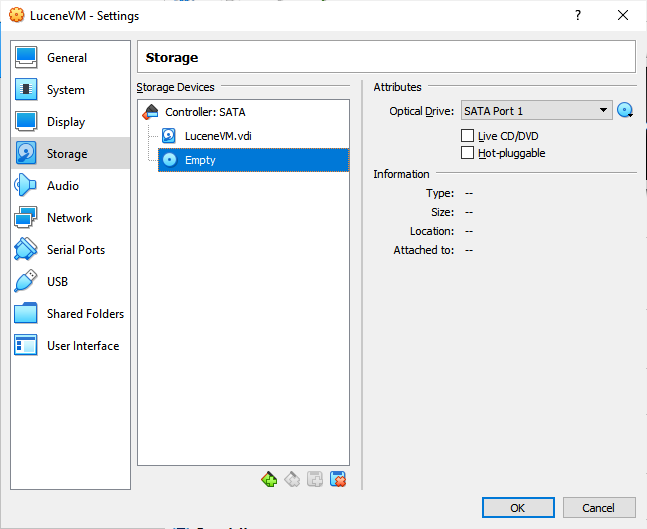
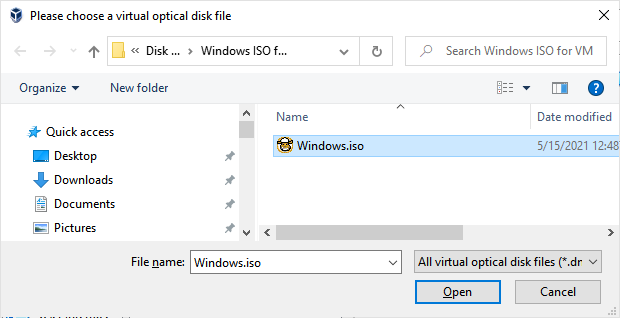
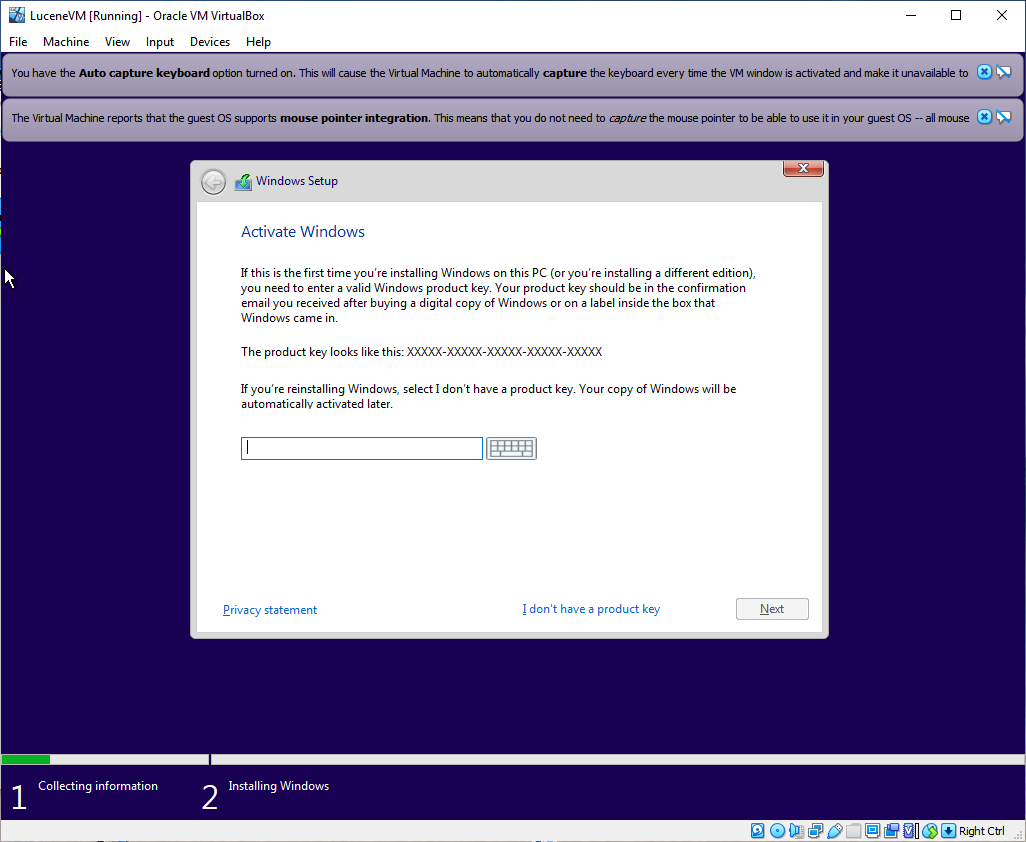
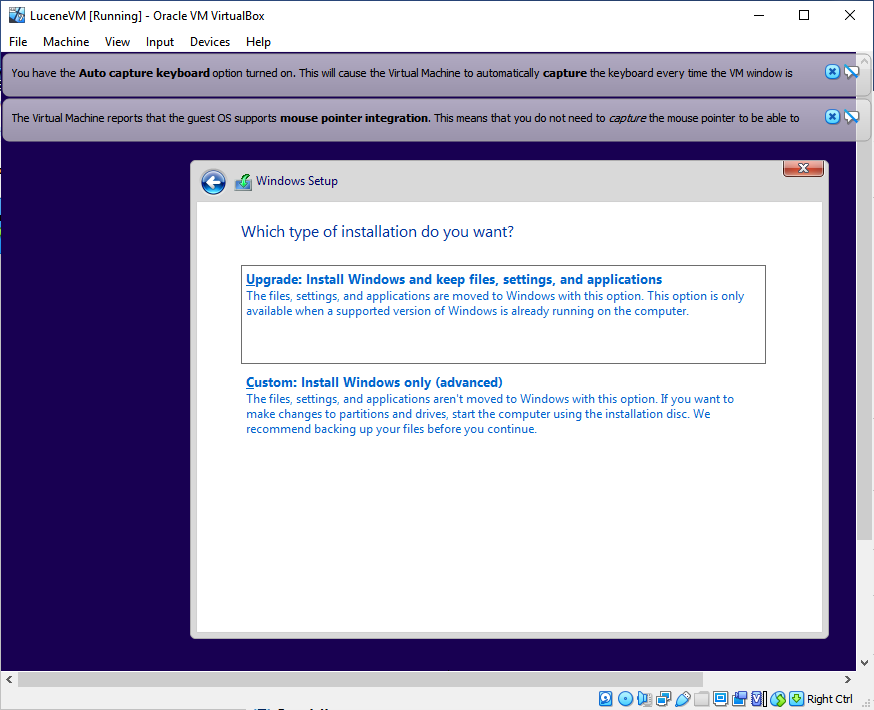
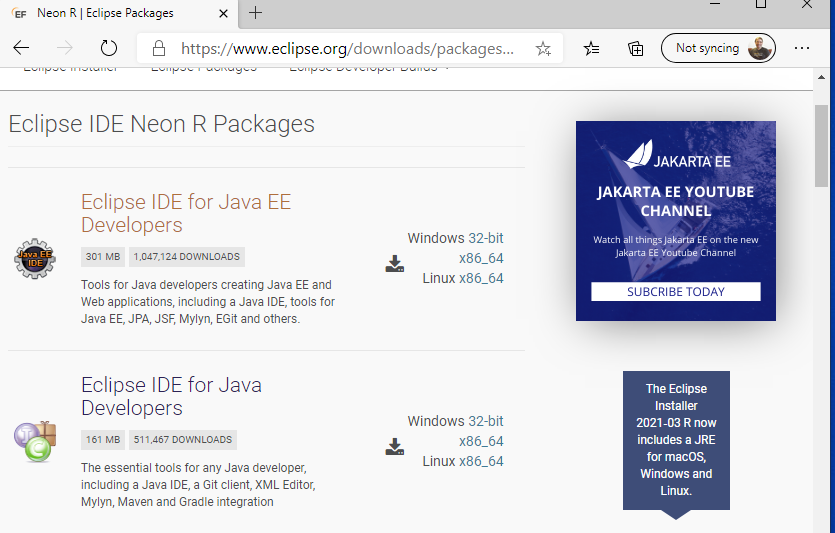
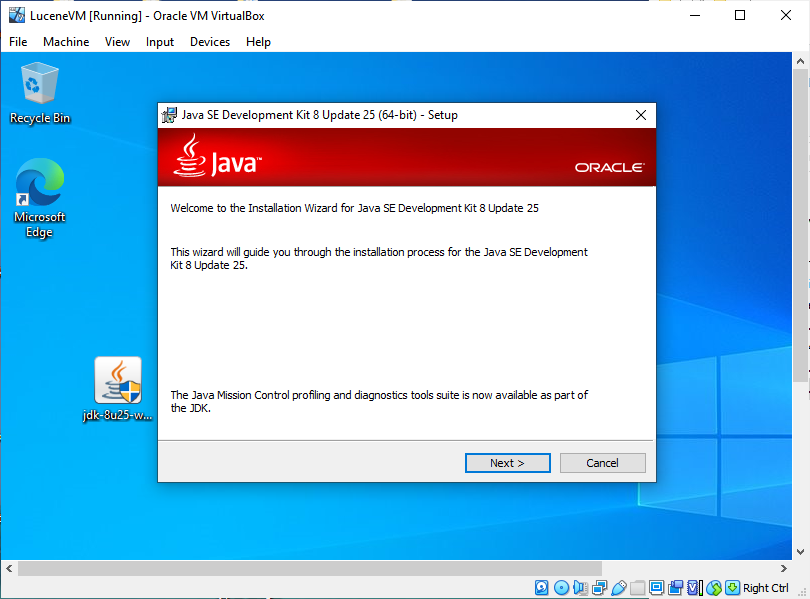
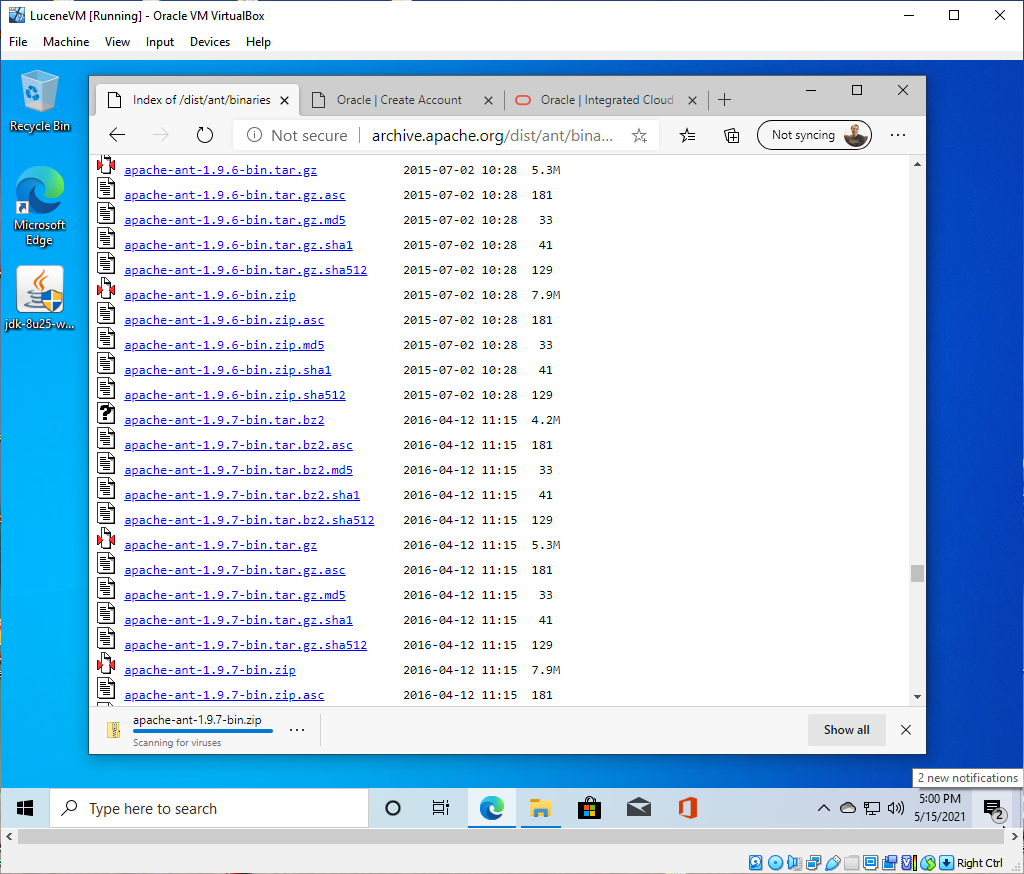
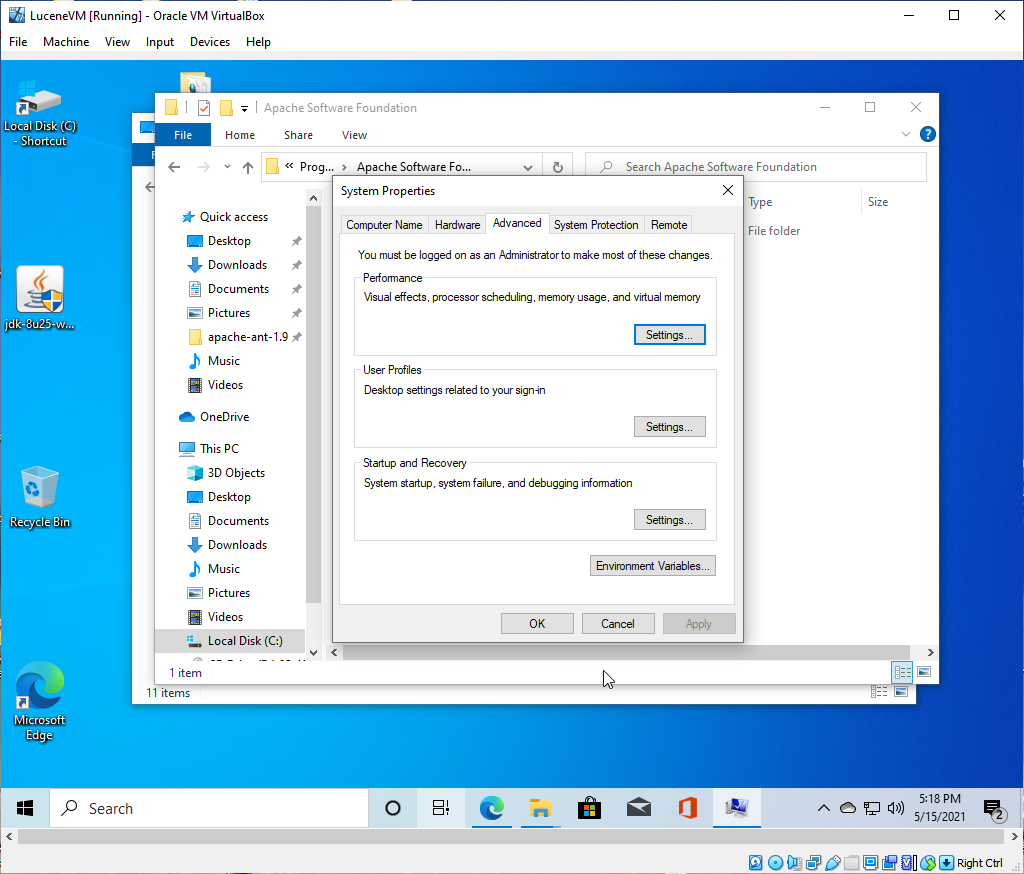
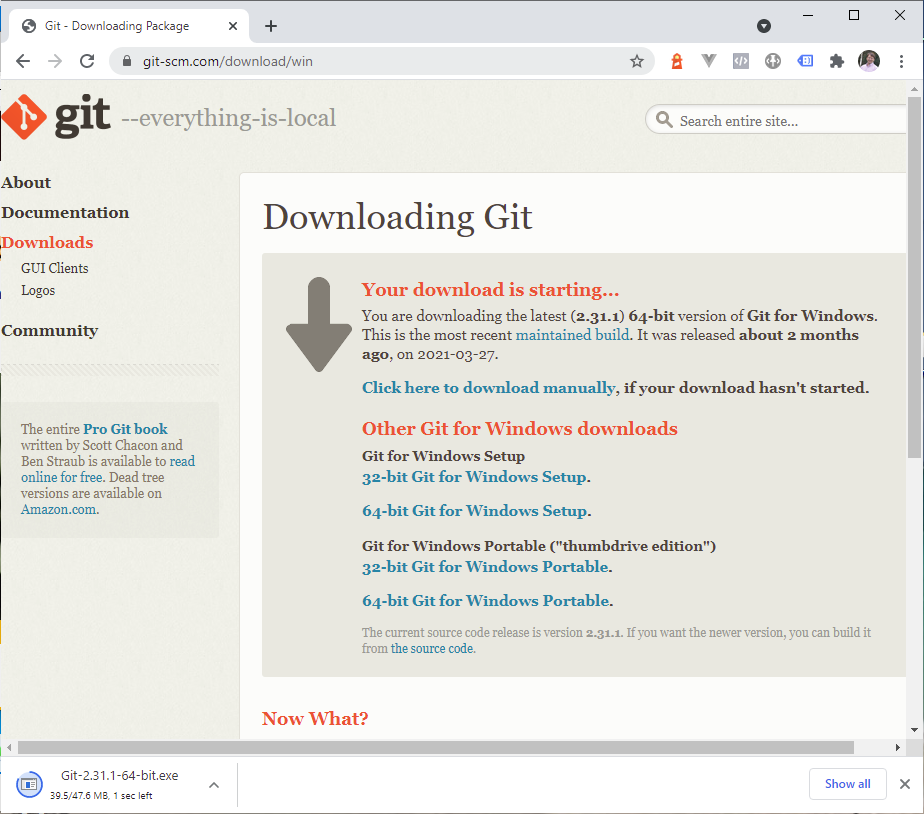
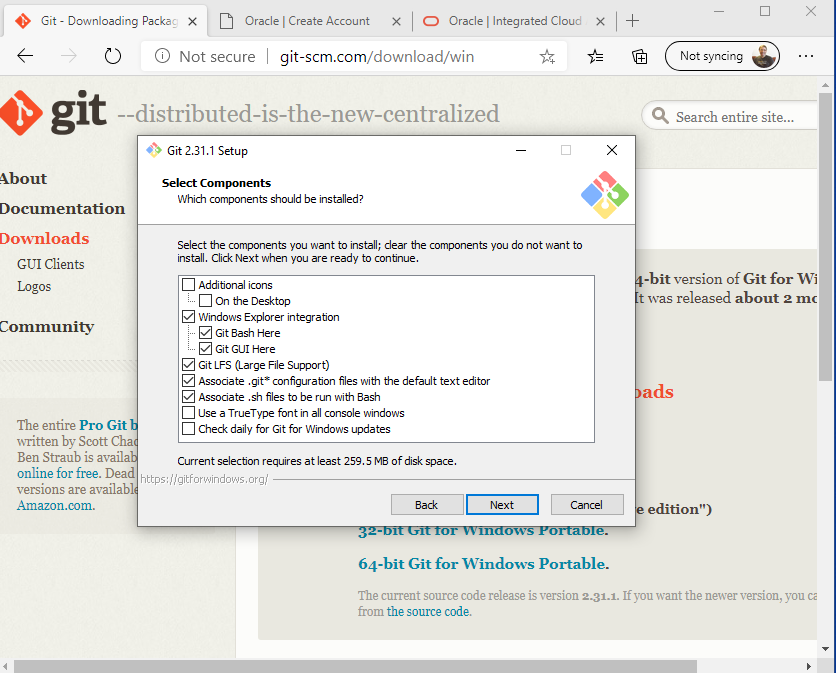
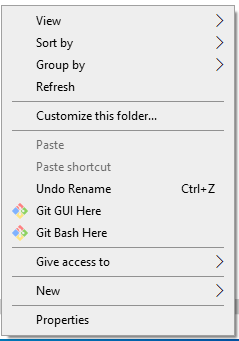
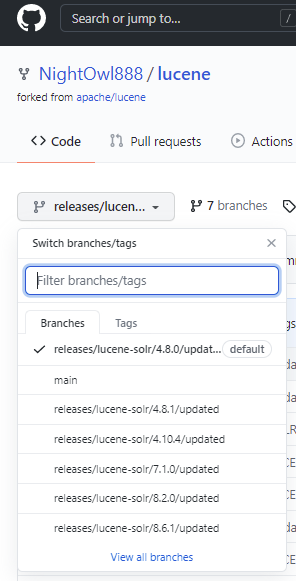
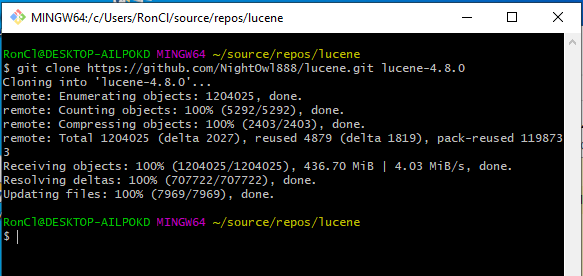
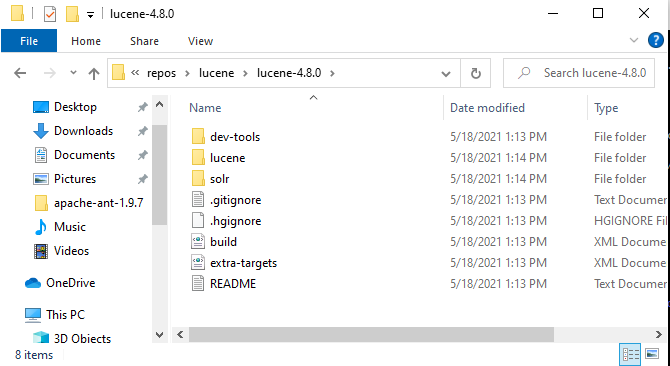
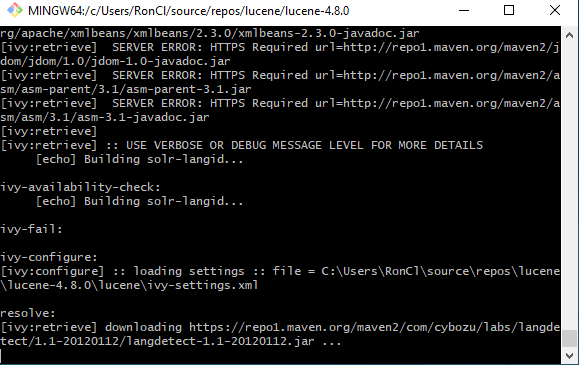
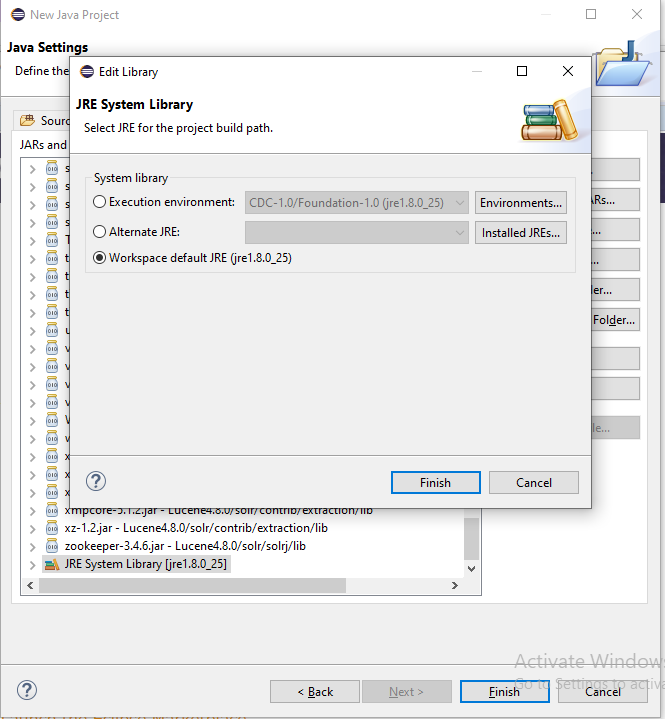
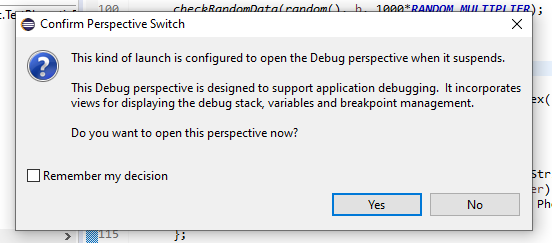
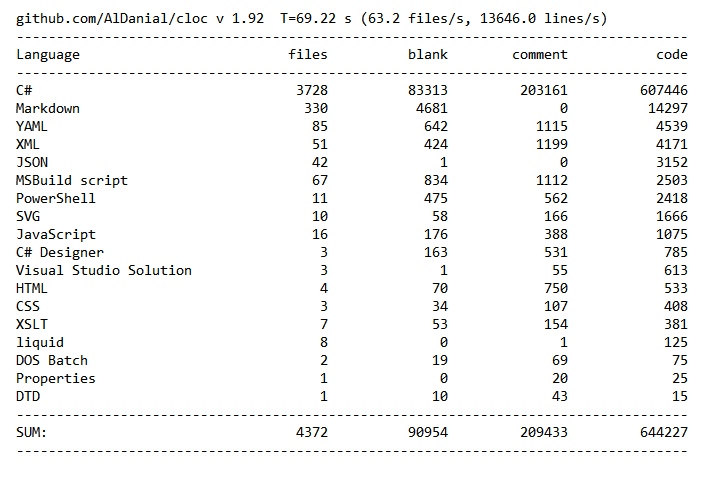
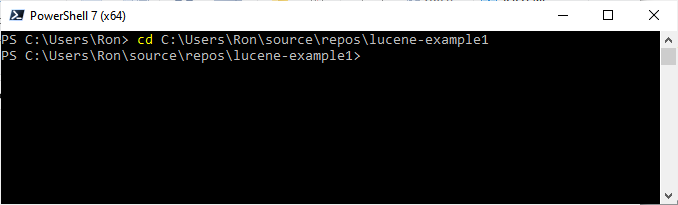
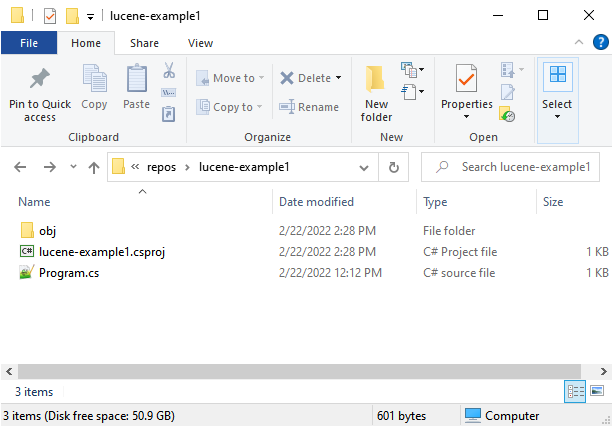
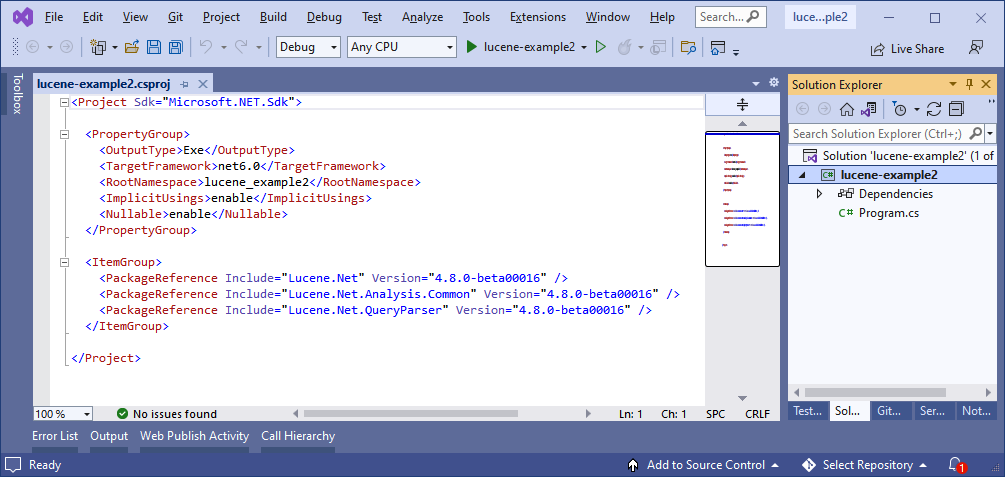
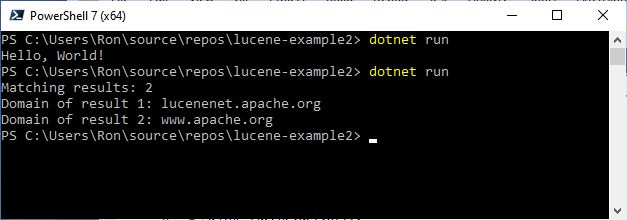
commit 3f9166913ae51df66617ffdb9d626b92feab412f Author: Ron Clabo <[email protected]> AuthorDate: Wed Mar 23 16:02:06 2022 -0400 Website: Converted smart quotes to regular quotes and other small tweaks related to code review. --- .../how-to-setup-java-lucene-debugging.md | 62 +++++++++++----------- websites/site/contributing/make-release.md | 2 +- websites/site/quick-start/introduction.md | 14 ++--- websites/site/quick-start/tutorial.md | 42 +++++++-------- 4 files changed, 60 insertions(+), 60 deletions(-) diff --git a/websites/site/contributing/how-to-setup-java-lucene-debugging.md b/websites/site/contributing/how-to-setup-java-lucene-debugging.md index 6cfdb1e..bad35f9 100644 --- a/websites/site/contributing/how-to-setup-java-lucene-debugging.md +++ b/websites/site/contributing/how-to-setup-java-lucene-debugging.md @@ -16,13 +16,13 @@ The Java Lucene 4.8 repository indicates that the following development environm + IntelliJ - IntelliJ idea can import the project out of the box. + Netbeans - Not tested. -In this document however, we will be using Eclipse because it’s open source and widely used. Because Java Lucene 4.8 uses an old version of the Java JDK that has known security issues, the approach we take here is to setup a virtual machine vis VirtualBox to quarantine our use of the insecure JDK. +In this document however, we will be using Eclipse because it's open source and widely used. Because Java Lucene 4.8 uses an old version of the Java JDK that has known security issues, the approach we take here is to setup a virtual machine vis VirtualBox to quarantine our use of the insecure JDK. ## Setting up VirtualBox ### Introduction and Background -We don’t need to setup network access for VirtualBox for our needs and since the old JVM required to run Lucene 4.8 has security issues, it’s safer not to give VirtualBox network access. And since VirtualBox can run in a window, it means that when running it that way you will still have access to the internet and a browser on your main OS for doing coding research and such. +We don't need to setup network access for VirtualBox for our needs and since the old JVM required to run Lucene 4.8 has security issues, it's safer not to give VirtualBox network access. And since VirtualBox can run in a window, it means that when running it that way you will still have access to the internet and a browser on your main OS for doing coding research and such. ### Download Virtual Box You can get the installer from [https://www.virtualbox.org/wiki/Downloads](https://www.virtualbox.org/wiki/Downloads) . On that page download the binary version for **Windows hosts**. @@ -54,7 +54,7 @@ Then when the install is done you will see a dialog similar to the one below. ### Configuring VirtualBox -Clicking the Finished button in the prior dialog will launch VirtualBox, or you can launch it manually via the programs menu in Windows 10 as you would with any other “application.” +Clicking the Finished button in the prior dialog will launch VirtualBox, or you can launch it manually via the programs menu in Windows 10 as you would with any other "application." <img src='https://lucenenet.apache.org/images/contributing/java-lucene-4_8-setup/virtual-box02.png'> @@ -65,17 +65,17 @@ To change the location where the machine will be stored, click the Preferences i <img src='https://lucenenet.apache.org/images/contributing/java-lucene-4_8-setup/virtual-box03.png'> ### Create Windows 10 Installation Media -In this walkthrough we will be running Windows 10 in the VM. Note that to do this one needs a 2nd Windows 10 license other then the one installed on the physical machine. So two licenses are needed, one for the physical machine OS install and one for the VM OS install. If you don’t have a spare Windows 10 license to use in the VM you can consider installing ubuntu or other open source OS. Next to run Windows 10 in the VM we much download and create Windows 10 installation media. Thi [...] +In this walkthrough we will be running Windows 10 in the VM. Note that to do this one needs a 2nd Windows 10 license other then the one installed on the physical machine. So two licenses are needed, one for the physical machine OS install and one for the VM OS install. If you don't have a spare Windows 10 license to use in the VM you can consider installing ubuntu or other open source OS. Next to run Windows 10 in the VM we much download and create Windows 10 installation media. Thi [...] <img src='https://lucenenet.apache.org/images/contributing/java-lucene-4_8-setup/virtual-box04.png'> -Then run the exe that is downloaded. You need to agree to the terms if they are acceptable to you. Our goal here is to create an iso file that we can use to install Windows in the VM. We don’t need that iso file burned to a cd, just having it saved to the computer is fine. +Then run the exe that is downloaded. You need to agree to the terms if they are acceptable to you. Our goal here is to create an iso file that we can use to install Windows in the VM. We don't need that iso file burned to a cd, just having it saved to the computer is fine. -In this dialog select “Create installation media” +In this dialog select "Create installation media" <img src='https://lucenenet.apache.org/images/contributing/java-lucene-4_8-setup/virtual-box05.png'> -On this dialog select “ISO file” +On this dialog select "ISO file" <img src='https://lucenenet.apache.org/images/contributing/java-lucene-4_8-setup/virtual-box06.png'> @@ -85,7 +85,7 @@ Then in the dialog that comes up pick a place on the computer to save the ISO fi And then it will begin downloading the file and displaying a progress indicator. Once the file is downloaded, we have now have the ISO file we need for installing the OS inside of VirtualBox. -Once that’s done, you can click Finished in the dialog that comes up since we don’t need to burn this ISO file to a dvd. Having it on the hard drive is fine. +Once that's done, you can click Finished in the dialog that comes up since we don't need to burn this ISO file to a dvd. Having it on the hard drive is fine. <img src='https://lucenenet.apache.org/images/contributing/java-lucene-4_8-setup/virtual-box08.png'> @@ -103,7 +103,7 @@ The default choice below is fine:<br> <br> <img src='https://lucenenet.apache.org/images/contributing/java-lucene-4_8-setup/virtual-box12.png'> -In the following dialog “Dynamically allocated” is fine. Then in the dialog after that set the max size. +In the following dialog "Dynamically allocated" is fine. Then in the dialog after that set the max size. <img src='https://lucenenet.apache.org/images/contributing/java-lucene-4_8-setup/virtual-box13.png'> <br> @@ -115,12 +115,12 @@ In the following dialog “Dynamically allocated” is fine. Then in the dialog <img src='https://lucenenet.apache.org/images/contributing/java-lucene-4_8-setup/virtual-box15.png'> -Now click the little disk drop down next to the Optical Drive label. From that menu select “Chose a Disk File…” and select the windows ISO file you previously downloaded. +Now click the little disk drop down next to the Optical Drive label. From that menu select "Chose a Disk File…" and select the windows ISO file you previously downloaded. <img src='https://lucenenet.apache.org/images/contributing/java-lucene-4_8-setup/virtual-box16.png'> -Now it’s like that Windows Install DVD is installed on our virtual computer. (See below) +Now it's like that Windows Install DVD is installed on our virtual computer. (See below) <img src='https://lucenenet.apache.org/images/contributing/java-lucene-4_8-setup/virtual-box17.png'> @@ -134,12 +134,12 @@ Since by default the VM is setup to boot from the virtual optical drive (as well <img src='https://lucenenet.apache.org/images/contributing/java-lucene-4_8-setup/windows-install01.png'> -Click next in the dialog above, then install now. Then in the window below key in your product key or click I don’t have a product key. +Click next in the dialog above, then install now. Then in the window below key in your product key or click I don't have a product key. <img src='https://lucenenet.apache.org/images/contributing/java-lucene-4_8-setup/windows-install02.png'> Click agree on the license terms if you agree. -Then in the dialog below click “Custom” since this is a new install not an upgrade. +Then in the dialog below click "Custom" since this is a new install not an upgrade. <img src='https://lucenenet.apache.org/images/contributing/java-lucene-4_8-setup/windows-install03.png'> @@ -163,9 +163,9 @@ And then finally we have windows running in the vm, and in the screenshot below ## Installing Eclipse 4.6 -Source of download https://wiki.eclipse.org/Older_Versions_Of_Eclipse. We want “Eclipse Neon Packages (2016 - v 4.6.0)” This version goes by the name “neon r” and it’s page is here: https://www.eclipse.org/downloads/packages/release/neon/r +Source of download https://wiki.eclipse.org/Older_Versions_Of_Eclipse. We want "Eclipse Neon Packages (2016 - v 4.6.0)" This version goes by the name "neon r" and it's page is here: https://www.eclipse.org/downloads/packages/release/neon/r -We want the 2nd package below, “Eclipse IDE for Java Developers” so download that, in my case the x86_64 link. +We want the 2nd package below, "Eclipse IDE for Java Developers" so download that, in my case the x86_64 link. <img src='https://lucenenet.apache.org/images/contributing/java-lucene-4_8-setup/eclipse01.png'> @@ -176,11 +176,11 @@ Once that zip file downloads, then extract the contents into a folder. ## Installing Java 8 Lucene 4.8.0 uses Java 8 to run according to the build.xml file but Eclipse needs Java 8. And Eclipse can use Java 8 to emulate Java 7 when running Lucene. -So we will need to install “**Java SE Development Kit 8u25**” into our VM which can be downloaded from https://www.oracle.com/java/technologies/javase/javase8-archive-downloads.html You will notice the following warning on that page. This is why we chose to work inside a VirtualBox. +So we will need to install "**Java SE Development Kit 8u25**" into our VM which can be downloaded from https://www.oracle.com/java/technologies/javase/javase8-archive-downloads.html You will notice the following warning on that page. This is why we chose to work inside a VirtualBox. > **WARNING**: These older versions of the JRE and JDK are provided to help > developers debug issues in older systems. **They are not updated with the > latest security patches and are not recommended for use in production.** -You will need to scroll down a ways on the page to find “**Java SE Development Kit 8u25**” or better yet search the page for 8u25. Then download the Windows x64 one jre-8u25-windows-x64.exe +You will need to scroll down a ways on the page to find "**Java SE Development Kit 8u25**" or better yet search the page for 8u25. Then download the Windows x64 one jre-8u25-windows-x64.exe Download and run that jdk-8u25-windows-x64.exe file that in the VM. <img src='https://lucenenet.apache.org/images/contributing/java-lucene-4_8-setup/install-java8-01.png'> @@ -213,11 +213,11 @@ You can get version 1.9.7 here: https://archive.apache.org/dist/ant/binaries/ Th <img src='https://lucenenet.apache.org/images/contributing/java-lucene-4_8-setup/install-apache-ant02.png'> -You’ll have to unzip the downloaded `apache-ant-1.9.7-bin.zip` file. +You'll have to unzip the downloaded `apache-ant-1.9.7-bin.zip` file. -The unzipped folder will need to be moved to a place of your choosing where you want ant to live. In my case I created a folder called “Apache Software Foundation” inside the “Program Files” folder and placed it there. So my path was `c:\Program Files\Apache Software Foundation\apache-ant-1.9.7` Directions for installing Ant are on this page under “The Short Story” https://ant.apache.org/manual/install.html +The unzipped folder will need to be moved to a place of your choosing where you want ant to live. In my case I created a folder called "Apache Software Foundation" inside the "Program Files" folder and placed it there. So my path was `c:\Program Files\Apache Software Foundation\apache-ant-1.9.7` Directions for installing Ant are on this page under "The Short Story" https://ant.apache.org/manual/install.html -I typed “Environment Variables” into windows search and used that to open the System Properties window. Then clicked the Environment Variables button. +I typed "Environment Variables" into windows search and used that to open the System Properties window. Then clicked the Environment Variables button. <img src='https://lucenenet.apache.org/images/contributing/java-lucene-4_8-setup/install-apache-ant03.png'> @@ -268,7 +268,7 @@ Use version 3.8.1. https://maven.apache.org/download.cgi The installation proce We are going to download `apache-maven-3.8.1-bin.zip` Move the folder out of the zip and into the location by the apache ant folder. -“install” instructions are here: https://maven.apache.org/install.html +"install" instructions are here: https://maven.apache.org/install.html Add the `bin` directory of `apache-maven-3.8.1 to` the `PATH` environment variable @@ -286,7 +286,7 @@ https://git-scm.com/download/win <img src='https://lucenenet.apache.org/images/contributing/java-lucene-4_8-setup/install-git01.png'> -Of the choices above I chose “64-bit Git for Windows Setup.” Download and run the installer. Agree to the license, pick a directory to install it in, I kept the default, I also kept the default components in the dialog below: +Of the choices above I chose "64-bit Git for Windows Setup." Download and run the installer. Agree to the license, pick a directory to install it in, I kept the default, I also kept the default components in the dialog below: <img src='https://lucenenet.apache.org/images/contributing/java-lucene-4_8-setup/install-git02.png'> @@ -312,7 +312,7 @@ C:\Users\Ron\source\eclipse_workspaces\lucene_workspace C:\Users\Ron\source\repos\lucene ### Why not clone the code directly from Java Lucene Repo? -It turns out that it’s no longer possible to directly compile the Lucene 4.8 code obtained from the Java Lucene Repo without modification. Unlike NuGet which makes old versions available forever and is always online, Maven has lots of mirrors that may cease to exist at some point, and that is what’s happed, so the configuration in the Java Lucene 4.8 Repo is out of date and no longer builds. +It turns out that it's no longer possible to directly compile the Lucene 4.8 code obtained from the Java Lucene Repo without modification. Unlike NuGet which makes old versions available forever and is always online, Maven has lots of mirrors that may cease to exist at some point, and that is what's happed, so the configuration in the Java Lucene 4.8 Repo is out of date and no longer builds. In addition, Java 8 (which we need for Eclipse) detects an error in the code that Java 7 did not, so the build doesn't complete. It is due to some fields that are marked final that are disposed at the end of the constructor (so they really don't need to be fields). Taking the final keyword off of the field removes the error. So, the project has to be modified slightly so all of this can happen. @@ -323,7 +323,7 @@ There is a fork of the Java Lucene Repo at https://github.com/NightOwl888/lucene Steps to Clone it into the VM -Open the folder that will contain the clone folder and then right click in there and select “Git Bash Here” from the content menu. +Open the folder that will contain the clone folder and then right click in there and select "Git Bash Here" from the content menu. <img src='https://lucenenet.apache.org/images/contributing/java-lucene-4_8-setup/where-can-we-get-the-code02.png'> @@ -349,7 +349,7 @@ You can see the name of the branches here: <img src='https://lucenenet.apache.org/images/contributing/java-lucene-4_8-setup/where-can-we-get-the-code05.png'> -Here’s what I looked like when the clone was done; +Here's what I looked like when the clone was done; <img src='https://lucenenet.apache.org/images/contributing/java-lucene-4_8-setup/where-can-we-get-the-code06.png'> @@ -362,7 +362,7 @@ In windows, this is what the directory looks like: <img src='https://lucenenet.apache.org/images/contributing/java-lucene-4_8-setup/where-can-we-get-the-code08.png'> -## Downloading the Project’s Dependencies +## Downloading the Project's Dependencies ### Boostrap ant First we need to get ant bootstrapped. @@ -387,7 +387,7 @@ We should now be setup to build. So run the following Bash command: `ant eclipse` -Example screenshot while ant is doing it’s work: +Example screenshot while ant is doing it's work: <img src='https://lucenenet.apache.org/images/contributing/java-lucene-4_8-setup/download-dependencies02.png'> @@ -417,7 +417,7 @@ We can zoom to take up the whole VM screen space. Then click the **Create new Java project** in the welcome screen. 1) Provide a Project name, in my case Lucene4.8.0, -2) Then uncheck the “Use default location” check box. +2) Then uncheck the "Use default location" check box. 3) Then use the browse button to specify the **location of the git repo clone.** So the dialog will then look something like this: @@ -436,7 +436,7 @@ Then click the Edit button. <img src='https://lucenenet.apache.org/images/contributing/java-lucene-4_8-setup/using-eclipse07.png'> -Then set the System Library radio button to “Workspace default JRE” if it’s not selected already. Then clicked the Finish button on that dialog, and then click the Finish button on the other dialog. +Then set the System Library radio button to "Workspace default JRE" if it's not selected already. Then clicked the Finish button on that dialog, and then click the Finish button on the other dialog. Then expand the window to take up the whole VM and you will see a build progress indicator in the lower status bar. The project is now building in the background. @@ -488,7 +488,7 @@ You will get this dialog: <img src='https://lucenenet.apache.org/images/contributing/java-lucene-4_8-setup/debugging-with-eclipse09.png'> -Eclipse has a different "perspective" for debugging than for browsing projects, similar to in VisualStudo. However, it gives you a choice whether you want to use it or not. Click yes, but don’t choose to remember the setting, because it’s not clear where to find it again. +Eclipse has a different "perspective" for debugging than for browsing projects, similar to in VisualStudo. However, it gives you a choice whether you want to use it or not. Click yes, but don't choose to remember the setting, because it's not clear where to find it again. And it will launch into the debugger layout and be waiting on the breakpoint. @@ -507,7 +507,7 @@ So it works much like VisualStudio but the F key configuration is different. Yo <font style="font-weight:bold; font-size: 20px">How cool is that?!</font> - You’re welcome, and a big shout out to NightOwl888 who blazed this trail for us all. + You're welcome, and a big shout out to NightOwl888 who blazed this trail for us all. ## Two More Helpful Tips diff --git a/websites/site/contributing/make-release.md b/websites/site/contributing/make-release.md index 2f37608..a4da8bc 100644 --- a/websites/site/contributing/make-release.md +++ b/websites/site/contributing/make-release.md @@ -386,7 +386,7 @@ Remove the old releases from SVN under https://dist.apache.org/repos/dist/releas The release vote may fail due to an issue discovered in the release candidate. If the vote fails the release should be canceled by: -- Sending an email to [[email protected]](mailto:[email protected]) on the VOTE thread notifying of the vote’s cancellation. +- Sending an email to [[email protected]](mailto:[email protected]) on the VOTE thread notifying of the vote's cancellation. A new release candidate can now be prepared. When complete, a new VOTE thread can be started as described in the steps above. diff --git a/websites/site/quick-start/introduction.md b/websites/site/quick-start/introduction.md index 09e2fb4..3589932 100644 --- a/websites/site/quick-start/introduction.md +++ b/websites/site/quick-start/introduction.md @@ -10,11 +10,11 @@ uid: quick-start/introduction Apache Lucene.NET is a C# port of Java based Apache Lucene. Apache Lucene has a huge following and is used directly or indirectly to power search by many companies you probably know including Amazon, Twitter, LinkedIn, Netflix, Salesforce, SAS, and Microsoft Power BI. -Apache Lucene is the core search library used by popular open source search servers like Apache Solr, ElasticSearch and OpenSearch. The reason Apache Lucene is so widely used is because it’s extremely powerful and can index large amounts of data quickly -- think 100s of GB/Hours. And it can perform full text search on that data in sub-second time. And unlike traditional sql databases, it’s data engine is optimized for full text search. +Apache Lucene is the core search library used by popular open source search servers like Apache Solr, ElasticSearch and OpenSearch. The reason Apache Lucene is so widely used is because it's extremely powerful and can index large amounts of data quickly -- think 100s of GB/Hours. And it can perform full text search on that data in sub-second time. And unlike traditional sql databases, it's data engine is optimized for full text search. The codebase for Apache Lucene is very mature. In March 2020, the open source project celebrated it's 20th birthday. You can scroll through the years and see the major [Apache Lucene milestones](https://www.elastic.co/celebrating-lucene). -Apache Lucene.NET 4.8 is an open source project who’s aim is to be a line by line c# port of java based Apache Lucene 4.8. This port makes the power of Lucene available to all .NET developers. And makes it easy for them to contribute to the project or customize it since it's pure C#. +Apache Lucene.NET 4.8 is an open source project who's aim is to be a line by line c# port of java based Apache Lucene 4.8. This port makes the power of Lucene available to all .NET developers. And makes it easy for them to contribute to the project or customize it since it's pure C#. Currently Lucene.NET 4.8 is in Beta but it is extremely stable and many developers already use it in production. It has far more features then Lucene.NET 3.03 and has much better unit test coverage then the older version. Lucene.NET has more than 7800+ passing unit tests. This test coverage is what makes Lucene.NET so stable. @@ -24,21 +24,21 @@ Currently Lucene.NET 4.8 is in Beta but it is extremely stable and many develope Porting Lucene from java to C# is a huge undertaking. There are over [644K lines of code](https://lucenenet.apache.org/images/contributing/source/lucenenet-repo-lines-of-code--jan-2022.png) not counting outside dependencies. This is why only a few specific versions have been ported. The prior Lucene.NET release was version 3.0.3 and the current release (which receives all the focus) is Lucene.NET 4.8. Version 4.8 is now in late Beta and, as I already mentioned, is used in production b [...] -You might be aware that Java Lucene is at version 9.x. But don’t be misled by the number. The step up in features between 3.x and 4.x was the biggest in Lucene’s history and after that it was followed my many smaller releases. **So the reality is that Lucene.NET 4.8 contains the vast majority of features found in Java Lucene 9.x and in fact Lucene 4.x is more similar to Lucene 9.x than to Lucene 3.x.** If you'd like to dive deeper into this topic, [Lucene.NET 4.8 vs Java Lucene 9.x]( [...] +You might be aware that Java Lucene is at version 9.x. But don't be misled by the number. The step up in features between 3.x and 4.x was the biggest in Lucene's history and after that it was followed my many smaller releases. **So the reality is that Lucene.NET 4.8 contains the vast majority of features found in Java Lucene 9.x and in fact Lucene 4.x is more similar to Lucene 9.x than to Lucene 3.x.** If you'd like to dive deeper into this topic, [Lucene.NET 4.8 vs Java Lucene 9.x](h [...] ## Lucene.NET is Multi-Platform -Lucene.NET 4.8 runs everywhere .NET runs: Windows, Unix or Mac. And as a library it can be used to power search in desktop applications, websites, mobile apps (iOS or Android) or even on IoT devices like the Raspberry Pi. And because it’s licensed under the permissive Apache 2.0 license it’s typically considered suitable for both commercial and non-commercial use. +Lucene.NET 4.8 runs everywhere .NET runs: Windows, Unix or Mac. And as a library it can be used to power search in desktop applications, websites, mobile apps (iOS or Android) or even on IoT devices like the Raspberry Pi. And because it's licensed under the permissive Apache 2.0 license it's typically considered suitable for both commercial and non-commercial use. ## Lucene's LSM Inspired Architecture At this early stage of your journey it's probably good to cover a few things about how Lucene stores data. We are just going to hit the highlights here because it's a deep topic. -Lucene and hence Lucene.NET stores data in immutable “segments.” Segments are made of multiple files. Segments automatically get merged together to form new bigger segments and then the old segments are typically deleted by the merge process. This approach is based on what is called a Log Structured Merge (LSM) design. +Lucene and hence Lucene.NET stores data in immutable "segments." Segments are made of multiple files. Segments automatically get merged together to form new bigger segments and then the old segments are typically deleted by the merge process. This approach is based on what is called a Log Structured Merge (LSM) design. LSM has become the defacto standard for NoSql databases and is used not only by Lucene but also by Google BigTable, Apache Hbase, Apache Cassandra and many others. The details of each implementation vary as does the number and types of files used. So let's take a look at what those files might look like for a Lucene.NET index. -Here is an example of Lucene.NET’s files for a brand new index with one segment: +Here is an example of Lucene.NET's files for a brand new index with one segment:  @@ -60,7 +60,7 @@ Here is a two segment example that has gone through merges many times: ### Lucene Directories - We already mentioned that the data is stored in segments. Those segments can be stored via different classes that inherit from `LuceneDirectory`. Some of those classes, like `FSDirectory` store to your local file system, other can store elsewhere. For example a `RAMDirectory` can be useful for unit tests as it stores the segments in RAM. So one of the things that we must provide an `IndexWriter` is a instance of a `LuceneDirectory` that is the type of directory we want to work with. + We already mentioned that the data is stored in segments. Those segments can be stored via different classes that inherit from `Lucene.Net.Store.Directory`. Some of those classes, like `FSDirectory` store to your local file system, other can store elsewhere. For example a `RAMDirectory` can be useful for unit tests as it stores the segments in RAM. So one of the things that we must provide an `IndexWriter` is a instance of a `Lucene.Net.Store.Directory` that is the type of directo [...] ### How the Pieces Fit Together diff --git a/websites/site/quick-start/tutorial.md b/websites/site/quick-start/tutorial.md index aa06ce9..06ba7e0 100644 --- a/websites/site/quick-start/tutorial.md +++ b/websites/site/quick-start/tutorial.md @@ -12,7 +12,7 @@ Sometimes the best way to learn is just to see some working code. So that's what Now let's build a simple console application that can index a few documents, search those documents, and return some results. Actually, let's build two apps that do that. The first example will show how to do exact match searches and the 2nd example will show how to do a full text search. These example console applications will give you some working code that can serve as a great starting point for trying out various Lucene.NET features. ## Multi-Platform -It's worth mentioning that Lucene.NET runs everywhere that .NET runs. That means that Lucene.NET can be used in Windows and Unix applications, Asp.NET websites (Windows, Mac or Unix), iOS Apps, Android Apps and even on the Raspberry Pi. +It's worth mentioning that Lucene.NET runs everywhere that .NET runs. That means that Lucene.NET can be used in Windows and Unix applications, ASP.NET websites (Windows, Mac or Unix), iOS Apps, Android Apps and even on the Raspberry Pi. ## Why the .NET CLI? In these examples we will use the .NET CLI (Command Line Interface) because it's a cross platform way to generate the project file we need and to add references to Nuget packages. We will be using PowerShell to invoke the .NET CLI because PowerShell provides a command line environment that is also cross platform. @@ -20,16 +20,16 @@ In these examples we will use the .NET CLI (Command Line Interface) because it's However you are totally free to use [Visual Studio](https://visualstudio.microsoft.com/) (Windows/Mac) or [Visual Studio Code](https://code.visualstudio.com/) (Windows/Unix/Max) to create the console application project and to add references to the Nuget packages. Whichever tool you use, you should end up with the same files and you can compare their contents to the contents that we show in the examples. ## Download and Install the .NET SDK -First you must install the .NET Core SDK, if it's not already installed on your machine. The .NET Core SDK contains the .NET runtime, .NET Libraries and the .NET CLI. If you haven't installed it yet, download it from https://dotnet.microsoft.com/en-us/download and run the installer. It's a pretty straightforward process. I’ll be using the **.NET 6.0 SDK** in this tutorial. +First you must install the .NET Core SDK, if it's not already installed on your machine. The .NET Core SDK contains the .NET runtime, .NET Libraries and the .NET CLI. If you haven't installed it yet, download it from https://dotnet.microsoft.com/en-us/download and run the installer. It's a pretty straightforward process. I'll be using the **.NET 6.0 SDK** in this tutorial. > [!NOTE] > The C# code we present **requires the .NET 6.0 SDK or later**. However, > with a few simple modifications it can run on older SDKs including 4.x. To > do that, the Program.cs file will need to have a namespace, Program class > and a static void main method. See Microsoft docs > [here](https://docs.microsoft.com/en-us/dotnet/core/tutorials/with-visual-studio?pivots=dotnet-5-0#code-try-3) > for details. You will also need to add [braces to the using > statements](https://docs.microsoft.com/en-us/ [...] ## Download and Install PowerShell -PowerShell is cross platform and runs everywhere .NET runs, so we will be using PowerShell for all of our command line work. If you don't already have PowerShell installed you can download and find instructions for installing it on Window, Unix or Mac on this [Installing PowerShell](https://docs.microsoft.com/en-us/powershell/scripting/install/installing-powershell) page. In my examples I’m using PowerShell 7.2 but the specific version probably doesn’t make a difference. +PowerShell is cross platform and runs everywhere .NET runs, so we will be using PowerShell for all of our command line work. If you don't already have PowerShell installed you can download and find instructions for installing it on Window, Unix or Mac on this [Installing PowerShell](https://docs.microsoft.com/en-us/powershell/scripting/install/installing-powershell) page. In my examples I'm using PowerShell 7.2 but the specific version probably doesn't make a difference. ## Verify dotnet CLI Installed -Let’s use PowerShell now to verify that you have the .NET SDK with the .NET CLI installed. Launch PowerShell however you do that on your OS, for Windows I’ll search for it in the start menu and select it from there. Once you have the PowerShell window open, execute the following command in PowerShell: +Let's use PowerShell now to verify that you have the .NET SDK with the .NET CLI installed. Launch PowerShell however you do that on your OS, for Windows I'll search for it in the start menu and select it from there. Once you have the PowerShell window open, execute the following command in PowerShell: `dotnet –info` @@ -49,7 +49,7 @@ This is actually pretty simple to do in Lucene.NET but since this in our very fi ### Create a Directory for the Project Create a directory where you would like this project to live on your hard drive and call that directory `lucene-example1`. In my case that will be ` C:\Users\Ron\source\repos\lucene-example1` but you can chose any location you like. Then make that directory the current directory in PowerShell. -In my case, since I’m on Windows, I’ll create the directory using the GUI and use the `cd` command in PowerShell to change directory to the one I created. So the exact PowerShell command I used was `cd C:\Users\Ron\source\repos\lucene-example1` but you will need to modify that command to specify the directory you created. +In my case, since I'm on Windows, I'll create the directory using the GUI and use the `cd` command in PowerShell to change directory to the one I created. So the exact PowerShell command I used was `cd C:\Users\Ron\source\repos\lucene-example1` but you will need to modify that command to specify the directory you created. <img src='https://lucenenet.apache.org/images/quick-start/tutorial/power-shell02.png'> @@ -81,7 +81,7 @@ Our directory looks like this: <img src='https://lucenenet.apache.org/images/quick-start/tutorial/directory-files-example1.png'> ### Viewing the Two Main files -From here on out, you can use your favorite editor to view and edit files as we walk through the rest of the example. I’ll be using Visual Studio 2022 on Windows, but you could just as easily use VIM, Visual Studio Code or any other editor and even be doing that on Ubuntu on a Raspberry Pi if you like. Remember, Lucene.NET and the .NET framework both support a wide variety of platforms. +From here on out, you can use your favorite editor to view and edit files as we walk through the rest of the example. I'll be using Visual Studio 2022 on Windows, but you could just as easily use VIM, Visual Studio Code or any other editor and even be doing that on Ubuntu on a Raspberry Pi if you like. Remember, Lucene.NET and the .NET framework both support a wide variety of platforms. Below is what the project file looks like which we created using the dotnet CLI. Notice that it contains package references to the two Lucene.NET Nuget packages we specified. @@ -115,7 +115,7 @@ Now let's look at the `Program.cs` file that got generated. It looks like: ### Running the Application -Before going further lets just run this console application and see that it generates the “Hello World!” output we expect. +Before going further lets just run this console application and see that it generates the "Hello World!" output we expect. If you are using Visual Studio or Visual Studio Code you can just hit F5 to run it. But what if are using a plain text editor to do your work? No problem, we can run console application from PowerShell. Just type this command in PowerShell: @@ -196,9 +196,9 @@ Console.WriteLine($"Title of first result: {title}"); > As mentioned earlier, if you are not running .NET 6.0 SDK or later you will > need to modify the above code in the following two ways: 1) Program.cs file > will need to have a namespace, Program class and a static void main method. > See Microsoft docs > [here](https://docs.microsoft.com/en-us/dotnet/core/tutorials/with-visual-studio?pivots=dotnet-5-0#code-try-3) > for details; and 2) you will need to add [braces to the using > statements](https://docs.microsoft.com/en-us/dotnet/csharp/language-r [...] ### Code Walkthrough -Before running the code let’s talk about what it does. +Before running the code let's talk about what it does. -The using declarations at the top of the file specify the various namespaces we are going to use. Then we have this block of code that basically specifies that our Lucene.NET index will be in a subdirectory called “example_index”. +The using declarations at the top of the file specify the various namespaces we are going to use. Then we have this block of code that basically specifies that our Lucene.NET index will be in a subdirectory called "example_index". ```c# // Specify the compatibility version we want @@ -213,7 +213,7 @@ using LuceneDirectory indexDir = FSDirectory.Open(indexPath); Then in the next block we create an `IndexWriter` that will use our `LuceneDirectory`. The `IndexWriter` is a important class in Lucene.NET and is used to write documents to the Index (among other things). -The `IndexWriter` will create our subdirectory for us since it doesn’t yet exist and it will create the index since it also doesn’t yet exist. By using `OpenMode.CREATE` we are telling Lucene.NET that we want to recreate the index if it already exists. This works great for a demo like this since every time the console app is ran we will be recreating our LuceneIndex which means we will get the same output each time. +The `IndexWriter` will create our subdirectory for us since it doesn't yet exist and it will create the index since it also doesn't yet exist. By using `OpenMode.CREATE` we are telling Lucene.NET that we want to recreate the index if it already exists. This works great for a demo like this since every time the console app is ran we will be recreating our LuceneIndex which means we will get the same output each time. ```c# //Create an index writer @@ -226,7 +226,7 @@ Then in the next block we add three documents to the index. In this example we We also specify here that title is a `TextField` which means that want the field to support full text searches, and we specify domain as a `StringField` which means we what to do exact match searches against that field. -It’s worth noting that the documents are buffered in RAM initially and are not written to the index in the `Directory` until we call `writer.Commit();` +It's worth noting that the documents are buffered in RAM initially and are not written to the index in the `Directory` until we call `writer.Commit();` ```c# //Add three documents to the index @@ -254,7 +254,7 @@ So now our documents are in the index and we want to see how to read a document In the block of code below we search the index for all the documents that have a domain field value of "lucenenet.apache.org". > [!NOTE] -> Note that in the block of code below we specify `applyAllDeletes: true` when getting a Reader. This means that uncommitted deleted documents will be applied to the reader we obtain. If this value were false then only committed deletes would be applied to the reader. In our example we don't delete any documents but when getting a Reader we must still specify some value for this parameter. +> Note that in the block of code below we specify `applyAllDeletes: true` when getting a `DirectoryReader`. This means that uncommitted deleted documents will be applied to the reader we obtain. If this value were false then only committed deletes would be applied to the reader. In our example we don't delete any documents but when getting a `DirectoryReader` we must still specify some value for this parameter. We happen to specify that we want just the top 2 matching results from the search but based on the data in our example only one result matches and so only that one result will be returned. The code then writes out to the console the number of matching documents and the title of the first (and in this case only) matching result. @@ -298,7 +298,7 @@ This is exactly what we would expect. ### Conclusion - Example 1 While this example is not particularly complicated, it will get you started. It provides fully working code that uses Lucne.NET that you now understand. -When looking at this code it’s pretty easy to imagine how one might use a while loop instead of inline code for adding documents and how one could perhaps add 10,000 documents (or a million documents) instead of just three. And it's pretty easy to imagine how one would add several fields per document rather then just two. +When looking at this code it's pretty easy to imagine how one might use a while loop instead of inline code for adding documents and how one could perhaps add 10,000 documents (or a million documents) instead of just three. And it's pretty easy to imagine how one would add several fields per document rather then just two. I would encourage you to play with this code, modify it (maybe by adding more fields, or changing the field name or field values) and then run it to see the results. This iterative process is a great way to grow your knowledge of Lucene.NET. @@ -334,7 +334,7 @@ You can use whatever tool you choose for Example 1 to accomplish these steps. In Technically the line above to `dotnet add package Lucene.Net --prerelease` is not needed because the `Lucene.Net.Analysis.Common` Nuget package has a dependency on the `Lucene.Net` Nuget package which means that when you execute this line `dotnet add package Lucene.Net.Analysis.Common --prerelease` it will automatically pull that dependency into the project too. But since this is another introductory example I chose to add each Nuget package explicitly so that I'm not counting on one pa [...] ### View the Project Files -Just like in the prior example the project folder will have two files and an obj directory with some files. Now use your favorite editor to view the project’s .proj file. It should look like this: +Just like in the prior example the project folder will have two files and an obj directory with some files. Now use your favorite editor to view the project's .proj file. It should look like this: <img src='https://lucenenet.apache.org/images/quick-start/tutorial/example2.csproj.png'> @@ -447,7 +447,7 @@ for (int i = 0; i < topDocs.TotalHits; i++) > As mentioned earlier, if you are not running .NET 6.0 SDK or later you will > need to modify the above code in the following two ways: 1) Program.cs file > will need to have a namespace, Program class and a static void main method. > See Microsoft docs > [here](https://docs.microsoft.com/en-us/dotnet/core/tutorials/with-visual-studio?pivots=dotnet-5-0#code-try-3) > for details; and 2) you will need to add [braces to the using > statements](https://docs.microsoft.com/en-us/dotnet/csharp/language-r [...] ### Code Walkthrough -Before we run the code let’s talk about what’s different then the code in Example 1. +Before we run the code let's talk about what's different then the code in Example 1. As you might guess we have an additional using declaration `using Lucene.Net.QueryParsers.Classic` related to the additional Nuget package we added. But other than that the rest of the code at beginning and even middle of the code is just like what we already covered in Example1. @@ -464,7 +464,7 @@ Query query = parser.Parse("open source"); These lines allow us to create a query that will perform a full text search. This type of search is similar to what you are use to when doing a google or bing search. -What we are saying in these two lines is that we want to create a query that will search the `title` field of our documents and we want back document that contain “open source” or just “open” or just “source” and we want them sorted by how well they match our “open source” query. +What we are saying in these two lines is that we want to create a query that will search the `title` field of our documents and we want back document that contain "open source" or just "open" or just "source" and we want them sorted by how well they match our "open source" query. So when the line of code below runs, Lucene.NET will score each of our docs that match the query and return the top 3 matching documents sorted by score. @@ -497,16 +497,16 @@ So now you can hit F5 in Visual Studio or VS Code or you can execute `dotnet run <img src='https://lucenenet.apache.org/images/quick-start/tutorial/run-example2.png'> -If you go back and review the contents of the `title` field for each document you will see the output from running the code does indeed return the only two documents that that contain “open source” in the title field. +If you go back and review the contents of the `title` field for each document you will see the output from running the code does indeed return the only two documents that that contain "open source" in the title field. ### Conclusion - Example 2 -In this Example we saw Lucene.NET’s full text search feature. But we only scratched the surface. +In this Example we saw Lucene.NET's full text search feature. But we only scratched the surface. -It’s the responsibility of the analyzer to tokenize the text and it’s the tokens that are stored in the index as terms. In our case we used the `StandardAnalyzer` which removes punctuation, lower cases the text so it’s not case sensitive and removes stop words (common words like “a” “an” and “the”). +It's the responsibility of the analyzer to tokenize the text and it's the tokens that are stored in the index as terms. In our case we used the `StandardAnalyzer` which removes punctuation, lower cases the text so it's not case sensitive and removes stop words (common words like "a" "an" and "the"). -But there are other analyzers we could choose. For example the `EnglishAnalyzer` does everything the `StandardAnalyzer` does but also “stems” the terms via the Porter Stemming algorithm. Without going into the details of what the stemmer does, it provides the ability for us to perform a search and match documents that contain other forms of the word we are searching on. +But there are other analyzers we could choose. For example the `EnglishAnalyzer` does everything the `StandardAnalyzer` does but also "stems" the terms via the Porter Stemming algorithm. Without going into the details of what the stemmer does, it provides the ability for us to perform a search and match documents that contain other forms of the word we are searching on. -So for example if we used the `EnglishAnalyzer` both for indexing our documents and searching our documents then if we searched on “run” we could match documents that contained “run”, “runs”, and “running”. And not only that, Lucene.NET contains Analyzers for 100s of other languages besides English. +So for example if we used the `EnglishAnalyzer` both for indexing our documents and searching our documents then if we searched on "run" we could match documents that contained "run", "runs", and "running". And not only that, Lucene.NET contains Analyzers for 100s of other languages besides English. Based on what you just learned, I suspect you could find some fun ways to change the code in Example2 to further your experimenting and learning. For example you could add other documents with different field values, or use a different Analyzer and see how the results change.