indhub closed pull request #10537: [MXNET-307] Add .md tutorials to .ipynb for
CI integration
URL: https://github.com/apache/incubator-mxnet/pull/10537
This is a PR merged from a forked repository. As GitHub hides the original diff on merge, it is displayed below for the sake of provenance: As this is a foreign pull request (from a fork), the diff is supplied below (as it won't show otherwise due to GitHub magic): diff --git a/docs/tutorials/gluon/customop.md b/docs/tutorials/gluon/customop.md index e10f3987eed..df10788d678 100644 --- a/docs/tutorials/gluon/customop.md +++ b/docs/tutorials/gluon/customop.md @@ -196,3 +196,6 @@ x = mx.nd.uniform(shape=(4, 3)) y = dense(x) print(y) ``` + + +<!-- INSERT SOURCE DOWNLOAD BUTTONS --> diff --git a/docs/tutorials/gluon/data_augmentation.md b/docs/tutorials/gluon/data_augmentation.md index 97bb46f1d10..df7462c3304 100644 --- a/docs/tutorials/gluon/data_augmentation.md +++ b/docs/tutorials/gluon/data_augmentation.md @@ -10,6 +10,7 @@ import mxnet as mx # used version '1.0.0' at time of writing import numpy as np from matplotlib.pyplot import imshow import multiprocessing +import os mx.random.seed(42) # set seed for repeatability ``` @@ -27,17 +28,17 @@ def plot_mx_array(array): ``` ```python -!mkdir -p data/images -!wget https://raw.githubusercontent.com/dmlc/web-data/master/mxnet/doc/tutorials/data_aug/inputs/0.jpg -P ./data/images/ +image_folder = os.path.join('data','images') +mx.test_utils.download('https://raw.githubusercontent.com/dmlc/web-data/master/mxnet/doc/tutorials/data_aug/inputs/0.jpg', dirname=image_folder) ``` ```python -example_image = mx.image.imread("./data/images/0.jpg").astype("float32") +example_image = mx.image.imread(os.path.join(image_folder, "0.jpg")).astype("float32") plot_mx_array(example_image) ``` - +<!--notebook-skip-line--> ## Quick start with [`ImageFolderDataset`](https://mxnet.incubator.apache.org/api/python/gluon/data.html#mxnet.gluon.data.vision.datasets.ImageFolderDataset) @@ -61,7 +62,7 @@ def aug_transform(data, label): return data, label -training_dataset = mx.gluon.data.vision.ImageFolderDataset('./data', transform=aug_transform) +training_dataset = mx.gluon.data.vision.ImageFolderDataset('data', transform=aug_transform) ``` @@ -75,7 +76,7 @@ plot_mx_array(sample_data*255) ``` - +<!--notebook-skip-line--> In practice you should load images from a dataset with a [`mxnet.gluon.data.DataLoader`](https://mxnet.incubator.apache.org/api/python/gluon/data.html?highlight=dataloader#mxnet.gluon.data.DataLoader) to take advantage of automatic batching and shuffling. Under the hood the `DataLoader` calls `__getitem__`, but you shouldn't need to call directly for anything other than debugging. Some practitioners pre-augment their datasets by applying a fixed number of augmentations to each image and saving the outputs to disk with the aim of increased throughput. With the `num_workers` parameter of `DataLoader` you can use all CPU cores to apply the augmentations, which often mitigates the need to perform pre-augmentation; reducing complexity and saving disk space. @@ -93,4 +94,6 @@ for data_batch, label_batch in training_data_loader: ``` -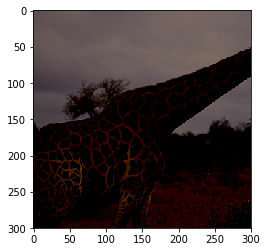 \ No newline at end of file +<!--notebook-skip-line--> + +<!-- INSERT SOURCE DOWNLOAD BUTTONS --> \ No newline at end of file diff --git a/docs/tutorials/gluon/datasets.md b/docs/tutorials/gluon/datasets.md index 0c9b5375d20..21eac78622f 100644 --- a/docs/tutorials/gluon/datasets.md +++ b/docs/tutorials/gluon/datasets.md @@ -12,7 +12,10 @@ We first start by generating random data `X` (with 3 variables) and correspondin ```python import mxnet as mx +import os +import tarfile +mx.random.seed(42) # Fix the seed for reproducibility X = mx.random.uniform(shape=(10, 3)) y = mx.random.uniform(shape=(10, 1)) dataset = mx.gluon.data.dataset.ArrayDataset(X, y) @@ -56,8 +59,9 @@ for X_batch, y_batch in data_loader: print("X_batch has shape {}, and y_batch has shape {}".format(X_batch.shape, y_batch.shape)) ``` - X_batch has shape (5, 3), and y_batch has shape (5, 1) - X_batch has shape (5, 3), and y_batch has shape (5, 1) +`X_batch has shape (5, 3), and y_batch has shape (5, 1)` <!--notebook-skip-line--> + +`X_batch has shape (5, 3), and y_batch has shape (5, 1)` <!--notebook-skip-line--> We can see 2 mini-batches of data (and labels), each with 5 samples, which makes sense given we started with a dataset of 10 samples. When comparing the shape of the batches to the samples returned by the [`Dataset`](https://mxnet.incubator.apache.org/api/python/gluon/data.html?highlight=dataset#mxnet.gluon.data.Dataset), we've gained an extra dimension at the start which is sometimes called the batch axis. @@ -99,13 +103,14 @@ print("Label: {}".format(label)) print("Label description: {}".format(label_desc[label])) ``` - Data type: <class 'numpy.float32'> - Label: 8 - Label description: Bag +`Data type: <class 'numpy.float32'>`<!--notebook-skip-line--> +`Label: 8`<!--notebook-skip-line--> +`Label description: Bag`<!--notebook-skip-line--> -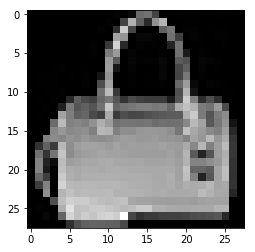 + +<!--notebook-skip-line--> When training machine learning models it is important to shuffle the training samples every time you pass through the dataset (i.e. each epoch). Sometimes the order of your samples will have a spurious relationship with the target variable, and shuffling the samples helps remove this. With [`DataLoader`](https://mxnet.incubator.apache.org/api/python/gluon/data.html?highlight=dataloader#mxnet.gluon.data.DataLoader) it's as simple as adding `shuffle=True`. You don't need to shuffle the validation and testing data though. @@ -175,11 +180,11 @@ for epoch in range(epochs): print("Epoch {}, training loss: {:.2f}, validation loss: {:.2f}".format(epoch, train_loss, valid_loss)) ``` - Epoch 0, training loss: 0.54, validation loss: 0.45 - Epoch 1, training loss: 0.40, validation loss: 0.39 - Epoch 2, training loss: 0.36, validation loss: 0.39 - Epoch 3, training loss: 0.33, validation loss: 0.34 - Epoch 4, training loss: 0.32, validation loss: 0.33 +`Epoch 0, training loss: 0.54, validation loss: 0.45`<!--notebook-skip-line--> + +`...`<!--notebook-skip-line--> + +`Epoch 4, training loss: 0.32, validation loss: 0.33`<!--notebook-skip-line--> # Using own data with included `Dataset`s @@ -187,46 +192,39 @@ for epoch in range(epochs): Gluon has a number of different [`Dataset`](https://mxnet.incubator.apache.org/api/python/gluon/data.html?highlight=dataset#mxnet.gluon.data.Dataset) classes for working with your own image data straight out-of-the-box. You can get started quickly using the [`mxnet.gluon.data.vision.datasets.ImageFolderDataset`](https://mxnet.incubator.apache.org/api/python/gluon/data.html?highlight=imagefolderdataset#mxnet.gluon.data.vision.datasets.ImageFolderDataset) which loads images directly from a user-defined folder, and infers the label (i.e. class) from the folders. We will run through an example for image classification, but a similar process applies for other vision tasks. If you already have your own collection of images to work with you should partition your data into training and test sets, and place all objects of the same class into seperate folders. Similar to: - +``` ./images/train/car/abc.jpg ./images/train/car/efg.jpg ./images/train/bus/hij.jpg ./images/train/bus/klm.jpg ./images/test/car/xyz.jpg ./images/test/bus/uvw.jpg +``` You can download the Caltech 101 dataset if you don't already have images to work with for this example, but please note the download is 126MB. ```python -!wget http://www.vision.caltech.edu/Image_Datasets/Caltech101/101_ObjectCategories.tar.gz -!tar -xzf 101_ObjectCategories.tar.gz + +data_folder = "data" +dataset_name = "101_ObjectCategories" +archive_file = "{}.tar.gz".format(dataset_name) +archive_path = os.path.join(data_folder, archive_file) +data_url = "https://s3.us-east-2.amazonaws.com/mxnet-public/"; + +if not os.path.isfile(archive_path): + mx.test_utils.download("{}{}".format(data_url, archive_file), dirname = data_folder) + print('Extracting {} in {}...'.format(archive_file, data_folder)) + tar = tarfile.open(archive_path, "r:gz") + tar.extractall(data_folder) + tar.close() + print('Data extracted.') ``` -After downloading and extracting the data archive, we seperate the data into training and test sets (50:50 split), and place images of the same class into the same folders, as required for using [`ImageFolderDataset`](https://mxnet.incubator.apache.org/api/python/gluon/data.html?highlight=imagefolderdataset#mxnet.gluon.data.vision.datasets.ImageFolderDataset). +After downloading and extracting the data archive, we have two folders: `data/101_ObjectCategories` and `data/101_ObjectCategories_test`. We load the data into separate training and testing [`ImageFolderDataset`](https://mxnet.incubator.apache.org/api/python/gluon/data.html?highlight=imagefolderdataset#mxnet.gluon.data.vision.datasets.ImageFolderDataset)s. ```python -import shutil -import os - -def split_train_test(source_dir='./101_ObjectCategories', train_dir='./images/train', test_dir='./images/test'): - """ - Walks through source_dir and alternates between places files in the train_dir and the test_dir. - """ - train_set = True - for root, dirs, files in os.walk(source_dir): - for name in files: - current_filepath = os.path.join(root, name) - dataset_dir = train_dir if train_set else test_dir - new_filepath = current_filepath.replace(source_dir, dataset_dir) - try: - os.makedirs(os.path.dirname(new_filepath)) - except FileExistsError: - pass - shutil.move(current_filepath, new_filepath) - train_set = not train_set - shutil.rmtree(source_dir) - -split_train_test() +training_path = os.path.join(data_folder, dataset_name) +testing_path = os.path.join(data_folder, "{}_test".format(dataset_name)) ``` We instantiate the [`ImageFolderDataset`](https://mxnet.incubator.apache.org/api/python/gluon/data.html?highlight=imagefolderdataset#mxnet.gluon.data.vision.datasets.ImageFolderDataset)s by providing the path to the data, and the folder structure will be traversed to determine which image classes are available and which images correspond to each class. You must take care to ensure the same classes are both the training and testing datasets, otherwise the label encodings can get muddled. @@ -235,8 +233,8 @@ Optionally, you can pass a `transform` parameter to these [`Dataset`](https://mx ```python -train_dataset = mx.gluon.data.vision.datasets.ImageFolderDataset('./images/train') -test_dataset = mx.gluon.data.vision.datasets.ImageFolderDataset('./images/test') +train_dataset = mx.gluon.data.vision.datasets.ImageFolderDataset(training_path) +test_dataset = mx.gluon.data.vision.datasets.ImageFolderDataset(testing_path) ``` Samples from these datasets are tuples of data and label. Images are loaded from disk, decoded and optionally transformed when the `__getitem__(i)` method is called (equivalent to `train_dataset[i]`). @@ -245,7 +243,7 @@ As with the Fashion MNIST dataset the labels will be integer encoded. You can us ```python -sample_idx = 888 +sample_idx = 539 sample = train_dataset[sample_idx] data = sample[0] label = sample[1] @@ -257,13 +255,15 @@ print("Label description: {}".format(train_dataset.synsets[label])) assert label == 1 ``` - Data type: <class 'numpy.uint8'> - Label: 2 - Label description: Faces_easy +`Data type: <class 'numpy.uint8'>`<!--notebook-skip-line--> + +`Label: 1`<!--notebook-skip-line--> + +`Label description: Faces_easy` <!--notebook-skip-line--> + +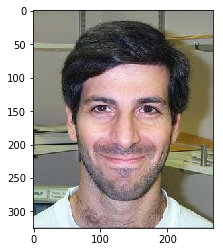<!--notebook-skip-line--> - # Using own data with custom `Dataset`s @@ -308,3 +308,4 @@ for X_batch, y_batch in data_iter_loader: assert X_batch.shape == (5, 3) assert y_batch.shape == (5, 1) ``` +<!-- INSERT SOURCE DOWNLOAD BUTTONS --> \ No newline at end of file diff --git a/docs/tutorials/nlp/cnn.md b/docs/tutorials/nlp/cnn.md index 7f56b76531a..b3d7d0d3894 100644 --- a/docs/tutorials/nlp/cnn.md +++ b/docs/tutorials/nlp/cnn.md @@ -149,11 +149,15 @@ print('vocab_size', vocab_size) print('sentence max words', sentence_size) ``` - Train/Dev split: 9662/1000 - train shape: (9662, 56) - dev shape: (1000, 56) - vocab_size 18766 - sentence max words 56 +`Train/Dev split: 9662/1000`<!--notebook-skip-line--> + +`train shape: (9662, 56)`<!--notebook-skip-line--> + +`dev shape: (1000, 56)`<!--notebook-skip-line--> + +`vocab_size 18766`<!--notebook-skip-line--> + +`sentence max words 56`<!--notebook-skip-line--> Now that we prepared the training and test data by loading, vectorizing and shuffling it we can go on to defining the network architecture we want to train with the data. @@ -187,11 +191,12 @@ print('embedding dimensions', num_embed) embed_layer = mx.sym.Embedding(data=input_x, input_dim=vocab_size, output_dim=num_embed, name='vocab_embed') # reshape embedded data for next layer -conv_input = mx.sym.Reshape(data=embed_layer, target_shape=(batch_size, 1, sentence_size, num_embed)) +conv_input = mx.sym.Reshape(data=embed_layer, shape=(batch_size, 1, sentence_size, num_embed)) ``` - batch size 50 - embedding dimensions 300 +`batch size 50` <!--notebook-skip-line--> + +`embedding dimensions 300` <!--notebook-skip-line--> The next layer in the network performs convolutions over the ordered embedded word vectors in a sentence using multiple filter sizes, sliding over 3, 4 or 5 words at a time. This is the equivalent of looking at all 3-grams, 4-grams and 5-grams in a sentence and will allow us to understand how words contribute to sentiment in the context of those around them. @@ -219,10 +224,10 @@ total_filters = num_filter * len(filter_list) concat = mx.sym.Concat(*pooled_outputs, dim=1) # reshape for next layer -h_pool = mx.sym.Reshape(data=concat, target_shape=(batch_size, total_filters)) +h_pool = mx.sym.Reshape(data=concat, shape=(batch_size, total_filters)) ``` - convolution filters [3, 4, 5] +`convolution filters [3, 4, 5]` <!--notebook-skip-line--> Next, we add dropout regularization, which will randomly disable a fraction of neurons in the layer (set to 50% here) to ensure that that model does not overfit. This prevents neurons from co-adapting and forces them to learn individually useful features. @@ -233,7 +238,7 @@ This is necessary for our model because the dataset has a vocabulary of size aro ```python # dropout layer dropout = 0.5 -print 'dropout probability', dropout +print('dropout probability', dropout) if dropout > 0.0: h_drop = mx.sym.Dropout(data=h_pool, p=dropout) @@ -242,7 +247,7 @@ else: ``` - dropout probability 0.5 +`dropout probability 0.5` <!--notebook-skip-line--> Finally, we add a fully connected layer to add non-linearity to the model. We then classify the resulting output of this layer using a softmax function, yielding a result between 0 (negative sentiment) and 1 (positive). @@ -277,10 +282,8 @@ import time # Define the structure of our CNN Model (as a named tuple) CNNModel = namedtuple("CNNModel", ['cnn_exec', 'symbol', 'data', 'label', 'param_blocks']) -# Define what device to train/test on -ctx = mx.gpu(0) -# If you have no GPU on your machine change this to -# ctx = mx.cpu(0) +# Define what device to train/test on, use GPU if available +ctx = mx.gpu() if mx.test_utils.list_gpus() else mx.cpu() arg_names = cnn.list_arguments() @@ -430,16 +433,9 @@ for iteration in range(epoch): learning rate (step size) 0.0005 epochs to train for 50 Iter [0] Train: Time: 3.903s, Training Accuracy: 56.290 --- Dev Accuracy thus far: 63.300 - Iter [1] Train: Time: 3.142s, Training Accuracy: 71.917 --- Dev Accuracy thus far: 69.400 - Iter [2] Train: Time: 3.146s, Training Accuracy: 80.508 --- Dev Accuracy thus far: 73.900 - Iter [3] Train: Time: 3.142s, Training Accuracy: 87.233 --- Dev Accuracy thus far: 76.300 - Iter [4] Train: Time: 3.145s, Training Accuracy: 91.057 --- Dev Accuracy thus far: 77.100 - Iter [5] Train: Time: 3.145s, Training Accuracy: 94.073 --- Dev Accuracy thus far: 77.700 - Iter [6] Train: Time: 3.147s, Training Accuracy: 96.000 --- Dev Accuracy thus far: 77.400 - Iter [7] Train: Time: 3.150s, Training Accuracy: 97.399 --- Dev Accuracy thus far: 77.100 + ... Iter [8] Train: Time: 3.144s, Training Accuracy: 98.425 --- Dev Accuracy thus far: 78.000 Saved checkpoint to ./cnn-0009.params - Iter [9] Train: Time: 3.151s, Training Accuracy: 99.192 --- Dev Accuracy thus far: 77.100 ... Now that we have gone through the trouble of training the model, we have stored the learned parameters in the .params file in our local directory. We can now load this file whenever we want and predict the sentiment of new sentences by running them through a forward pass of the trained model. @@ -450,3 +446,6 @@ Now that we have gone through the trouble of training the model, we have stored ## Next Steps * [MXNet tutorials index](http://mxnet.io/tutorials/index.html) + + +<!-- INSERT SOURCE DOWNLOAD BUTTONS --> diff --git a/docs/tutorials/python/data_augmentation.md b/docs/tutorials/python/data_augmentation.md index 30b5b7d33d3..e4dbbb67299 100644 --- a/docs/tutorials/python/data_augmentation.md +++ b/docs/tutorials/python/data_augmentation.md @@ -11,6 +11,7 @@ import mxnet as mx # used version '1.0.0' at time of writing import numpy as np from matplotlib.pyplot import imshow import multiprocessing +import os mx.random.seed(42) # set seed for repeatability ``` @@ -28,17 +29,14 @@ def plot_mx_array(array): ``` ```python -!mkdir -p data/images -!wget https://raw.githubusercontent.com/dmlc/web-data/master/mxnet/doc/tutorials/data_aug/inputs/0.jpg -P ./data/images/ -``` - -```python -example_image = mx.image.imread("./data/images/0.jpg").astype("float32") +image_dir = os.path.join("data", "images") +mx.test_utils.download('https://raw.githubusercontent.com/dmlc/web-data/master/mxnet/doc/tutorials/data_aug/inputs/0.jpg', dirname=image_dir) +example_image = mx.image.imread(os.path.join(image_dir,"0.jpg")).astype("float32") plot_mx_array(example_image) ``` - +<!--notebook-skip-line--> ## Quick start using [`ImageIter`](https://mxnet.incubator.apache.org/api/python/image/image.html?highlight=imageiter#mxnet.image.ImageIter) @@ -49,13 +47,21 @@ One of the most convenient ways to augment your image data is via arguments of [ We show a simple example of this below, after creating an `images.lst` file used by the [`ImageIter`](https://mxnet.incubator.apache.org/api/python/image/image.html?highlight=imageiter#mxnet.image.ImageIter). Use [`tools/im2rec.py`](https://github.com/apache/incubator-mxnet/blob/master/tools/im2rec.py) to create the `images.lst` if you don't already have this for your data. ```python -!echo -e "0\t0.000000\timages/0.jpg" > ./data/images.lst +path_to_image = os.path.join("images", "0.jpg") +index = 0 +label = 0. +list_file_content = "{0}\t{1:.5f}\t{2}".format(index, label, path_to_image) + +path_list_file = os.path.join(image_dir, "images.lst") +with open(path_list_file, 'w') as f: + f.write(list_file_content) + ``` ```python training_iter = mx.image.ImageIter(batch_size = 1, data_shape = (3, 300, 300), - path_root= './data', path_imglist='./data/images.lst', + path_root= 'data', path_imglist=path_list_file, rand_crop=0.5, rand_mirror=True, inter_method=10, brightness=0.125, contrast=0.125, saturation=0.125, pca_noise=0.02 @@ -73,7 +79,7 @@ for batch in training_iter: ``` -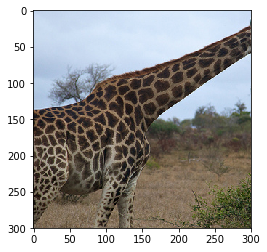 +<!--notebook-skip-line--> [`mxnet.image.ImageDetIter`](https://mxnet.incubator.apache.org/api/python/image/image.html?highlight=imagedetiter#mxnet.image.ImageDetIter) works similarly (with [`mxnet.image.CreateDetAugmenter`](https://mxnet.incubator.apache.org/api/python/image/image.html?highlight=createdetaugmenter#mxnet.image.CreateDetAugmenter)), but [`mxnet.io.ImageRecordIter`](https://mxnet.incubator.apache.org/api/python/io/io.html?highlight=imagerecorditer#mxnet.io.ImageRecordIter) has a slightly different interface, so reference the documentation [here](https://mxnet.incubator.apache.org/api/python/io/io.html?highlight=imagerecorditer#mxnet.io.ImageRecordIter) if you're using Record IO data format. @@ -93,7 +99,7 @@ assert aug_image.shape == (100, 100, 3) ``` - +<!--notebook-skip-line--> ### Augmenter Classes @@ -109,7 +115,7 @@ assert aug_image.shape == (100, 100, 3) ``` - +<!--notebook-skip-line--> ### Augmenter list @@ -130,7 +136,7 @@ assert all([isinstance(a, mx.image.Augmenter) for a in aug_list]) ``` - +<!--notebook-skip-line--> @@ -147,9 +153,11 @@ assert all([isinstance(a, mx.image.Augmenter) for a in aug_list]) ``` - +<!--notebook-skip-line--> __*Watch Out!*__ Check some examples that are output after applying all the augmentations. You may find that the augmentation steps are too severe and may actually prevent the model from learning. Some of the augmentation parameters used in this tutorial are set high for demonstration purposes (e.g. `brightness=1`); you might want to reduce them if your training error stays too high during training. Some examples of excessive augmentation are shown below: -<img src="https://raw.githubusercontent.com/dmlc/web-data/master/mxnet/doc/tutorials/data_aug/outputs/use//severe_aug.png"; alt="Drawing" style="width: 700px;"/> \ No newline at end of file +<img src="https://raw.githubusercontent.com/dmlc/web-data/master/mxnet/doc/tutorials/data_aug/outputs/use//severe_aug.png"; alt="Drawing" style="width: 700px;"/> + +<!-- INSERT SOURCE DOWNLOAD BUTTONS --> \ No newline at end of file diff --git a/docs/tutorials/python/data_augmentation_with_masks.md b/docs/tutorials/python/data_augmentation_with_masks.md index 28a57b6e63a..ac587ac2f5e 100644 --- a/docs/tutorials/python/data_augmentation_with_masks.md +++ b/docs/tutorials/python/data_augmentation_with_masks.md @@ -97,15 +97,9 @@ class ImageWithMaskDataset(dataset.Dataset): Usually Datasets are used in conjunction with DataLoaders, but we'll sample a single base image and mask pair for testing purposes. Calling `dataset[0]` (which is equivalent to `dataset.__getitem__(0)`) returns the first base image and mask pair from the `_image_list`. At first download the sample images and then we'll load them without any augmentation. ```python -!wget https://raw.githubusercontent.com/dmlc/web-data/master/mxnet/doc/tutorials/data_aug/inputs/0.jpg -P ./data/images -``` - -```python -!wget https://raw.githubusercontent.com/dmlc/web-data/master/mxnet/doc/tutorials/data_aug/inputs/0_mask.png -P ./data/images -``` - -```python -image_dir = "./data/images" +image_dir = os.path.join("data", "images") +mx.test_utils.download('https://raw.githubusercontent.com/dmlc/web-data/master/mxnet/doc/tutorials/data_aug/inputs/0.jpg', dirname=image_dir) +mx.test_utils.download('https://raw.githubusercontent.com/dmlc/web-data/master/mxnet/doc/tutorials/data_aug/inputs/0_mask.png', dirname=image_dir) dataset = ImageWithMaskDataset(root=image_dir) sample = dataset.__getitem__(0) sample_base = sample[0].astype('float32') @@ -133,7 +127,7 @@ plot_mx_arrays([sample_base, sample_mask]) ``` - +<!--notebook-skip-line--> # Implementing `transform` for Augmentation @@ -196,7 +190,7 @@ It's simple to use augmentation now that we have the `joint_transform` function ```python -image_dir = "./data/images" +image_dir = os.path.join("data","images") ds = ImageWithMaskDataset(root=image_dir, transform=joint_transform) sample = ds.__getitem__(0) assert len(sample) == 2 @@ -206,7 +200,7 @@ plot_mx_arrays([sample[0]*255, sample[1]*255]) ``` - +<!--notebook-skip-line--> # Summary @@ -246,3 +240,5 @@ mkdir coco_data/masks mv -v stuff_val2017_pixelmaps/* coco_data/masks/ rm -r stuff_val2017_pixelmaps ``` + +<!-- INSERT SOURCE DOWNLOAD BUTTONS --> \ No newline at end of file diff --git a/docs/tutorials/python/kvstore.md b/docs/tutorials/python/kvstore.md index 44afb879a7c..3e6bbf12c39 100644 --- a/docs/tutorials/python/kvstore.md +++ b/docs/tutorials/python/kvstore.md @@ -10,76 +10,89 @@ Let's consider a simple example: initializing a (`int`, `NDArray`) pair into the store, and then pulling the value out: ```python - >>> kv = mx.kv.create('local') # create a local kv store. - >>> shape = (2,3) - >>> kv.init(3, mx.nd.ones(shape)*2) - >>> a = mx.nd.zeros(shape) - >>> kv.pull(3, out = a) - >>> print a.asnumpy() - [[ 2. 2. 2.] - [ 2. 2. 2.]] +import mxnet as mx + +kv = mx.kv.create('local') # create a local kv store. +shape = (2,3) +kv.init(3, mx.nd.ones(shape)*2) +a = mx.nd.zeros(shape) +kv.pull(3, out = a) +print(a.asnumpy()) ``` +`[[ 2. 2. 2.],[ 2. 2. 2.]]`<!--notebook-skip-line--> + ## Push, Aggregate, and Update For any key that has been initialized, you can push a new value with the same shape to the key: ```python - >>> kv.push(3, mx.nd.ones(shape)*8) - >>> kv.pull(3, out = a) # pull out the value - >>> print a.asnumpy() - [[ 8. 8. 8.] - [ 8. 8. 8.]] +kv.push(3, mx.nd.ones(shape)*8) +kv.pull(3, out = a) # pull out the value +print(a.asnumpy()) ``` +`[[ 8. 8. 8.],[ 8. 8. 8.]]`<!--notebook-skip-line--> + The data for pushing can be stored on any device. Furthermore, you can push multiple values into the same key, where KVStore will first sum all of these values and then push the aggregated value: ```python - >>> gpus = [mx.gpu(i) for i in range(4)] - >>> b = [mx.nd.ones(shape, gpu) for gpu in gpus] - >>> kv.push(3, b) - >>> kv.pull(3, out = a) - >>> print a.asnumpy() - [[ 4. 4. 4.] - [ 4. 4. 4.]] +# The numbers used below assume 4 GPUs +gpus = mx.test_utils.list_gpus() +if len(gpus) > 1: + contexts = [mx.gpu(i) for i in gpus] +else: + contexts = [mx.cpu(i) for i in range(4)] +b = [mx.nd.ones(shape, ctx) for ctx in contexts] +kv.push(3, b) +kv.pull(3, out = a) +print(a.asnumpy()) ``` +`[[ 4. 4. 4.],[ 4. 4. 4.]]`<!--notebook-skip-line--> + For each push, KVStore combines the pushed value with the value stored using an `updater`. The default updater is `ASSIGN`. You can replace the default to control how data is merged: ```python - >>> def update(key, input, stored): - >>> print "update on key: %d" % key - >>> stored += input * 2 - >>> kv._set_updater(update) - >>> kv.pull(3, out=a) - >>> print a.asnumpy() - [[ 4. 4. 4.] - [ 4. 4. 4.]] - >>> kv.push(3, mx.nd.ones(shape)) - update on key: 3 - >>> kv.pull(3, out=a) - >>> print a.asnumpy() - [[ 6. 6. 6.] - [ 6. 6. 6.]] +def update(key, input, stored): + print("update on key: %d" % key) + stored += input * 2 +kv._set_updater(update) +kv.pull(3, out=a) +print(a.asnumpy()) +``` + +`[[ 4. 4. 4.],[ 4. 4. 4.]]`<!--notebook-skip-line--> + +```python +kv.push(3, mx.nd.ones(shape)) +# +kv.pull(3, out=a) +print(a.asnumpy()) ``` +`update on key: 3`<!--notebook-skip-line--> + +`[[ 6. 6. 6.],[ 6. 6. 6.]]`<!--notebook-skip-line--> + + ## Pull You've already seen how to pull a single key-value pair. Similarly, to push, you can pull the value onto several devices with a single call: ```python - >>> b = [mx.nd.ones(shape, gpu) for gpu in gpus] - >>> kv.pull(3, out = b) - >>> print b[1].asnumpy() - [[ 6. 6. 6.] - [ 6. 6. 6.]] +b = [mx.nd.ones(shape, ctx) for ctx in contexts] +kv.pull(3, out = b) +print(b[1].asnumpy()) ``` +`[ 6. 6. 6.]],[[ 6. 6. 6.]`<!--notebook-skip-line--> + ## Handle a List of Key-Value Pairs All operations introduced so far involve a single key. KVStore also provides @@ -88,33 +101,39 @@ an interface for a list of key-value pairs. For a single device: ```python - >>> keys = [5, 7, 9] - >>> kv.init(keys, [mx.nd.ones(shape)]*len(keys)) - >>> kv.push(keys, [mx.nd.ones(shape)]*len(keys)) - update on key: 5 - update on key: 7 - update on key: 9 - >>> b = [mx.nd.zeros(shape)]*len(keys) - >>> kv.pull(keys, out = b) - >>> print b[1].asnumpy() - [[ 3. 3. 3.] - [ 3. 3. 3.]] +keys = [5, 7, 9] +kv.init(keys, [mx.nd.ones(shape)]*len(keys)) +kv.push(keys, [mx.nd.ones(shape)]*len(keys)) +b = [mx.nd.zeros(shape)]*len(keys) +kv.pull(keys, out = b) +print(b[1].asnumpy()) ``` +`update on key: 5`<!--notebook-skip-line--> + +`update on key: 7`<!--notebook-skip-line--> + +`update on key: 9`<!--notebook-skip-line--> + +`[[ 3. 3. 3.],[ 3. 3. 3.]]`<!--notebook-skip-line--> + For multiple devices: ```python - >>> b = [[mx.nd.ones(shape, gpu) for gpu in gpus]] * len(keys) - >>> kv.push(keys, b) - update on key: 5 - update on key: 7 - update on key: 9 - >>> kv.pull(keys, out = b) - >>> print b[1][1].asnumpy() - [[ 11. 11. 11.] - [ 11. 11. 11.]] +b = [[mx.nd.ones(shape, ctx) for ctx in contexts]] * len(keys) +kv.push(keys, b) +kv.pull(keys, out = b) +print(b[1][1].asnumpy()) ``` +`update on key: 5`<!--notebook-skip-line--> + +`update on key: 7`<!--notebook-skip-line--> + +`update on key: 9`<!--notebook-skip-line--> + +`[[ 11. 11. 11.],[ 11. 11. 11.]]`<!--notebook-skip-line--> + ## Run on Multiple Machines Based on parameter server, the `updater` runs on the server nodes. When the distributed version is ready, we will update this section. @@ -135,4 +154,6 @@ When the distributed version is ready, we will update this section. <!-- flexibly as your choice. --> ## Next Steps -* [MXNet tutorials index](http://mxnet.io/tutorials/index.html) \ No newline at end of file +* [MXNet tutorials index](http://mxnet.io/tutorials/index.html) + +<!-- INSERT SOURCE DOWNLOAD BUTTONS --> \ No newline at end of file diff --git a/docs/tutorials/python/types_of_data_augmentation.md b/docs/tutorials/python/types_of_data_augmentation.md index 9ace047e922..4cd1ad7bd05 100644 --- a/docs/tutorials/python/types_of_data_augmentation.md +++ b/docs/tutorials/python/types_of_data_augmentation.md @@ -32,12 +32,9 @@ def plot_mx_array(array): We load an example image, this will be the target for our augmentations in the tutorial. ```python -!wget https://raw.githubusercontent.com/dmlc/web-data/master/mxnet/doc/tutorials/data_aug/inputs/0.jpg -``` - -```python -example_image = mx.image.imread("./0.jpg") -assert str(example_image.dtype) == "<class 'numpy.uint8'>" +mx.test_utils.download('https://raw.githubusercontent.com/dmlc/web-data/master/mxnet/doc/tutorials/data_aug/inputs/0.jpg') +example_image = mx.image.imread("0.jpg") +assert example_image.dtype == np.uint8 ``` @@ -50,7 +47,7 @@ plot_mx_array(example_image) ``` - +<!--notebook-skip-line--> # Position Augmentation @@ -75,7 +72,7 @@ assert example_image.shape == (427, 640, 3) assert aug_image.shape == (100, 100, 3) ``` - +<!--notebook-skip-line--> __*Watch Out!*__ Crop are a great way of adding diversity to your training examples, but be careful not to take it to the extreme. An example of this would be cropping out an object of interest from the image completely. Visualise a few examples after cropping to determine if this will be an issue. @@ -99,7 +96,7 @@ assert example_image.shape == (427, 640, 3) assert aug_image.shape == (50, 74, 3) ``` -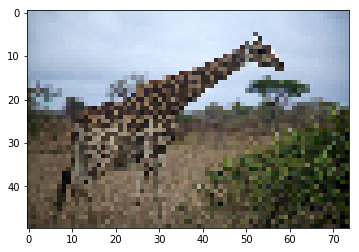 +<!--notebook-skip-line--> __*Watch out!*__ `size` should be (width, height). @@ -114,7 +111,7 @@ assert example_image.shape == (427, 640, 3) assert aug_image.shape == (50, 100, 3) ``` - +<!--notebook-skip-line--> ### Horizontal Flip @@ -133,7 +130,7 @@ assert example_image.shape == (427, 640, 3) assert aug_image.shape == (427, 640, 3) ``` - +<!--notebook-skip-line--> You can get a random vertical flip too using [`mxnet.NDArray.swapaxes`](https://mxnet.incubator.apache.org/api/python/ndarray/ndarray.html?highlight=swapaxes#mxnet.ndarray.NDArray.swapaxes) (to switch height and width) before and after the random horizontal flip. Once again `p` will be the probability of a flip occurring, and is set to 1 for demonstration purposes. @@ -146,7 +143,7 @@ plot_mx_array(aug_image) ``` - +<!--notebook-skip-line--> # Color Augmentation @@ -172,7 +169,7 @@ plot_mx_array(aug_image) ``` - +<!--notebook-skip-line--> ### Contrast @@ -195,7 +192,7 @@ plot_mx_array(aug_image) ``` - + <!--notebook-skip-line--> ### Saturation @@ -211,7 +208,7 @@ plot_mx_array(aug_image) ``` - +<!--notebook-skip-line--> ### Hue @@ -227,7 +224,7 @@ plot_mx_array(aug_image) ``` -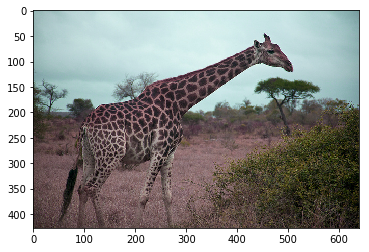 +<!--notebook-skip-line--> ### LightingAug @@ -247,7 +244,7 @@ plot_mx_array(aug_image) ``` - +<!--notebook-skip-line--> ### Color Normalization @@ -276,7 +273,7 @@ plot_mx_array(aug_image) ``` -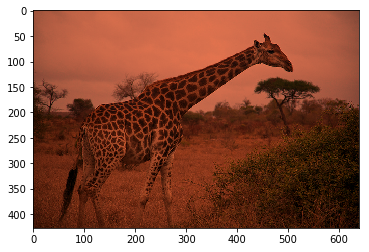 +<!--notebook-skip-line--> ### Grayscale @@ -294,7 +291,7 @@ plot_mx_array(aug_image) ``` -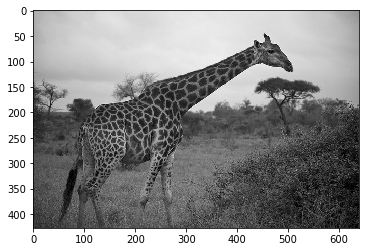 +<!--notebook-skip-line--> # Combinations @@ -313,7 +310,7 @@ assert aug_image.shape == (100, 100, 3) ``` - +<!--notebook-skip-line--> @@ -326,7 +323,7 @@ plot_mx_array(aug_image) ``` - +<!--notebook-skip-line--> And lastly, you can use [`mxnet.image.RandomOrderAug`](https://mxnet.incubator.apache.org/api/python/image.html#mxnet.image.RandomOrderAug) to apply multiple augmenters to an image, in a random order. @@ -335,7 +332,7 @@ And lastly, you can use [`mxnet.image.RandomOrderAug`](https://mxnet.incubator.a ```python example_image_copy = example_image.copy() aug_list = [ - mx.image.RandomCropAug(size=(50, 50)), + mx.image.RandomCropAug(size=(250, 250)), mx.image.HorizontalFlipAug(p=1), mx.image.BrightnessJitterAug(brightness=1), mx.image.HueJitterAug(hue=0.5) @@ -344,11 +341,11 @@ aug = mx.image.RandomOrderAug(aug_list) aug_image = aug(example_image_copy) plot_mx_array(aug_image) -assert aug_image.shape == (50, 50, 3) +assert aug_image.shape == (250, 250, 3) ``` - +<!--notebook-skip-line--> # FAQs @@ -377,3 +374,5 @@ Most of the augmenters contain a mixture of control logic and `NDArray` operatio #### 4) Can I implement custom augmentations? Yes, you can implement your own class that inherits from [`Augmenter`](https://mxnet.incubator.apache.org/api/python/image/image.html?highlight=augmenter#mxnet.image.Augmenter) and define the augmentation steps in the `__call__` method. You can also implement a `dumps` method which returns a string representation of the augmenter and its parameters: it's used when inspecting a list of `Augmenter`s. + +<!-- INSERT SOURCE DOWNLOAD BUTTONS --> diff --git a/docs/tutorials/speech_recognition/ctc.md b/docs/tutorials/speech_recognition/ctc.md index 9c9a9c98dbd..0b01fb48999 100644 --- a/docs/tutorials/speech_recognition/ctc.md +++ b/docs/tutorials/speech_recognition/ctc.md @@ -1,5 +1,14 @@ # Connectionist Temporal Classification +```python + +import mxnet as mx +print(mx.__version__) +``` + +`1.1.0`<!--notebook-skip-line--> + + [Connectionist Temporal Classification](https://www.cs.toronto.edu/~graves/icml_2006.pdf) (CTC) is a cost function that is used to train Recurrent Neural Networks (RNNs) to label unsegmented input sequence data in supervised learning. For example, in a speech recognition application, using a typical cross-entropy loss, the input signal needs to be segmented into words or sub-words. However, using CTC-loss, it suffices to provide one label sequence for input sequence and the network learns both the alignment as well labeling. Baidu's warp-ctc page contains a more detailed [introduction to CTC-loss](https://github.com/baidu-research/warp-ctc#introduction). ## CTC-loss in MXNet @@ -13,3 +22,5 @@ MXNet's example folder contains a [CTC example](https://github.com/apache/incuba ## Next Steps * [MXNet tutorials index](http://mxnet.io/tutorials/index.html) + +<!-- INSERT SOURCE DOWNLOAD BUTTONS --> \ No newline at end of file diff --git a/docs/tutorials/unsupervised_learning/auto_encoders.md b/docs/tutorials/unsupervised_learning/auto_encoders.md deleted file mode 100644 index 7dfefac440e..00000000000 --- a/docs/tutorials/unsupervised_learning/auto_encoders.md +++ /dev/null @@ -1,5 +0,0 @@ -# Autoencoders -Get the source code for an example of autoencoders running on MXNet on GitHub in the [autoencoder](https://github.com/dmlc/mxnet/tree/master/example/autoencoder) folder. - -## Next Steps -* [MXNet tutorials index](http://mxnet.io/tutorials/index.html) \ No newline at end of file diff --git a/docs/tutorials/unsupervised_learning/gan.md b/docs/tutorials/unsupervised_learning/gan.md index c7b879c174b..1c99a02cc19 100644 --- a/docs/tutorials/unsupervised_learning/gan.md +++ b/docs/tutorials/unsupervised_learning/gan.md @@ -212,9 +212,8 @@ So far we have defined a MXNet Symbol for both the Generator and the Discriminat sigma = 0.02 lr = 0.0002 beta1 = 0.5 -# If you do not have a GPU. Use the below outlined -# ctx = mx.cpu() -ctx = mx.gpu(0) +# Define the compute context, use GPU if available +ctx = mx.gpu() if mx.test_utils.list_gpus() else mx.cpu() #=============Generator Module============= generator = mx.mod.Module(symbol=generatorSymbol, data_names=('rand',), label_names=None, context=ctx) @@ -387,3 +386,5 @@ Along the way, we have learned how to do the image manipulation and visualizatio ## Acknowledgements This tutorial is based on [MXNet DCGAN codebase](https://github.com/apache/incubator-mxnet/blob/master/example/gluon/dcgan.py), [The original paper on GANs](https://arxiv.org/abs/1406.2661), as well as [this paper on deep convolutional GANs](https://arxiv.org/abs/1511.06434). + +<!-- INSERT SOURCE DOWNLOAD BUTTONS --> \ No newline at end of file diff --git a/docs/tutorials/vision/large_scale_classification.md b/docs/tutorials/vision/large_scale_classification.md index 089f55b8716..4f4059810e7 100644 --- a/docs/tutorials/vision/large_scale_classification.md +++ b/docs/tutorials/vision/large_scale_classification.md @@ -11,6 +11,14 @@ Training a neural network with a large number of images presents several challen $ pip install opencv-python ``` +```python +import mxnet as mx +print(mx.__version__) +``` + +`1.1.0`<!--notebook-skip-line--> + + ## Preprocessing ### Disk space @@ -253,3 +261,5 @@ It is often straightforward to achieve a reasonable validation accuracy, but ach If the batch size is too big, it can exhaust GPU memory. If this happens, you’ll see the error message “cudaMalloc failed: out of memory” or something similar. There are a couple of ways to fix this: - Reduce the batch size. - Set the environment variable `MXNET_BACKWARD_DO_MIRROR` to 1. It reduces the memory consumption by trading off speed. For example, with batch size 64, inception-v3 uses 10G memory and trains 30 image/sec on a single K80 GPU. When mirroring is enabled, with 10G GPU memory consumption, we can run inception-v3 using batch size of 128. The cost is that, the speed reduces to 27 images/sec. + +<!-- INSERT SOURCE DOWNLOAD BUTTONS --> \ No newline at end of file diff --git a/tests/nightly/test_tutorial_config.txt b/tests/nightly/test_tutorial_config.txt index e88074f99f3..be249b0c56a 100644 --- a/tests/nightly/test_tutorial_config.txt +++ b/tests/nightly/test_tutorial_config.txt @@ -1,20 +1,31 @@ basic/ndarray +basic/ndarray_indexing basic/symbol basic/module basic/data -python/linear-regression -python/mnist -python/predict_image -onnx/super_resolution -onnx/fine_tuning_gluon -onnx/inference_on_onnx_model -basic/ndarray_indexing -python/matrix_factorization +gluon/customop +gluon/data_augmentation +gluon/datasets gluon/ndarray gluon/mnist gluon/autograd gluon/gluon gluon/hybrid +nlp/cnn +onnx/super_resolution +onnx/fine_tuning_gluon +onnx/inference_on_onnx_model +python/matrix_factorization +python/linear-regression +python/mnist +python/predict_image +python/data_augmentation +python/data_augmentation_with_masks +python/kvstore +python/types_of_data_augmentation sparse/row_sparse sparse/csr -sparse/train \ No newline at end of file +sparse/train +speech_recognition/ctc +unsupervised_learning/gan +vision/large_scale_classification ---------------------------------------------------------------- This is an automated message from the Apache Git Service. To respond to the message, please log on GitHub and use the URL above to go to the specific comment. For queries about this service, please contact Infrastructure at: us...@infra.apache.org With regards, Apache Git Services
