This is an automated email from the ASF dual-hosted git repository.

nswamy pushed a commit to branch master
in repository https://gitbox.apache.org/repos/asf/incubator-mxnet.git
The following commit(s) were added to refs/heads/master by this push:
new a4c8d97 Updating Scala IntelliJ tutorial & installation instructions
(#11152)
a4c8d97 is described below
commit a4c8d979f30c842098312169d28000b017ce15bf
Author: Aaron Markham <[email protected]>
AuthorDate: Thu Jul 5 17:21:08 2018 -0700
Updating Scala IntelliJ tutorial & installation instructions (#11152)
* Added installation and package building info for MXNet-Scala
---
docs/install/index.md | 85 ++++-
docs/install/osx_setup.md | 19 +-
docs/install/scala_setup.md | 109 +++++++
docs/install/ubuntu_setup.md | 9 +
docs/install/windows_setup.md | 55 +---
docs/mxdoc.py | 1 +
docs/tutorials/index.md | 8 +-
docs/tutorials/scala/{README.md => index.md} | 12 +-
docs/tutorials/scala/mxnet_scala_on_intellij.md | 344 +++++++++++++--------
.../mxnetexamples/infer/imageclassifier/README.md | 2 +-
.../mxnetexamples/infer/objectdetector/README.md | 2 +-
tests/tutorials/test_sanity_tutorials.py | 4 +-
12 files changed, 433 insertions(+), 217 deletions(-)
diff --git a/docs/install/index.md b/docs/install/index.md
index a35cf94..ab99bbd 100644
--- a/docs/install/index.md
+++ b/docs/install/index.md
@@ -933,7 +933,7 @@ pip install graphviz
</div> <!-- END of build from source -->
</div> <!-- END of GPU -->
</div> <!-- END of Python -->
--<!-- END - Linux Python GPU Installation Instructions -->
+<!-- END - Linux Python GPU Installation Instructions -->
<div class="r">
@@ -1068,13 +1068,40 @@ $ R CMD INSTALL mxnet_current_r.tar.gz
</div> <!-- END of R -->
-<div class="scala julia perl">
+<div class="scala">
+<div class="gpu">
+
+```html
+<dependency>
+ <groupId>org.apache.mxnet</groupId>
+ <artifactId>mxnet-full_2.11-linux-x86_64-gpu</artifactId>
+</dependency>
+```
+<br>
+</div> <!-- End of gpu -->
+
+<div class="cpu">
+
+```html
+<dependency>
+ <groupId>org.apache.mxnet</groupId>
+ <artifactId>mxnet-full_2.11-linux-x86_64-cpu</artifactId>
+</dependency>
+```
+<br>
+</div> <!-- End of cpu -->
+</div> <!-- End of scala -->
+
+
+<div class="julia perl">
<div class="cpu gpu">
Follow the installation instructions [in this guide](./ubuntu_setup.md) to set
up MXNet.
</div> <!-- End of cpu gpu -->
-</div> <!-- End of scala julia perl -->
+</div> <!-- End of julia perl -->
+
+
<div class="cpp">
<div class="cpu gpu">
<p> To build the C++ package, please refer to <a
href="build_from_source.html#build-the-c-package">this guide</a>. </p>
@@ -1500,14 +1527,34 @@ Will be available soon.
</div> <!-- END of GPU -->
</div> <!-- END of R -->
+<div class="scala">
+<div class="cpu">
+
+```html
+<dependency>
+ <groupId>org.apache.mxnet</groupId>
+ <artifactId>mxnet-full_2.11-osx-x86_64-cpu</artifactId>
+</dependency>
+```
+<br>
+</div> <!-- End of cpu -->
+<div class="gpu">
+
+Not available at this time. <br>
-<div class="scala julia perl">
+</div>
+</div> <!-- End of scala -->
+
+
+<div class="julia perl">
<div class="cpu gpu">
Follow the installation instructions [in this guide](./osx_setup.md) to set up
MXNet.
</div> <!-- End of cpu gpu -->
-</div> <!-- End of scala julia perl -->
+</div> <!-- End of julia perl -->
+
+
<div class="cpp">
<p>To build the C++ package, please refer to <a
href="build_from_source.html#build-the-c-package">this guide</a>.</p>
<br/>
@@ -1854,14 +1901,22 @@ Alternatively, You can also follow the installation
instructions [in this guide]
</div> <!-- END of GPU -->
</div> <!-- END - Windows R -->
+<div class="scala">
+<div class="cpu gpu">
+
+MXNet-Scala for Windows is not yet available.
+<br>
+</div> <!-- End of cpu gpu -->
+</div> <!-- End of scala -->
-<div class="scala julia perl">
+<div class="julia perl">
<div class="cpu gpu">
Follow the installation instructions [in this guide](./windows_setup.md) to
set up MXNet.
</div> <!-- End of cpu gpu -->
-</div> <!-- End of scala julia perl -->
+</div> <!-- End of julia perl -->
+
<div class="cpp">
<div class="cpu gpu">
<p> To build the C++ package, please refer to <a
href="build_from_source.html#build-the-c-package">this guide</a>. </p>
@@ -2429,8 +2484,15 @@ b
</div>
+
<div class="linux">
- <div class="scala julia perl cpp">
+ <div class="scala">
+ <div class="cpu gpu">
+ Refer to the <a href="scala_setup.html">MXNet-Scala setup guide</a>.
+ </div>
+ </div>
+
+ <div class="julia perl cpp">
<div class="cpu gpu">
Will be available soon.
@@ -2440,7 +2502,12 @@ Will be available soon.
</div>
<div class="macos">
- <div class="scala julia perl cpp">
+ <div class="scala">
+ <div class="cpu gpu">
+ Refer to the <a href="scala_setup.html">MXNet-Scala setup guide</a>.
+ </div>
+ </div>
+ <div class="julia perl cpp">
<div class="cpu gpu">
Will be available soon.
diff --git a/docs/install/osx_setup.md b/docs/install/osx_setup.md
index 18c84d3..66e098d 100644
--- a/docs/install/osx_setup.md
+++ b/docs/install/osx_setup.md
@@ -166,26 +166,15 @@ You might want to add this command to your
```~/.bashrc``` file. If you do, you
For more details about installing and using MXNet with Julia, see the [MXNet
Julia documentation](http://dmlc.ml/MXNet.jl/latest/user-guide/install/).
+
## Install the MXNet Package for Scala
-If you haven't installed maven yet, you need to install it now (required by
the makefile):
-```bash
- brew install maven
-```
+To use the MXNet-Scala package, you can acquire the Maven package as a
dependency.
-Before you build MXNet for Scala from source code, you must complete [building
the shared library](#build-the-shared-library). After you build the shared
library, run the following command from the MXNet source root directory to
build the MXNet Scala package:
+Further information is in the [MXNet-Scala Setup
Instructions](./scala_setup.md).
-```bash
- make scalapkg
-```
+If you use IntelliJ or a similar IDE, you may want to follow the [MXNet-Scala
on IntelliJ tutorial](../tutorials/scala/mxnet_scala_on_intellij.md) instead.
-This command creates the JAR files for the assembly, core, and example
modules. It also creates the native library in the
```native/{your-architecture}/target directory```, which you can use to
cooperate with the core module.
-
-To install the MXNet Scala package into your local Maven repository, run the
following command from the MXNet source root directory:
-
-```bash
- make scalainstall
-```
## Install the MXNet Package for Perl
Before you build MXNet for Perl from source code, you must complete [building
the shared library](#build-the-shared-library).
diff --git a/docs/install/scala_setup.md b/docs/install/scala_setup.md
new file mode 100644
index 0000000..3e646f2
--- /dev/null
+++ b/docs/install/scala_setup.md
@@ -0,0 +1,109 @@
+# Setup the MXNet Package for Scala
+
+The following instructions are provided for macOS and Ubuntu. Windows is not
yet available.
+
+**Note:** If you use IntelliJ or a similar IDE, you may want to follow the
[MXNet-Scala on IntelliJ
tutorial](../tutorials/scala/mxnet_scala_on_intellij.html) instead of these
instructions.
+
+<hr>
+
+## Maven
+
+### Setup Instructions
+
+**Step 1.** Install dependencies:
+
+**macOS Steps**
+
+```bash
+brew update
+brew tap caskroom/versions
+brew cask install java8
+brew install opencv
+brew install maven
+```
+
+**Ubuntu Steps**
+
+These scripts will install Maven and its dependencies.
+
+```bash
+wget
https://raw.githubusercontent.com/apache/incubator-mxnet/master/ci/docker/install/ubuntu_core.sh
+wget
https://raw.githubusercontent.com/apache/incubator-mxnet/master/ci/docker/install/ubuntu_scala.sh
+sudo ./ubuntu_core.sh
+sudo ./ubuntu_scala.sh
+```
+
+**Step 2.** Run the demo MXNet-Scala project.
+
+Go to the [MXNet-Scala demo project's
README](https://github.com/apache/incubator-mxnet/tree/master/scala-package/mxnet-demo)
and follow the directions to test the MXNet-Scala package installation.
+
+#### Maven Repository
+
+Package information can be found in the Maven Repository:
+https://mvnrepository.com/artifact/org.apache.mxnet
+
+**Linux CPU**
+```html
+<!--
https://mvnrepository.com/artifact/org.apache.mxnet/mxnet-full_2.11-linux-x86_64-cpu
-->
+<dependency>
+ <groupId>org.apache.mxnet</groupId>
+ <artifactId>mxnet-full_2.11-linux-x86_64-cpu</artifactId>
+</dependency>
+```
+
+**Linux GPU**
+```html
+<!--
https://mvnrepository.com/artifact/org.apache.mxnet/mxnet-full_2.11-osx-x86_64-cpu
-->
+<dependency>
+ <groupId>org.apache.mxnet</groupId>
+ <artifactId>mxnet-full_2.11-osx-x86_64-cpu</artifactId>
+</dependency>
+```
+
+**macOS CPU**
+```html
+<!--
https://mvnrepository.com/artifact/org.apache.mxnet/mxnet-full_2.11-linux-x86_64-gpu
-->
+<dependency>
+ <groupId>org.apache.mxnet</groupId>
+ <artifactId>mxnet-full_2.11-linux-x86_64-gpu</artifactId>
+</dependency>
+```
+
+**NOTE:** You may specify the version you wish to use by adding the version
number to the `dependency` block. For example, to use v1.2.0 you would add
`<version>1.2.0</version>`. Otherwise Maven will use the latest version
available.
+
+<hr>
+
+## Source
+
+The previously mentioned setup with Maven is recommended. Otherwise, the
following instructions for macOS, Ubuntu, and Windows are provided for
reference only:
+
+| OS | Step 1 | Step 2 |
+|---|---|---|
+|macOS | [Shared Library for
macOS](http://mxnet.incubator.apache.org/install/osx_setup.html#build-the-shared-library)
| [Scala Package for
macOS](http://mxnet.incubator.apache.org/install/osx_setup.html#install-the-mxnet-package-for-scala)
|
+| Ubuntu | [Shared Library for
Ubuntu](http://mxnet.incubator.apache.org/install/ubuntu_setup.html#installing-mxnet-on-ubuntu)
| [Scala Package for
Ubuntu](http://mxnet.incubator.apache.org/install/ubuntu_setup.html#install-the-mxnet-package-for-scala)
|
+| Windows | [Shared Library for
Windows](http://mxnet.incubator.apache.org/install/windows_setup.html#build-the-shared-library)
| <a class="github-button"
href="https://github.com/apache/incubator-mxnet/issues/10549"; data-size="large"
data-show-count="true" aria-label="Issue apache/incubator-mxnet on GitHub">Call
for Contribution</a> |
+
+
+#### Build Scala from an Existing MXNet Installation
+If you have already built MXNet **from source** and are looking to setup Scala
from that point, you may simply run the following from the MXNet source root:
+
+```
+make scalapkg
+make scalainstall
+```
+
+<hr>
+
+## Documentation
+
+Scaladocs are generated as part of the docs build pipeline. You can find them
published in the [Scala
API](http://mxnet.incubator.apache.org/api/scala/index.html) section of the
website or by going to the [scaladocs
output](https://mxnet.incubator.apache.org/api/scala/docs/index.html#org.apache.mxnet.package)
directly.
+
+To build the docs yourself, follow the [developer build docs
instructions](https://github.com/apache/incubator-mxnet/tree/master/docs/build_version_doc#developer-instructions).
+
+<hr>
+
+## Resources
+
+* [Scala API](http://mxnet.incubator.apache.org/api/scala/index.html)
+*
[scaladocs](https://mxnet.incubator.apache.org/api/scala/docs/index.html#org.apache.mxnet.package)
+* [MXNet-Scala Tutorials](../tutorials/scala)
diff --git a/docs/install/ubuntu_setup.md b/docs/install/ubuntu_setup.md
index c2b5f9d..10a2314 100644
--- a/docs/install/ubuntu_setup.md
+++ b/docs/install/ubuntu_setup.md
@@ -265,6 +265,15 @@ For more details about installing and using MXNet with
Julia, see the [MXNet Jul
<hr>
+## Install the MXNet Package for Scala
+
+To use the MXNet-Scala package, you can acquire the Maven package as a
dependency.
+
+Further information is in the [MXNet-Scala Setup
Instructions](./scala_setup.md).
+
+If you use IntelliJ or a similar IDE, you may want to follow the [MXNet-Scala
on IntelliJ tutorial](../tutorials/scala/mxnet_scala_on_intellij.md) instead.
+
+
### Install the MXNet Package for Perl
Before you build MXNet for Perl from source code, you must complete [building
the shared library](#build-the-shared-library). After you build the shared
library, run the following command from the MXNet source root directory to
build the MXNet Perl package:
diff --git a/docs/install/windows_setup.md b/docs/install/windows_setup.md
index 07027ad..7d7c629 100755
--- a/docs/install/windows_setup.md
+++ b/docs/install/windows_setup.md
@@ -39,7 +39,7 @@ After you have installed all of the required dependencies,
build the MXNet sourc
git clone https://github.com/apache/incubator-mxnet.git --recursive
```
2. Start a Visual Studio command prompt.
-3. Use [CMake](https://cmake.org/) to create a Visual Studio solution in
```./build``` or some other directory. Make sure to specify the architecture in
the
+3. Use [CMake](https://cmake.org/) to create a Visual Studio solution in
```./build``` or some other directory. Make sure to specify the architecture in
the
[CMake](https://cmake.org/) command:
```
mkdir build
@@ -64,7 +64,7 @@ We have installed MXNet core library. Next, we will install
MXNet interface pack
- [Python](#install-the-mxnet-package-for-python)
- [R](#install-mxnet-for-r)
- [Julia](#install-the-mxnet-package-for-julia)
-- [Scala](#install-the-mxnet-package-for-scala)
+- **Scala** is not yet available for Windows
## Install MXNet for Python
@@ -241,57 +241,8 @@ You might want to add this command to your ```~/.bashrc```
file. If you do, you
For more details about installing and using MXNet with Julia, see the [MXNet
Julia documentation](http://dmlc.ml/MXNet.jl/latest/user-guide/install/).
## Installing the MXNet Package for Scala
-There are four ways to install the MXNet package for Scala:
-* Use the prebuilt binary package
-
-* Build the library from source code
-
-### Use the Prebuilt Binary Package
-For Linux and OS X (Mac) users, MXNet provides prebuilt binary packages that
support computers with either GPU or CPU processors. To download and build
these packages using ```Maven```, change the ```artifactId``` in the following
Maven dependency to match your architecture:
-
-```HTML
-<dependency>
- <groupId>ml.dmlc.mxnet</groupId>
- <artifactId>mxnet-full_<system architecture></artifactId>
- <version>0.1.1</version>
-</dependency>
-```
-
-For example, to download and build the 64-bit CPU-only version for Linux, use:
-
-```HTML
-<dependency>
- <groupId>ml.dmlc.mxnet</groupId>
- <artifactId>mxnet-full_2.10-linux-x86_64-cpu</artifactId>
- <version>0.1.1</version>
-</dependency>
-```
-
-If your native environment differs slightly from the assembly package, for
example, if you use the openblas package instead of the atlas package, it's
better to use the mxnet-core package and put the compiled Java native library
in your load path:
-
-```HTML
-<dependency>
- <groupId>ml.dmlc.mxnet</groupId>
- <artifactId>mxnet-core_2.10</artifactId>
- <version>0.1.1</version>
-</dependency>
-```
-
-### Build the Library from Source Code
-Before you build MXNet for Scala from source code, you must complete [Step 1.
Build the Shared Library](#build-the-shared-library). After you build the
shared library, run the following command from the MXNet source root directory
to build the MXNet Scala package:
-
-```bash
- make scalapkg
-```
-
-This command creates the JAR files for the assembly, core, and example
modules. It also creates the native library in the
```native/{your-architecture}/target directory```, which you can use to
cooperate with the core module.
-
-To install the MXNet Scala package into your local Maven repository, run the
following command from the MXNet source root directory:
-
-```bash
- make scalainstall
-```
+Scala-MXNet is not yet available for Windows.
## Next Steps
diff --git a/docs/mxdoc.py b/docs/mxdoc.py
index 9be7160..df99d82 100644
--- a/docs/mxdoc.py
+++ b/docs/mxdoc.py
@@ -82,6 +82,7 @@ def build_scala_docs(app):
"""build scala doc and then move the outdir"""
scala_path = app.builder.srcdir + '/../scala-package'
# scaldoc fails on some apis, so exit 0 to pass the check
+ _run_cmd('cd ..; make scalapkg')
_run_cmd('cd ' + scala_path + '; scaladoc `find . -type f -name "*.scala"
| egrep \"\/core|\/infer\" | egrep -v \"Suite\"`; exit 0')
dest_path = app.builder.outdir + '/api/scala/docs'
_run_cmd('rm -rf ' + dest_path)
diff --git a/docs/tutorials/index.md b/docs/tutorials/index.md
index 546eee6..bb5f854 100644
--- a/docs/tutorials/index.md
+++ b/docs/tutorials/index.md
@@ -120,13 +120,13 @@ Select API:
<hr>
## Scala Tutorials
-
+* [MXNet-Scala Tutorials Overview](/tutorials/scala/)
* Getting Started
* [MXNet and JetBrain's
IntelliJ](/tutorials/scala/mxnet_scala_on_intellij.html)
* Models
* [MNIST Handwritten Digit Recognition with Fully Connected
Network](/tutorials/scala/mnist.html)
* [Barack Obama speech generation with Character-level
LSTM](/tutorials/scala/char_lstm.html)
-
+* [MXNet-Scala
Examples](https://github.com/apache/incubator-mxnet/tree/master/scala-package/examples/src/main/scala/org/apache/mxnetexamples)
<hr>
## C++ Tutorials
@@ -150,9 +150,9 @@ Select API:
* [Callbacks](/tutorials/r/CallbackFunction.html)
* [Custom Data Iterators](/tutorials/r/CustomIterator.html)
* [Custom Loss Functions](/tutorials/r/CustomLossFunction.html)
-
+
<hr>
-
+
## Contributing Tutorials
We really appreciate contributions, and tutorials are a great way to share
your knowledge and help the community. After you have followed [these
steps](https://github.com/apache/incubator-mxnet/tree/master/example#contributing),
please submit a pull request on Github.
diff --git a/docs/tutorials/scala/README.md b/docs/tutorials/scala/index.md
similarity index 51%
rename from docs/tutorials/scala/README.md
rename to docs/tutorials/scala/index.md
index 0081f9c..cd9b2e2 100644
--- a/docs/tutorials/scala/README.md
+++ b/docs/tutorials/scala/index.md
@@ -1,6 +1,16 @@
# MXNet-Scala Tutorials
-* [Setup Scala with MXNet and Create a MXNet-Scala Project with
IntelliJ](mxnet_scala_on_intellij.md)
+## Installation & Setup
+
+Using MXNet-Scala is easiest with Maven. You have a couple of options for
setting up that depend on your environment.
+
+**Note:** Windows is not yet supported.
+
+* [MXNet-Scala Setup Guide Using Maven](../install/scala_setup.html)
+* [Setup Scala with MXNet and Create a MXNet-Scala Project with
IntelliJ](mxnet_scala_on_intellij.html)
+
+## Tutorials
+
* [MNIST with MXNet-Scala](mnist.md)
* [Character-level Language Model with MXNet-Scala](char_lstm.md)
diff --git a/docs/tutorials/scala/mxnet_scala_on_intellij.md
b/docs/tutorials/scala/mxnet_scala_on_intellij.md
index 2520b90..205f644 100644
--- a/docs/tutorials/scala/mxnet_scala_on_intellij.md
+++ b/docs/tutorials/scala/mxnet_scala_on_intellij.md
@@ -1,25 +1,30 @@
-# Run MXNet Scala Examples Using the IntelliJ IDE
+# Run MXNet Scala Examples Using the IntelliJ IDE (macOS)
-This tutorial guides you through setting up a Scala project in the IntelliJ
IDE and shows how to use an MXNet package from your application.
+This tutorial guides you through setting up a Scala project in the IntelliJ
IDE on macOS, and shows how to use the MXNet package from your application.
## Prerequisites:
-To use this tutorial you need the following items, however after this list,
installation info for macOS is provided for your benefit:
+To use this tutorial you need the following software:
- [Java 8
JDK](http://www.oracle.com/technetwork/java/javase/downloads/index.html)
- [Maven](https://maven.apache.org/install.html)
- [Scala](https://www.scala-lang.org/download/) - comes with IntelliJ, so you
don't need to install it separately
-- [MXNet Shared Library and Scala
Package](#build-the-mxnet-shared-library-and-scala-package)
+- [OpenCV](https://opencv.org/)
- [IntelliJ IDE](https://www.jetbrains.com/idea/)
-## Mac Prerequisites Setup
+The following instructions are provided for macOS and Ubuntu 16.04. Windows
support is not yet available.
-For other operating systems, visit each Prerequisite's website and follow
their installations instructions. For macOS, you're in luck:
+### Mac Prerequisites Setup
**Step 1.** Install brew:
```
/usr/bin/ruby -e "$(curl -fsSL
https://raw.githubusercontent.com/Homebrew/install/master/install)"
```
+Or, if you already have brew, update it:
+```
+brew update
+```
+
**Step 2.** Install Java 8 JDK:
```
brew tap caskroom/versions
@@ -28,28 +33,48 @@ brew cask install java8
**Step 3.** Install maven:
```
-brew update
brew install maven
```
-## Build the MXNet Shared Library and Scala Package
+**Step 4.** Install OpenCV:
+```
+brew install opencv@2
+```
-This depends on your operating system. Instructions for macOS, Ubuntu, and
Windows are provided:
+### Ubuntu Prerequisites Setup
-| OS | Step 1 | Step 2 |
-|---|---|---|
-|macOS | [Shared Library for
macOS](http://mxnet.incubator.apache.org/install/osx_setup.html#build-the-shared-library)
| [Scala Package for
macOS](http://mxnet.incubator.apache.org/install/osx_setup.html#install-the-mxnet-package-for-scala)
|
-| Ubuntu | [Shared Library for
Ubuntu](http://mxnet.incubator.apache.org/install/ubuntu_setup.html#installing-mxnet-on-ubuntu)
| [Scala Package for
Ubuntu](http://mxnet.incubator.apache.org/install/ubuntu_setup.html#install-the-mxnet-package-for-scala)
|
-| Windows | [Shared Library for
Windows](http://mxnet.incubator.apache.org/install/windows_setup.html#build-the-shared-library)
| [Scala Package for
Windows](http://mxnet.incubator.apache.org/install/windows_setup.html#installing-the-mxnet-package-for-scala)
|
+**Step 1.**: Download the MXNet source.
+```bash
+git clone --recursive https://github.com/apache/incubator-mxnet.git mxnet
+cd mxnet
+```
-## Build Scala from an Existing MXNet Installation
-If you have already built MXNet **from source** and are looking to setup Scala
from that point, you may simply run the following from the MXNet source root:
+**Step 2.**: Run the dependency installation scripts.
+```bash
+sudo ./ci/docker/install/ubuntu_core.sh
+sudo ./ci/docker/install/ubuntu_scala.sh
```
-make scalapkg
-make scalainstall
+
+
+## Access the Maven Package for MXNet
+
+To view the latest Maven packages, you can check the Maven repository for the
`org.apache.mxnet` packages.
+
+* [MXNet Maven
Packages](https://search.maven.org/#search%7Cga%7C1%7Cg%3A%22org.apache.mxnet%22)
+
+In the tutorial below, you will install the latest package at the time of this
writing. You may find a different artifact for your specific operating system,
or a newer one by reviewing what is currently available in the Maven repo.
+
+The configuration you should update is in the pom file's dependency for MXNet:
+
+```
+<dependency>
+ <groupId>org.apache.mxnet</groupId>
+ <artifactId>mxnet-full_2.11-osx-x86_64-cpu</artifactId>
+ <version>1.2.0</version>
+</dependency>
```
## Set Up Your Project
@@ -107,7 +132,7 @@ Set the project's metadata. For this tutorial, use the
following:
**GroupId**
```
-your-name
+mxnet
```
**ArtifactId**
```
@@ -131,124 +156,147 @@ Set the project's location. The rest of the settings
can be left as their defaul
After clicking Finish, you will be presented with the project's first view.
The project's `pom.xml` will be open for editing.
-**Step 3.** Setup project properties:
- - Specify project properties in `pom.xml` by pasting the following content
in the `properties` tag. You will be overwriting the `scala.version` tag in the
process, upgrading from `2.11.5` to `2.11.8`.
+**Step 3.** Replace the pom file's content with the following code. Changes
include:
+ - Project properties: `scala.version`, upgrading from `2.11.5` to `2.11.8`
+ - Project dependencies: adding the MXNet package from Maven and updating the
dependency for JUnitRunner (specs2-junit_)
+ - Build options: removing '-make:transitive'
-```xml
-<properties>
- <scala.version>2.11.8</scala.version>
- <scala.binary.version>2.11</scala.binary.version>
-</properties>
-```
-
-**Step 4.** Setup project profiles and platforms:
-
- - Specify project profiles and platforms in `pom.xml` by pasting the
following content below the closing `properties` tag:
```
-<profiles>
+<project xmlns="http://maven.apache.org/POM/4.0.0";
xmlns:xsi="http://www.w3.org/2001/XMLSchema-instance";
xsi:schemaLocation="http://maven.apache.org/POM/4.0.0
http://maven.apache.org/maven-v4_0_0.xsd";>
+ <modelVersion>4.0.0</modelVersion>
+ <groupId>mxnet</groupId>
+ <artifactId>scalaMXNet</artifactId>
+ <version>1.0-SNAPSHOT</version>
+ <name>${project.artifactId}</name>
+ <description>My wonderful scala app</description>
+ <inceptionYear>2018</inceptionYear>
+ <licenses>
+ <license>
+ <name>Apache2</name>
+ <url>http://mxnet.apache.org</url>
+ <distribution>repo</distribution>
+ </license>
+ </licenses>
+ <profiles>
<profile>
- <id>osx-x86_64-cpu</id>
- <properties>
- <platform>osx-x86_64-cpu</platform>
- </properties>
+ <id>osx-x86_64-cpu</id>
+ <properties>
+ <platform>osx-x86_64-cpu</platform>
+ </properties>
</profile>
<profile>
- <id>linux-x86_64-cpu</id>
- <properties>
- <platform>linux-x86_64-cpu</platform>
- </properties>
+ <id>linux-x86_64-cpu</id>
+ <properties>
+ <platform>linux-x86_64-cpu</platform>
+ </properties>
</profile>
<profile>
- <id>linux-x86_64-gpu</id>
- <properties>
- <platform>linux-x86_64-gpu</platform>
- </properties>
+ <id>linux-x86_64-gpu</id>
+ <properties>
+ <platform>linux-x86_64-gpu</platform>
+ </properties>
</profile>
-</profiles>
-```
-
-**Step 5.** Setup project dependencies:
-
- - Specify project dependencies in `pom.xml` adding the dependencies listed
below. Place them inside the `dependencies` tag:
-
-```
-<dependencies>
- <!-- Begin deps for MXNet -->
- <dependency>
- <groupId>ml.dmlc.mxnet</groupId>
- <artifactId>mxnet-full_${scala.binary.version}-${platform}</artifactId>
- <version>1.2.0</version>
- <scope>system</scope>
-
<systemPath>/Development/incubator-mxnet/scala-package/assembly/osx-x86_64-cpu/target/mxnet-full_2.11-osx-x86_64-cpu-1.2.0-SNAPSHOT.jar</systemPath>
- </dependency>
- <dependency>
- <groupId>args4j</groupId>
- <artifactId>args4j</artifactId>
- <version>2.0.29</version>
- </dependency>
- <dependency>
- <groupId>org.slf4j</groupId>
- <artifactId>slf4j-api</artifactId>
- <version>${slf4jVersion}</version>
- </dependency>
- <dependency>
- <groupId>org.slf4j</groupId>
- <artifactId>slf4j-log4j12</artifactId>
- <version>${slf4jVersion}</version>
- </dependency>
- <!-- End deps for MXNet -->
- <dependency>
- <groupId>org.scala-lang</groupId>
- <artifactId>scala-library</artifactId>
- <version>${scala.version}</version>
- </dependency>
- <!-- Test -->
- <dependency>
- <groupId>junit</groupId>
- <artifactId>junit</artifactId>
- <version>4.11</version>
- <scope>test</scope>
- </dependency>
- <dependency>
- <groupId>org.specs2</groupId>
- <artifactId>specs2-core_${scala.compat.version}</artifactId>
- <version>2.4.16</version>
- <scope>test</scope>
- </dependency>
- <dependency>
- <groupId>org.specs2</groupId>
- <artifactId>specs2-junit_${scala.compat.version}</artifactId>
- <version>2.4.16</version>
- <scope>test</scope>
- </dependency>
- <dependency>
- <groupId>org.scalatest</groupId>
- <artifactId>scalatest_${scala.compat.version}</artifactId>
- <version>2.2.4</version>
- <scope>test</scope>
- </dependency>
-</dependencies>
-```
-
-
-
-Note the `systemPath` tag and update it to match the file path to the jar file
that was created when you built the MXNet-Scala package. It can be found in the
`mxnet-incubator/scala-package/assembly/{platform}/target` directory, and is
named with the pattern
`mxnet-full_${scala.binary.version}-${platform}-{version-SNAPSHOT}.jar`.
-
-**Step 6.** Import dependencies with Maven:
-
- - Note the prompt in the lower right corner that states "Maven projects need
to be imported".
-
-
+ </profiles>
+ <properties>
+ <maven.compiler.source>1.6</maven.compiler.source>
+ <maven.compiler.target>1.6</maven.compiler.target>
+ <encoding>UTF-8</encoding>
+ <scala.version>2.11.8</scala.version>
+ <scala.compat.version>2.11</scala.compat.version>
+ </properties>
+
+ <dependencies>
+ <dependency>
+ <groupId>org.apache.mxnet</groupId>
+ <artifactId>mxnet-full_2.11-osx-x86_64-cpu</artifactId>
+ <version>1.2.0</version>
+ </dependency>
+ <dependency>
+ <groupId>org.scala-lang</groupId>
+ <artifactId>scala-library</artifactId>
+ <version>${scala.version}</version>
+ </dependency>
+
+ <!-- Test -->
+ <dependency>
+ <groupId>junit</groupId>
+ <artifactId>junit</artifactId>
+ <version>4.11</version>
+ <scope>test</scope>
+ </dependency>
+ <dependency>
+ <groupId>org.specs2</groupId>
+ <artifactId>specs2-junit_${scala.compat.version}</artifactId>
+ <version>2.4.16</version>
+ <scope>test</scope>
+ </dependency>
+ <dependency>
+ <groupId>org.scalatest</groupId>
+ <artifactId>scalatest_${scala.compat.version}</artifactId>
+ <version>2.2.4</version>
+ <scope>test</scope>
+ </dependency>
+ </dependencies>
+
+ <build>
+ <sourceDirectory>src/main/scala</sourceDirectory>
+ <testSourceDirectory>src/test/scala</testSourceDirectory>
+ <plugins>
+ <plugin>
+ <!-- see http://davidb.github.com/scala-maven-plugin -->
+ <groupId>net.alchim31.maven</groupId>
+ <artifactId>scala-maven-plugin</artifactId>
+ <version>3.2.0</version>
+ <executions>
+ <execution>
+ <goals>
+ <goal>compile</goal>
+ <goal>testCompile</goal>
+ </goals>
+ <configuration>
+ <args>
+ <!--arg>-make:transitive</arg-->
+ <arg>-dependencyfile</arg>
+ <arg>${project.build.directory}/.scala_dependencies</arg>
+ </args>
+ </configuration>
+ </execution>
+ </executions>
+ </plugin>
+ <plugin>
+ <groupId>org.apache.maven.plugins</groupId>
+ <artifactId>maven-surefire-plugin</artifactId>
+ <version>2.18.1</version>
+ <configuration>
+ <useFile>false</useFile>
+ <disableXmlReport>true</disableXmlReport>
+ <!-- If you have classpath issue like NoDefClassError,... -->
+ <!-- useManifestOnlyJar>false</useManifestOnlyJar -->
+ <includes>
+ <include>**/*Test.*</include>
+ <include>**/*Suite.*</include>
+ </includes>
+ </configuration>
+ </plugin>
+ </plugins>
+ </build>
+</project>
+```
+
+**Step 4.** Import dependencies with Maven:
+
+ - Note the prompt in the lower right corner that states "Maven projects need
to be imported". If this is not visible, click on the little greed balloon that
appears in the lower right corner.
+
+
Click "Import Changes" in this prompt.
-**Step 7.** Build the project:
+**Step 5.** Build the project:
- To build the project, from the menu choose Build, and then choose Build
Project.
-**Note**: During the build you may experience `[ERROR] scalac error: bad
option: '-make:transitive'`. You can fix this by deleting or commenting this
out in your `pom.xml`. This line in question is the `arg` tag, and it should
contain: `-make:transitive`.
-**Step 8.** Run the Hello World App:
+**Step 6.** Run the Hello World App:
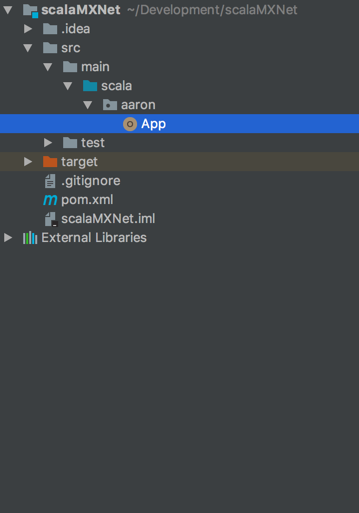
@@ -258,7 +306,7 @@ Navigate to the App included with the project.
Run the App by clicking the green arrow, and verify the Hello World output
-**Step 9.** Run Sample MXNet Code in the App:
+**Step 7.** Run Sample MXNet Code in the App:

@@ -266,9 +314,7 @@ Paste the following code in the App, overwriting the
original hello world code.
```scala
object App extends App {
- import ml.dmlc.mxnet._
- import org.apache.log4j.BasicConfigurator
- BasicConfigurator.configure()
+ import org.apache.mxnet._
private val a = NDArray.ones(2, 3)
println("Testing MXNet by generating an 2x3 NDArray...")
@@ -277,16 +323,49 @@ object App extends App {
}
```
-
+The result should be this output:
+
+```
+Testing MXNet by generating an 2x3 NDArray...
+Shape is:
+(2,3)
+
+Process finished with exit code 0
+```
+
+
+### Troubleshooting
+
+If you get an error, check the dependencies at the beginning of this tutorial.
For example, you might see the following in the middle of the error messages.
+
+```
+...
+Library not loaded: /usr/local/opt/opencv@2/lib/libopencv_calib3d.2.4.dylib
+...
+```
+
+This can be resolved be installing OpenCV2.
+
-Your result should be similar to this output.
+
+### Troubleshooting
+
+If you get an error, check if it is like this one regarding OpenCV. For
example, you might see the following in the middle of the error messages.
+
+```
+...
+Library not loaded: /usr/local/opt/opencv@2/lib/libopencv_calib3d.2.4.dylib
+...
+```
+
+This can be resolved be installing OpenCV2.
### Command Line Build Option
- You can also compile the project by using the following command at the
command line. Change directories to this project's folder then run the
following:
```bash
- mvn clean package -e -P osx-x86_64-cpu
+mvn clean package -e -P osx-x86_64-cpu
```
The `-P <platform>` parameter tells the build which platform to target.
The `-e` will give you more details if the build fails. If it succeeds, you
should see a lot of info and some warning messages, followed by:
@@ -302,9 +381,12 @@ The `-e` will give you more details if the build fails. If
it succeeds, you shou
```
The build generates a new jar file in the `target` folder called
`scalaInference-1.0-SNAPSHOT.jar`.
+
+
## Next Steps
For more information about MXNet Scala resources, see the following:
* [Scala API](http://mxnet.io/api/scala/)
-* [More Scala
Examples](https://github.com/apache/incubator-mxnet/tree/master/scala-package/examples/)
-* [MXNet tutorials index](http://mxnet.io/tutorials/index.html)
+* [Scala Inference
API](https://mxnet.incubator.apache.org/api/scala/infer.html)
+* [Scala
Examples](https://github.com/apache/incubator-mxnet/tree/master/scala-package/examples/)
+* [MXNet Tutorials Index](http://mxnet.io/tutorials/index.html)
diff --git
a/scala-package/examples/src/main/scala/org/apache/mxnetexamples/infer/imageclassifier/README.md
b/scala-package/examples/src/main/scala/org/apache/mxnetexamples/infer/imageclassifier/README.md
index 49eb9e3..541e0ce 100644
---
a/scala-package/examples/src/main/scala/org/apache/mxnetexamples/infer/imageclassifier/README.md
+++
b/scala-package/examples/src/main/scala/org/apache/mxnetexamples/infer/imageclassifier/README.md
@@ -27,7 +27,7 @@ The following example shows recognized object classes with
corresponding probabi
For this tutorial, you can get the model and sample input image by running
following bash file. This script will use `wget` to download these artifacts
from AWS S3.
-From the `scala-package/examples/scripts/inferexample/imageclassifier/` folder
run:
+From the `scala-package/examples/scripts/infer/imageclassifier/` folder run:
```bash
./get_resnet_data.sh
diff --git
a/scala-package/examples/src/main/scala/org/apache/mxnetexamples/infer/objectdetector/README.md
b/scala-package/examples/src/main/scala/org/apache/mxnetexamples/infer/objectdetector/README.md
index d18655d..69328a4 100644
---
a/scala-package/examples/src/main/scala/org/apache/mxnetexamples/infer/objectdetector/README.md
+++
b/scala-package/examples/src/main/scala/org/apache/mxnetexamples/infer/objectdetector/README.md
@@ -28,7 +28,7 @@ The model is trained on the [Pascal VOC 2012
dataset](http://host.robots.ox.ac.u
### Download Artifacts
#### Step 1
You can download the files using the script `get_ssd_data.sh`. It will
download and place the model files in a `model` folder and the test image files
in a `image` folder in the current directory.
-From the `scala-package/examples/scripts/inferexample/imageclassifier/` folder
run:
+From the `scala-package/examples/scripts/infer/imageclassifier/` folder run:
```bash
./get_resnet_data.sh
diff --git a/tests/tutorials/test_sanity_tutorials.py
b/tests/tutorials/test_sanity_tutorials.py
index eec6f4e..f87e98e 100644
--- a/tests/tutorials/test_sanity_tutorials.py
+++ b/tests/tutorials/test_sanity_tutorials.py
@@ -38,7 +38,7 @@ whitelist = ['c++/basics.md',
'r/symbol.md',
'scala/char_lstm.md',
'scala/mnist.md',
- 'scala/README.md',
+ 'scala/index.md',
'scala/mxnet_scala_on_intellij.md']
whitelist_set = set(whitelist)
@@ -79,5 +79,3 @@ def test_tutorial_tested():
friendly_name = '/'.join(tutorial.split('/')[-2:]).split('.')[0]
if friendly_name not in tested_tutorials and friendly_name+".md" not
in whitelist_set:
assert False, "{} has not been added to the
tests/tutorials/test_tutorials.py test_suite".format(friendly_name)
-
-