This is an automated email from the ASF dual-hosted git repository.

gaojun2048 pushed a commit to branch main
in repository https://gitbox.apache.org/repos/asf/seatunnel-website.git
The following commit(s) were added to refs/heads/main by this push:
new c38020ede77 Update the seatunnel web deployment doc & correct rest-api
compile error (#285)
c38020ede77 is described below
commit c38020ede77938a23510318bfa4438ed79077816
Author: David Zollo <[email protected]>
AuthorDate: Wed Dec 27 19:54:09 2023 +0800
Update the seatunnel web deployment doc & correct rest-api compile error
(#285)
---
.../version-1.0.0/deploy.md | 121 +++++++++++----------
.../version-1.0.0/download_datasource.sh | 62 +++++++++++
.../version-2.3.3/seatunnel-engine/rest-api.md | 26 +++++
3 files changed, 153 insertions(+), 56 deletions(-)
diff --git a/seatunnel_web_versioned_docs/version-1.0.0/deploy.md
b/seatunnel_web_versioned_docs/version-1.0.0/deploy.md
index a6d07f9b48b..0ad47e407a6 100644
--- a/seatunnel_web_versioned_docs/version-1.0.0/deploy.md
+++ b/seatunnel_web_versioned_docs/version-1.0.0/deploy.md
@@ -1,80 +1,89 @@
-# Deploy
+# Deployment of Apache SeaTunnel Web
-### 1 Preparing the Apache SeaTunnel environment
+Apache SeaTunnel offers two methods for submitting tasks:
-Because SeaTunnel Web uses the SeaTunnel Java Client to submit jobs, running
SeaTunnel Web requires preparing a SeaTunnel Zeta Engine service first.
+1. **SeaTunnel Web:** This is a visual method to create and submit seatunnel
tasks.
+2. **Command Line:** SeaTunnel also provides a command line method for task
submission.
-Based on the usage requirements of SeaTunnel Zeta Engine, the SeaTunnel Client
node that submits the job must have the same operating system and installation
directory structure as the SeaTunnel Server node that runs the job. Therefore,
if you want to run SeaTunnel Web in IDEA, you must install and run a SeaTunnel
Zeta Engine Server on the same machine as the IDEA.
+## Deployment of Apache SeaTunnel Server
+Since SeaTunnel Web uses SeaTunnel Java client to submit tasks, a SeaTunnel
server is required to run these tasks. Therefore, the first step is to deploy a
SeaTunnel server. If you haven't yet started the SeaTunnel server, you can
refer to the following steps for deployment and service start-up.
-Don't worry, the next steps will tell you how to correctly install SeaTunnel
Zeta Engine Server in different situations.
+Download and deploy the SeaTunnel installation package to start the Zeta
service. Obtain the SeaTunnel server package (version 2.3.3 or higher, as
SeaTunnel Web supports only 2.3.3 and above versions of the SeaTunnel Zeta
engine) from
[https://seatunnel.apache.org/download](https://seatunnel.apache.org/download).
-### 2 Run SeaTunnel Web In Server
-To run SeaTunnel Web on the server, you need to first have a SeaTunnel Zeta
Engine Server environment. If you do not already have one, you can refer to the
following steps for deployment.
+- **Download Connector Plugins:** This process also involves automatic
download and installation of third-party dependencies, such as
`seatunnel-hadoop3-3.1.4-uber-2.3.3-optional.jar`. Follow the instructions on
[https://seatunnel.apache.org/docs/2.3.3/start-v2/locally/deployment](https://seatunnel.apache.org/docs/2.3.3/start-v2/locally/deployment)
to download the connector plugins.
+- **Repackaging:** After downloading the connector plugins, run `tar -zcvf
apache-seatunnel-2.3.3.tar.gz apache-seatunnel-2.3.3` to repackage, creating a
complete installation package `apache-seatunnel-2.3.3.tar.gz` for deploying the
SeaTunnel Zeta engine server.
+- **Cluster Deployment:** Copy `apache-seatunnel-2.3.3.tar.gz` to other server
nodes for SeaTunnel Zeta cluster deployment. For details on deployment and
starting the Zeta service, refer to
[https://seatunnel.apache.org/docs/seatunnel-engine/deployment](https://seatunnel.apache.org/docs/seatunnel-engine/deployment).
To start the Zeta service, use: `$SEATUNNEL_HOME/bin/seatunnel-cluster.sh -d`
-#### 2.1 Deploy SeaTunnel Zeta Engine Server In Server Node
-You have two ways to get the SeaTunnel installer package. Build from source
code or download from the SeaTunnel website.
+## 2. Download and Unzip SeaTunnel Web
-**The SeaTunnel version used here is only for writing this document to show
you the process used, and does not necessarily represent the correct version.
SeaTunnel Web and SeaTunnel Engine have strict version dependencies, and you
can confirm the specific version mapping through xxx**
+1. Download installation package `apache-seatunnel-web-1.0.0-bin.tar.gz` from
[SeaTunnel Download Page](https://seatunnel.apache.org/download) or directly
from
[https://www.apache.org/dyn/closer.lua/seatunnel/seatunnel-web/1.0.0/apache-seatunnel-web-1.0.0-bin.tar.gz](https://www.apache.org/dyn/closer.lua/seatunnel/seatunnel-web/1.0.0/apache-seatunnel-web-1.0.0-bin.tar.gz).
+2. unzip `tar -zxvf apache-seatunnel-web-1.0.0-bin.tar.gz` to get a directory
named `apache-seatunnel-web-1.0.0-bin`.
-**Support SeaTunnel Version**
+## 3. Deploy SeaTunnel Zeta Client on SeaTunnel Web
-- SeaTunnel 2.3.3 Only
-
-##### 2.1.1 Build from source code
-* Get the source package from https://seatunnel.apache.org/download or
https://github.com/apache/seatunnel.git
-* Build installer package use maven command `./mvnw -U -T 1C clean install
-DskipTests -D"maven.test.skip"=true -D"maven.javadoc.skip"=true
-D"checkstyle.skip"=true -D"license.skipAddThirdParty" `
-* Then you can get the installer package in
`${Your_code_dir}/seatunnel-dist/target`, For
example:`apache-seatunnel-2.3.3-SNAPSHOT-bin.tar.gz`
-
-##### 2.1.2 Download installer package
-The other way to get SeaTunnel Zeta Engine Server installer package is
download the installer package from https://seatunnel.apache.org/download and
install plugins online.
-
-* Download and install connector plugin(Some third-party dependency packages
will also be automatically downloaded and installed during this process, such
as hadoop jar). You can get the step from
https://seatunnel.apache.org/docs/2.3.3/start-v2/locally/deployment.
-* After completing the previous step, you will receive an installation package
that can be used to install SeaTunnel Zeta Engine Server on the server. Run
`tar -zcvf apache-seatunnel-2.3.3-SNAPSHOT-bin.tar.gz
apache-seatunnel-2.3.3-SNAPSHOT`
+If you're using SeaTunnel Web, you need to deploy a SeaTunnel Zeta client on
the SeaTunnel Web node. (This step can be skipped if you're running both
SeaTunnel Zeta service and SeaTunnel Web on the same node.)
+- Copy `apache-seatunnel-2.3.3.tar.gz` to the SeaTunnel Web node and unzip it
in the same path as the SeaTunnel Zeta server node.
+- **Set Environment Variables:** On the SeaTunnel Web node, set
`SEATUNNEL_HOME` as an environment variable, similar to the SeaTunnel Zeta
server node.
+ ```
+ export SEATUNNEL_HOME=${seatunnel install path}
+ export PATH=$PATH:$SEATUNNEL_HOME/bin
+ ```
+- Run `$SEATUNNEL_HOME/bin/seatunnel.sh --config
$SEATUNNEL_HOME/config/v2.batch.config.template`. Successful completion of this
job indicates that the Zeta client is deployed successfully.
-##### 2.1.3 Deploy SeaTunnel Zeta Server
-After 2.1.1 or 2.1.2 you can get an installer package
`apache-seatunnel-2.3.3-SNAPSHOT-bin.tar.gz`, Then you can copy it to you
server node and deploy reference
https://seatunnel.apache.org/docs/seatunnel-engine/deployment.
-##### 2.1.4 Deploy SeaTunnel Zeta Client In SeaTunnel Web Run Node
-If you use SeaTunnel Web, you need deploy a SeaTunnel Zeta Client in the
SeaTunnel Web run Node. **If you run SeaTunnel Zeta Server and SeaTunnel Web in
same node, you can skip this step**.
+## 4. Initialize Database for SeaTunnel Web Service
+1. Modify `apache-seatunnel-web-1.0.0-bin/script/seatunnel_server_env.sh` to
set the database address, port, username, and password. Example:
+ ```
+ export HOSTNAME="localhost"
+ export PORT="3306"
+ export USERNAME="root"
+ export PASSWORD="123456"
+ ```
+2. **Install MySQL Client:** On the current node, install `mysql-client` using
`sudo apt install mysql-client`.
+3. Execute `sh apache-seatunnel-web-1.0.0-bin/script/init_sql.sh`. A
successful run without errors indicates successful initialization.
(Alternatively, manually copy `/script/seatunnel_server_mysql.sql` to the
database and execute the script.)
-* Copy `apache-seatunnel-2.3.3-SNAPSHOT-bin.tar.gz` to the SeaTunnel Web node
and unzip it **in the same path of SeaTunnel Zeta Server node**.
-* Set `SEATUNNEL_HOME` to environment variable like SeaTunnel Zeta Server node.
-* Config `hazelcast-client.yaml` reference
https://seatunnel.apache.org/docs/seatunnel-engine/deployment#6-config-seatunnel-engine-client
-* Run `$SEATUNNEL_HOME/bin/seatunnel.sh --config
$SEATUNNEL_HOME/config/v2.batch.config.template`, If this job run finished, it
indicates successful client deployment.
-#### 2.2 Download and Install SeaTunnel Web
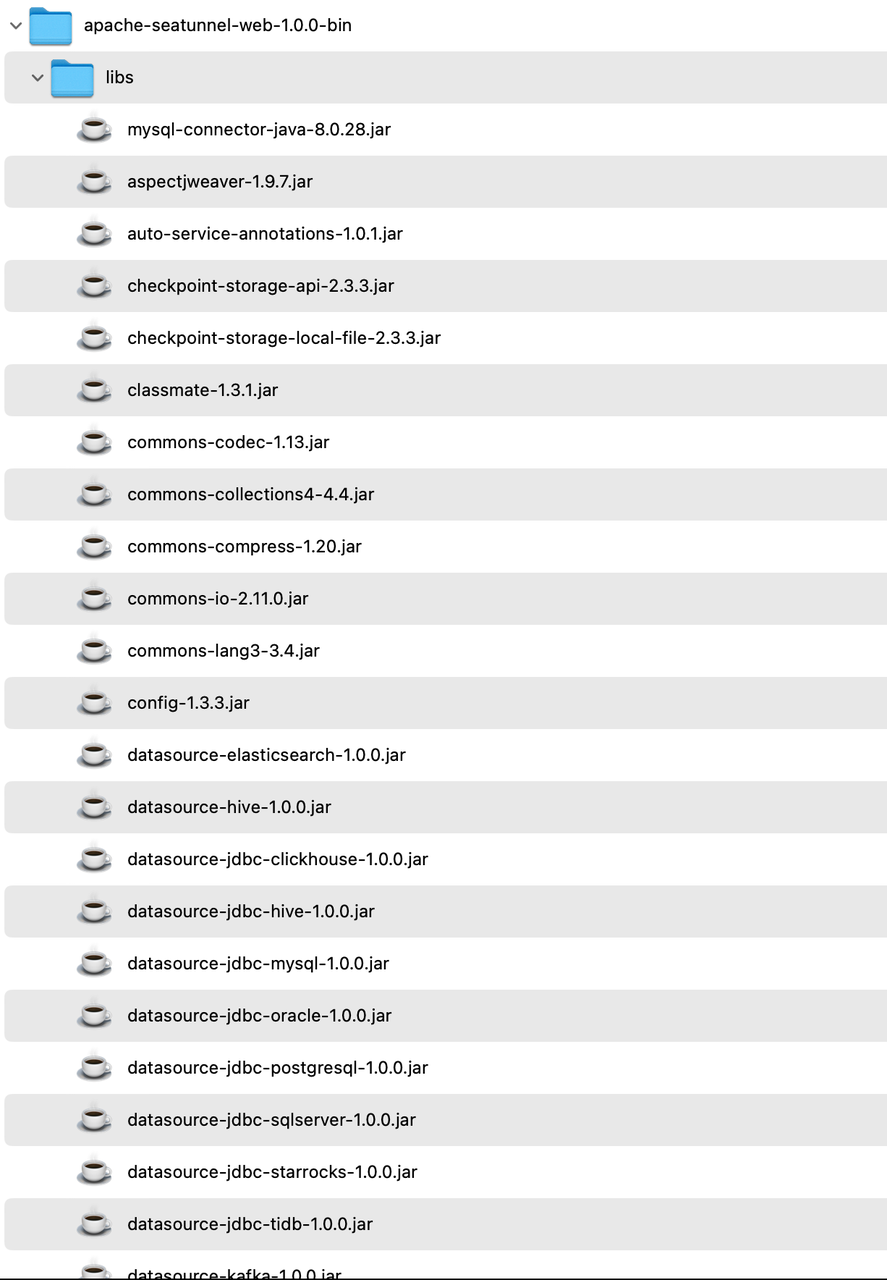
+## 5. Download DataSource Plugins
+1. Download the **[`download_datasource.sh`](./download_datasource.sh)**
script and place it in the `apache-seatunnel-web-1.0.0-bin/bin` directory. Run
the command `sh download_datasource.sh`. This will automatically download the
necessary JAR packages for various data source connections required for web
operation to the `libs` directory.
-1. Download seatunnel web from https://seatunnel.apache.org/download
-2. Copy the `apache-seatunnel-web-bin-${project.version}.tar.gz` to your
server node and unzip it.
+ 
-```shell
-tar -zxvf apache-seatunnel-web-bin-${project.version}.tar.gz
-```
+2. After downloading, ensure that the MySQL driver is included in the `libs`
directory. If not, manually download the MySQL driver to this directory, as
SeaTunnel Web cannot start without it.
-#### 2.3 Init database
-1. Edit
`apache-seatunnel-web-bin-${project.version}/script/seatunnel_server_env.sh`
file, Complete the installed database address, port, username, and password.
Here is an example:
+## 6. Configure the Application and Start SeaTunnel Web Backend Service
+- Modify `apache-seatunnel-web-1.0.0-bin/conf/application.yml` with SeaTunnel
database connection information (same as in `script/seatunnel_server_env.sh`).
+ ```yaml
+ url:
jdbc:mysql://localhost:3306/seatunnel?useSSL=false&useUnicode=true&characterEncoding=utf-8&allowMultiQueries=true&allowPublicKeyRetrieval=true
+ username: xxx
+ password: xxx
```
- export HOSTNAME="localhost"
- export PORT="3306"
- export USERNAME="root"
- export PASSWORD="123456"
+- Copy `hazelcast-client.yaml` from `apache-seatunnel-2.3.3/config` to
`apache-seatunnel-web-1.0.0-bin/conf/` and configure it, especially the cluster
members' IP and port. Refer to [SeaTunnel Engine Client
Configuration](https://seatunnel.apache.org/docs/seatunnel-engine/deployment#6-config-seatunnel-engine-client).
+ ```yaml
+ hazelcast-client:
+ cluster-name: seatunnel
+ properties:
+ hazelcast.logging.type: log4j2
+ network:
+ cluster-members:
+ - ip:5801
```
-2. Run init shell `sh
apache-seatunnel-web-bin-${project.version}/script/init_sql.sh` If there are no
errors during operation, it indicates successful initialization.
+- Move `plugin-mapping.properties` from `apache-seatunnel-2.3.3/connectors` to
the `apache-seatunnel-web-1.0.0-bin/conf/` directory.
-#### 2.4 Config application and Run SeaTunnel Web Backend Server
-* Edit `apache-seatunnel-web-bin-${project.version}/conf/application.yml` Fill
in the database connection information in the file.
-* Copy `$SEATUNNEL_HOME/config/hazelcast-client.yaml` to
`apache-seatunnel-web-bin-${project.version}/conf/`
-* Copy `apache-seatunnel-2.3.3-SNAPSHOT/connectors/plugin-mapping.properties`
file to `apache-seatunnel-web-bin-${project.version}/conf/` dir.
+## 7. Start SeaTunnel Web
-#### 2.5 Start SeaTunnel Web
-
-```shell
-cd apache-seatunnel-web-${project.version}
-sh bin/seatunnel-backend-daemon.sh start
-```
-
-Accessing in a browser http://127.0.0.1:8801/ui/ Okay, the default username
and password are admin/admin.
+1. Go to the `apache-seatunnel-web-1.0.0-bin` directory:
+ ```
+ cd apache-seatunnel-web-1.0.0-bin
+ ```
+2. Start the SeaTunnel Web backend service:
+ ```
+ sh bin/seatunnel-backend-daemon.sh start
+ ```
+3. Visit UI [http://127.0.0.1:8801/ui/](http://127.0.0.1:8801/ui/) and log in
with the default credentials (username: admin, password: admin). A successful
login screen indicates successful deployment.
+ ```
+ 
+ ```
diff --git a/seatunnel_web_versioned_docs/version-1.0.0/download_datasource.sh
b/seatunnel_web_versioned_docs/version-1.0.0/download_datasource.sh
new file mode 100644
index 00000000000..114c951c954
--- /dev/null
+++ b/seatunnel_web_versioned_docs/version-1.0.0/download_datasource.sh
@@ -0,0 +1,62 @@
+#!/bin/bash
+#
+# Licensed to the Apache Software Foundation (ASF) under one or more
+# contributor license agreements. See the NOTICE file distributed with
+# this work for additional information regarding copyright ownership.
+# The ASF licenses this file to You under the Apache License, Version 2.0
+# (the "License"); you may not use this file except in compliance with
+# the License. You may obtain a copy of the License at
+#
+# http://www.apache.org/licenses/LICENSE-2.0
+#
+# Unless required by applicable law or agreed to in writing, software
+# distributed under the License is distributed on an "AS IS" BASIS,
+# WITHOUT WARRANTIES OR CONDITIONS OF ANY KIND, either express or implied.
+# See the License for the specific language governing permissions and
+# limitations under the License.
+#
+
+#This script is used to download the connector plug-ins required during the
running process.
+#All are downloaded by default. You can also choose what you need.
+#You only need to configure the plug-in name in config/plugin_config.
+
+# get seatunnel web home
+SEATUNNEL_WEB_HOME=$(cd $(dirname $0);pwd)
+
+DATASOURCE_LIB_DIR=${SEATUNNEL_WEB_HOME}/../libs
+
+# the datasource default version is 1.0.0, you can also choose a custom
version. eg: 1.1.2: sh install-datasource.sh 2.1.2
+version=1.0.0
+
+if [ -n "$1" ]; then
+ version="$1"
+fi
+
+# If you don’t want to download a certain data source, you can delete the
element below
+datasource_list=(
+ "datasource-plugins-api"
+ "datasource-elasticsearch"
+ "datasource-hive"
+ "datasource-jdbc-clickhouse"
+ "datasource-jdbc-hive"
+ "datasource-jdbc-mysql"
+ "datasource-jdbc-oracle"
+ "datasource-jdbc-postgresql"
+ "datasource-jdbc-redshift"
+ "datasource-jdbc-sqlserver"
+ "datasource-jdbc-starrocks"
+ "datasource-jdbc-tidb"
+ "datasource-kafka"
+ "datasource-mysql-cdc"
+ "datasource-s3"
+ "datasource-sqlserver-cdc"
+ "datasource-starrocks"
+)
+
+echo "Downloading SeaTunnel Web Datasource lib, usage version is ${version}"
+
+for datasource in "${datasource_list[@]}"
+do
+ echo "Downloading datasource: ${datasource}"
+ wget
https://repo.maven.apache.org/maven2/org/apache/seatunnel/${datasource}/${version}/${datasource}-${version}.jar
-P $DATASOURCE_LIB_DIR
+done
diff --git a/versioned_docs/version-2.3.3/seatunnel-engine/rest-api.md
b/versioned_docs/version-2.3.3/seatunnel-engine/rest-api.md
index 2f44421a3d6..8920a0ac4a7 100644
--- a/versioned_docs/version-2.3.3/seatunnel-engine/rest-api.md
+++ b/versioned_docs/version-2.3.3/seatunnel-engine/rest-api.md
@@ -238,3 +238,29 @@ network:
------------------------------------------------------------------------------------------
+### Stop Job.
+
+<details>
+
+ <summary><code>POST</code> <code><b>/hazelcast/rest/maps/stop-job</b></code>
<code>(Returns jobId if job stoped successfully.)</code></summary>
+
+#### Body
+
+```json
+{
+ "jobId": 733584788375666689,
+ "isStopWithSavePoint": false # if job is stopped with save point
+}
+```
+
+#### Responses
+
+```json
+{
+"jobId": 733584788375666689
+}
+```
+
+</details>
+
+------------------------------------------------------------------------------------------