This is an automated email from the ASF dual-hosted git repository.

baoyuan pushed a commit to branch master
in repository https://gitbox.apache.org/repos/asf/apisix-website.git
The following commit(s) were added to refs/heads/master by this push:
new 683633fcabc chore: use CDN to speed up blog images (#1483)
683633fcabc is described below
commit 683633fcabc1856b9f9cc6fddfd3d00ecfc016a7
Author: Yilia <[email protected]>
AuthorDate: Fri Jan 20 18:02:37 2023 +0800
chore: use CDN to speed up blog images (#1483)
---
...from_everywhere_with_keycloak_authentication.md | 94 +++++++++++-----------
1 file changed, 47 insertions(+), 47 deletions(-)
diff --git
a/blog/en/blog/2023/01/02/accessing_apisix-dashboard_from_everywhere_with_keycloak_authentication.md
b/blog/en/blog/2023/01/02/accessing_apisix-dashboard_from_everywhere_with_keycloak_authentication.md
index e464b8adcc4..d488366e082 100644
---
a/blog/en/blog/2023/01/02/accessing_apisix-dashboard_from_everywhere_with_keycloak_authentication.md
+++
b/blog/en/blog/2023/01/02/accessing_apisix-dashboard_from_everywhere_with_keycloak_authentication.md
@@ -21,7 +21,7 @@ cover:
https://static.apiseven.com/uploads/2023/01/19/FKDU7U6j_blog01a.png
<!--truncate-->
-
+
This article presents how to setup a framework where a user can access the
Apisix-dashboard protected using an authentication system managed by a Keycloak
server.
@@ -154,7 +154,7 @@ sudo dpkg-reconfigure ca-certificates
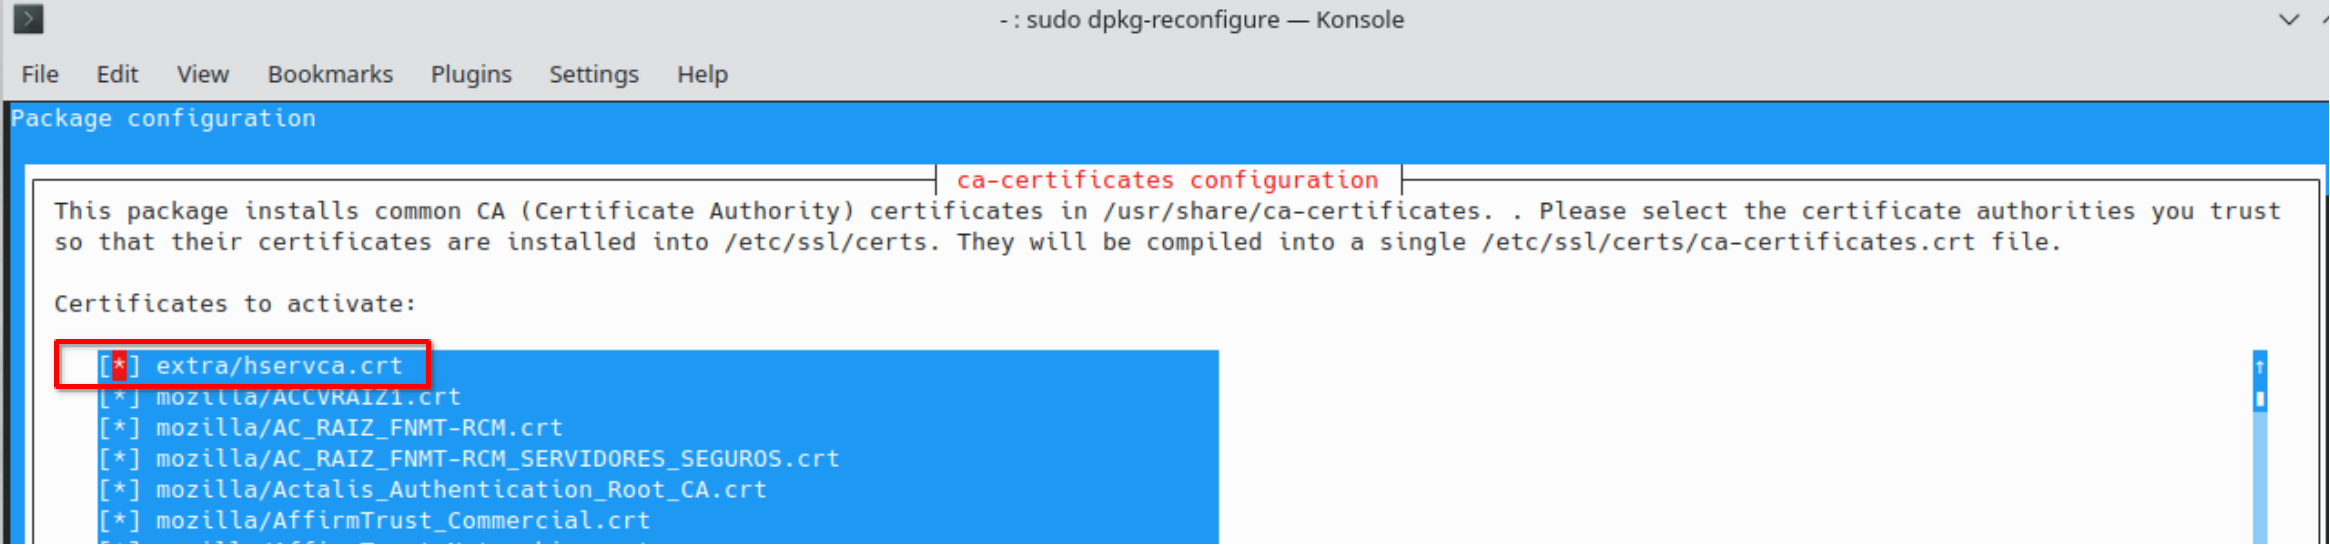
Confirm that you want to proceed: select “yes” and click “Ok”. Select the new
“hservca.crt” entry and click “Ok”
-
+
## Install nginx-mainline
@@ -242,15 +242,15 @@ Verify that Keycloak is accessible from **hserv** at the
URL **"http://localhost
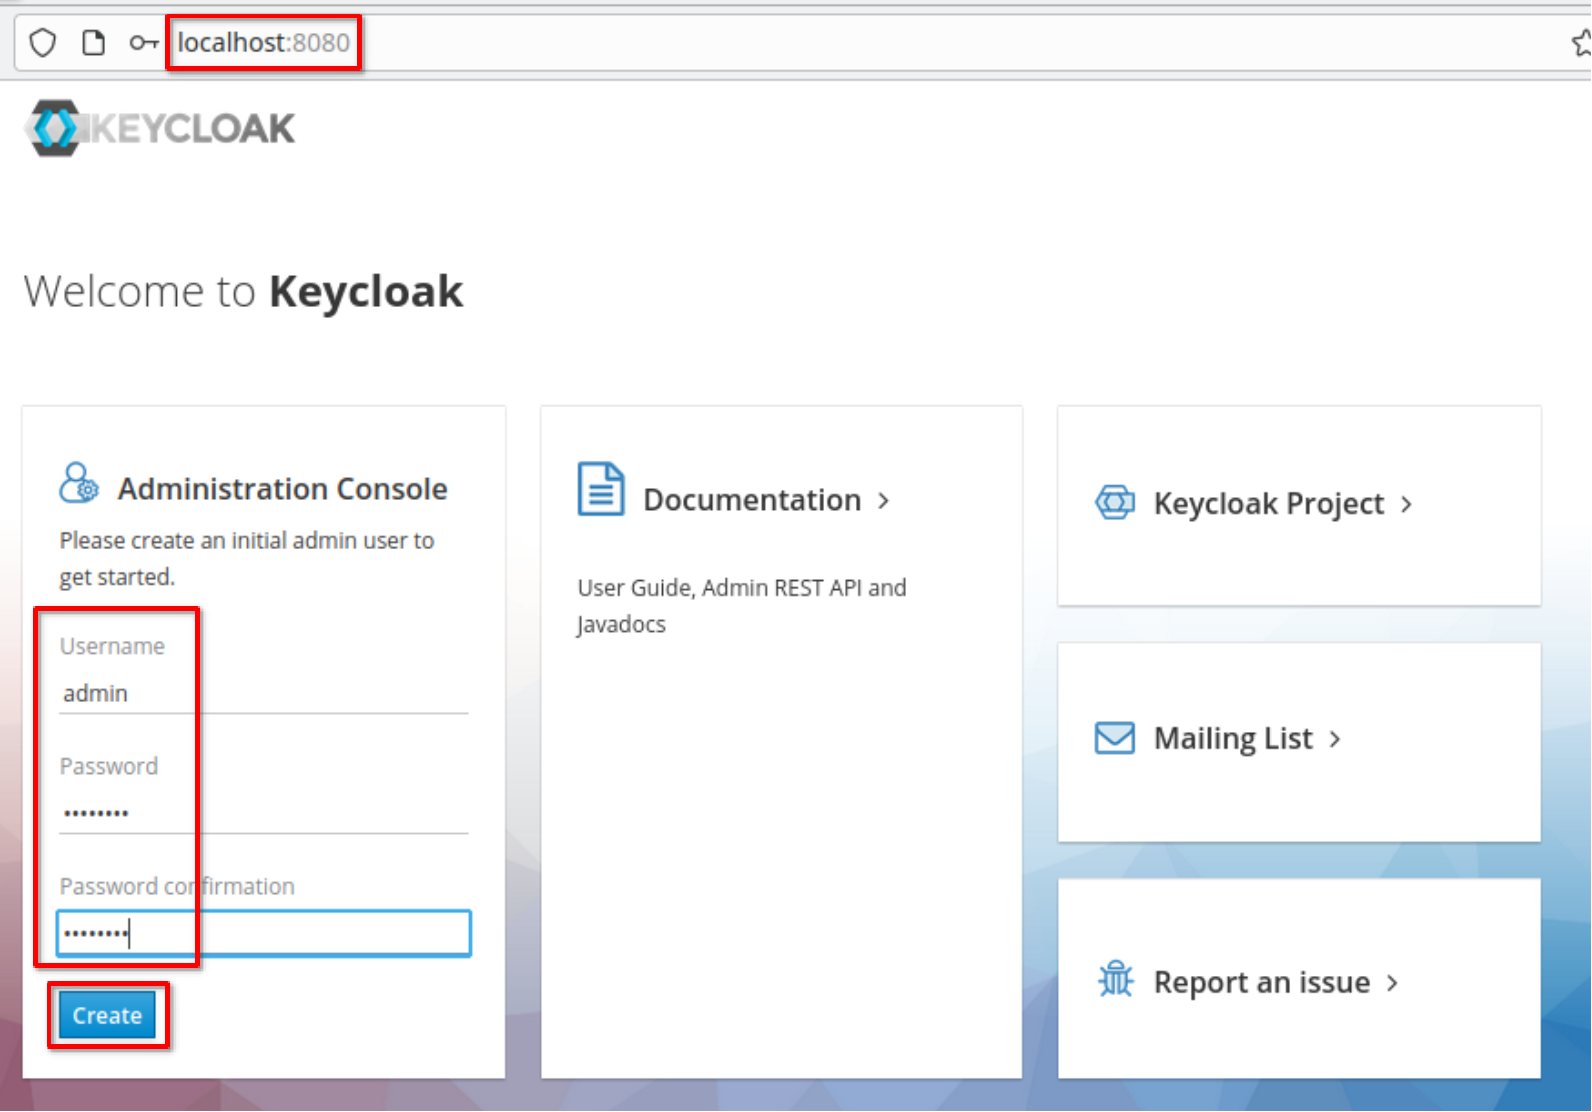
Create the admin user as name **"admin"** and password **"1357Togo"**
-
+
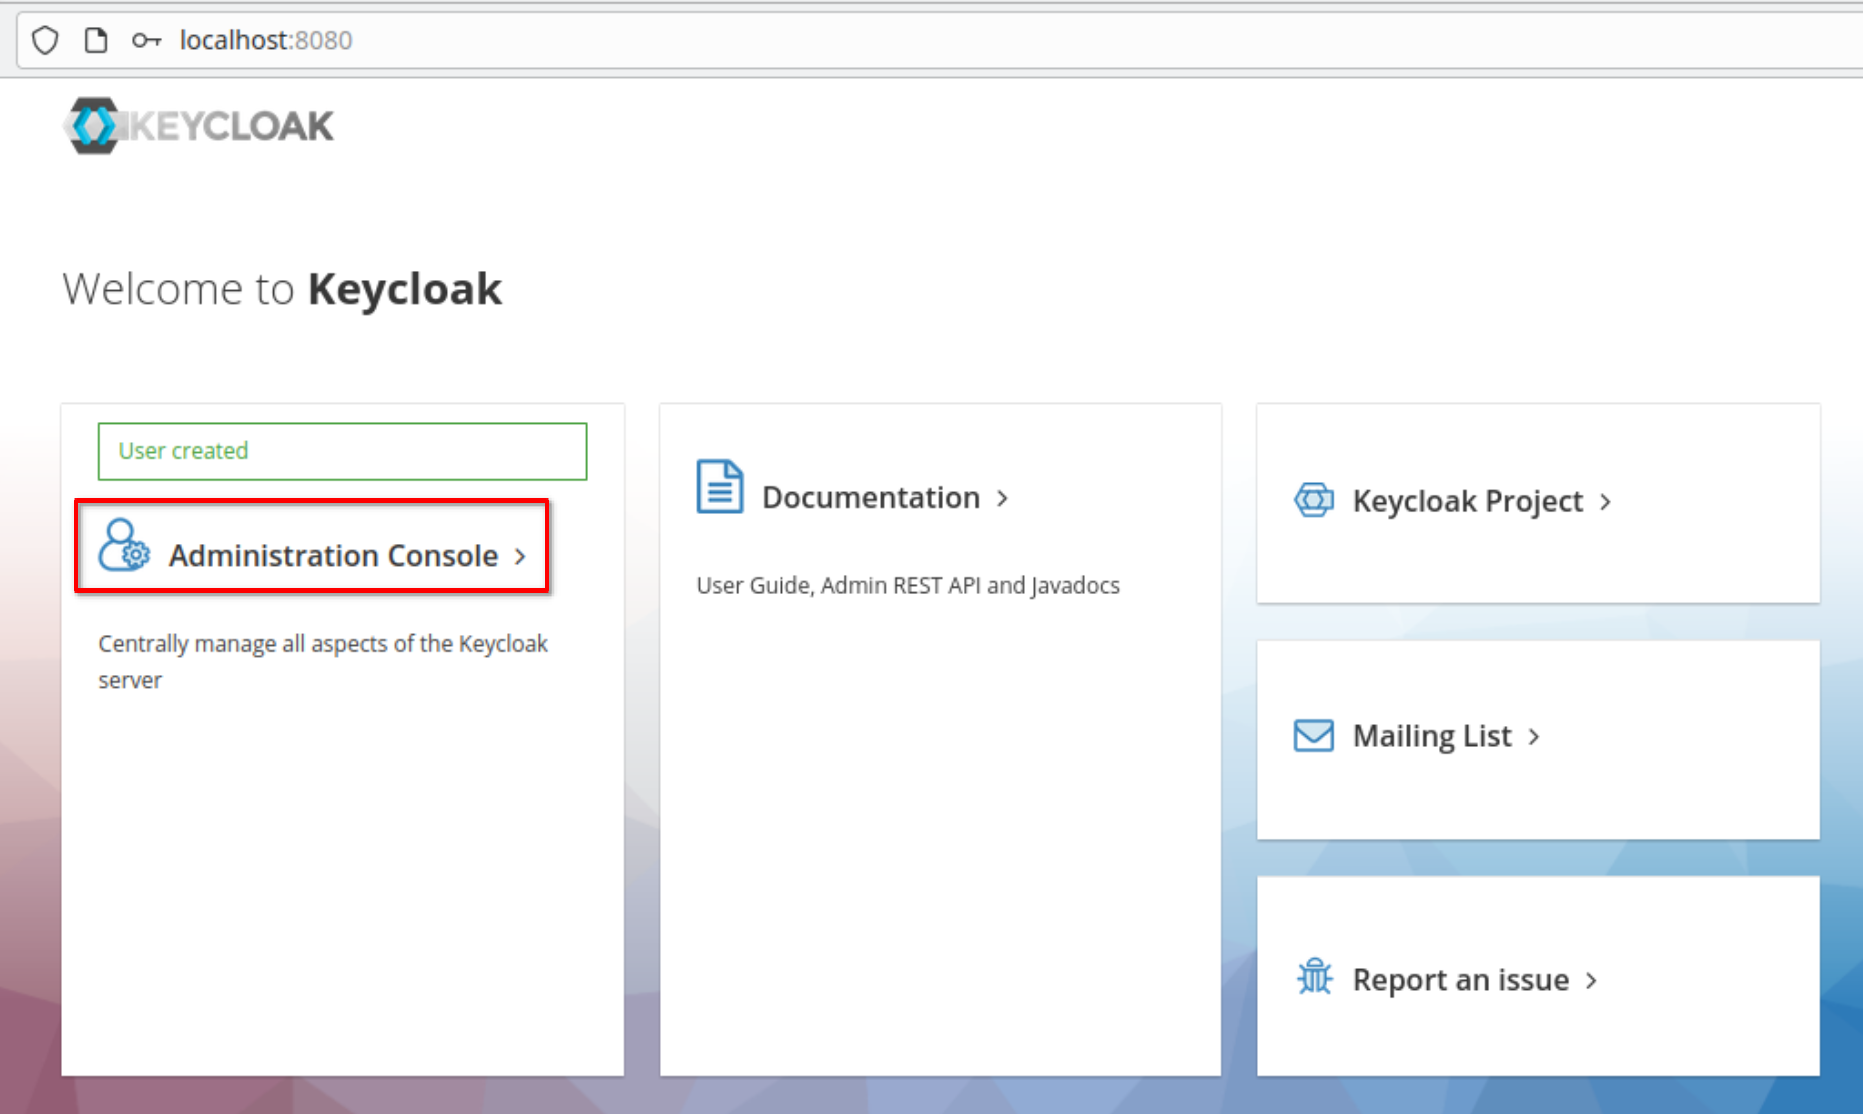
Go to the administration console
-
+
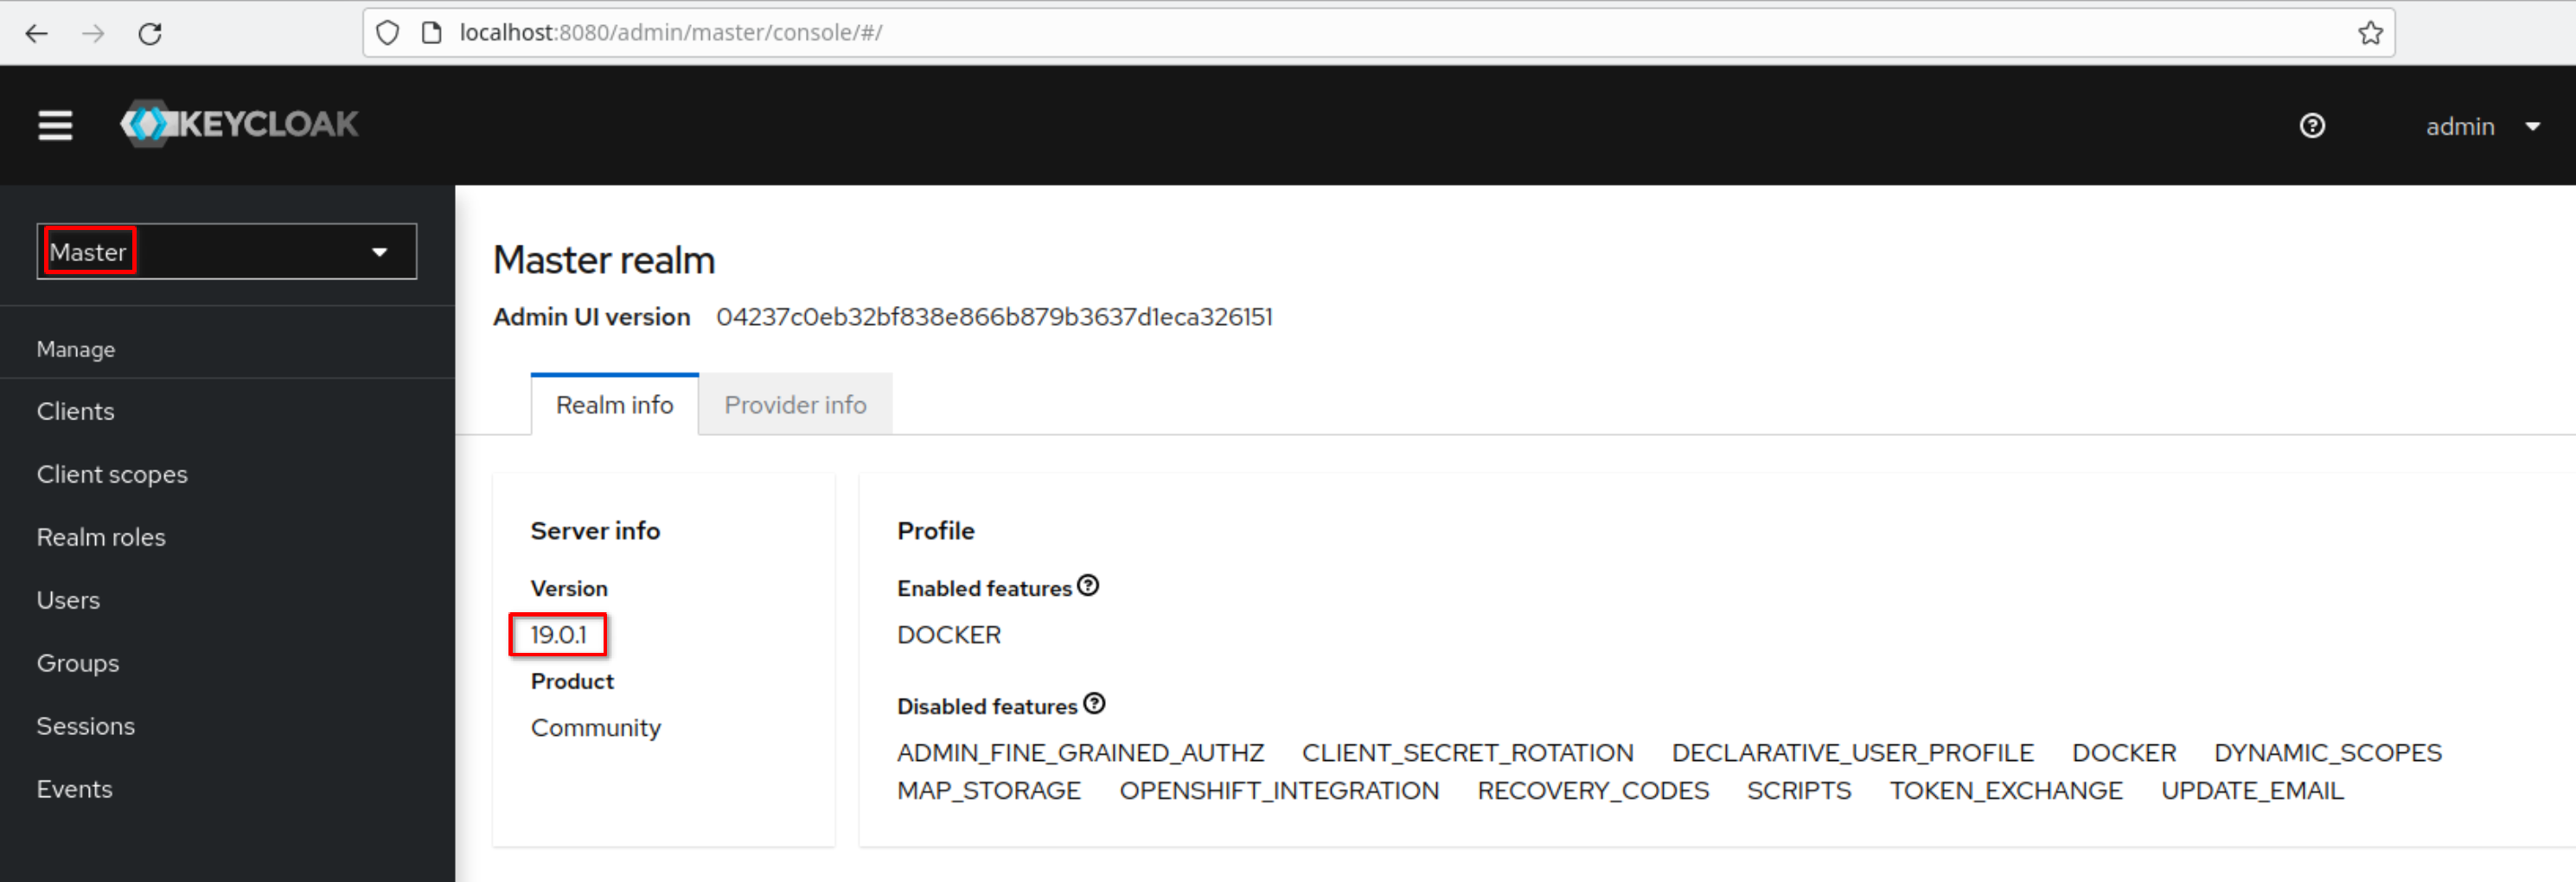
Login and the “Master” realm appears. Note the Keycloak version
-
+
### Automatic Keycloak Startup
@@ -298,7 +298,7 @@ In the **"/etc/hosts"** fle add the line
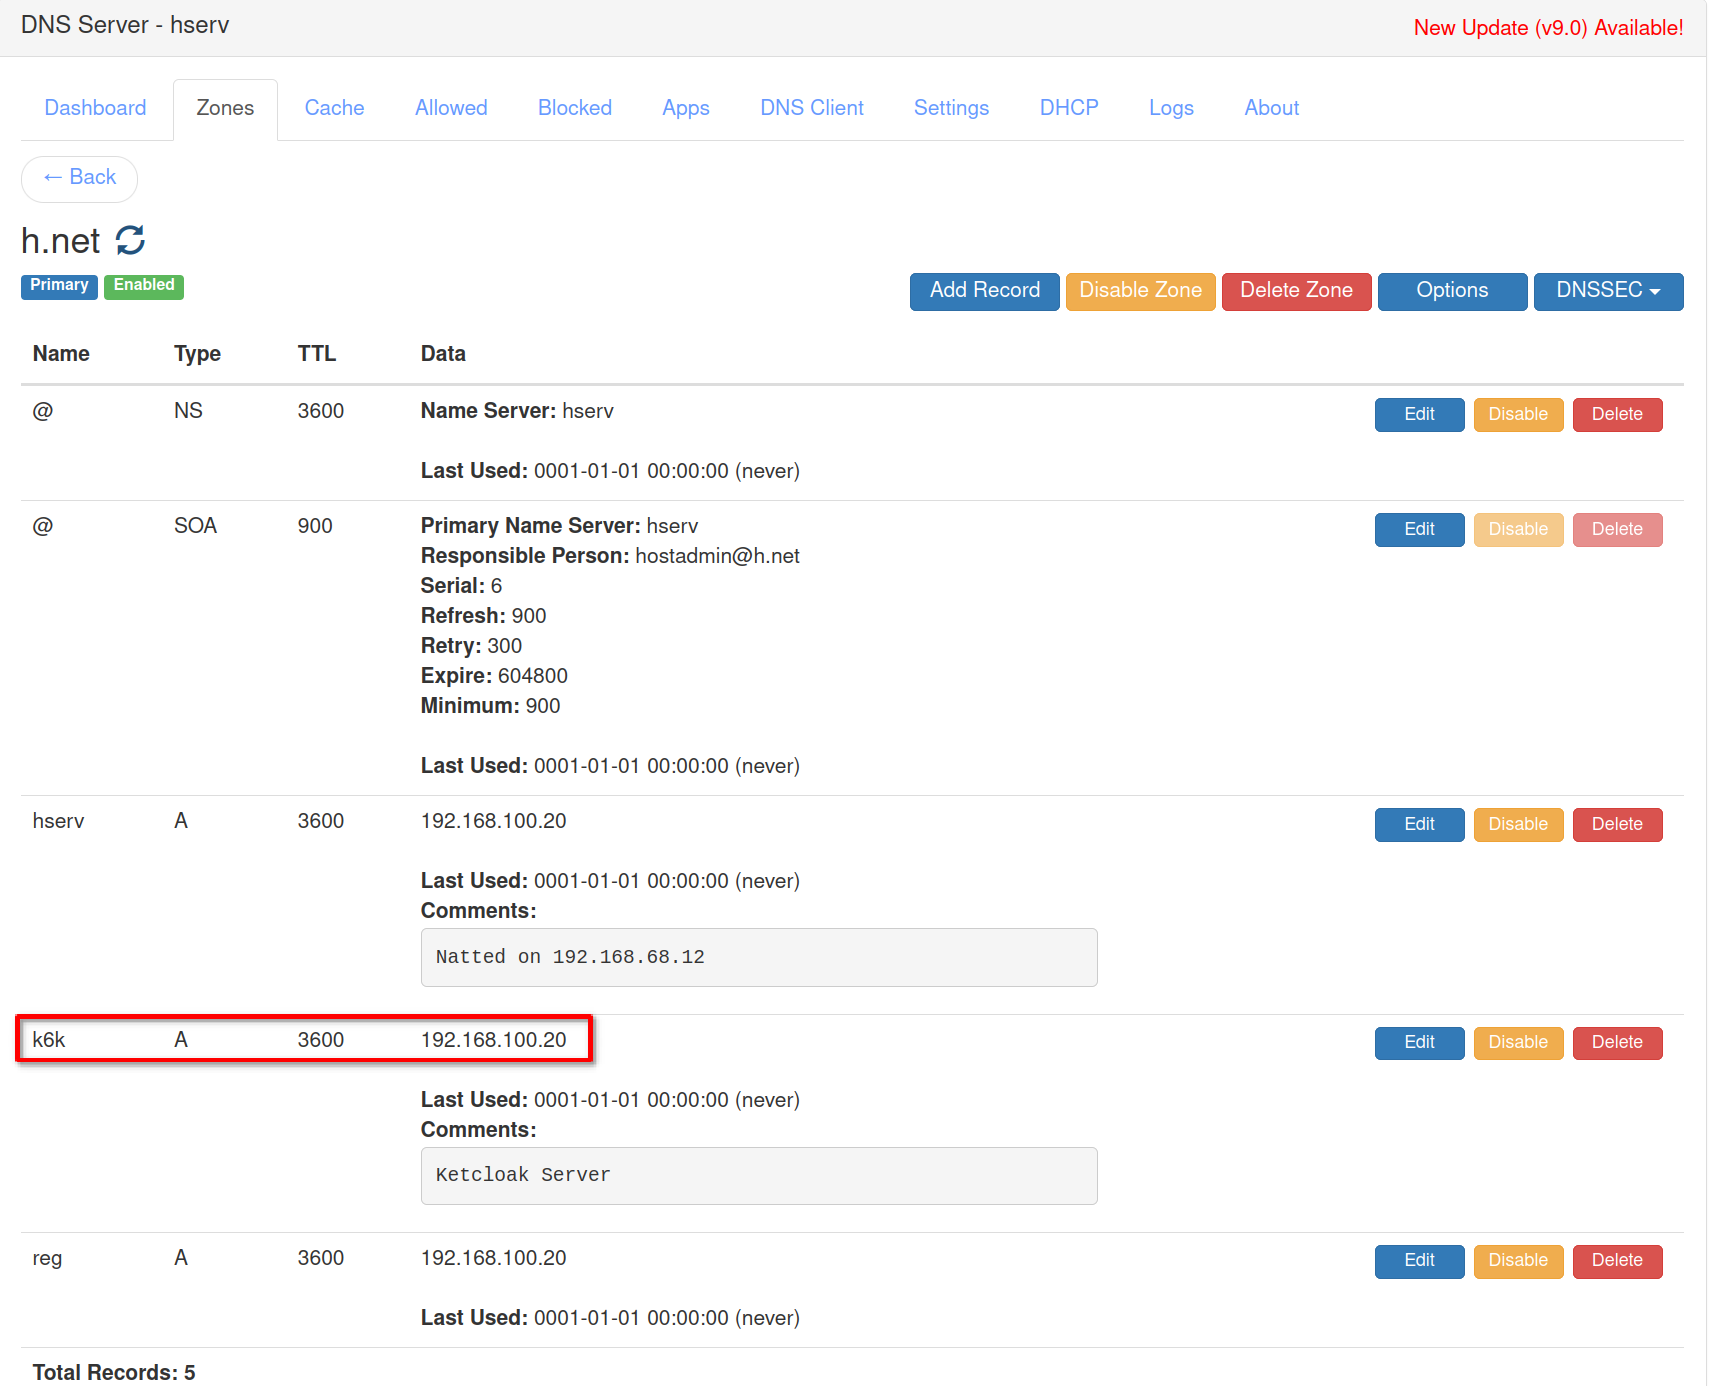
In the DNS server on **hserv** add the k6k entry in the **“h.net”** DNS zone
with address **“192.168.100.20”**
-
+
Create the certificate for **"k6k.h.net"**
@@ -514,7 +514,7 @@ In the **"/etc/hosts"** file of any machine accessing the
cluster through the ng
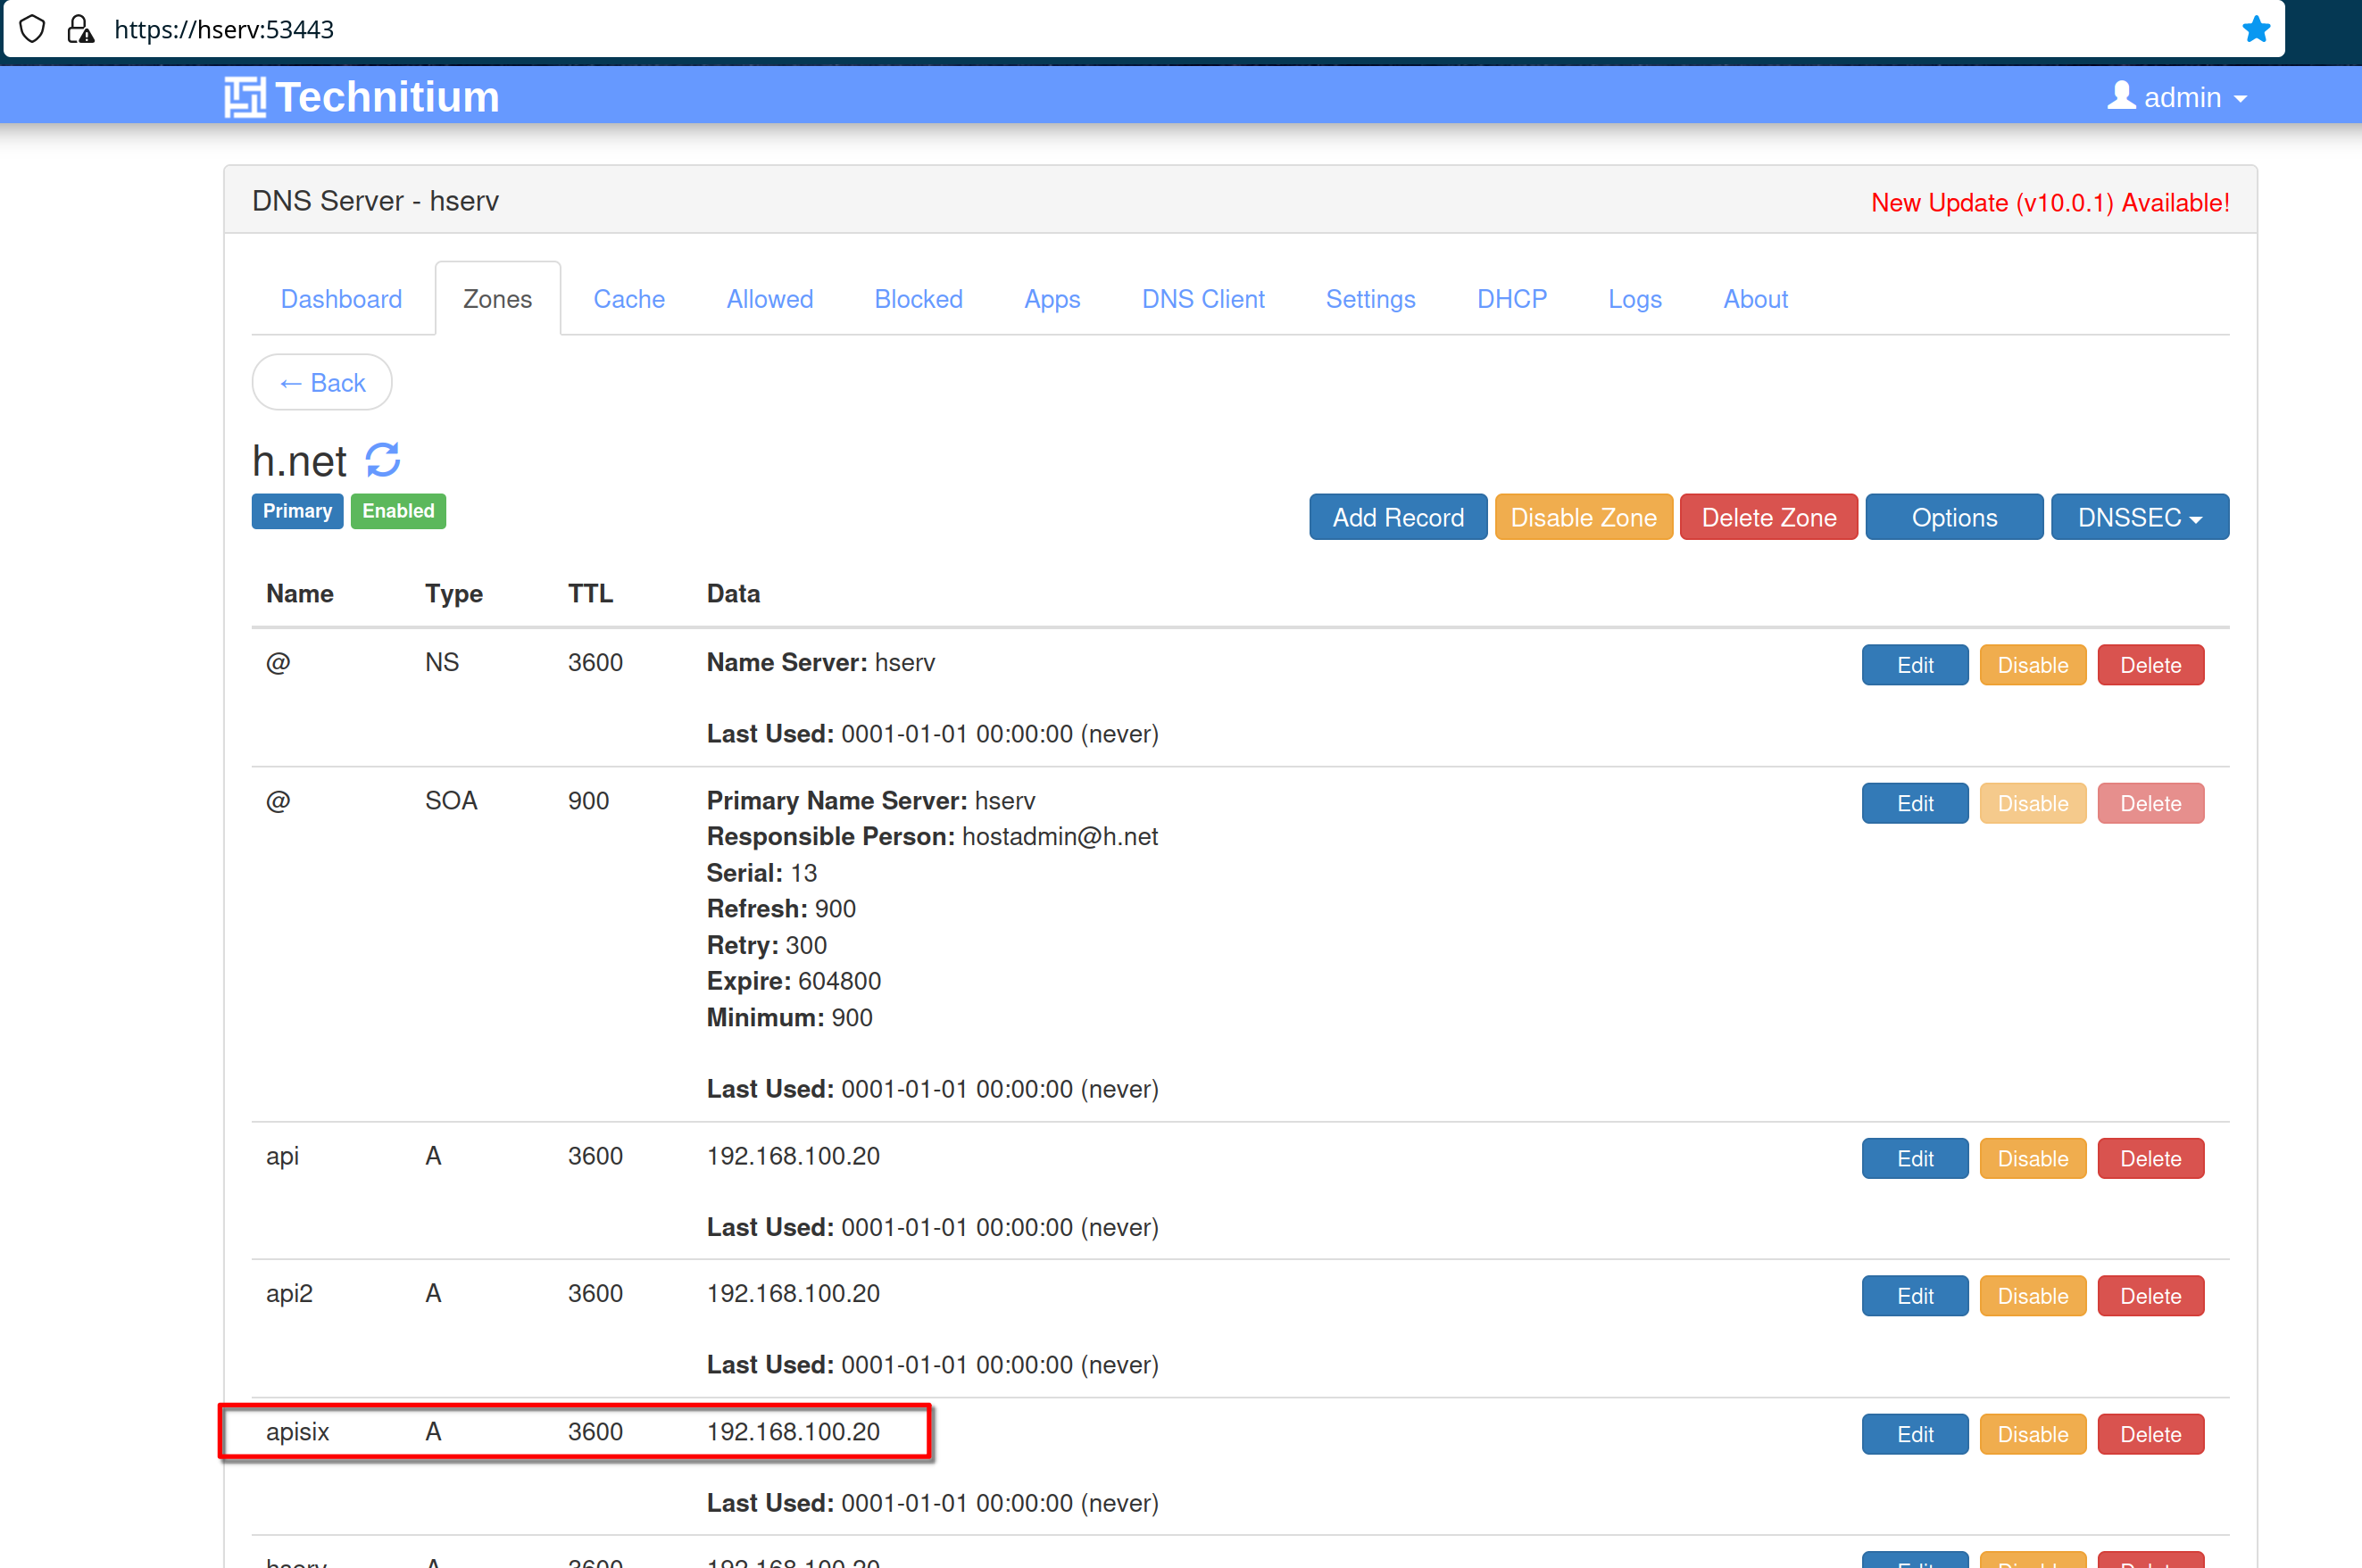
In the DNS server on **hserv** add the apisix entry in the **“h.net”** DNS
zone with address **“192.168.100.20”**
-
+
### APISIX Deployment
@@ -647,11 +647,11 @@ Forwarding from [::1]:8080 -> 9000
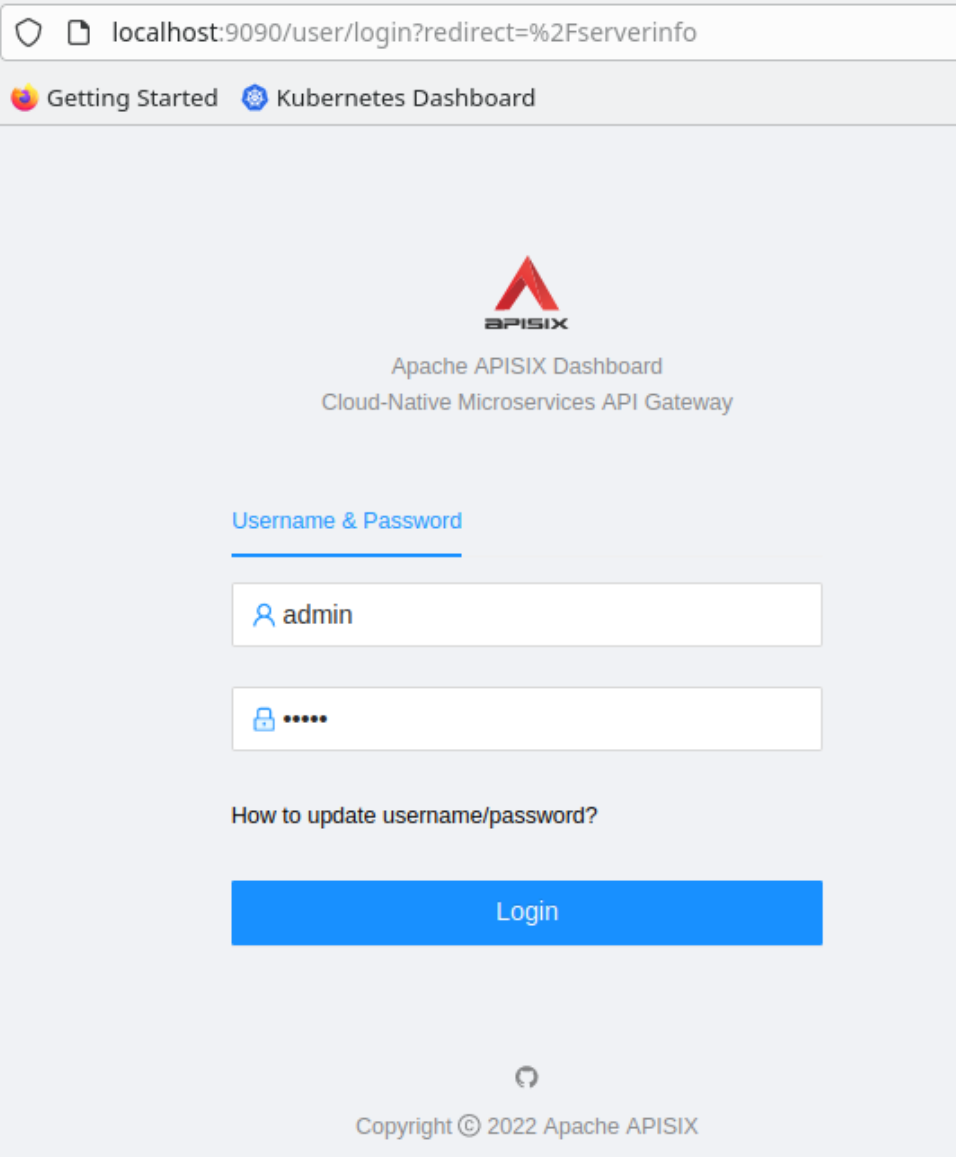
Then access the dashboard on **“hdev”** pointing the web browser to the url
“http://localhost:9090”
Login with **“admin / admin”**
-
+
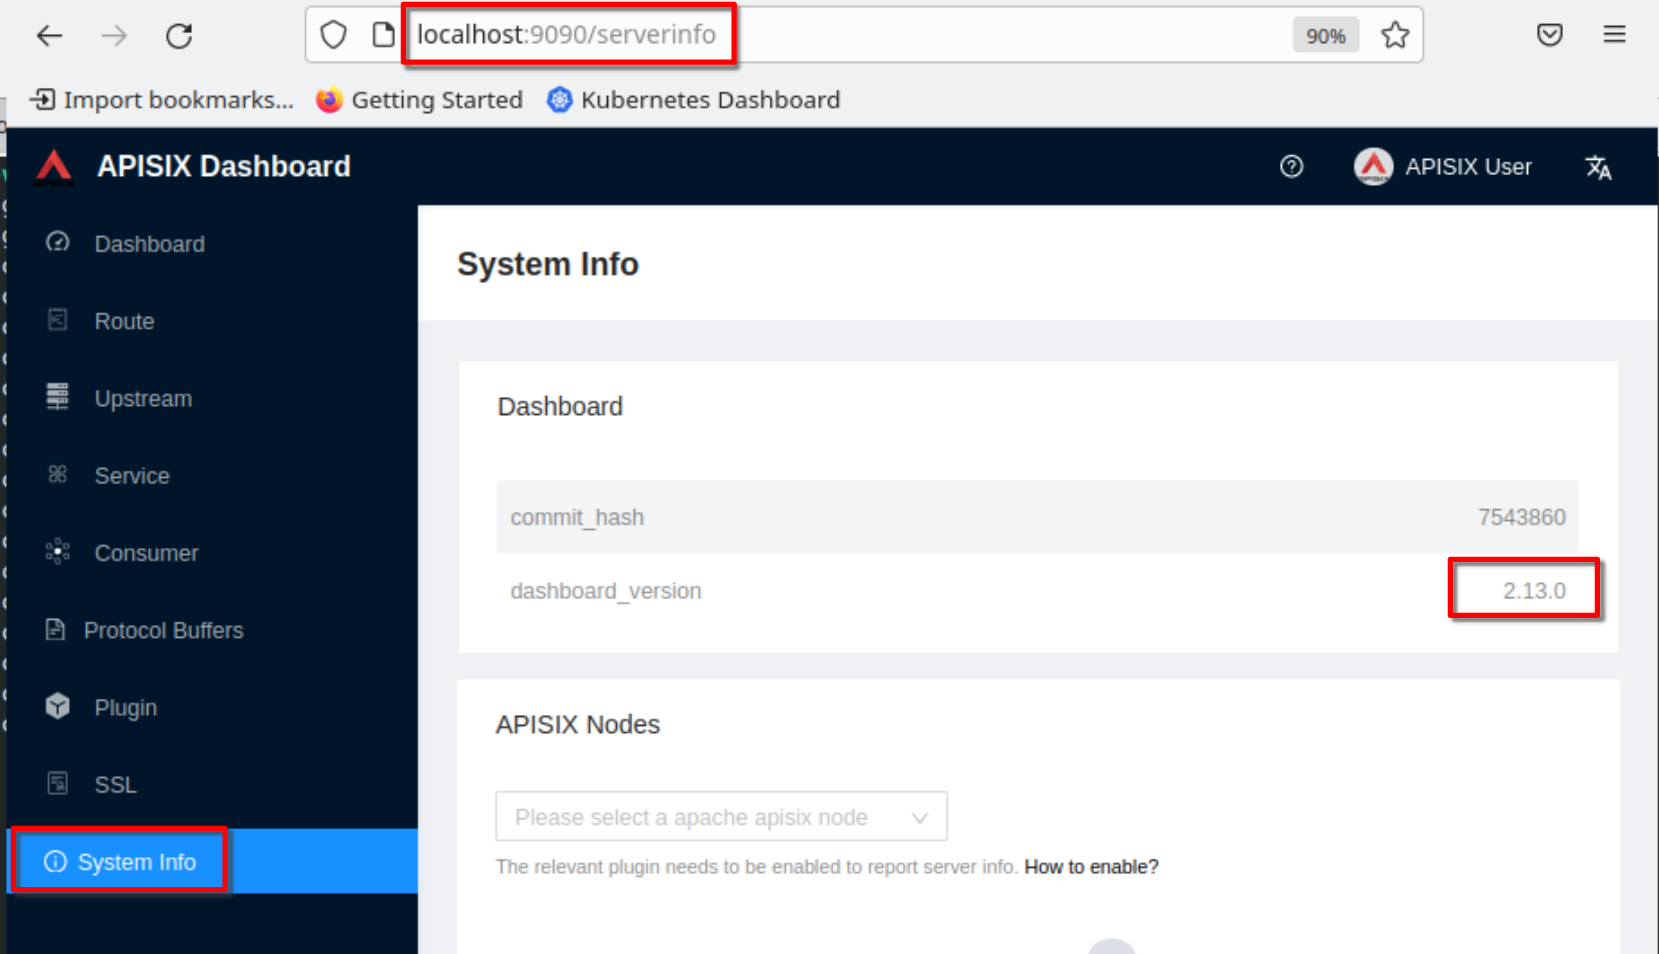
Verify the dashboard version
-
+
## Create Apisix resources for apisix-dashboard
@@ -784,7 +784,7 @@ Add the apisix line in “/etc/hosts” on any machine that
will access apisix-d
Add the apisix A record in the DNS in “h.net” zone
-
+
Access “https://apisix.h.net” from a browser and the apisix default page
should be presented
@@ -911,41 +911,41 @@ sysop@hdev:~/H/hservcerts$
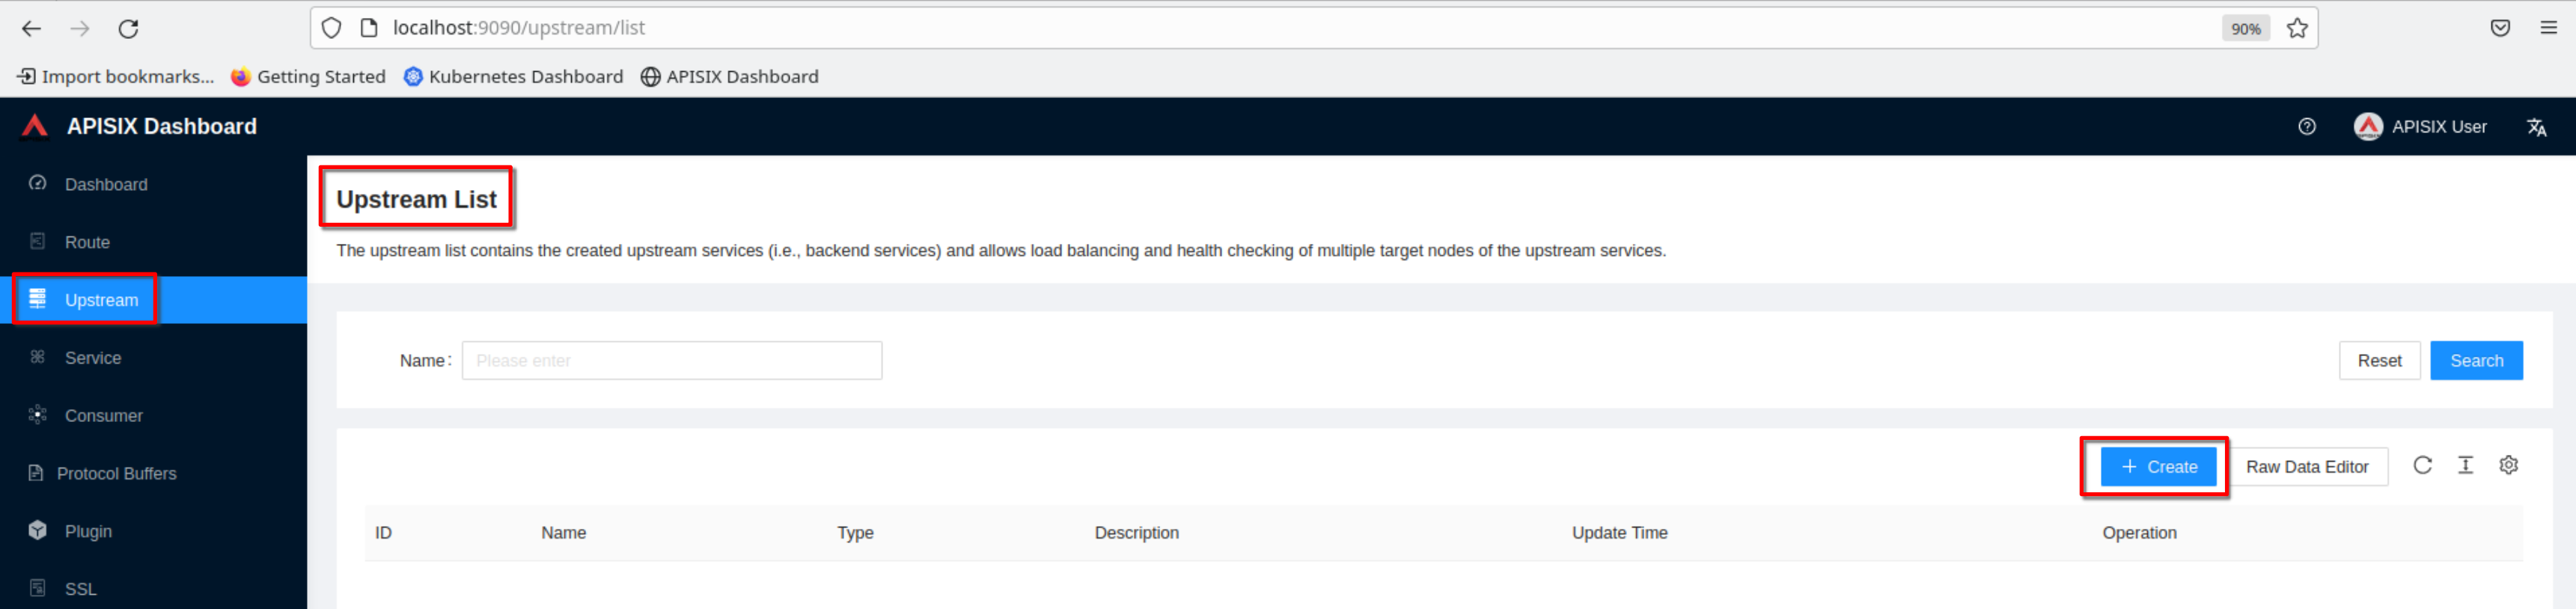
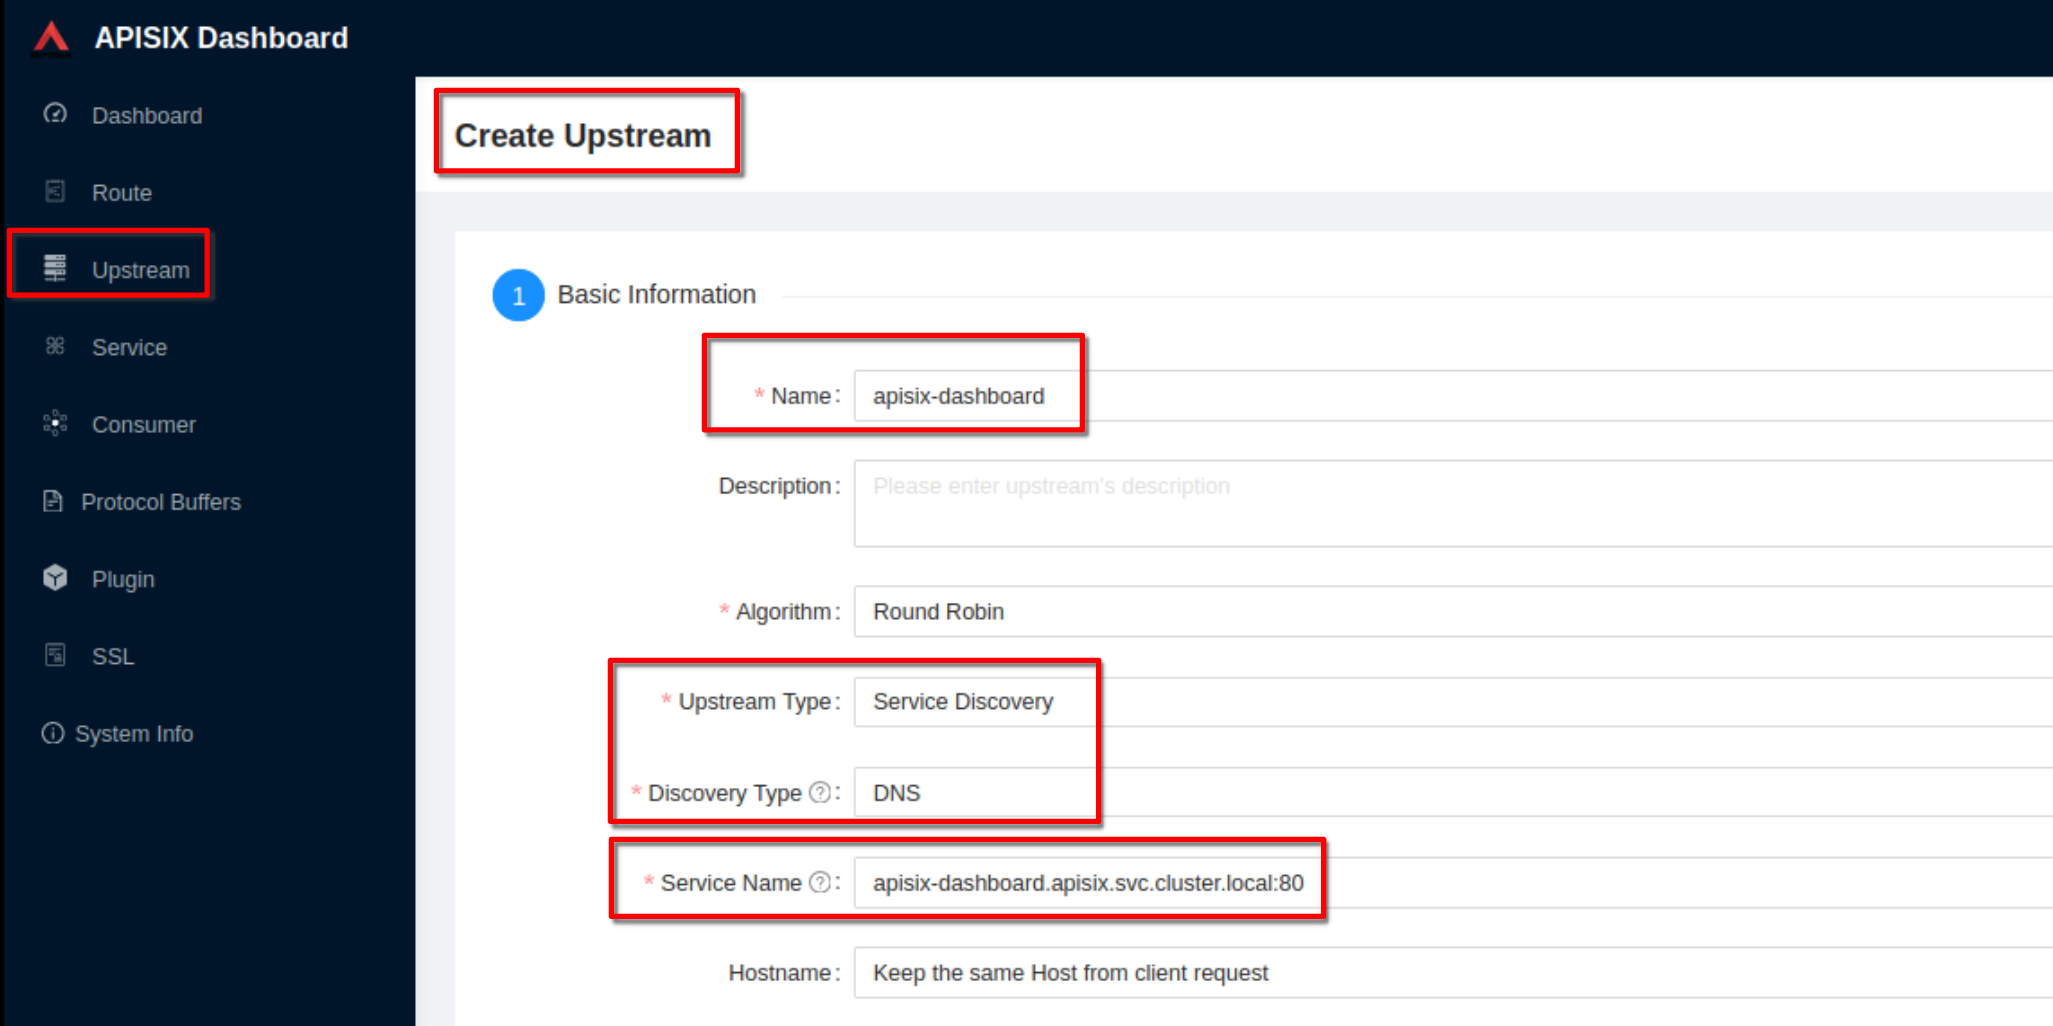
Create an upstream
-
+
Set the name to **“apisix-dashboard”**, upstream type to **“service
discovery”**, discovery type to **“dns”** and servicename to
**“apisix-dashboard.apisix.svc.cluster.local:80”**.
-
+
Then click “Next” and after click “Submit”
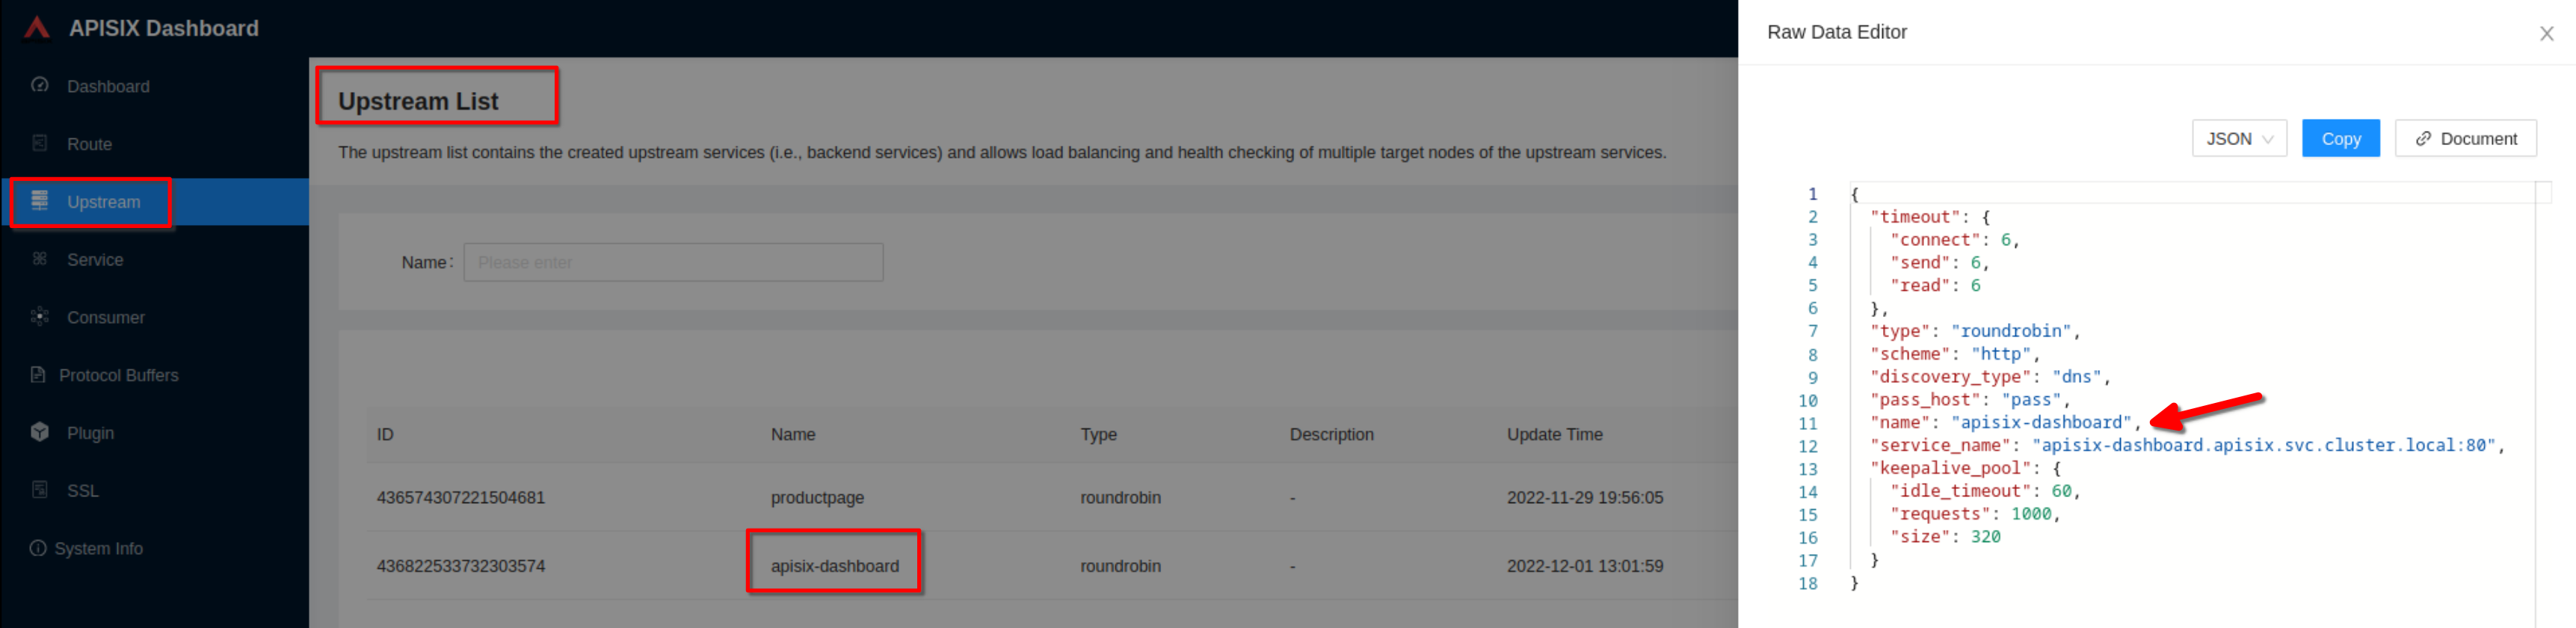
Click “View” to see the json upstream definition
-
+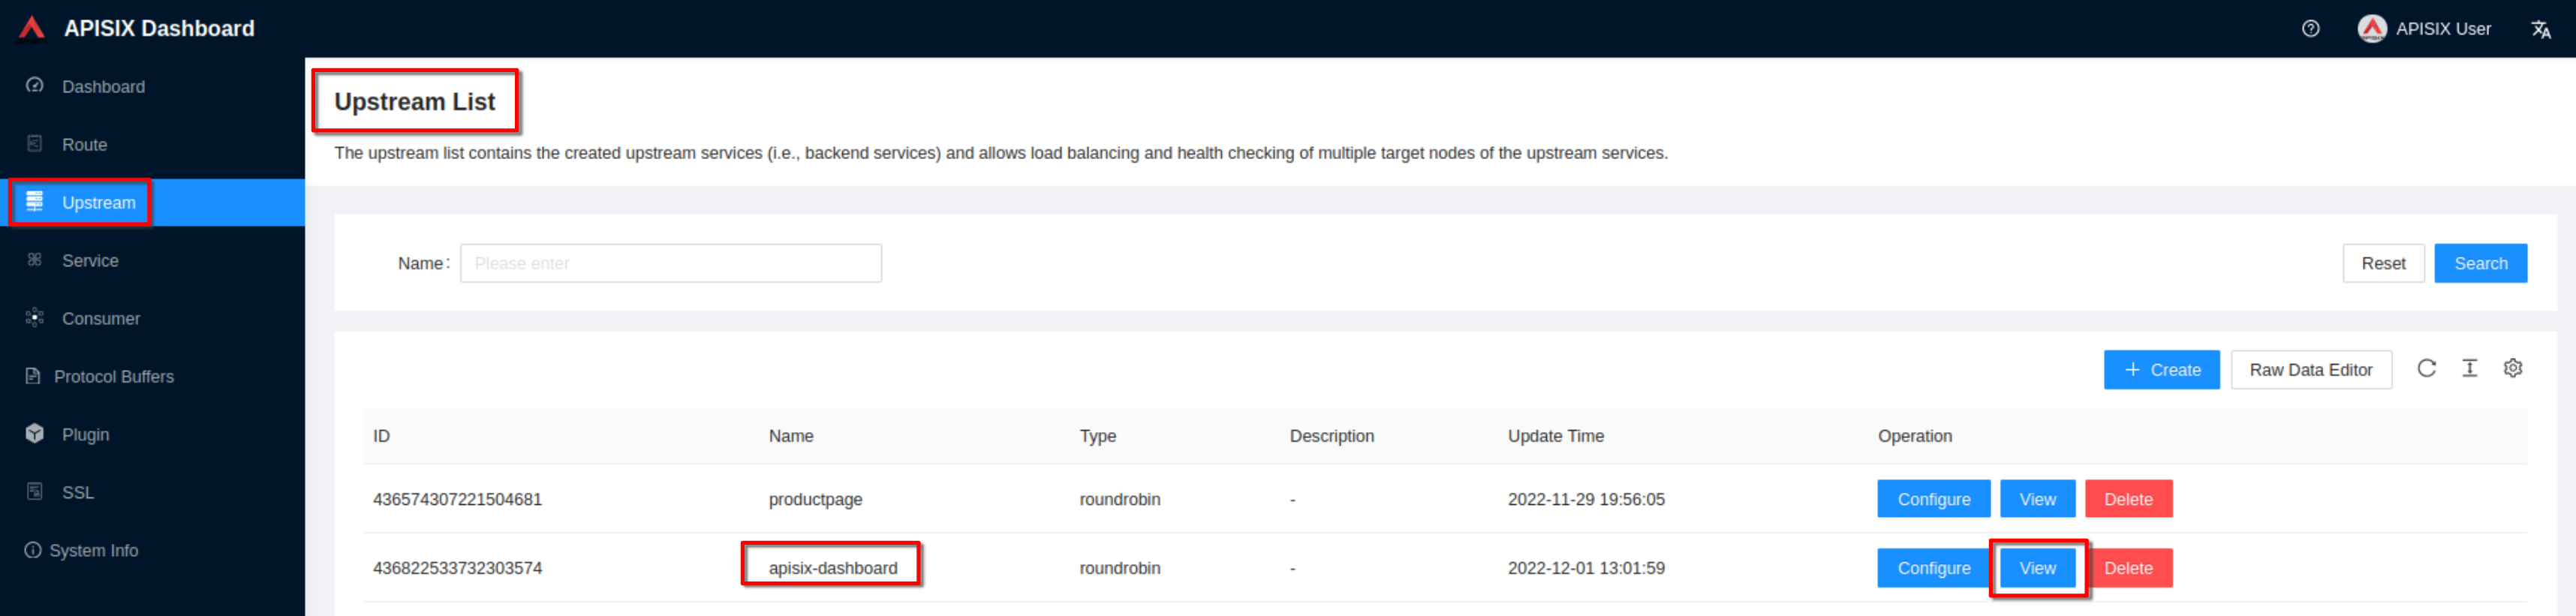
Note the upstream name to be used in the next route definition
-
+
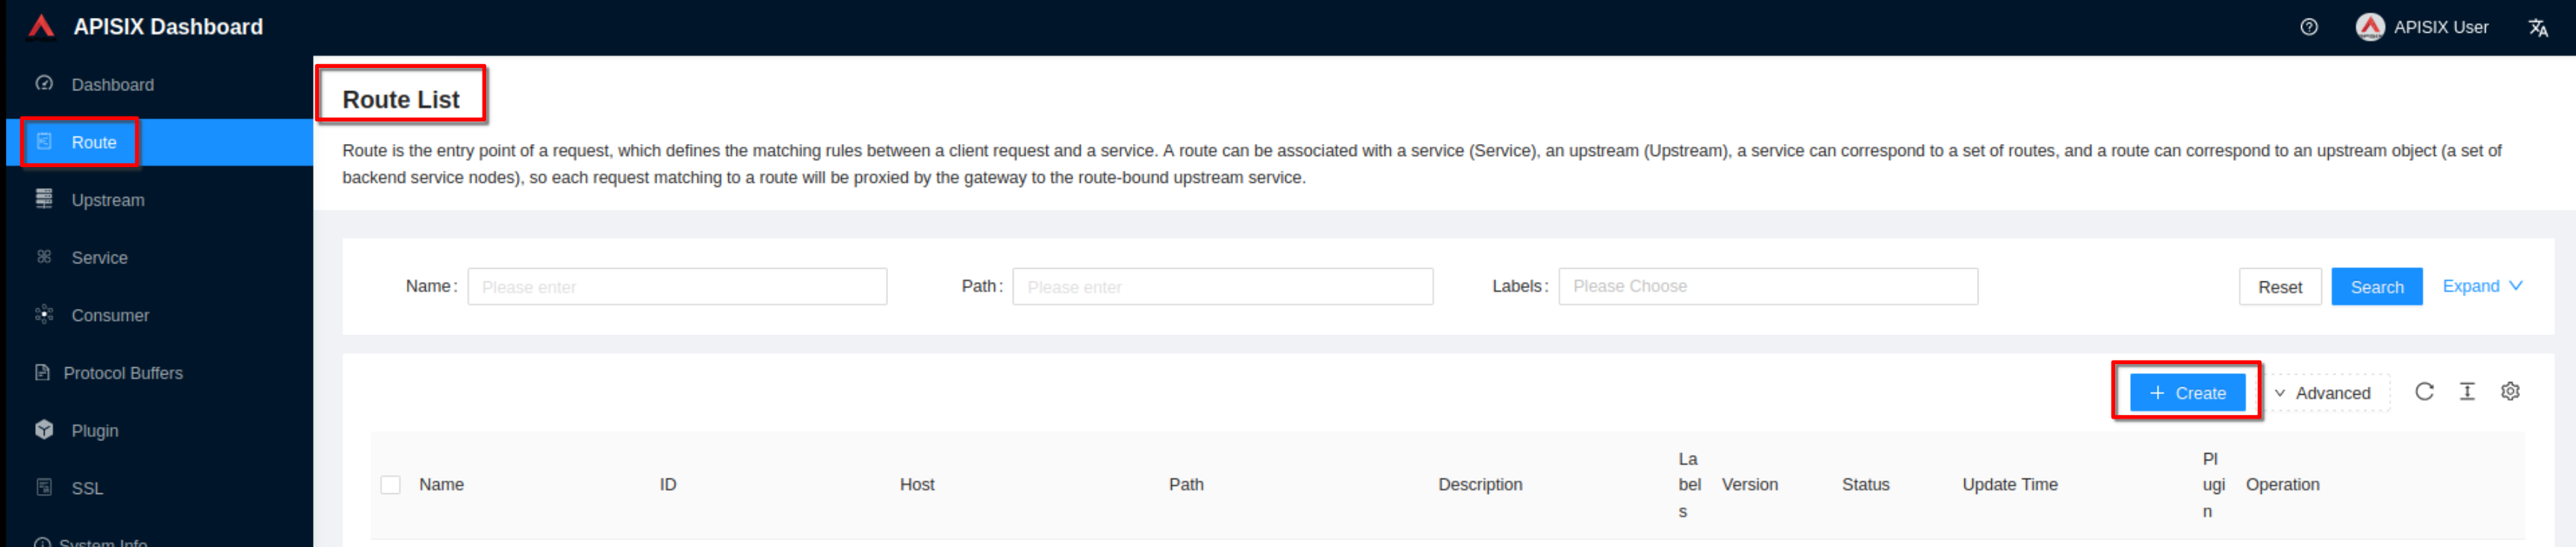
Now click “Create” on the “Route” page
-
+
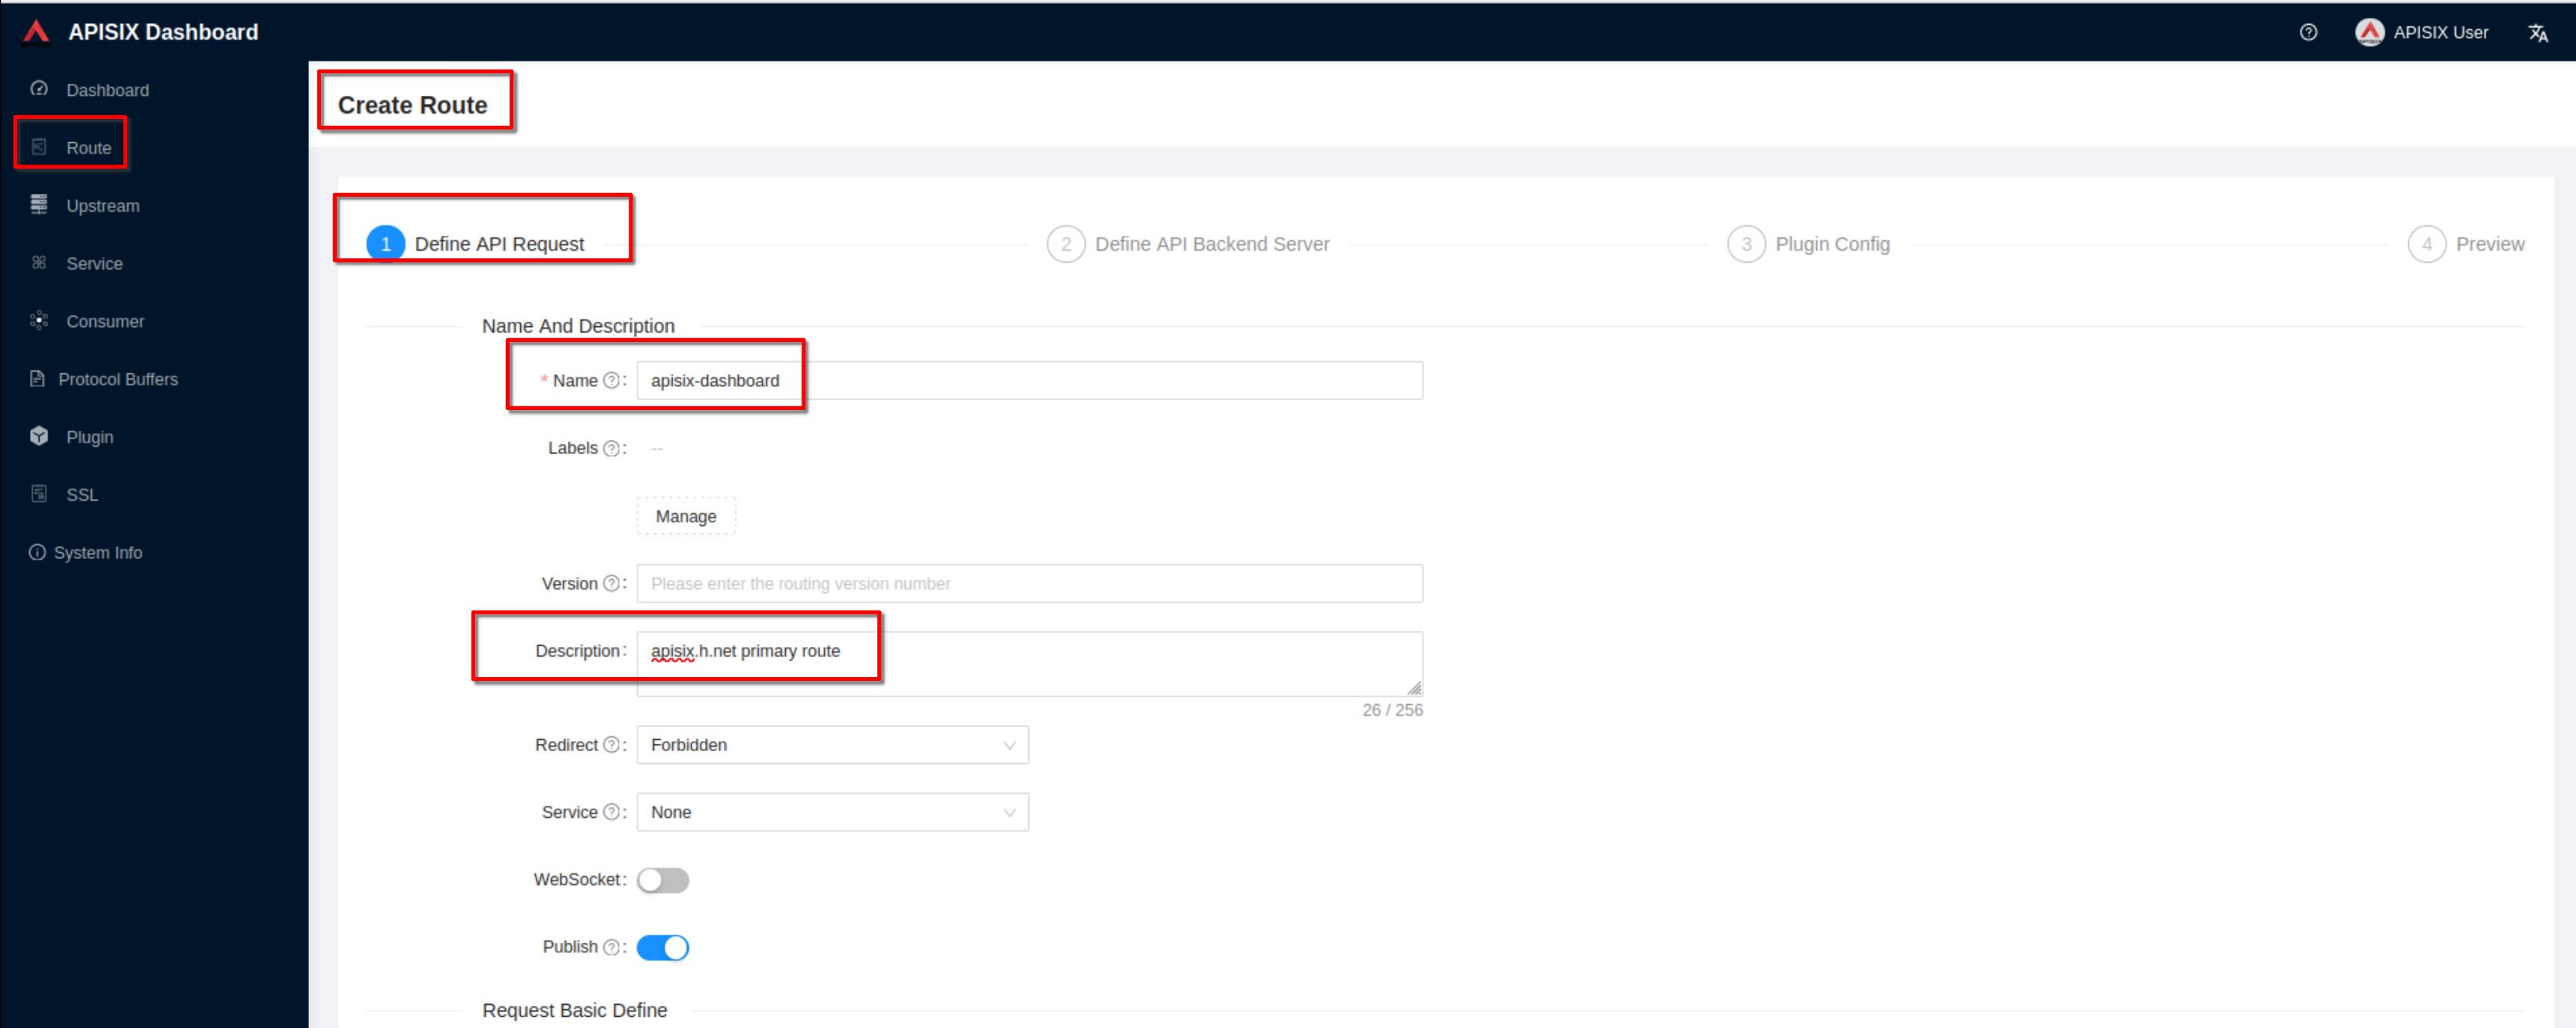
Create a route ("Define api request" - on top): set name to “apisix-dashboard”
and add a description
-
+
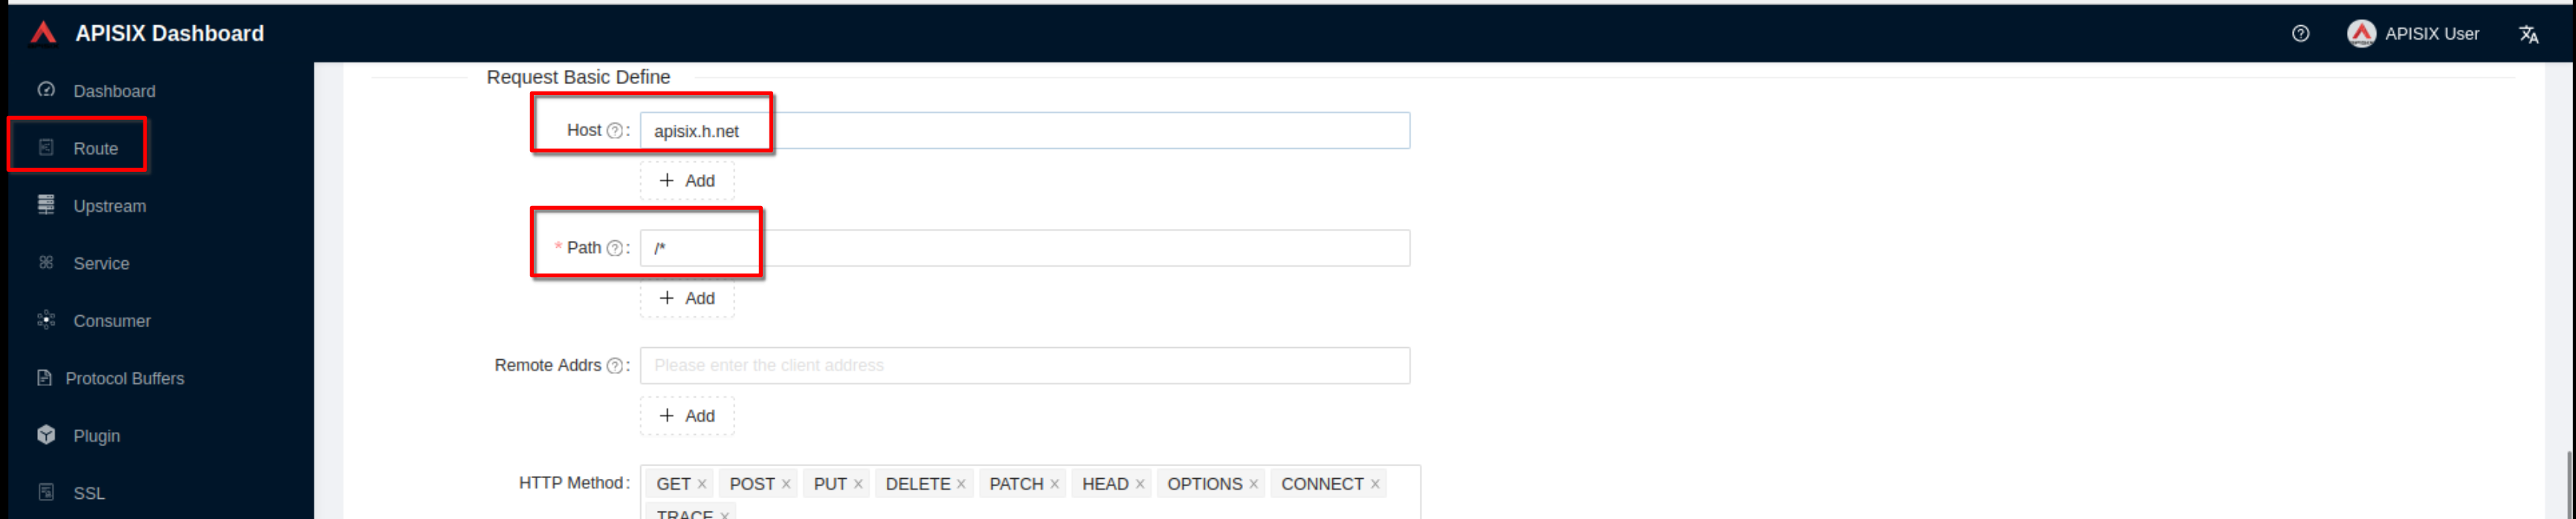
Create a route ("Define api request" - below): set host to **“apisix.h.net”**
and path to **“/*”**. Then click **“Next”**
-
+
Select the previous defined “apisix” upstream from the dropdown list. Then
click “Next”
-
+
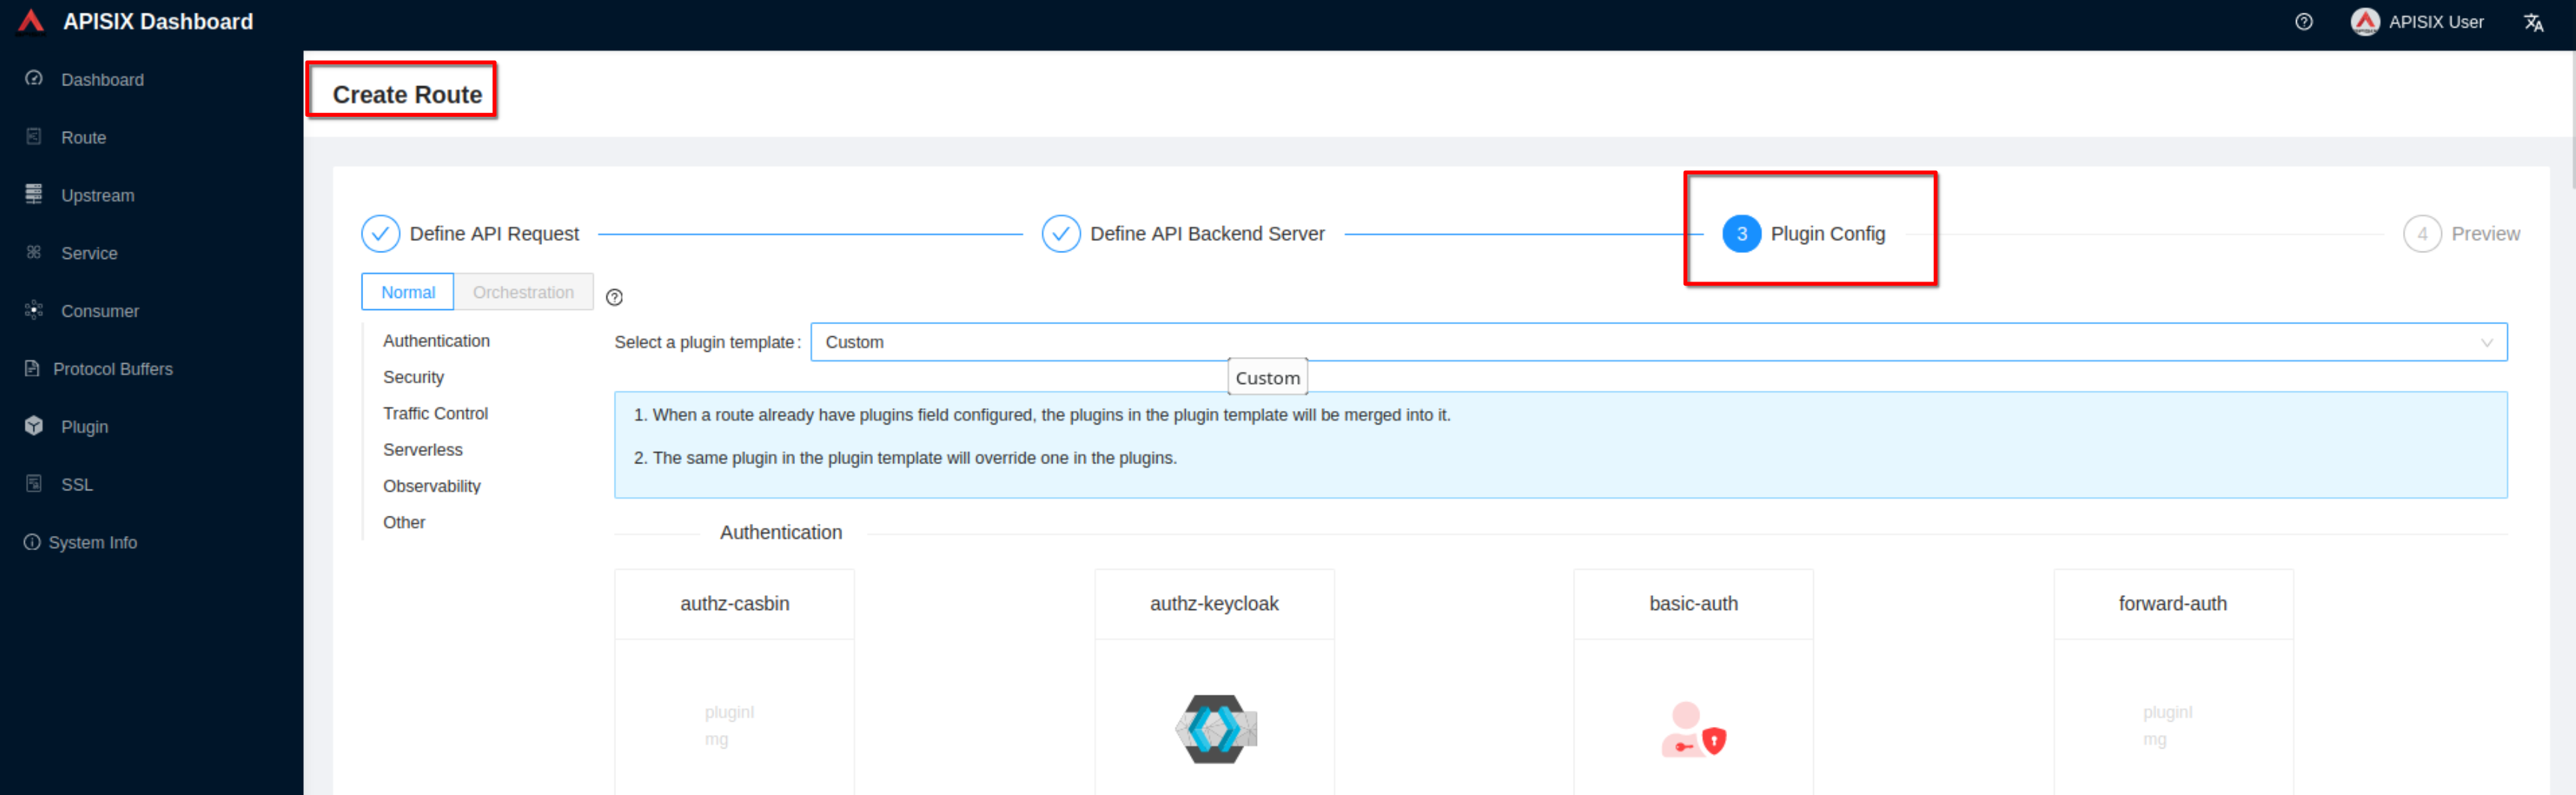
For now don’t use plugins and click “Next”. Then click “Submit”
-
+
### Enable https in apisix
@@ -968,39 +968,39 @@ kubectl -n apisix port-forward service/apisix-dashboard
9090:80
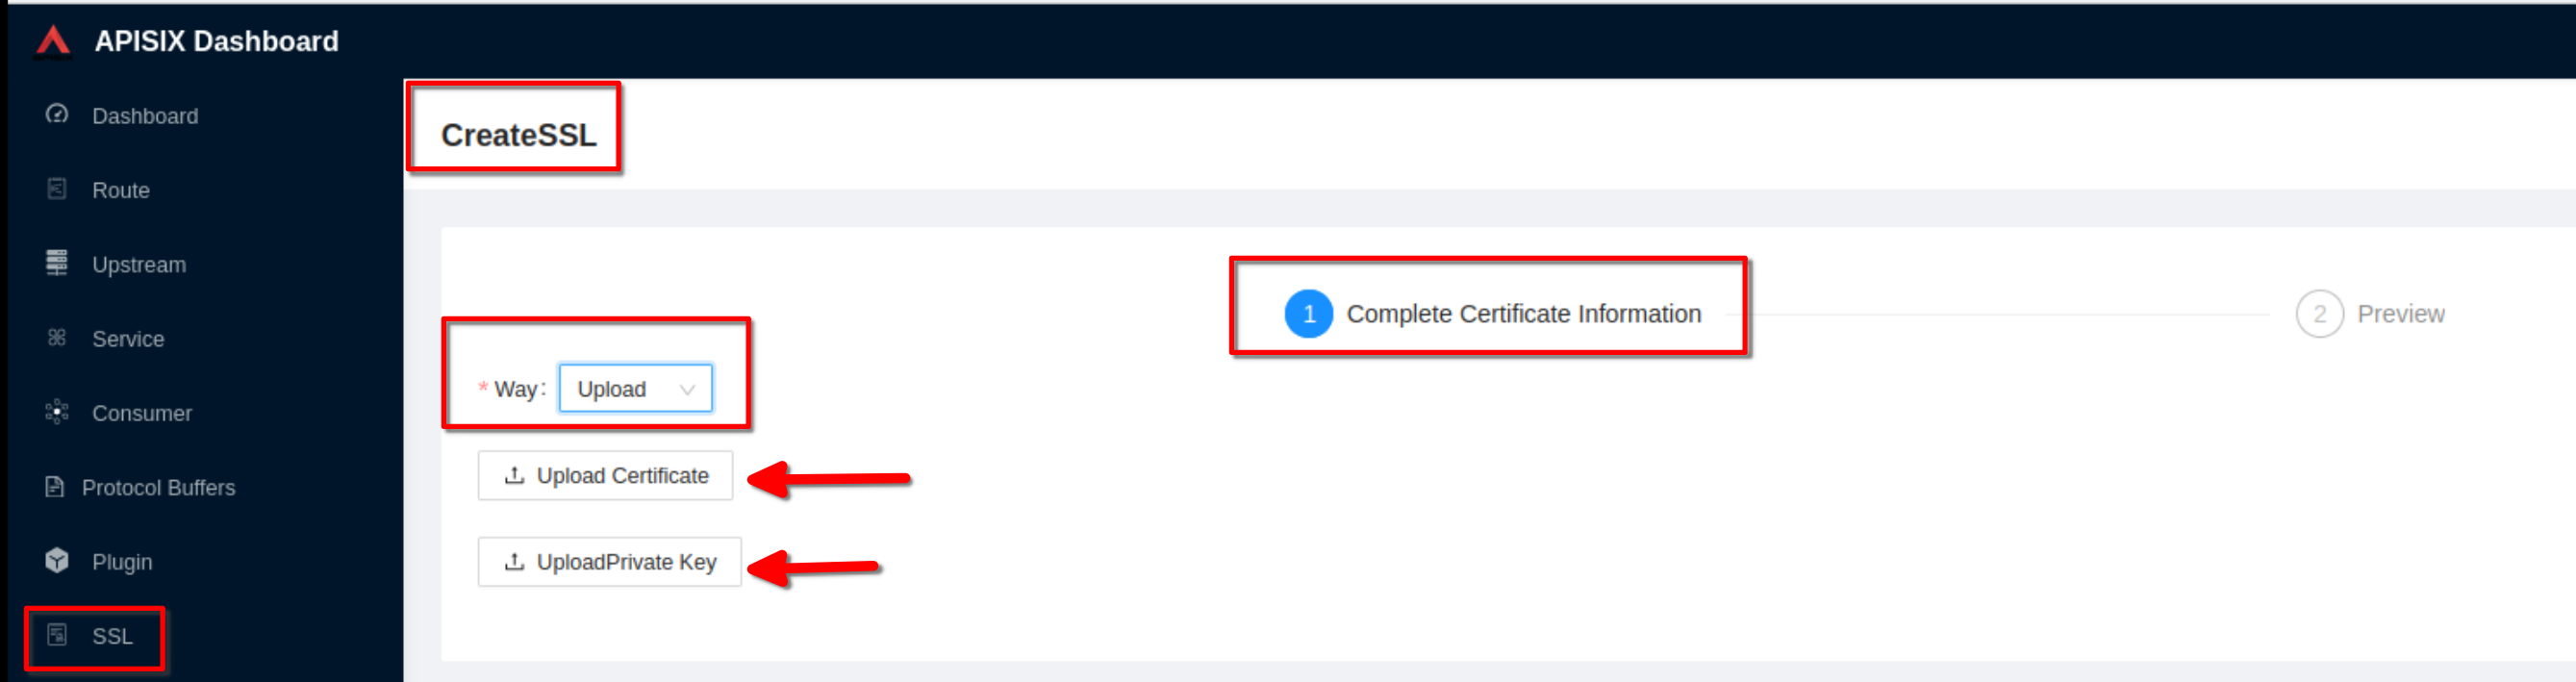
Select the “SSL” page and click Create
-
+
Select **“Way: Upload”**, then click **“upload certificate”** and **“upload
key”**. Clik “Next” (Take certificate and key files from **~/H/hservcerts**)
-
+
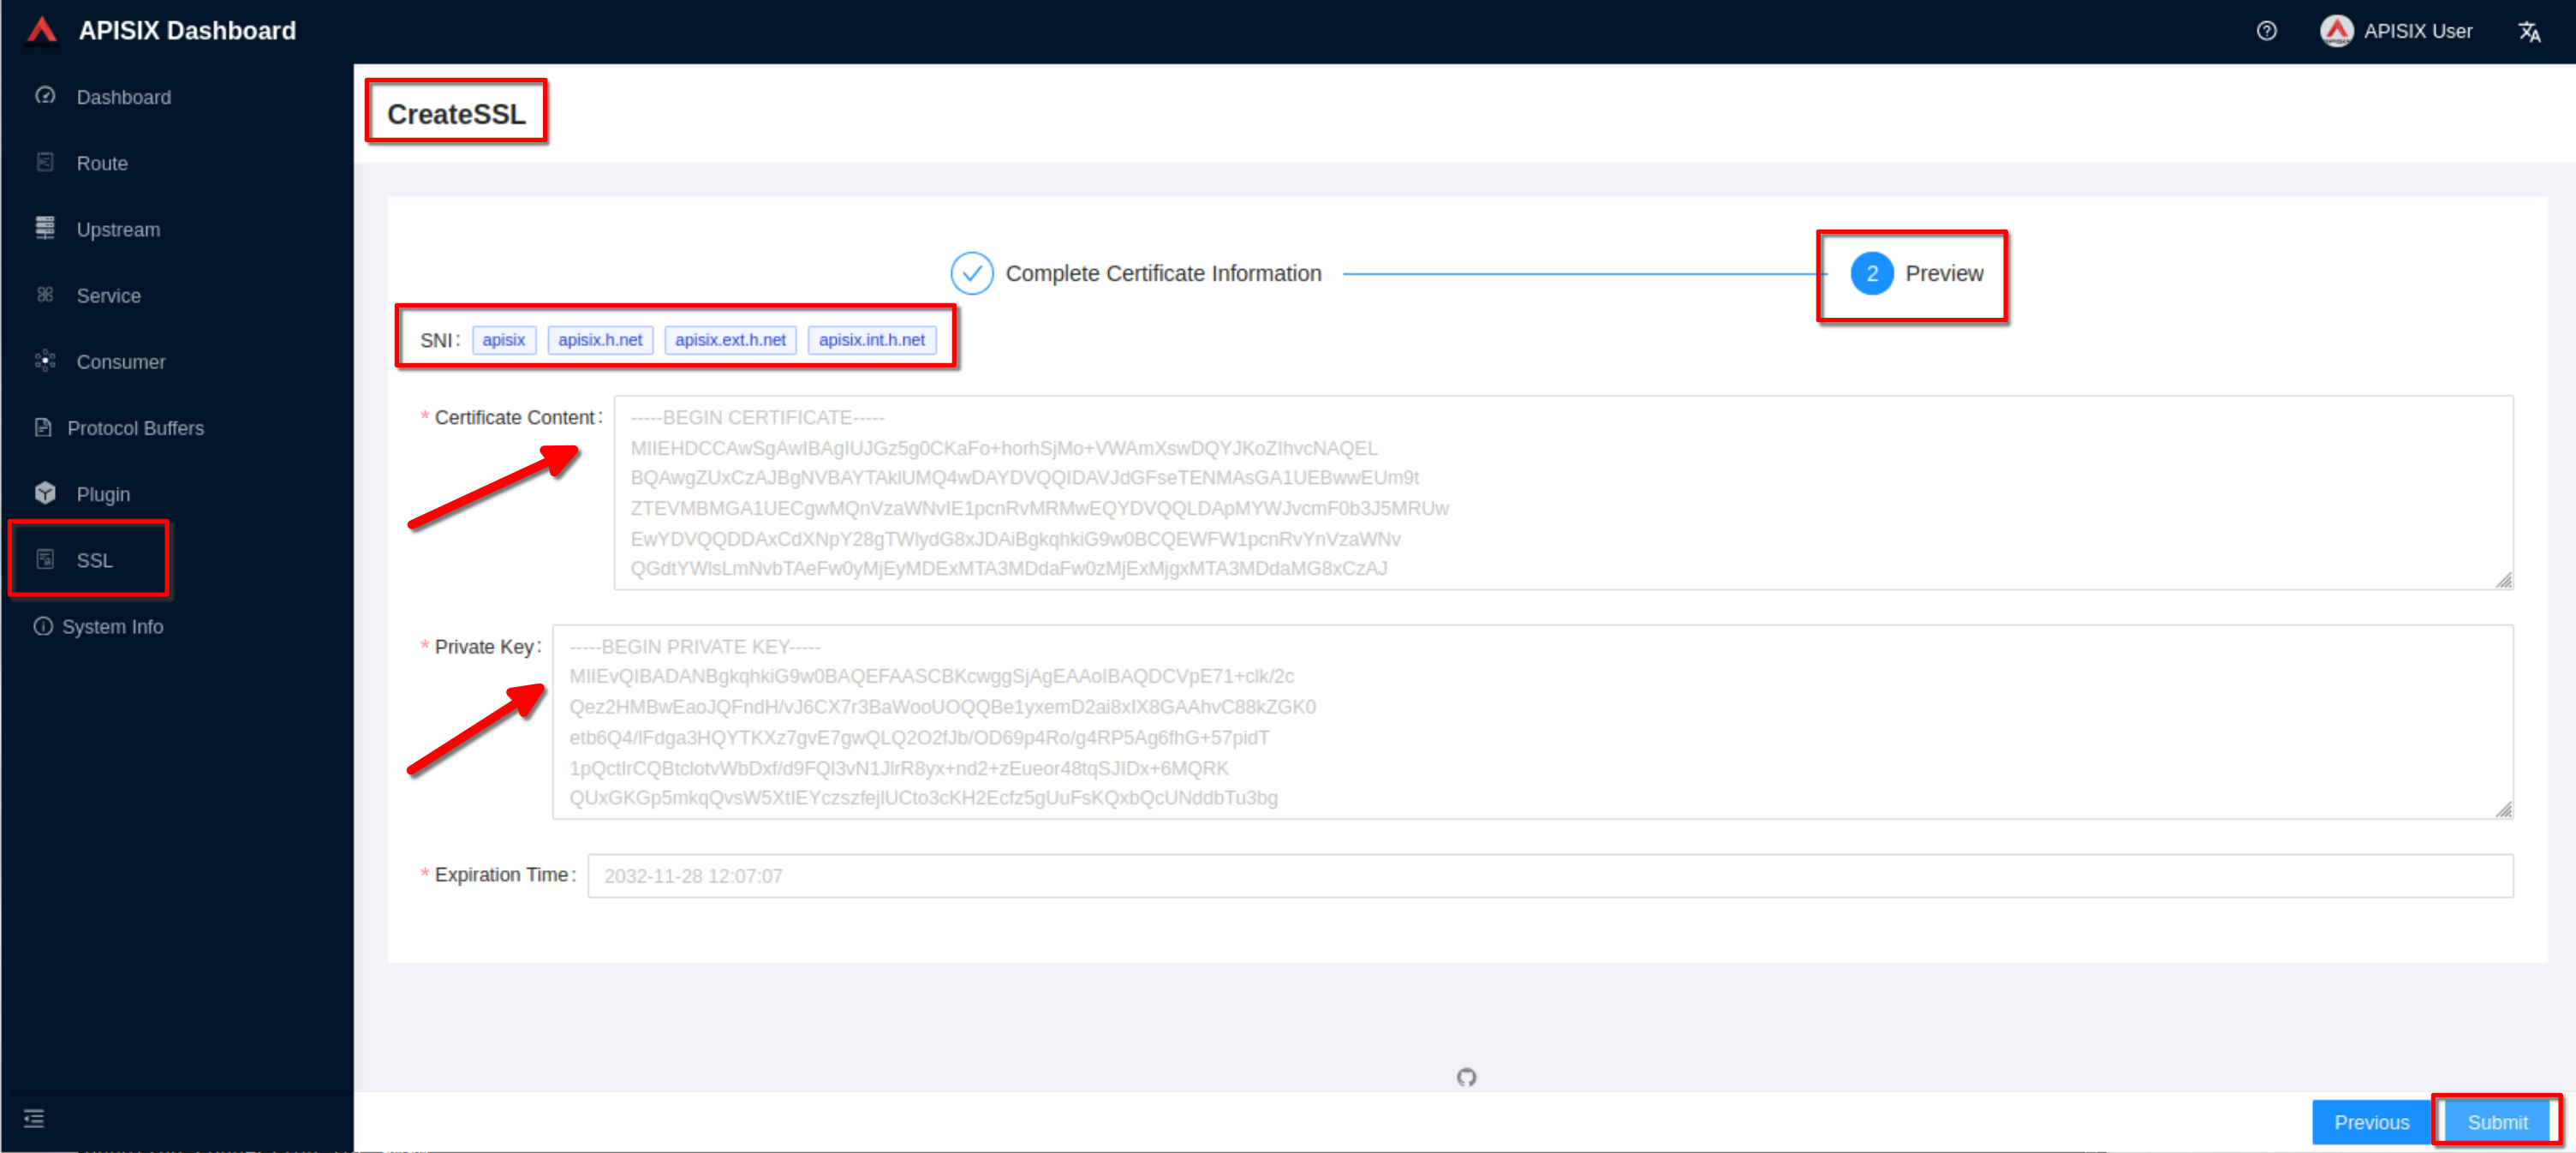
Preview the SSL resource and click “Submit”
-
+
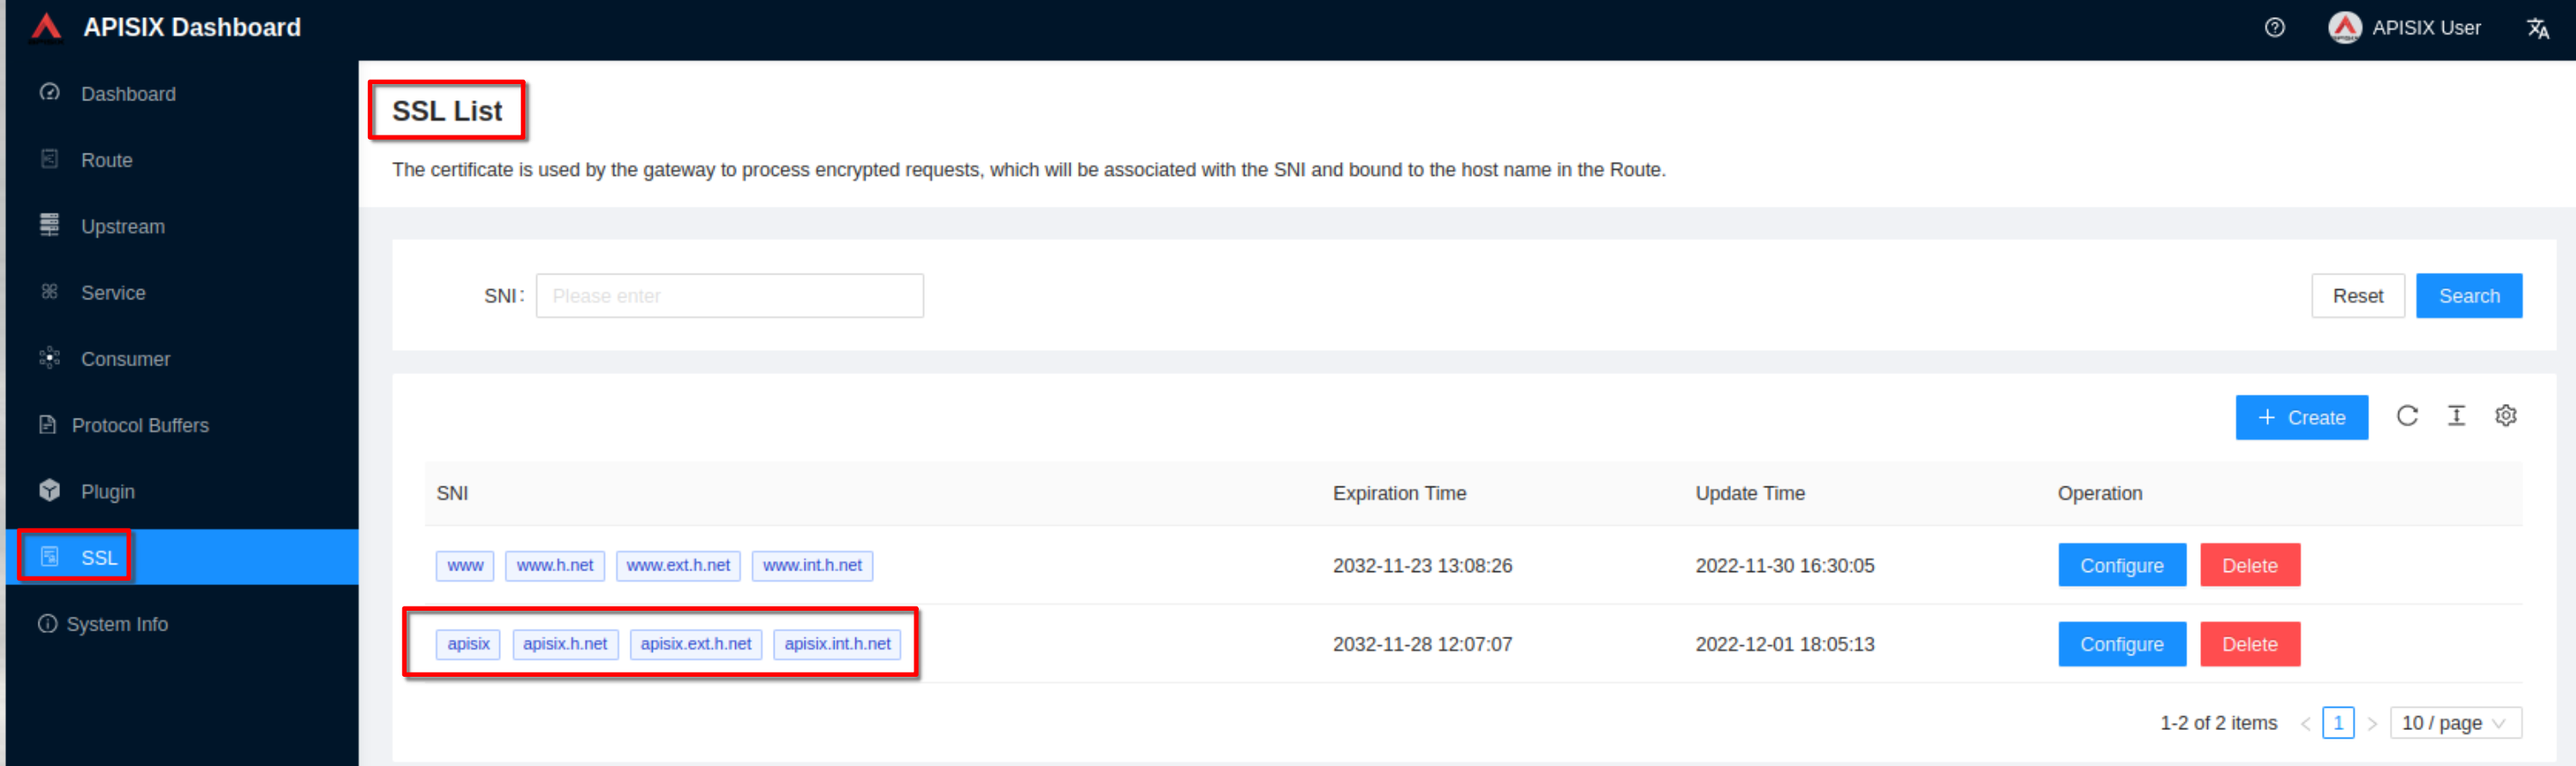
The ssl resource appear in the list (note the SNI values)
-
+
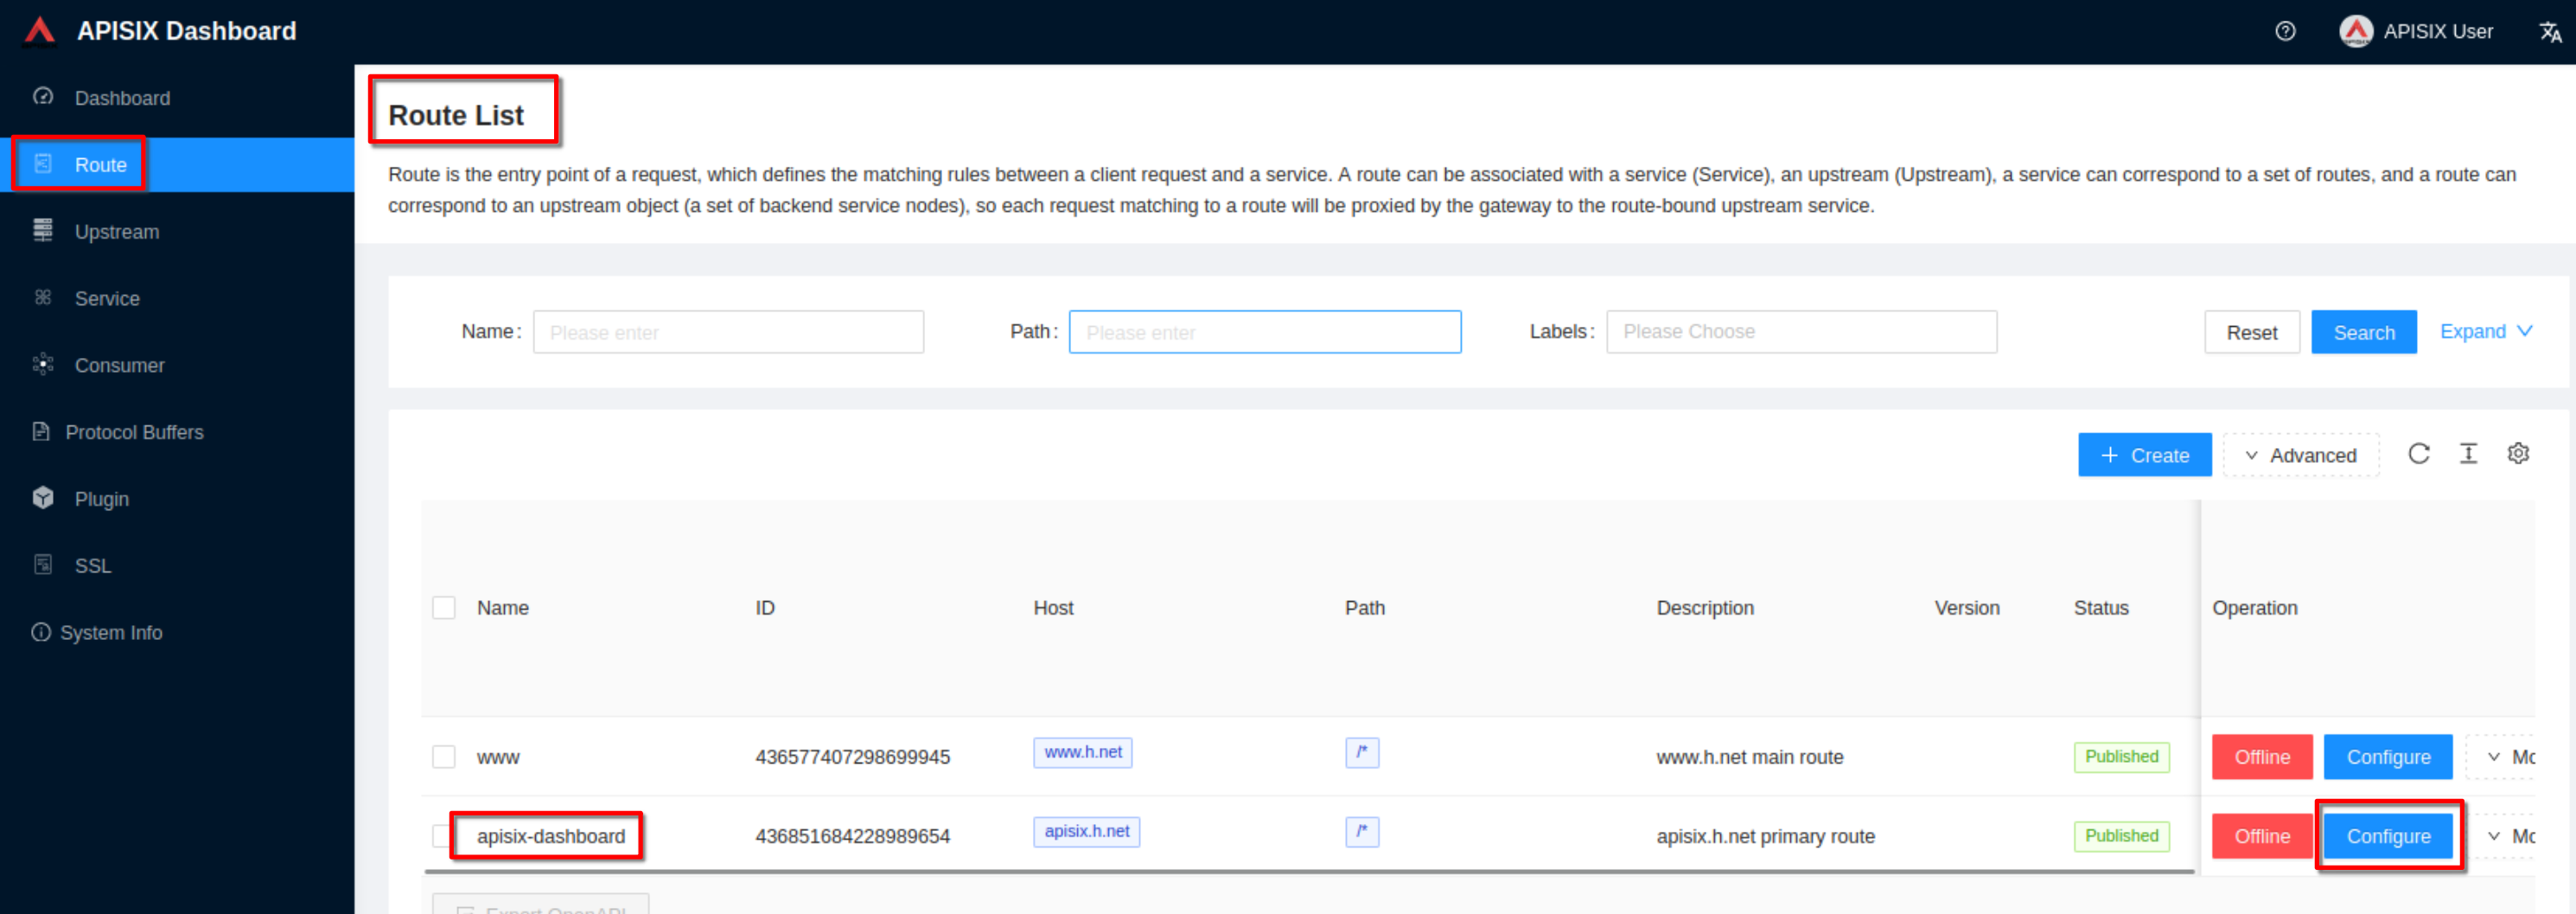
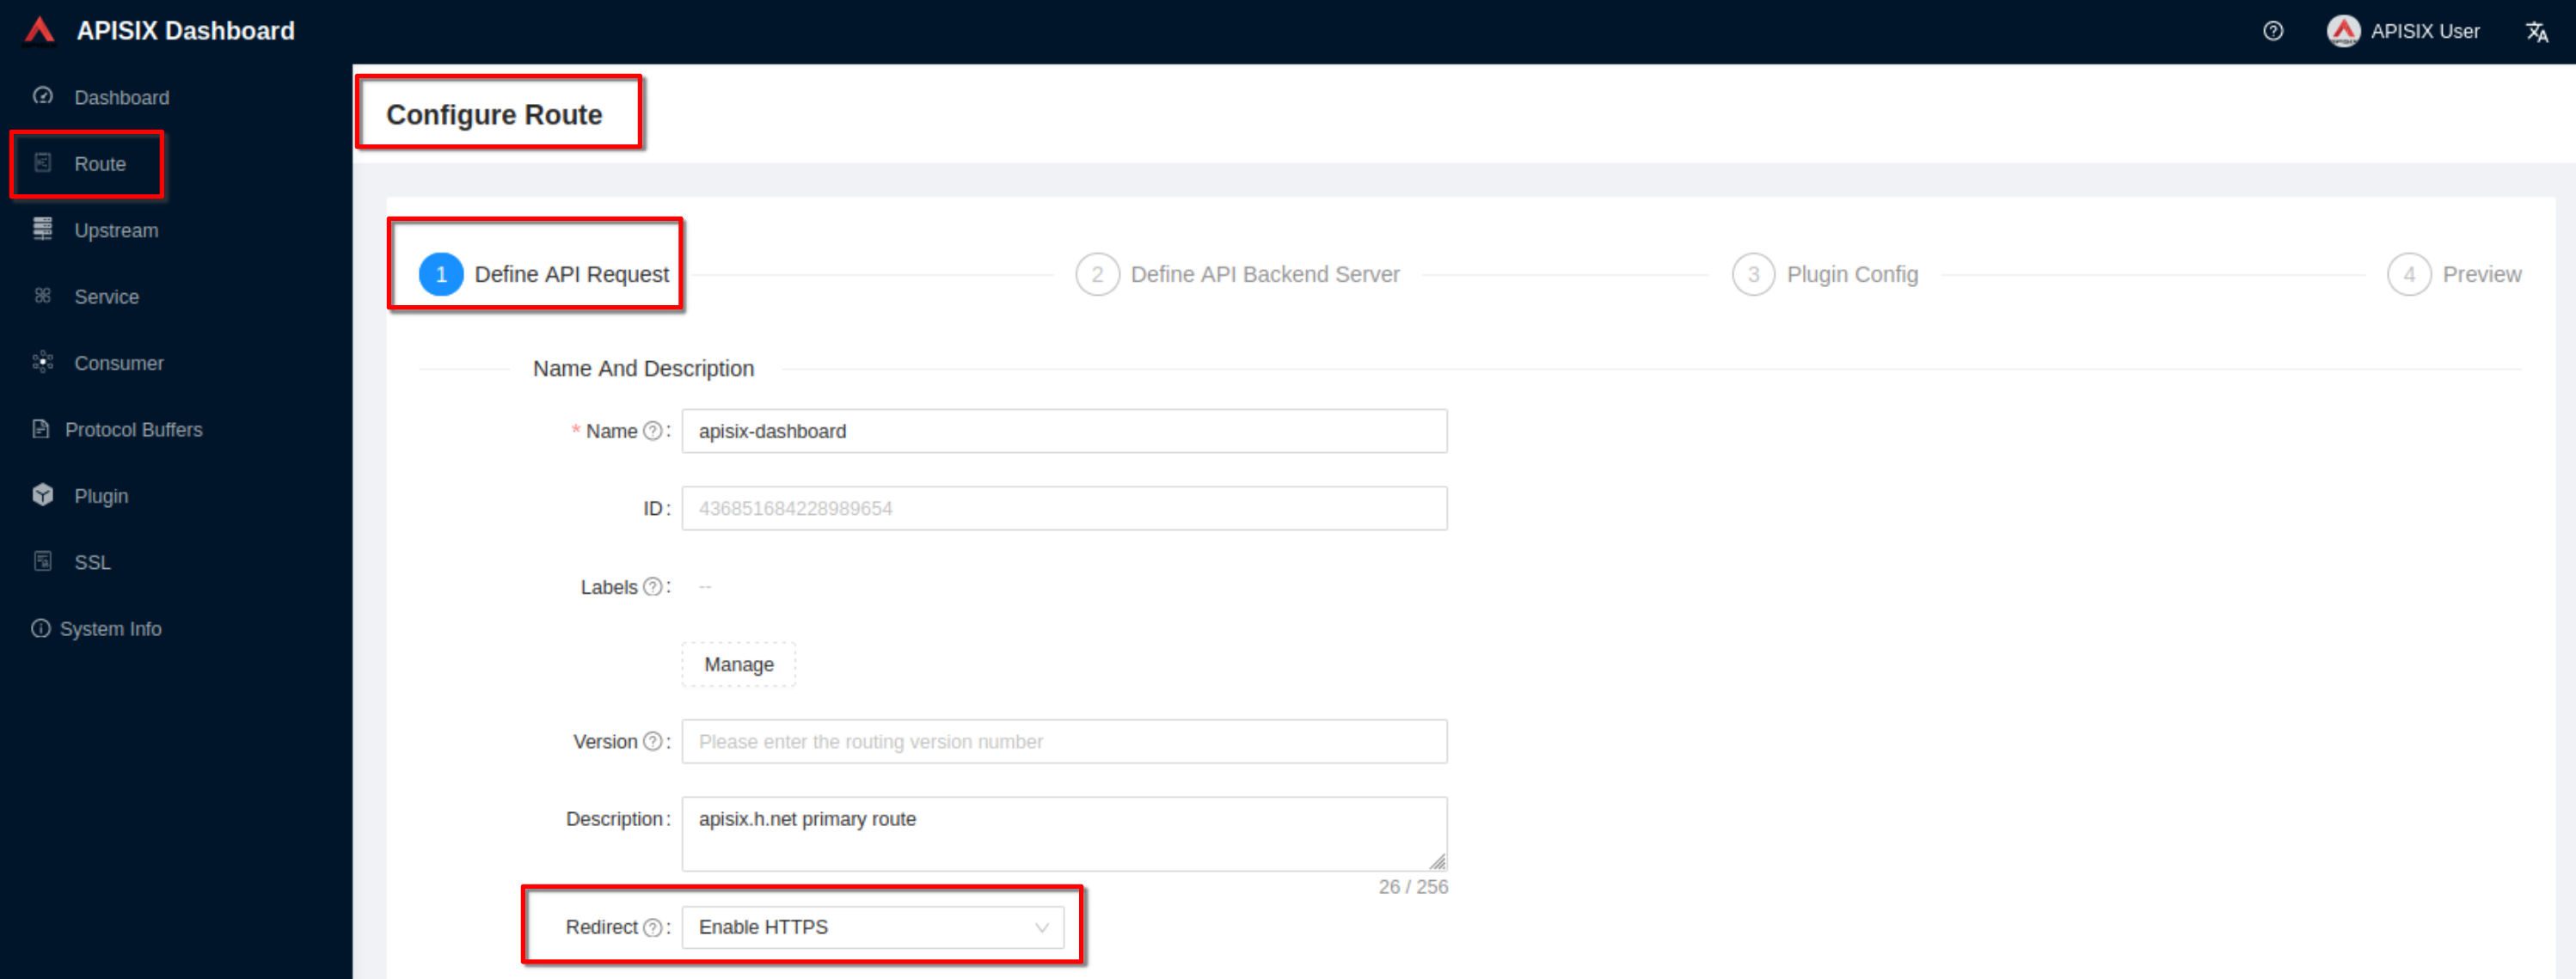
Configure the “apisix-dashboard” route to enable http to https redirection
-
+
Set the **“Redirect”** field to **“Enable HTTPS”**. Then click “Next” until
you see “Submit”. Click “Submit”
-
+
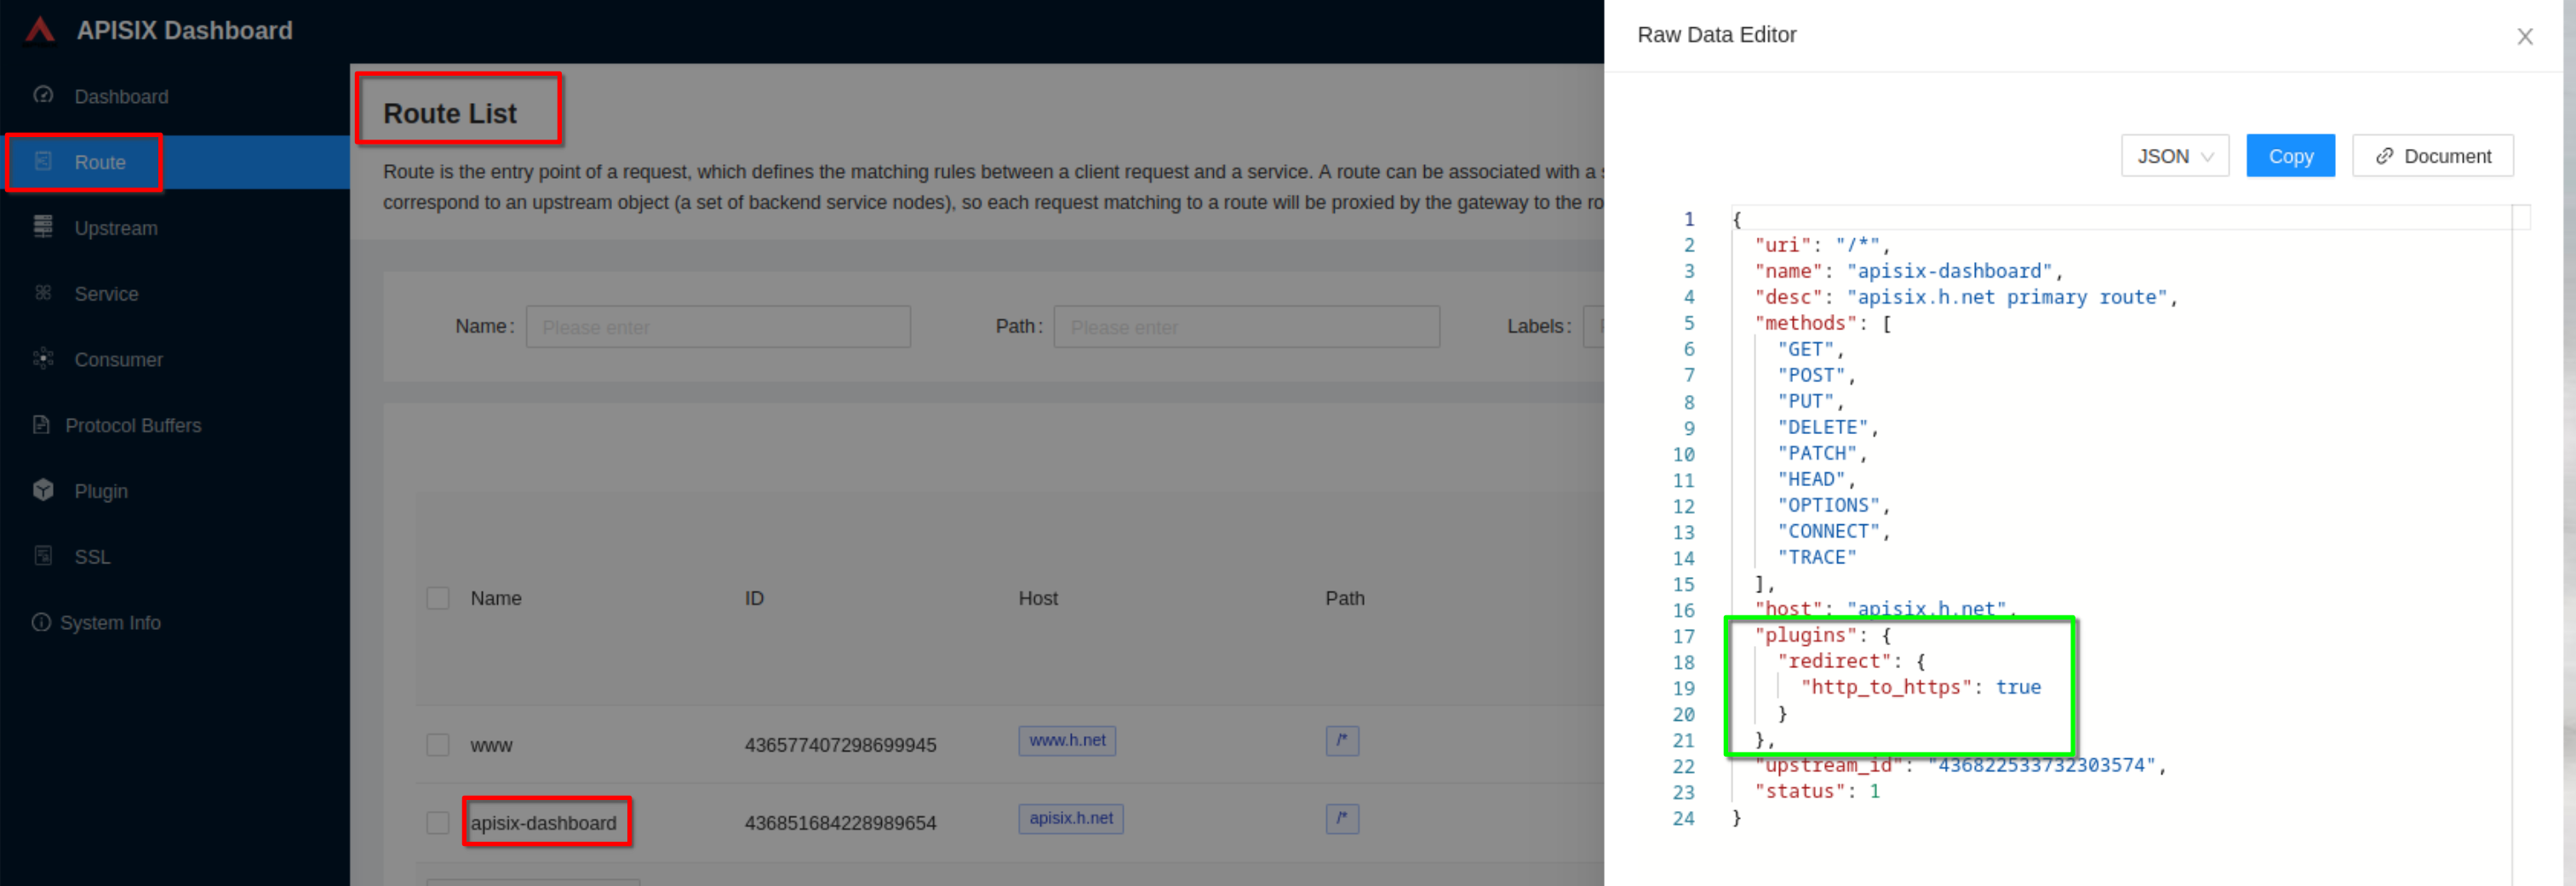
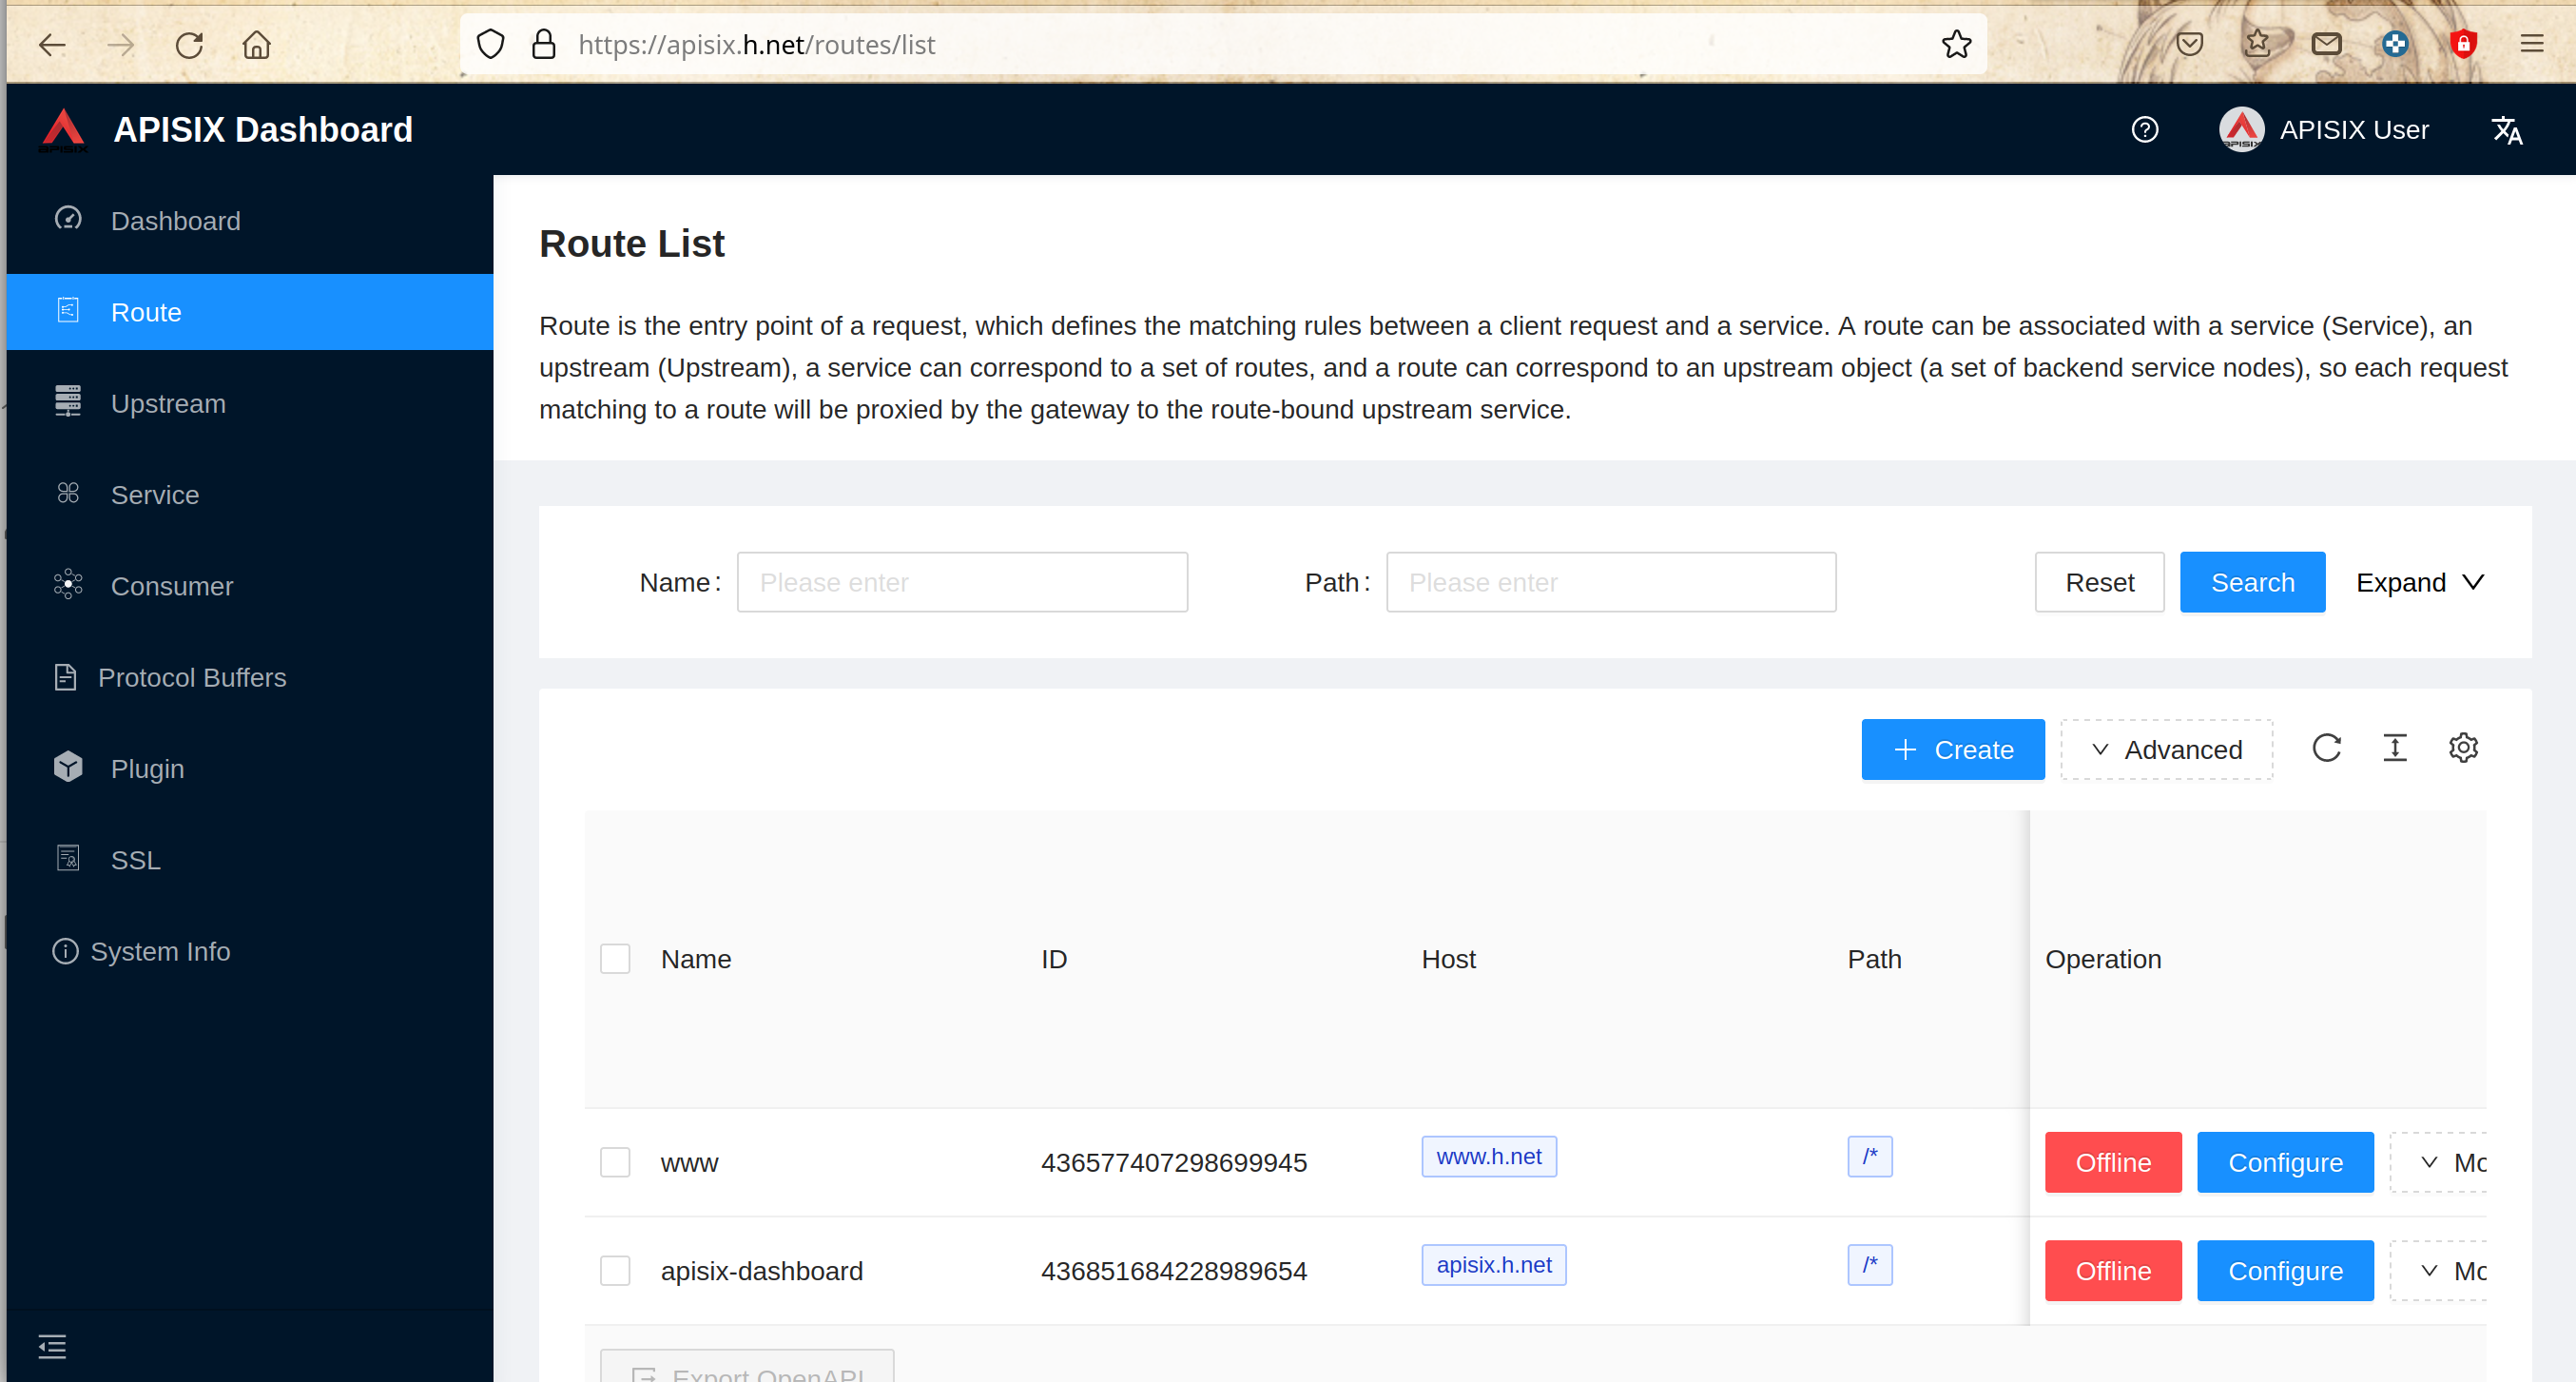
View the route configuration and verify that the redirect plugin is enabled
-
+
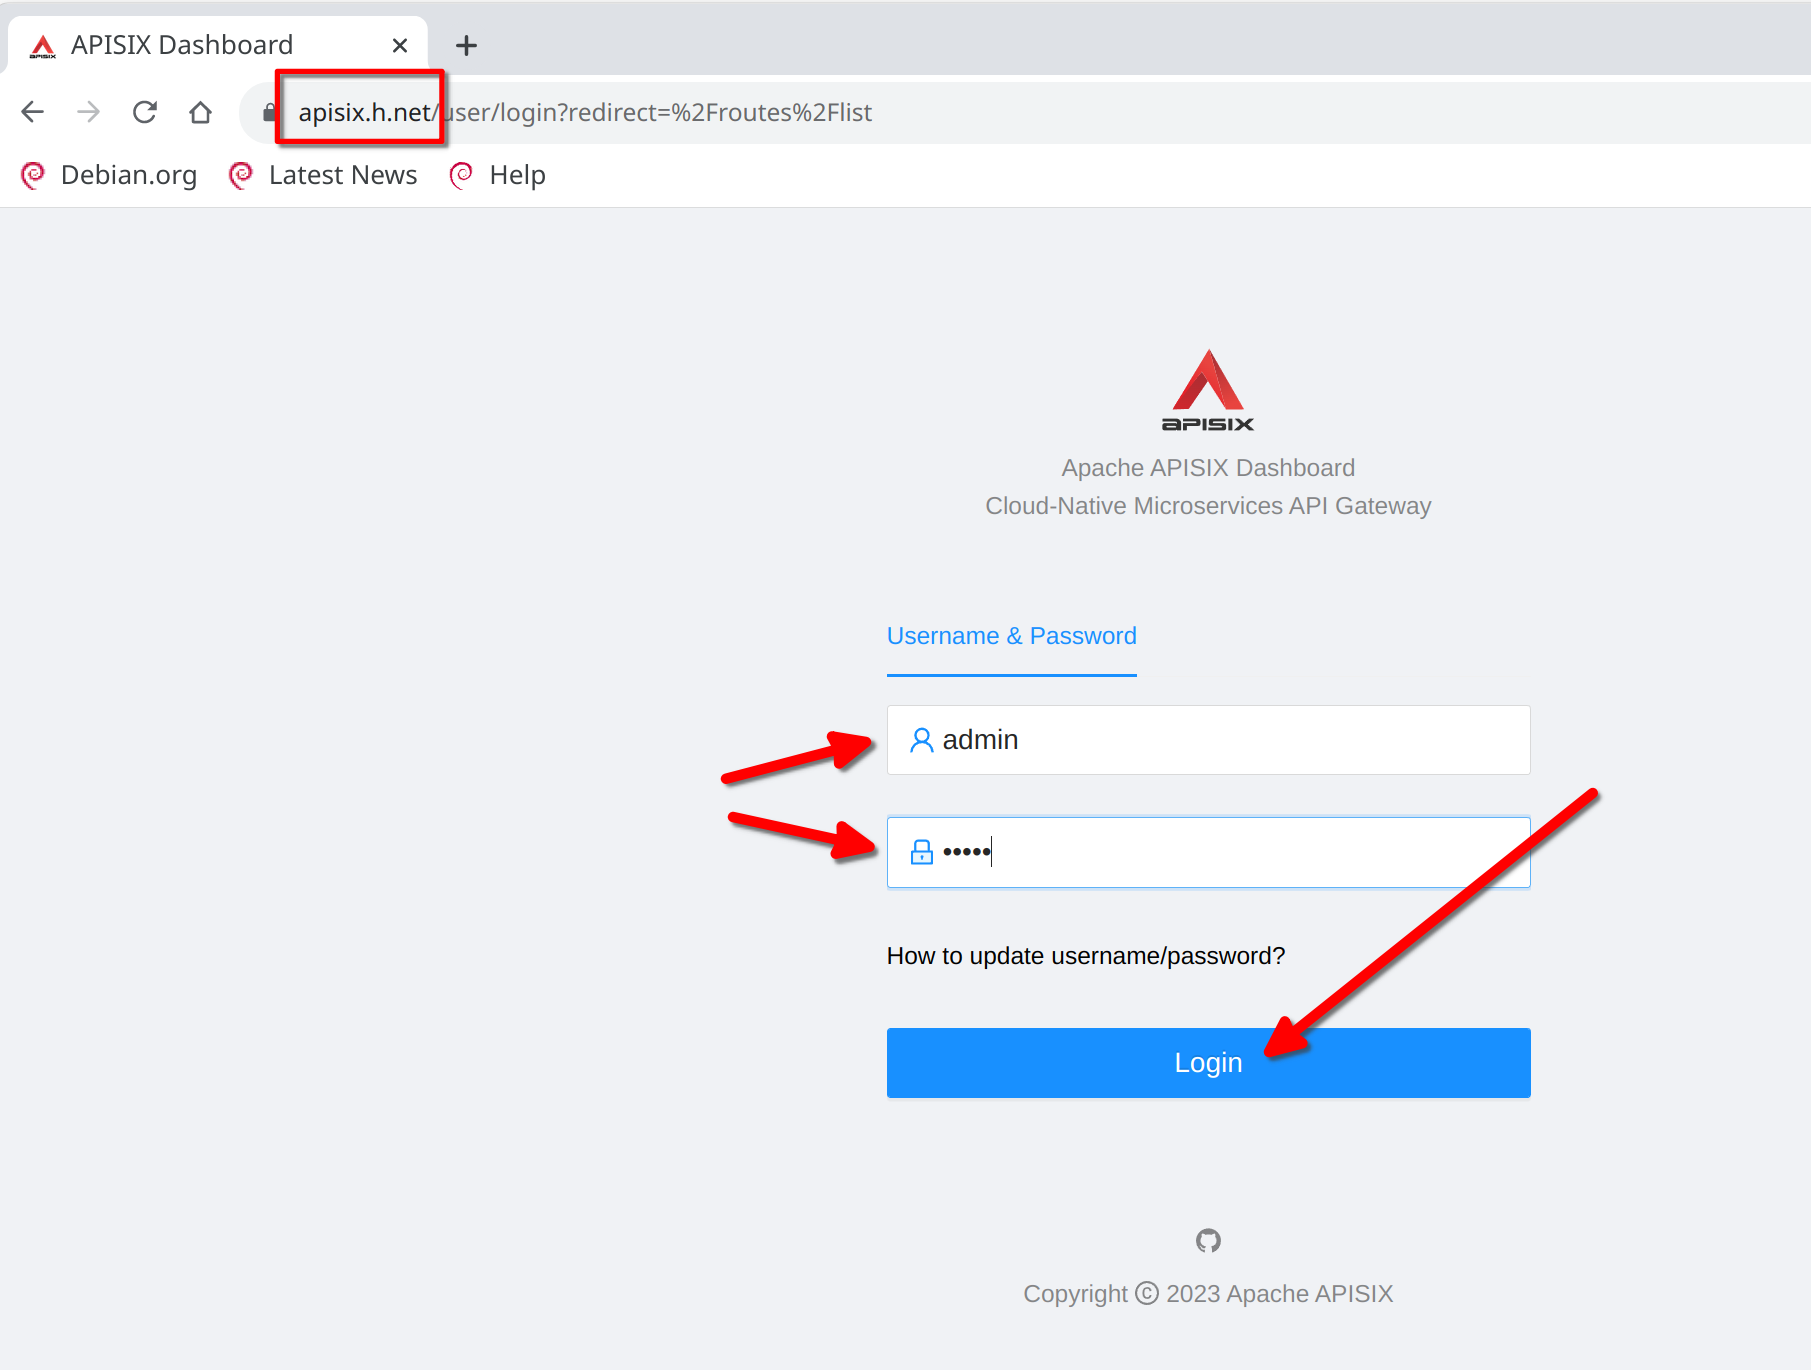
Now from any machine you can access the apisix-dashboard at the url
**“https://apisix.h.net”** and verify that the apisix-dashboard login page is
showed
-
+
Login with “admin” / “admin”
-
+
#### Create Keycloak Definitions for OpenID-Connect
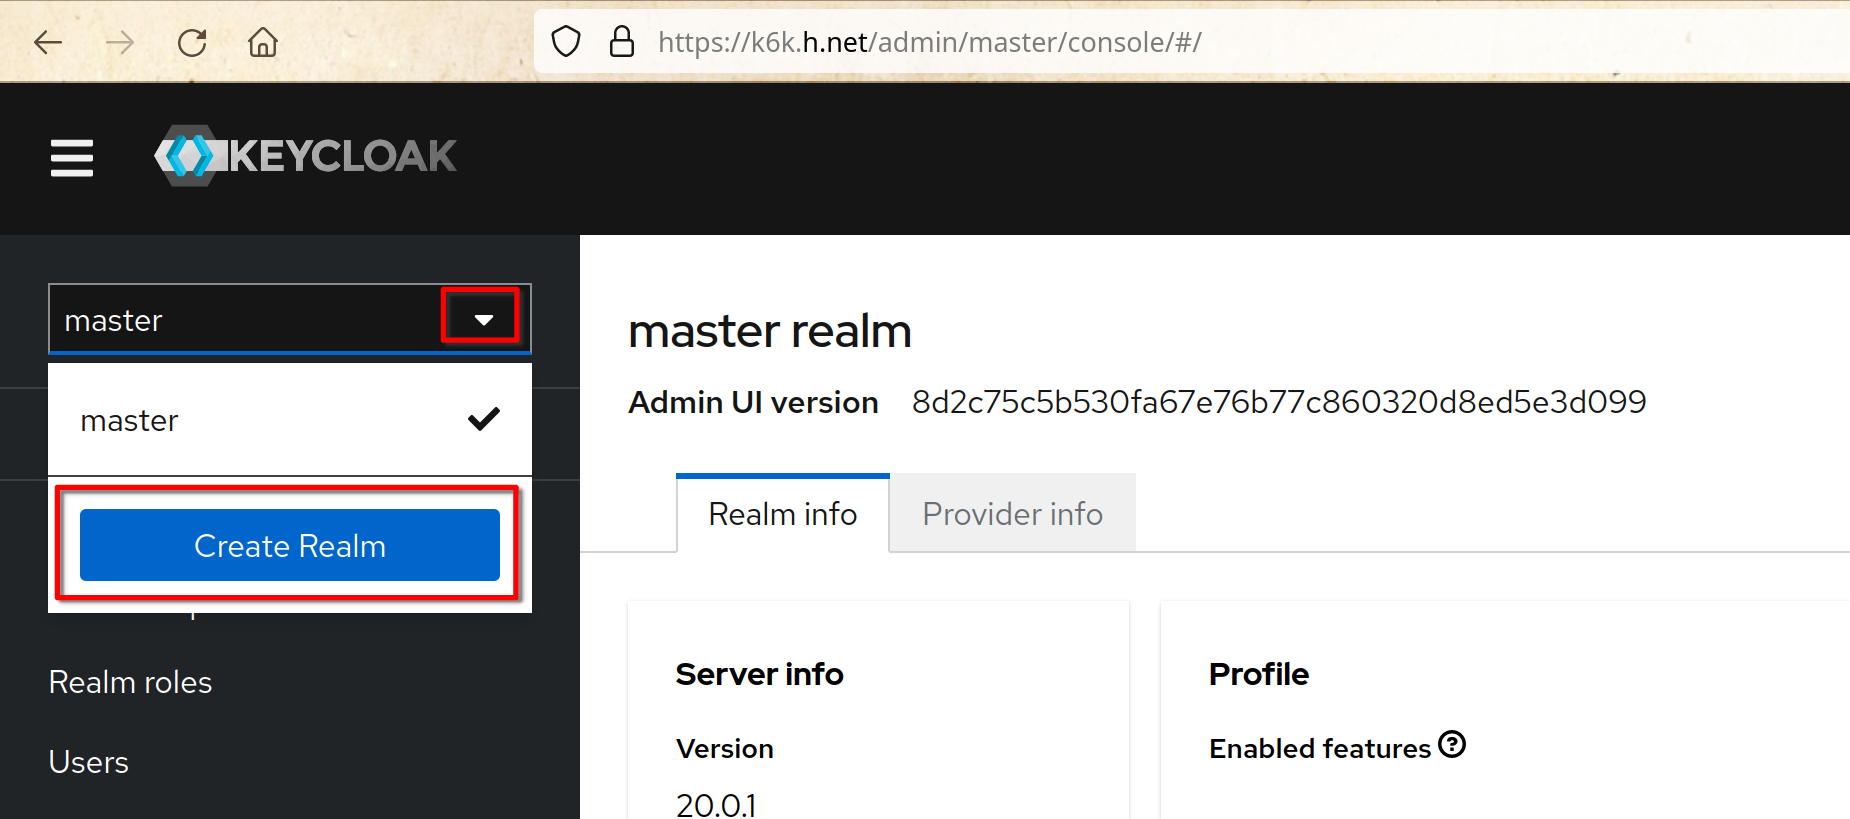
@@ -1010,31 +1010,31 @@ Working on any machine, access the keycloak console at
“https://k6k.h.net”
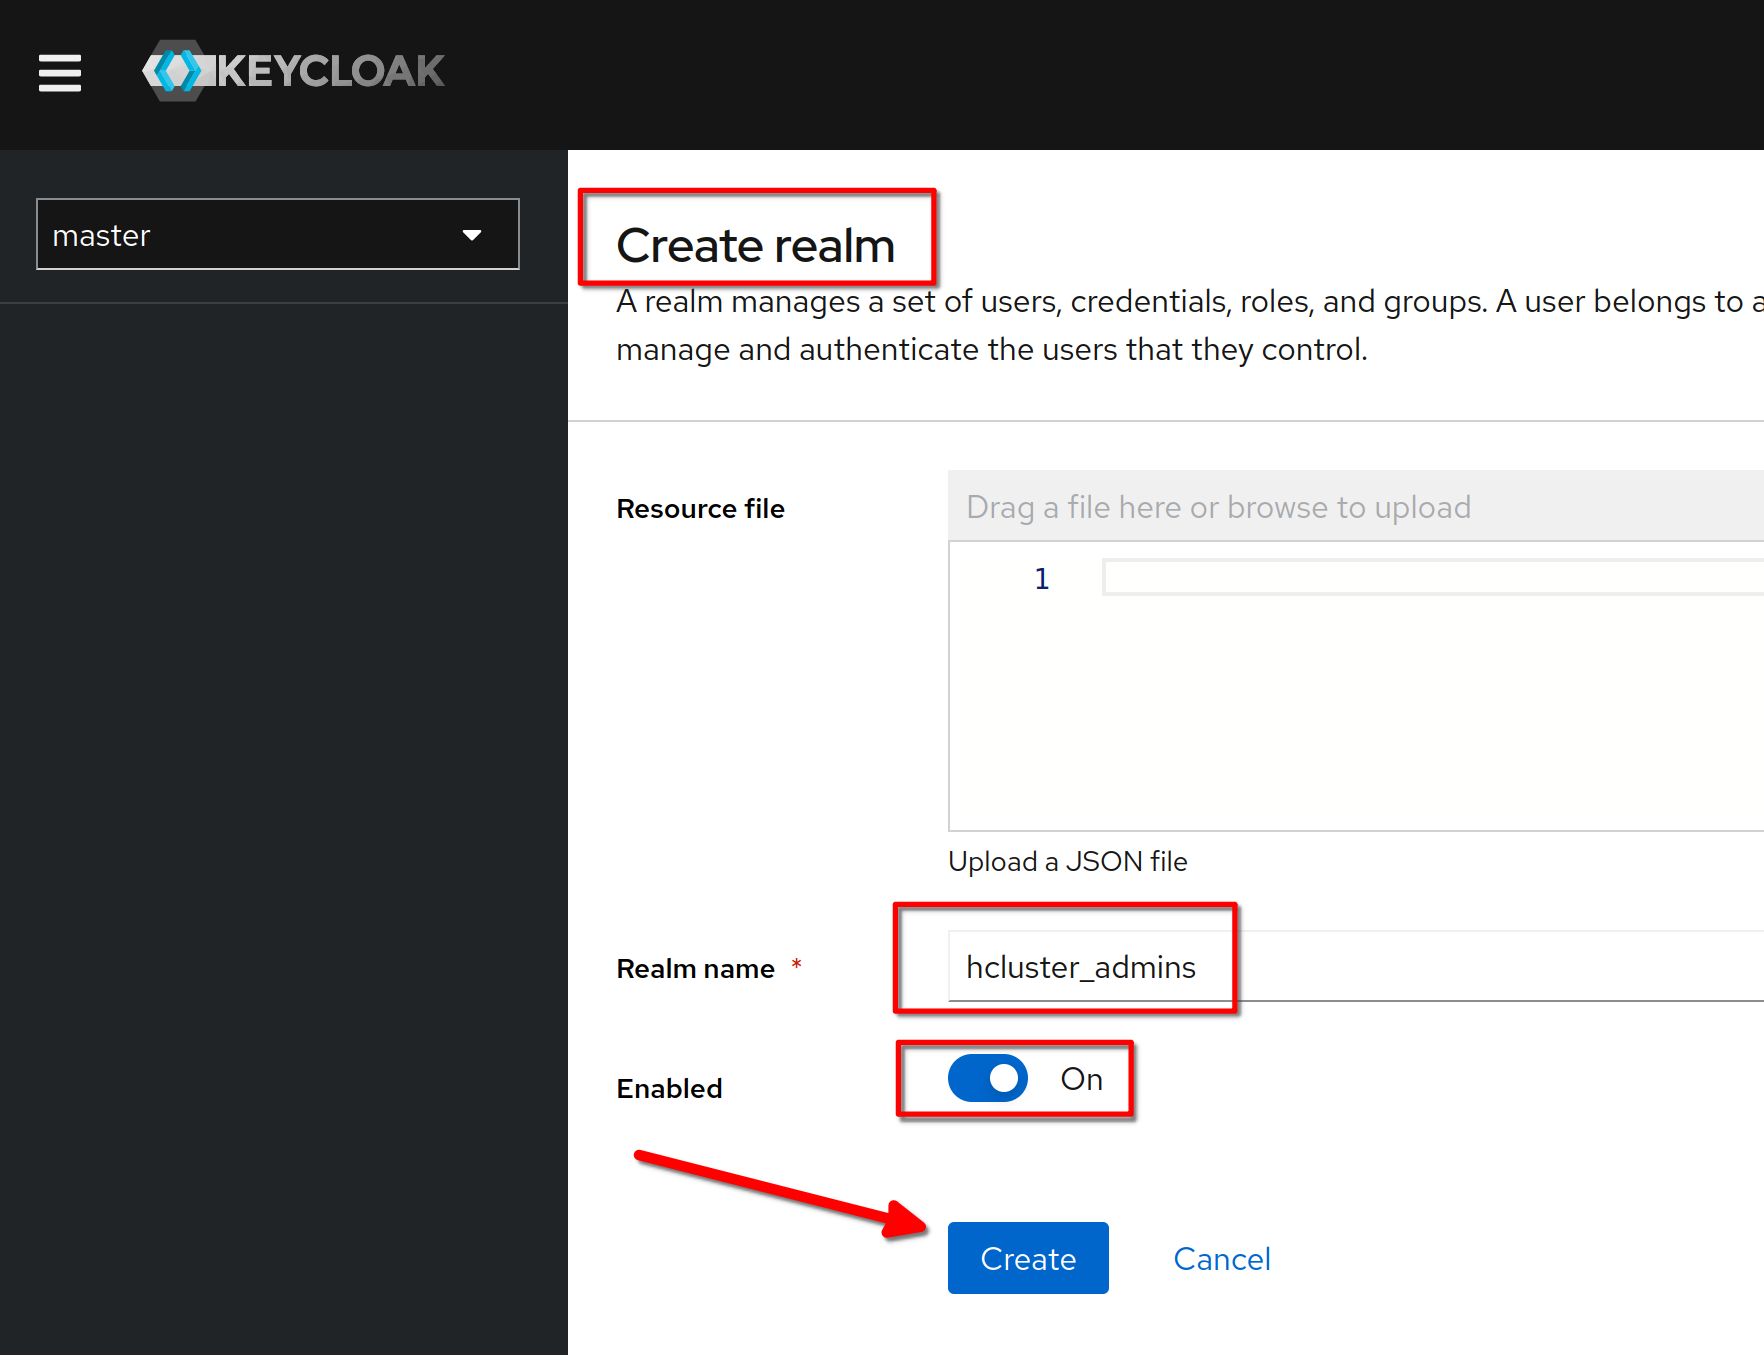
Click “Create Realm”
-
+
Create a realm named **“hcluster_admins”**
-
+
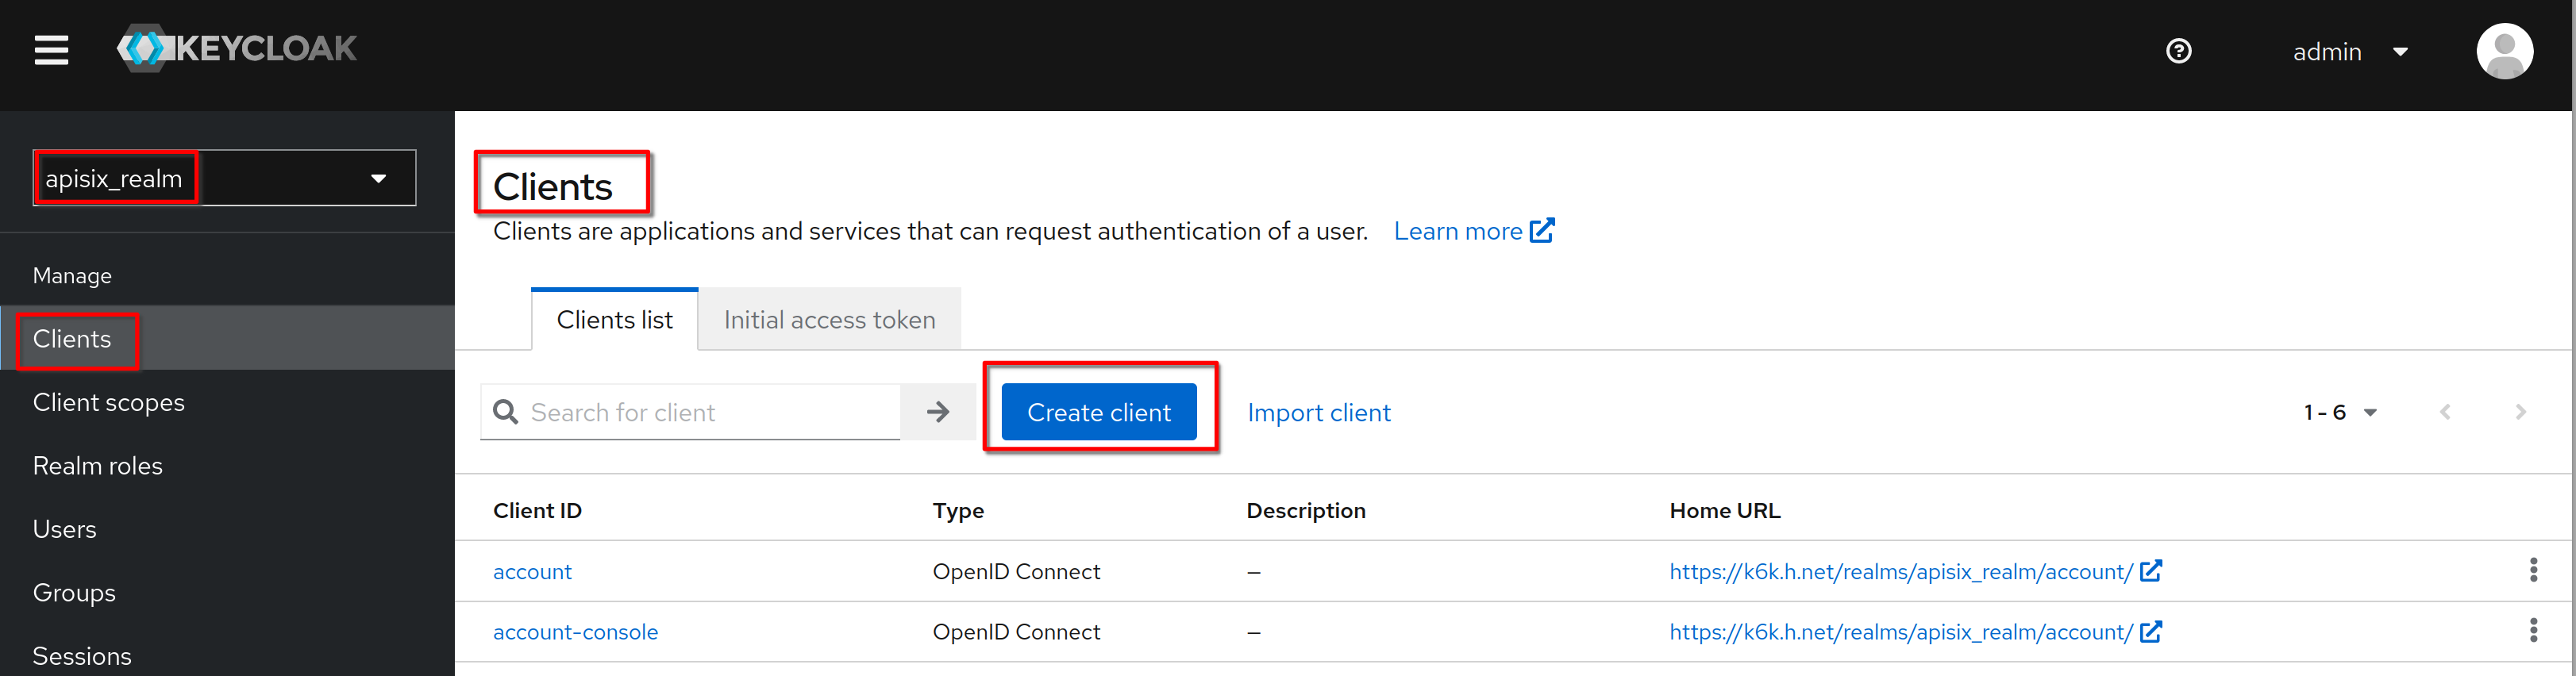
Create a client named **“hcadmins”**
-
+
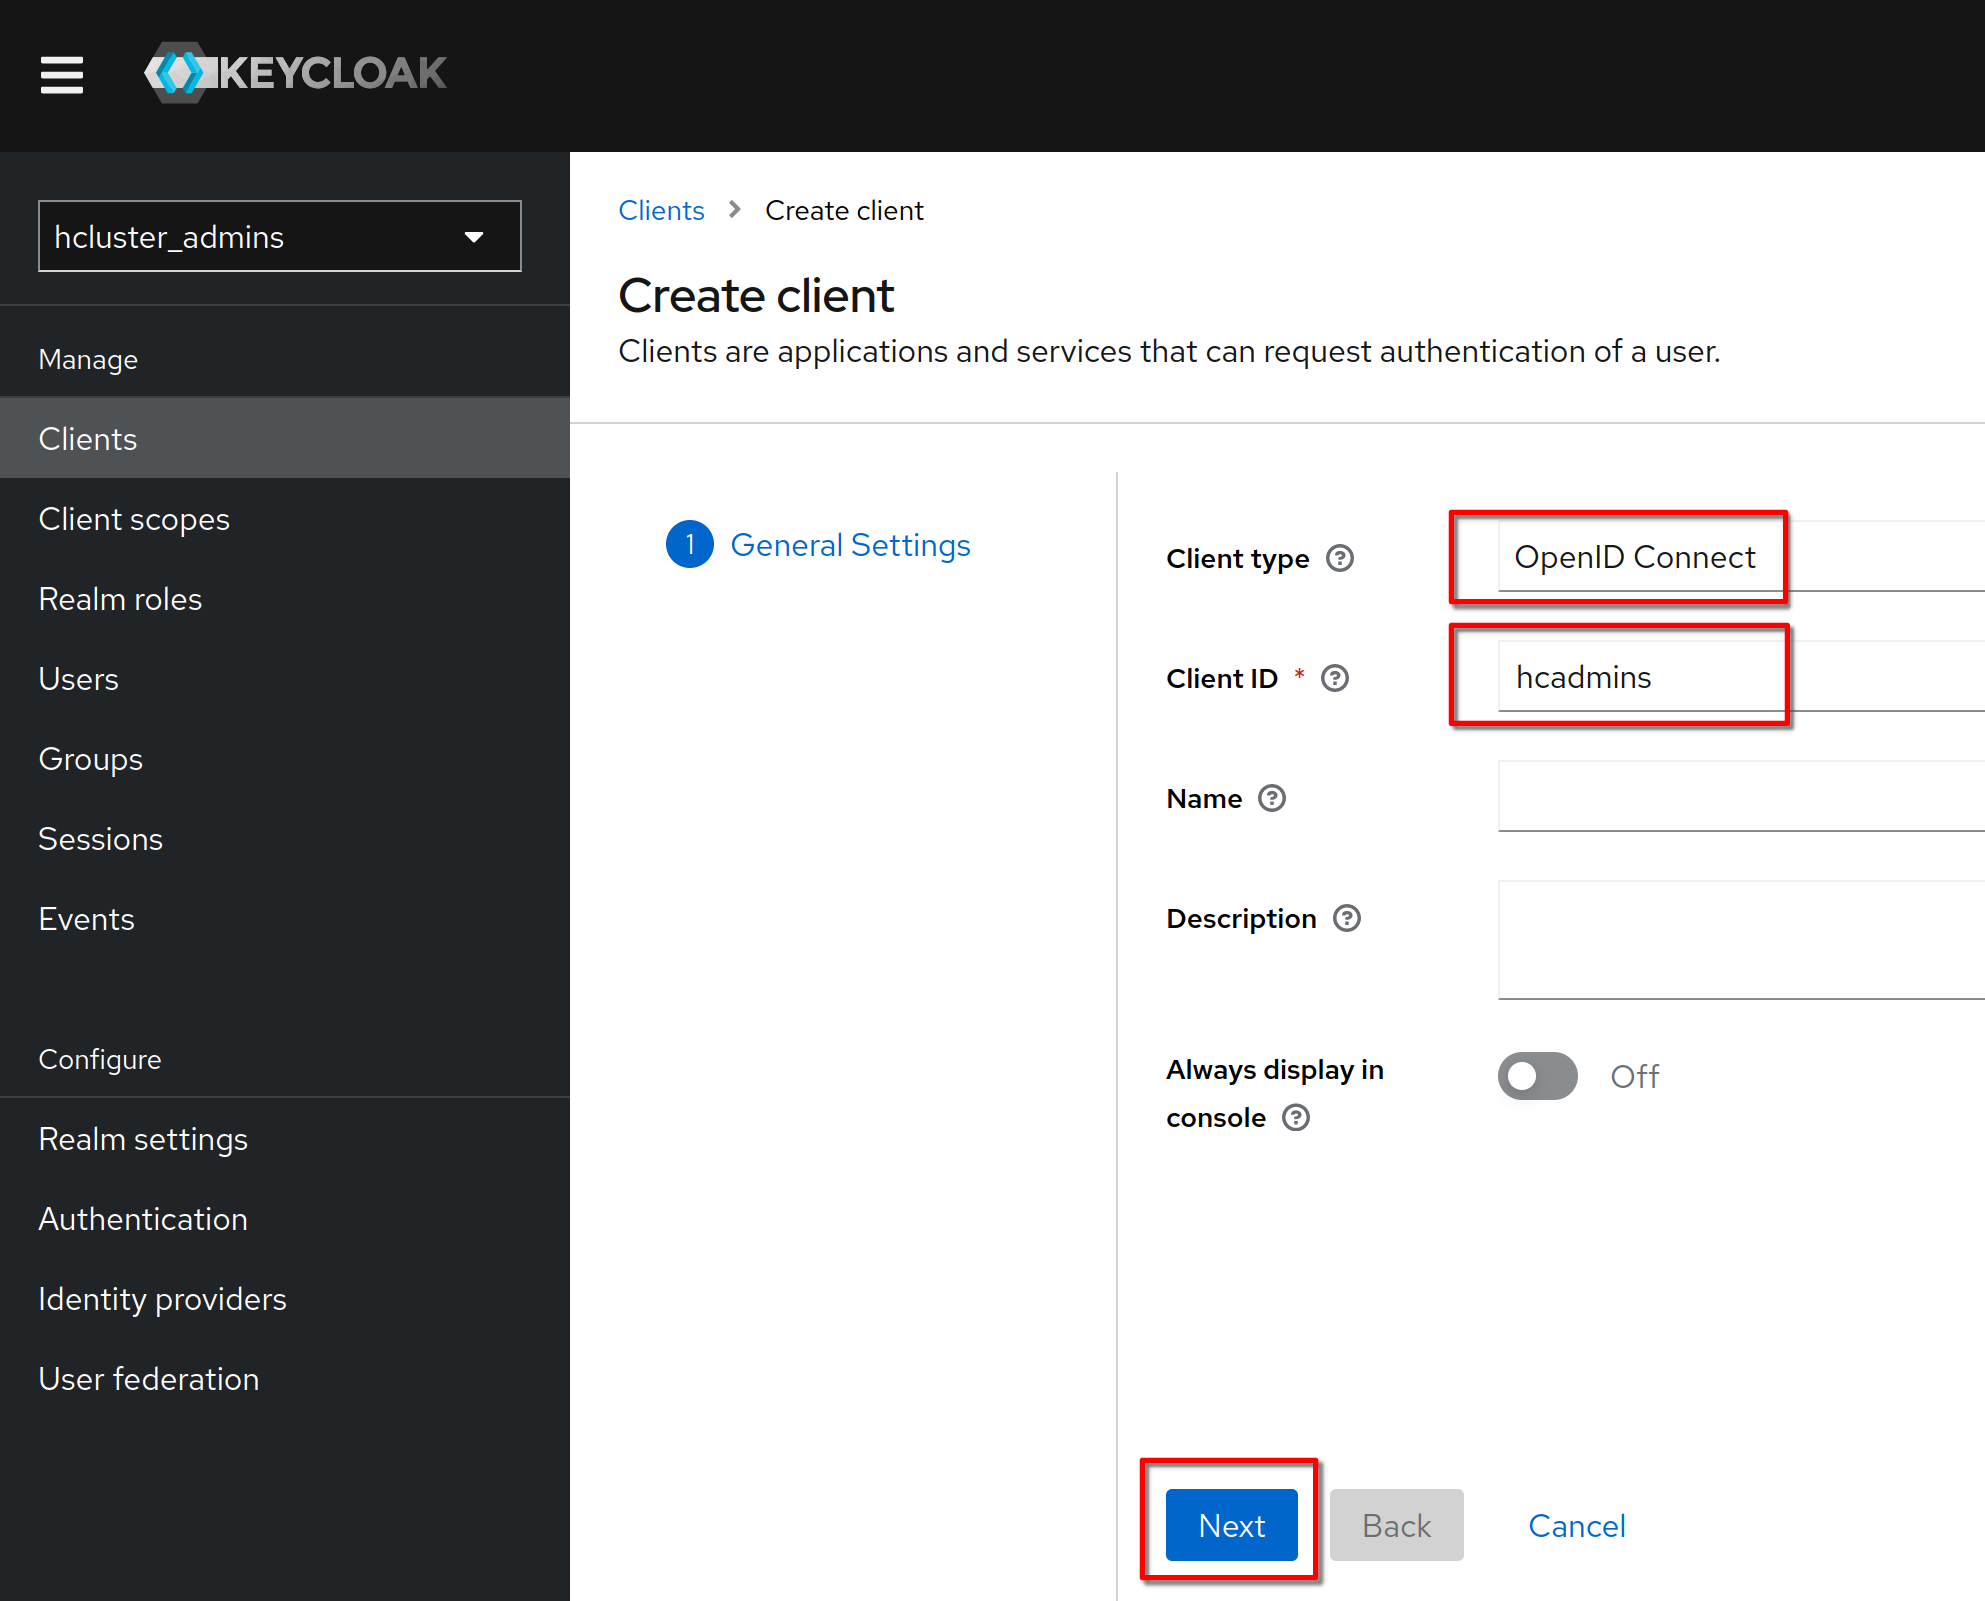
Verify that the client protocol is **“openid-connect”** and click “Next”
-
+
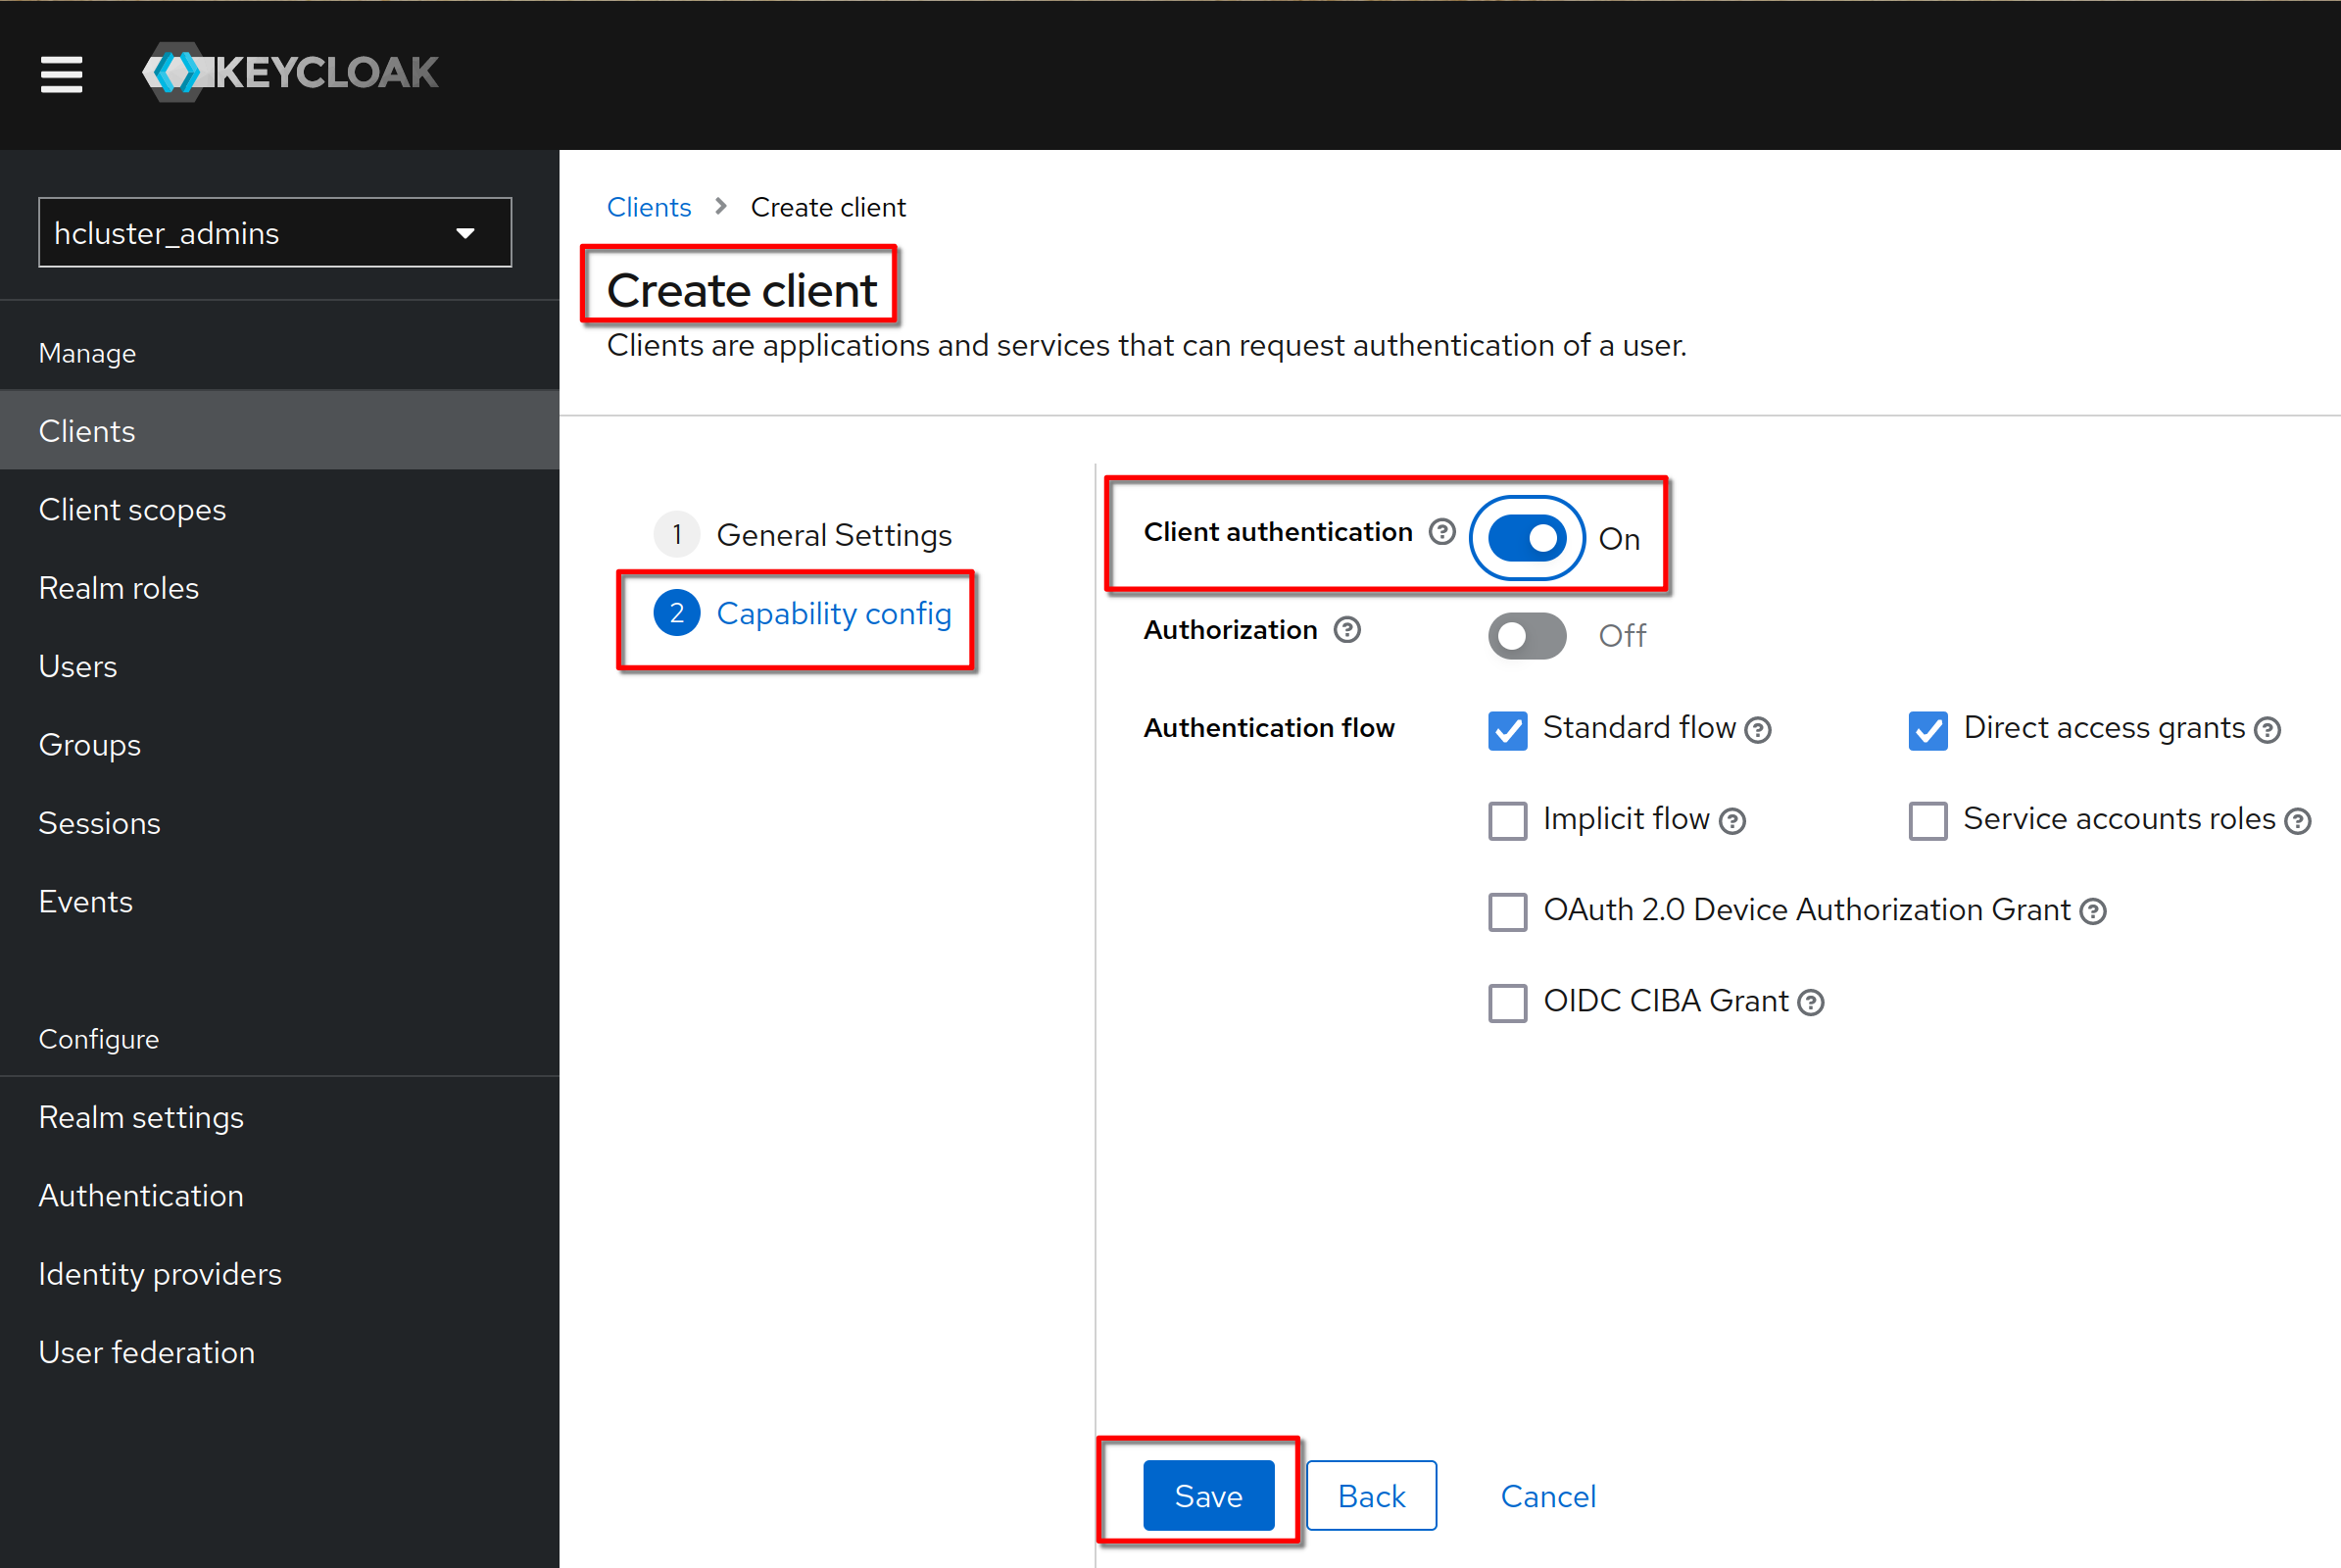
Set “Client authentication” to "on" (means OIDC type confidential). Click
“Save”
-
+
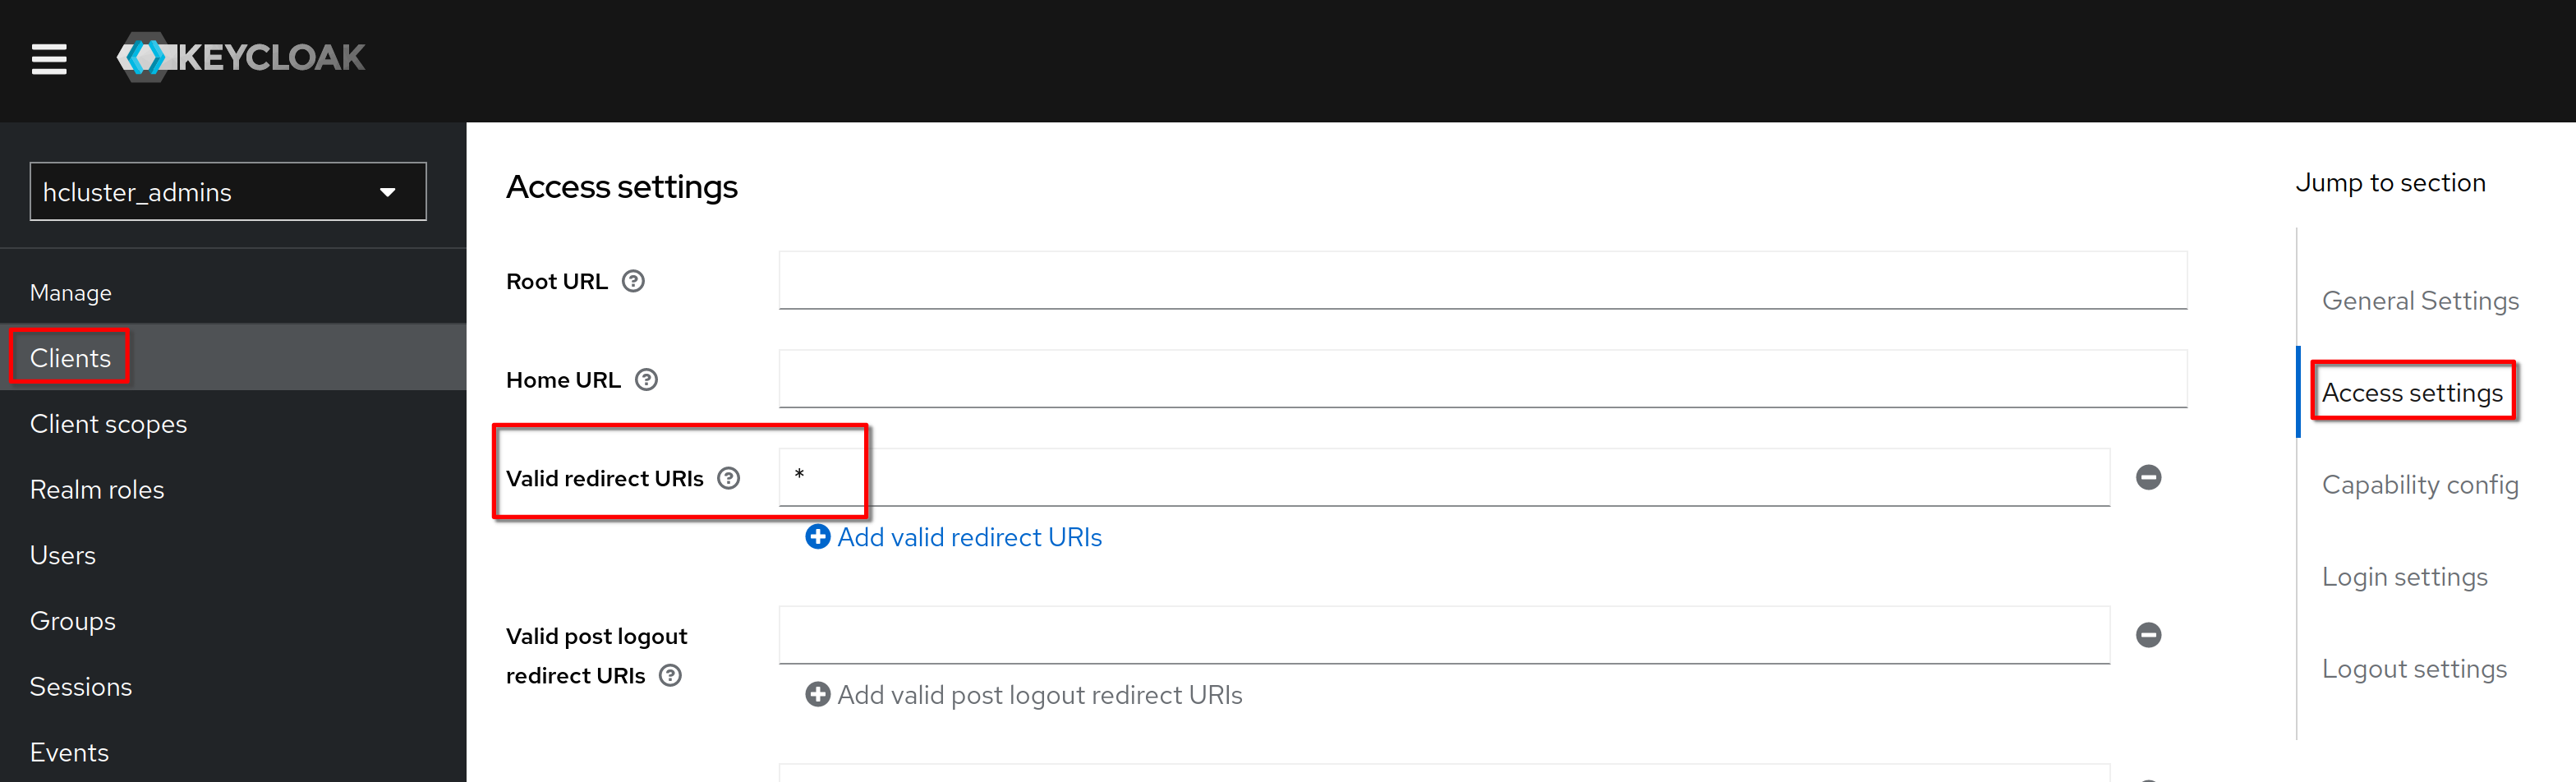
In **“Cient details”**, **“Settings”** tab, **“access settings”** section, set
**“Valid redirect URI”** to **“*”**. Click **“Save”**
-
+
Create a new user
-
+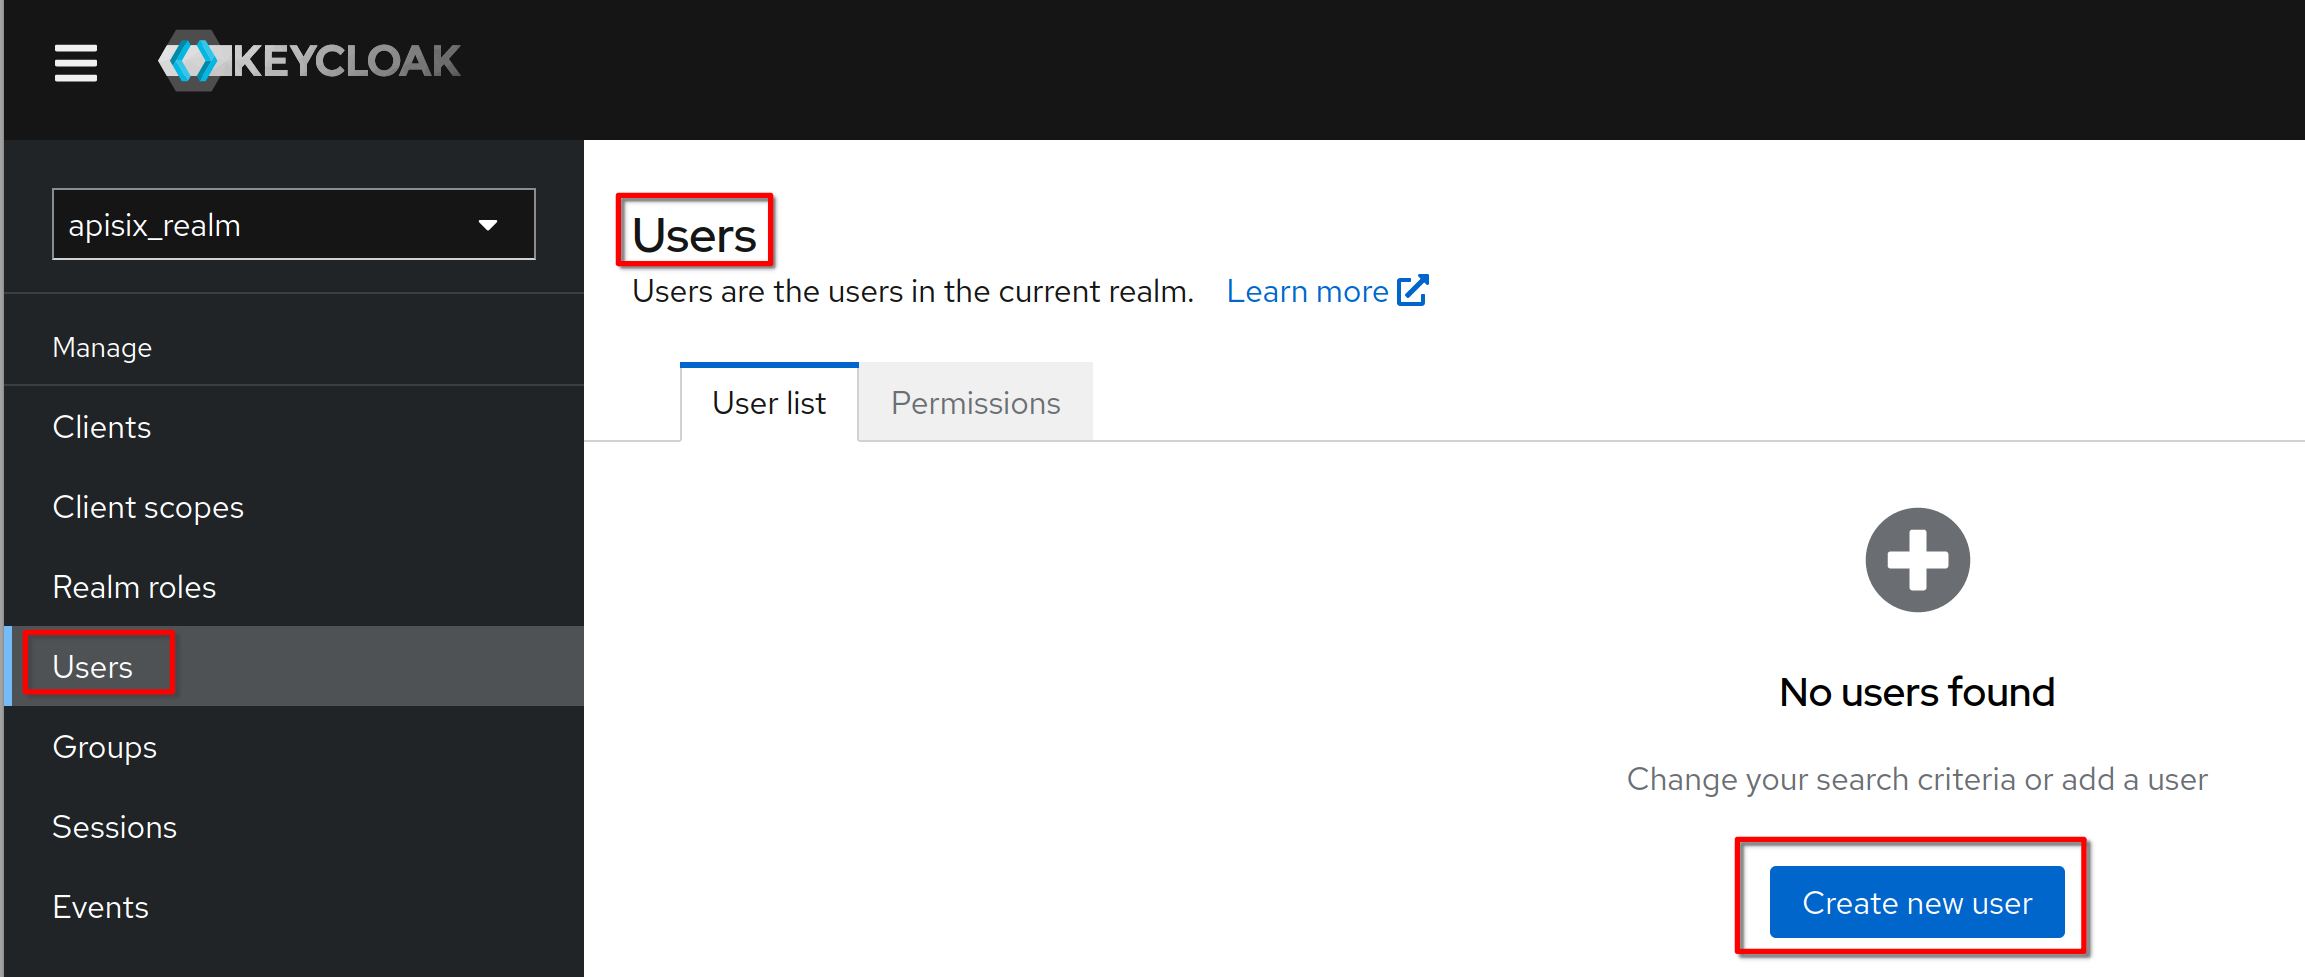
Set the username to **“hcadmin”** and click **“Create”**
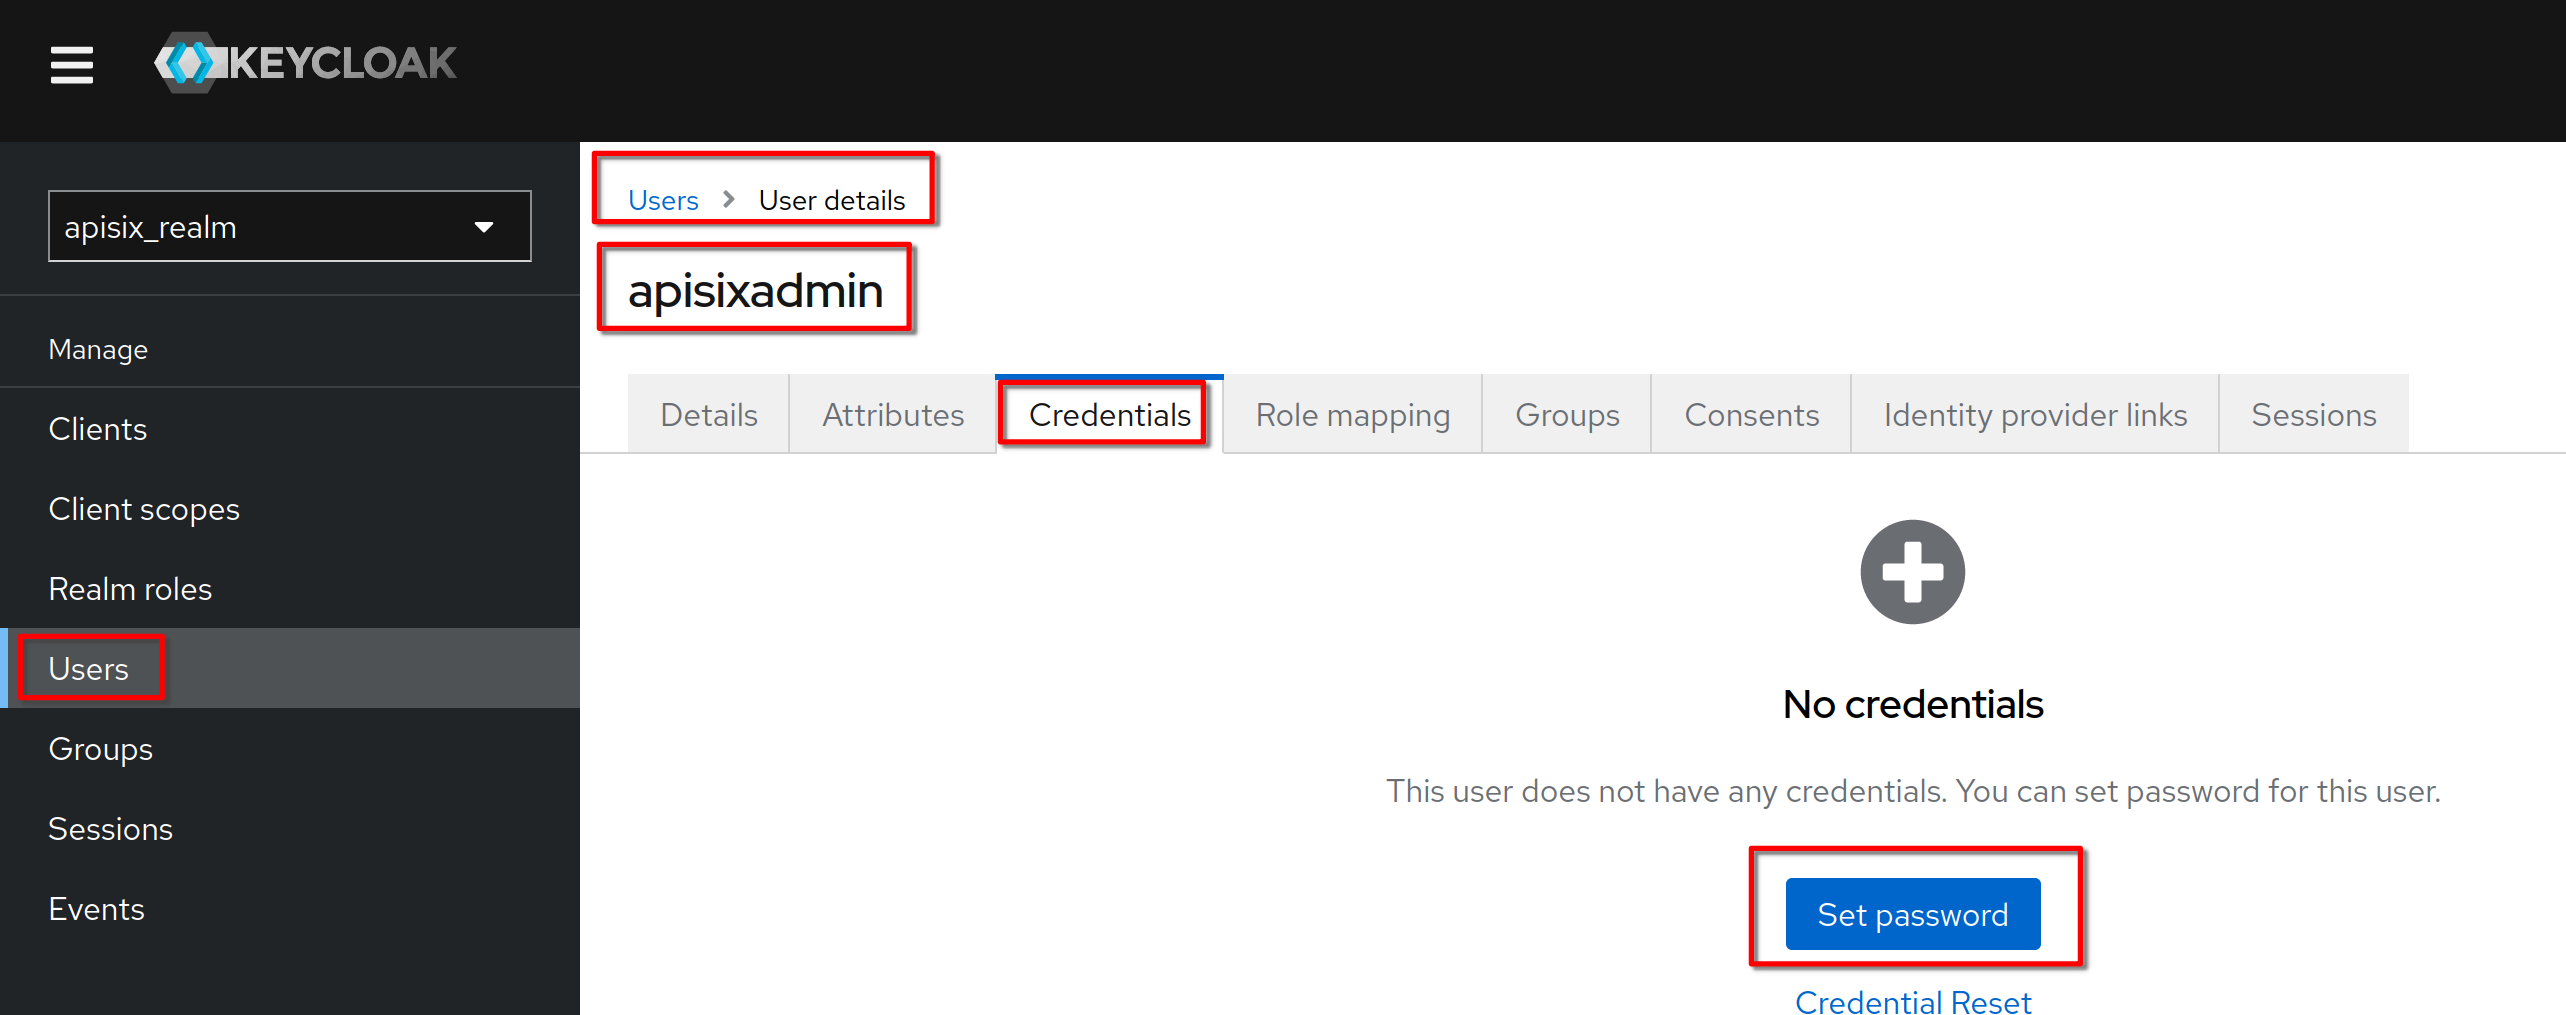
@@ -1042,11 +1042,11 @@ Set the username to **“hcadmin”** and click **“Create”**
In the **“Credentials”** tab click **“Set password”** (same procedure for
"Reset" password)
-
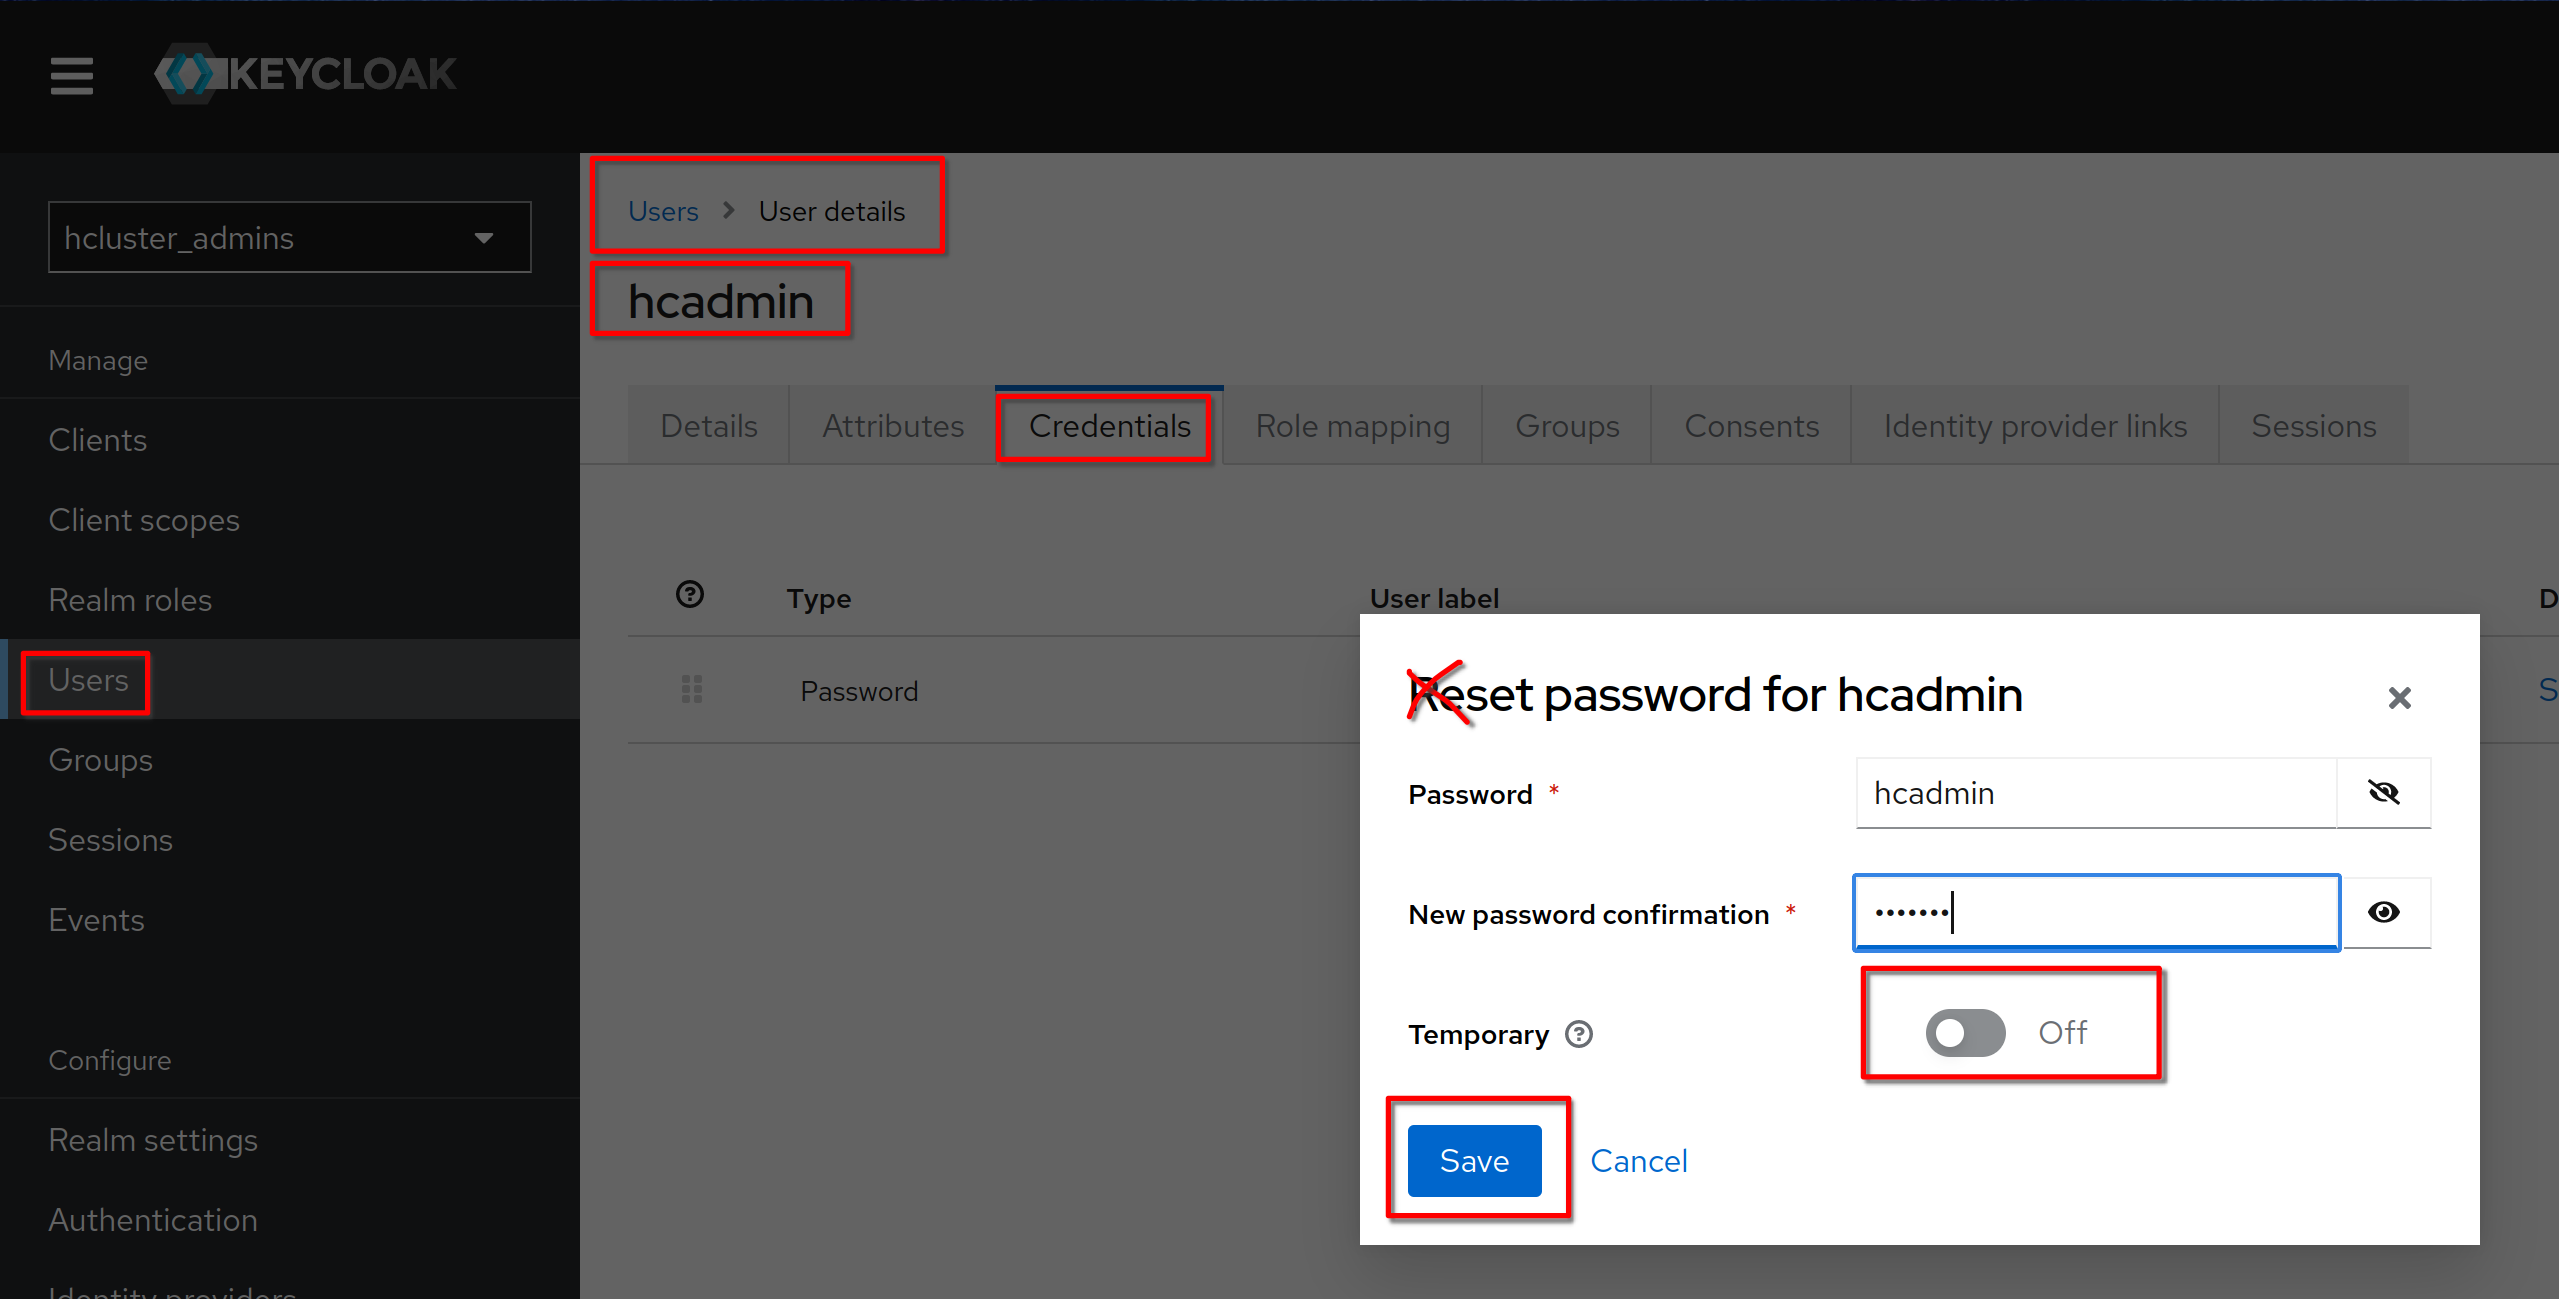
+
Set a permanent (Temporary set to Off) password to **“hcadmin”** (equal to the
username)
-
+
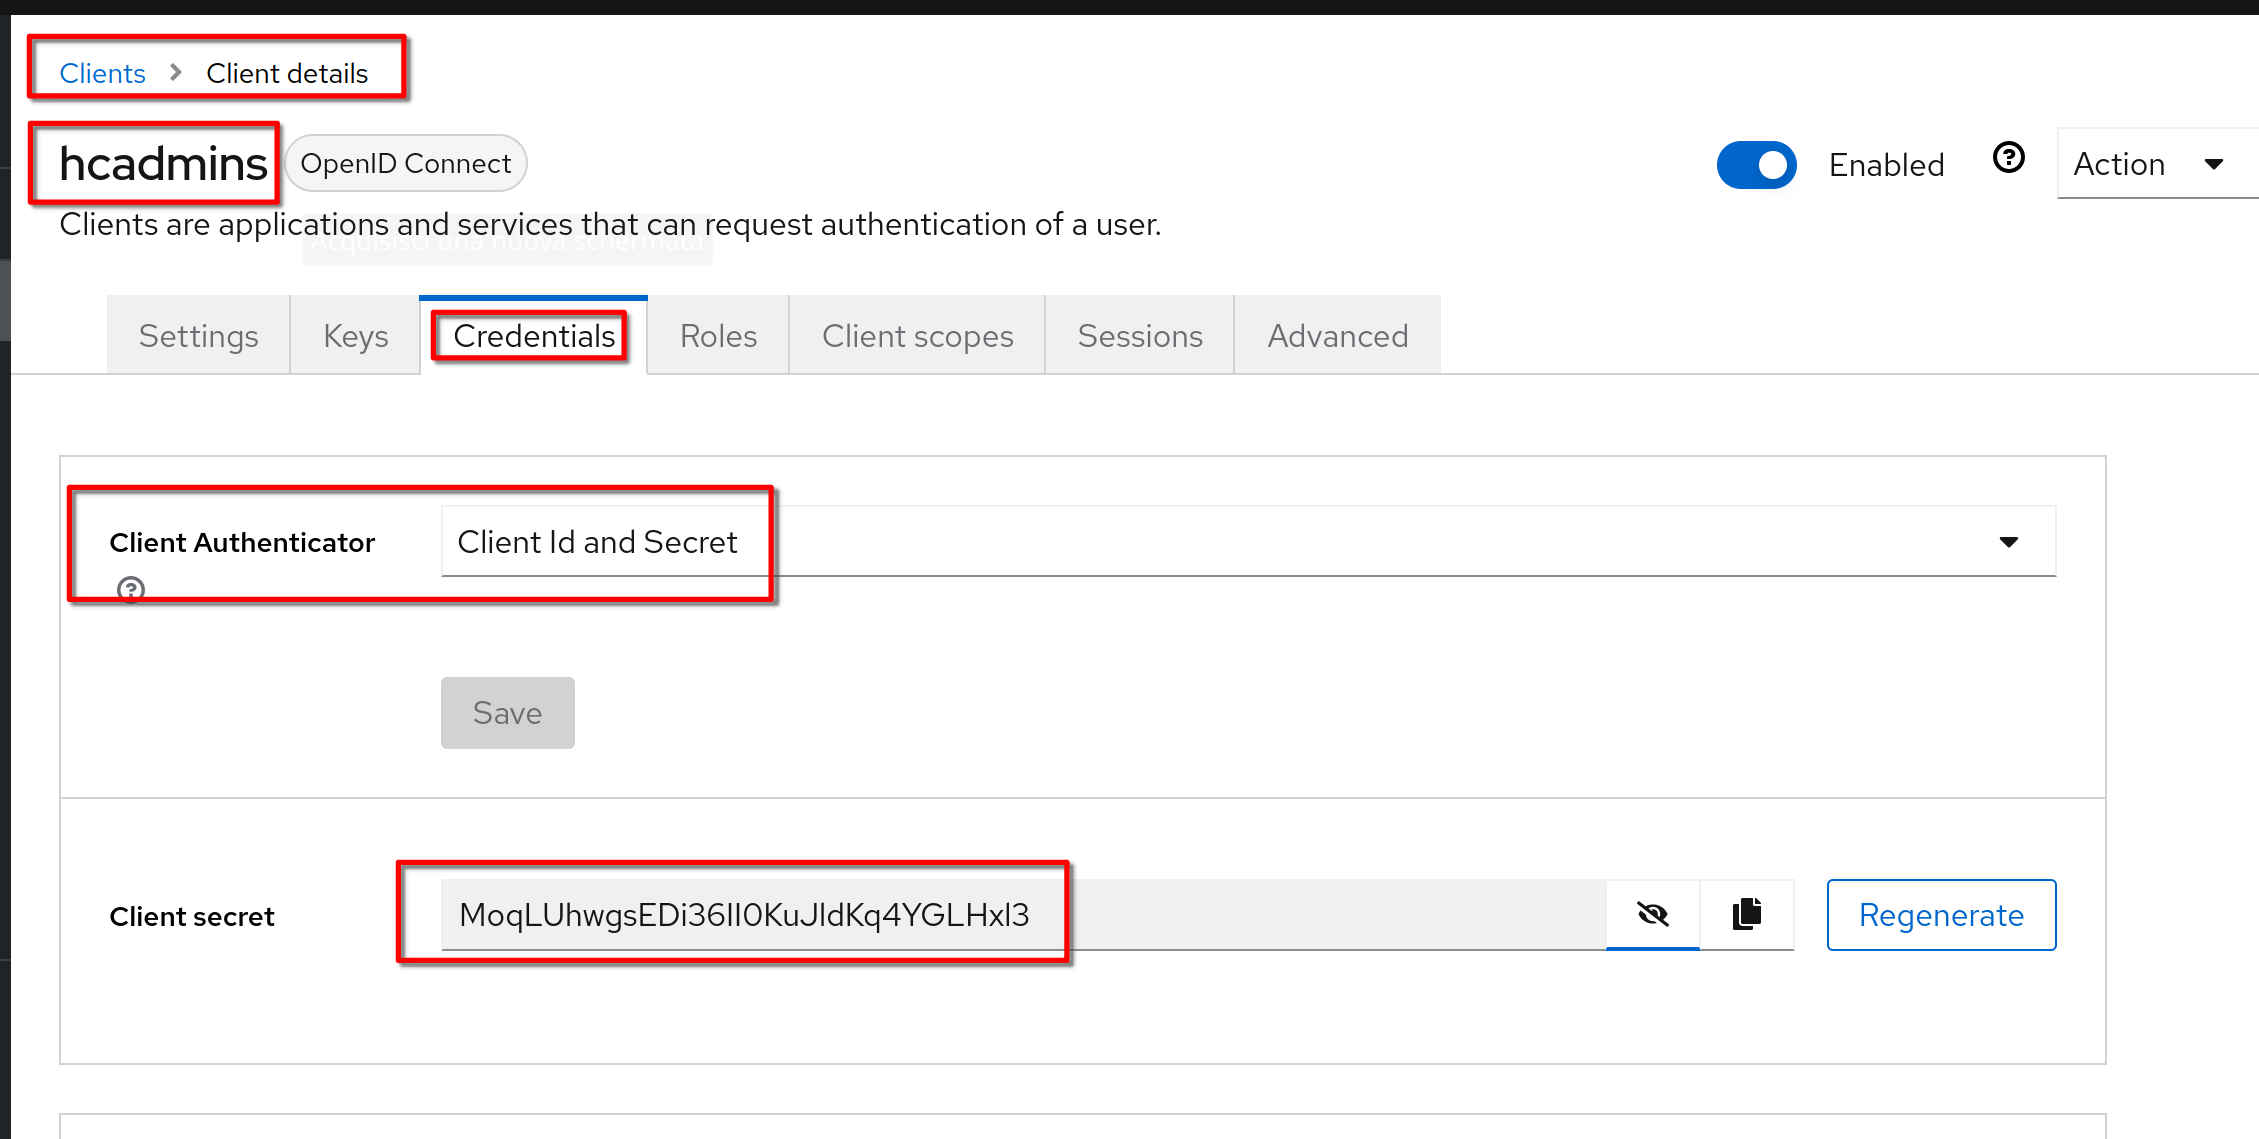
#### Get Client ID and Secret
@@ -1056,15 +1056,15 @@ client ID: **hcadmins**
Secret: **MoqLUhwgsEDi36II0KuJldKq4YGLHxl3**
-
+
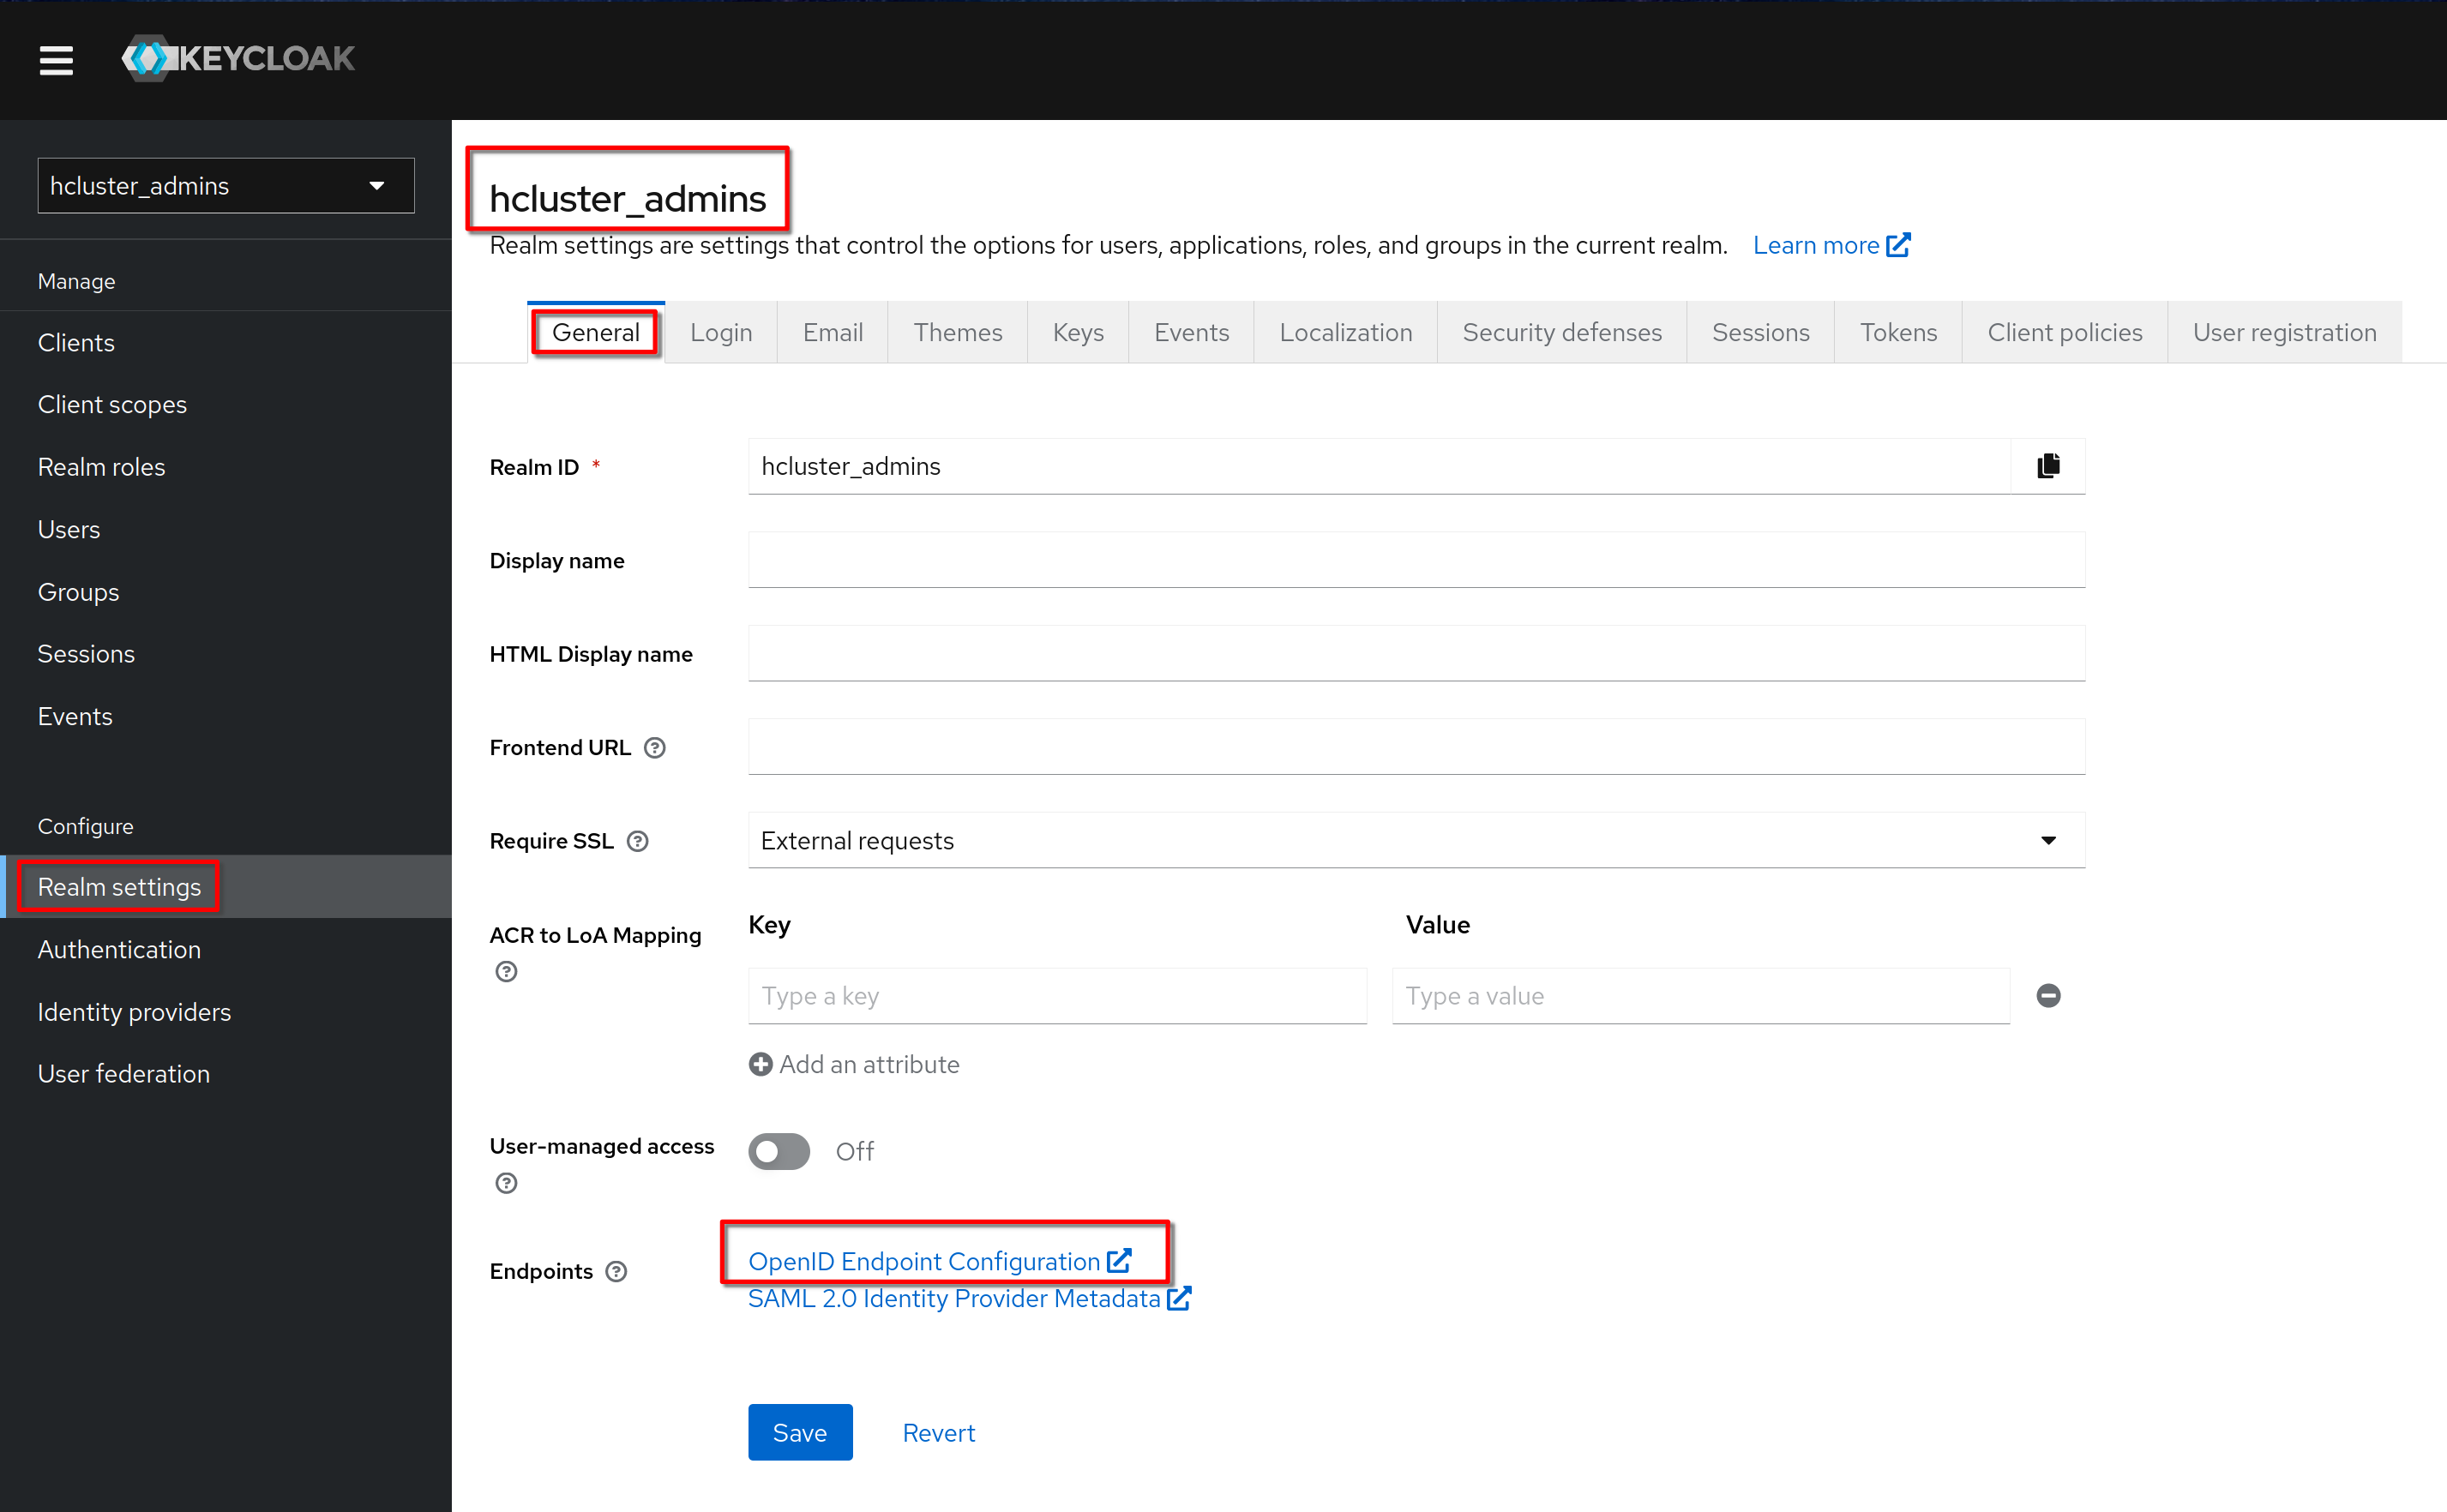
In the **“Realm settings”**, **“General”** tab click on the link **“OpenID
Endpoint Configuration”**
-
+
This is the shown page
-
+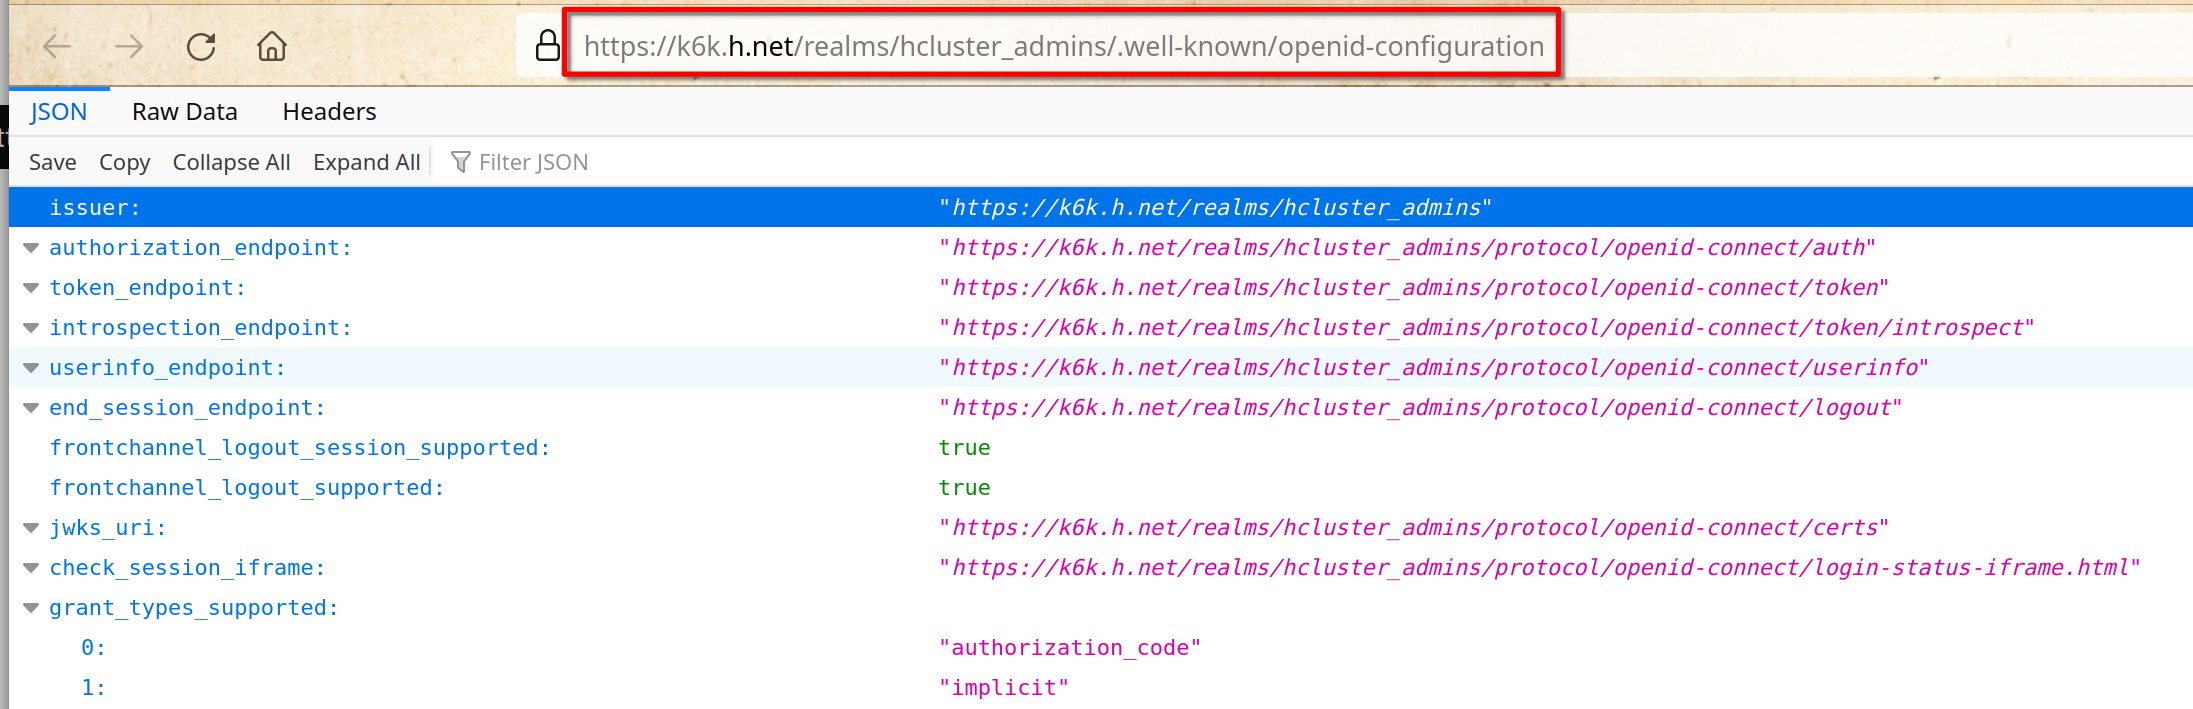
Copy the link
@@ -1096,21 +1096,21 @@ Configure the apisix-dashboard route.
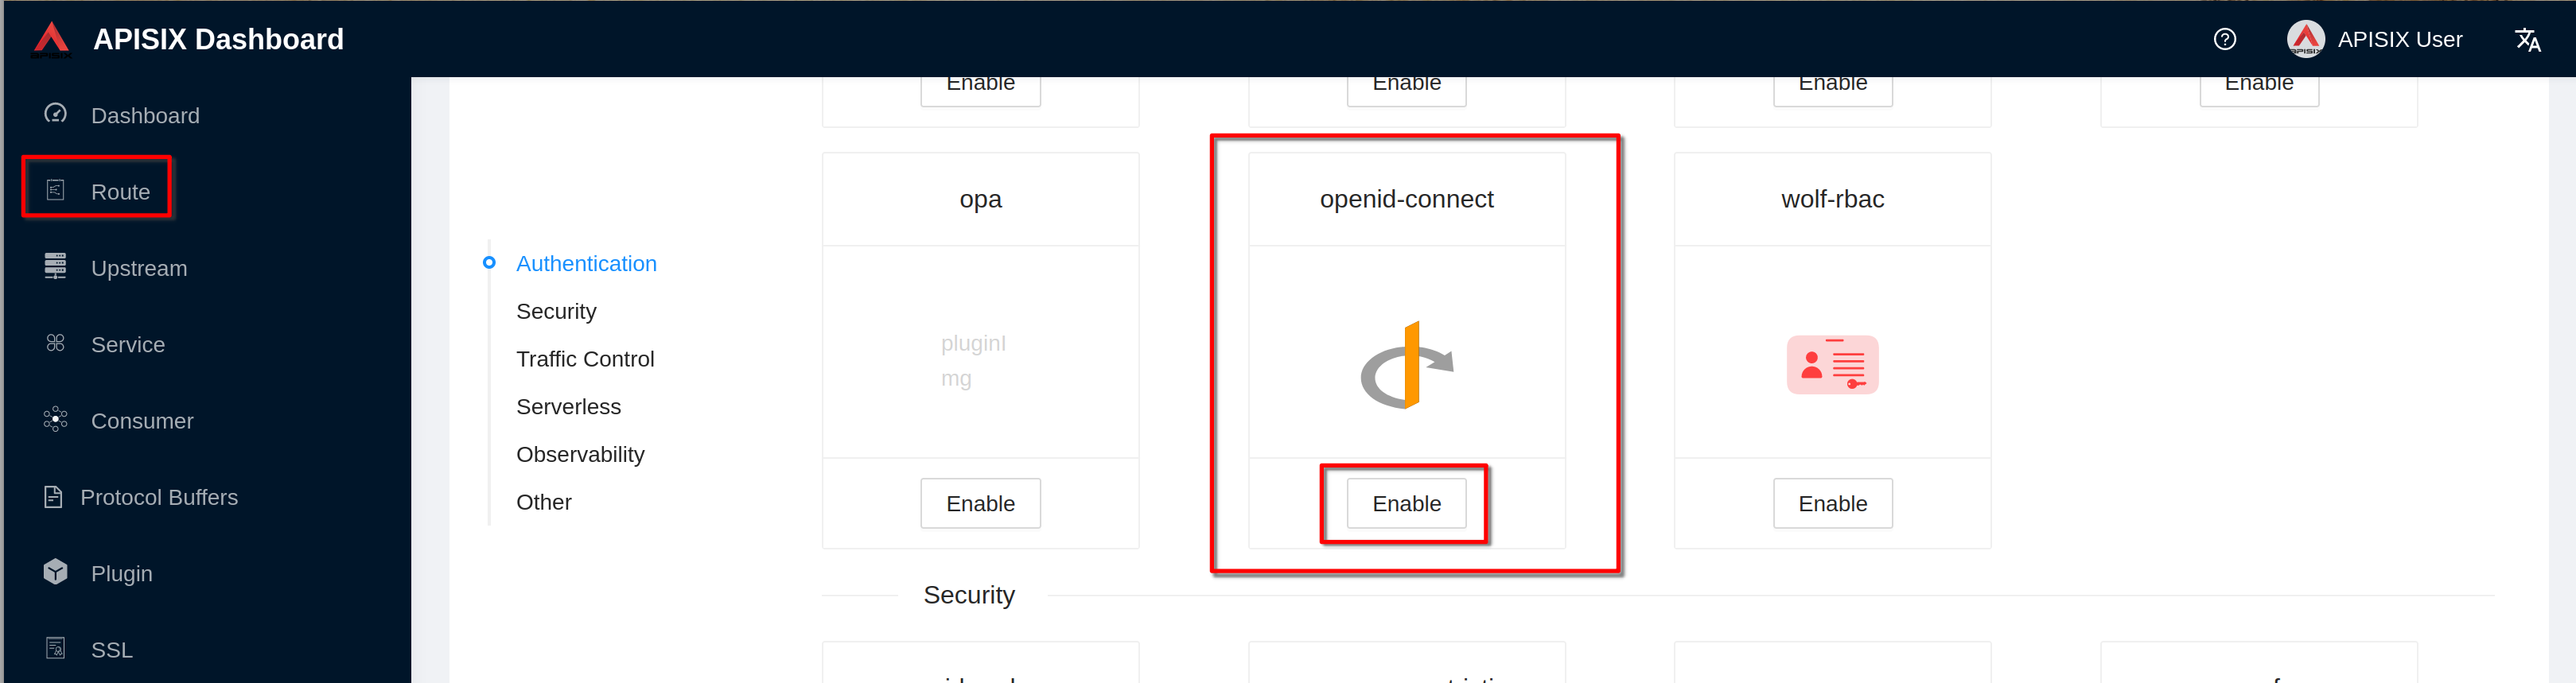
Go to **“3 Plugin config”**
-
+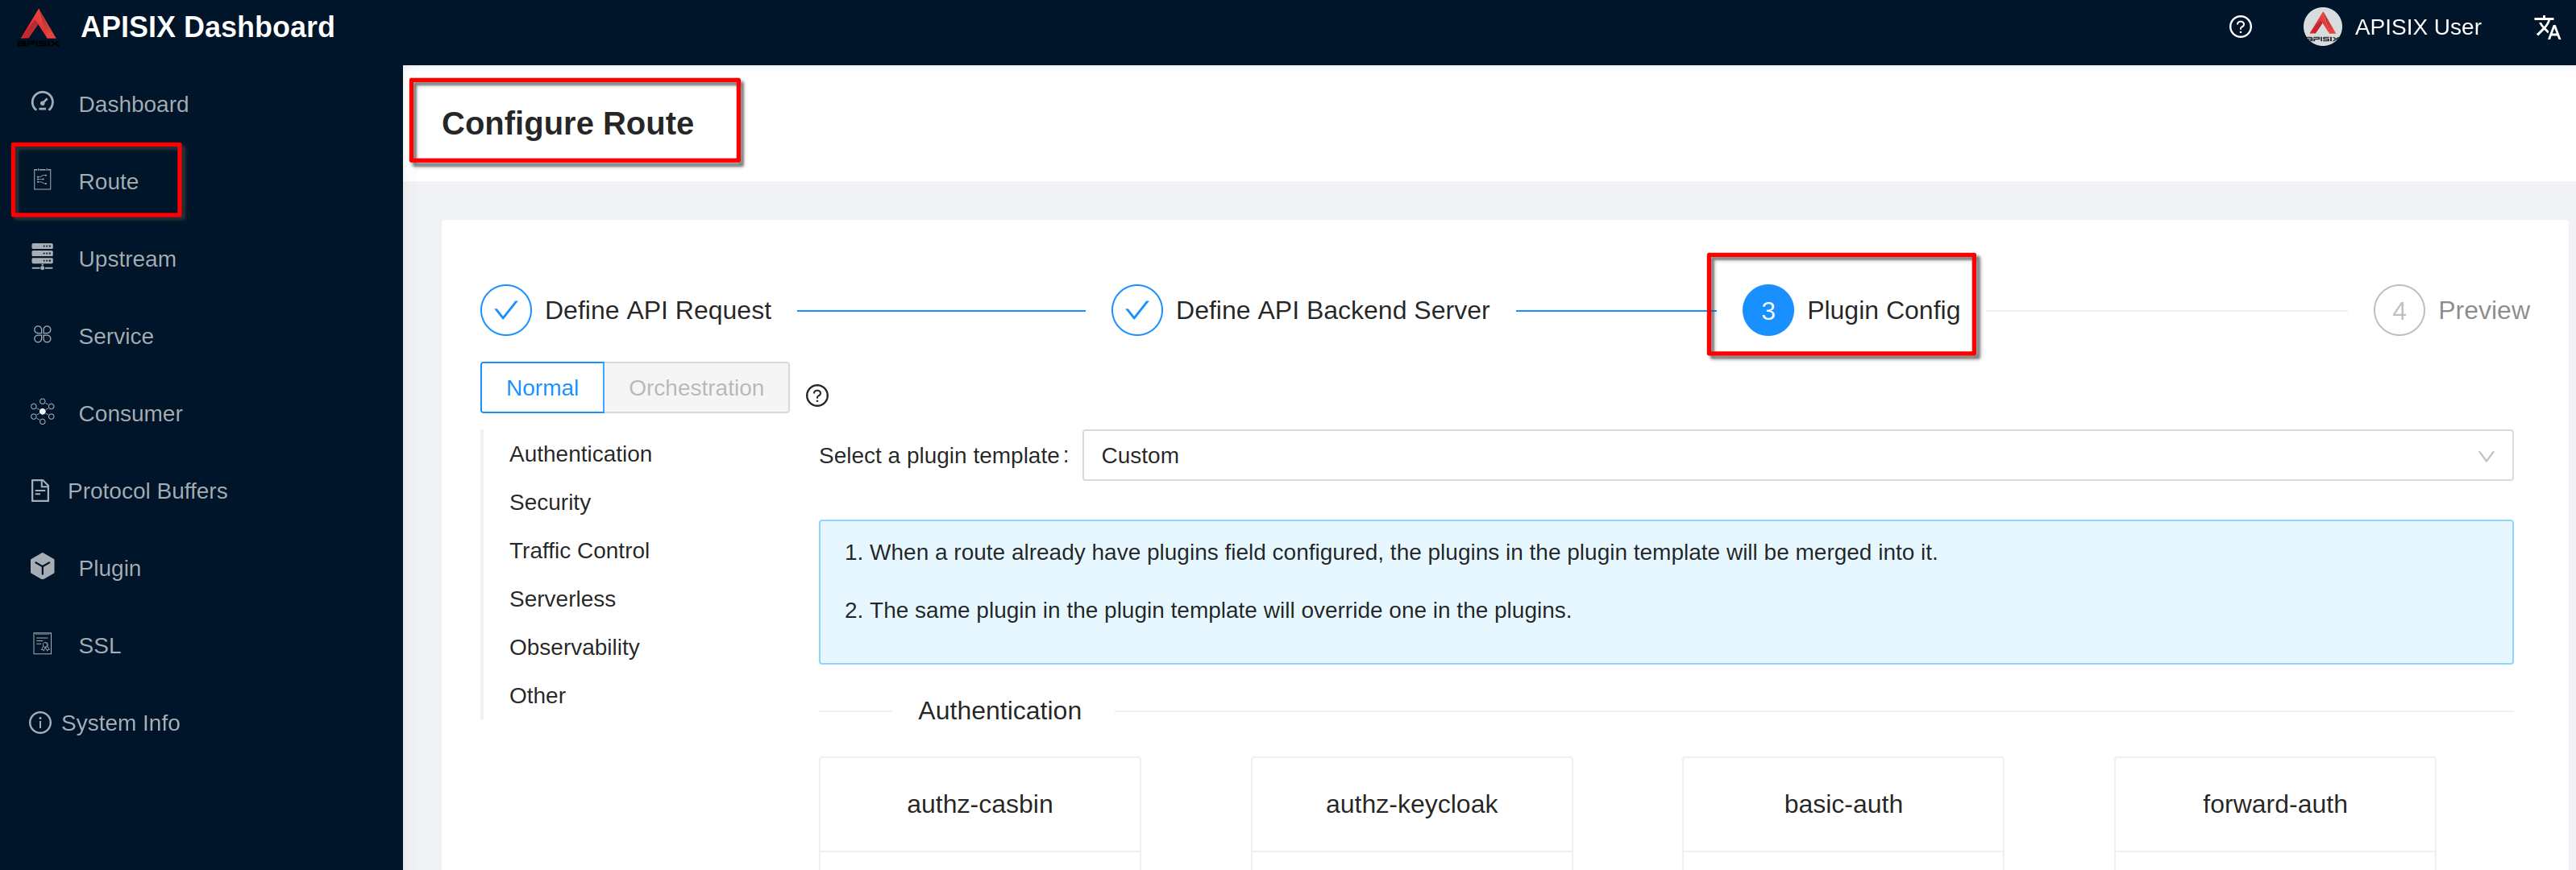
Click **“Enable”** on openid-connect plugin (if you have already defined the
plugin you'll see "Edit" instead of "Enable")
-
+
Enable the plugin. Copy the previous defined json definition and click
**“Submit”**
-
+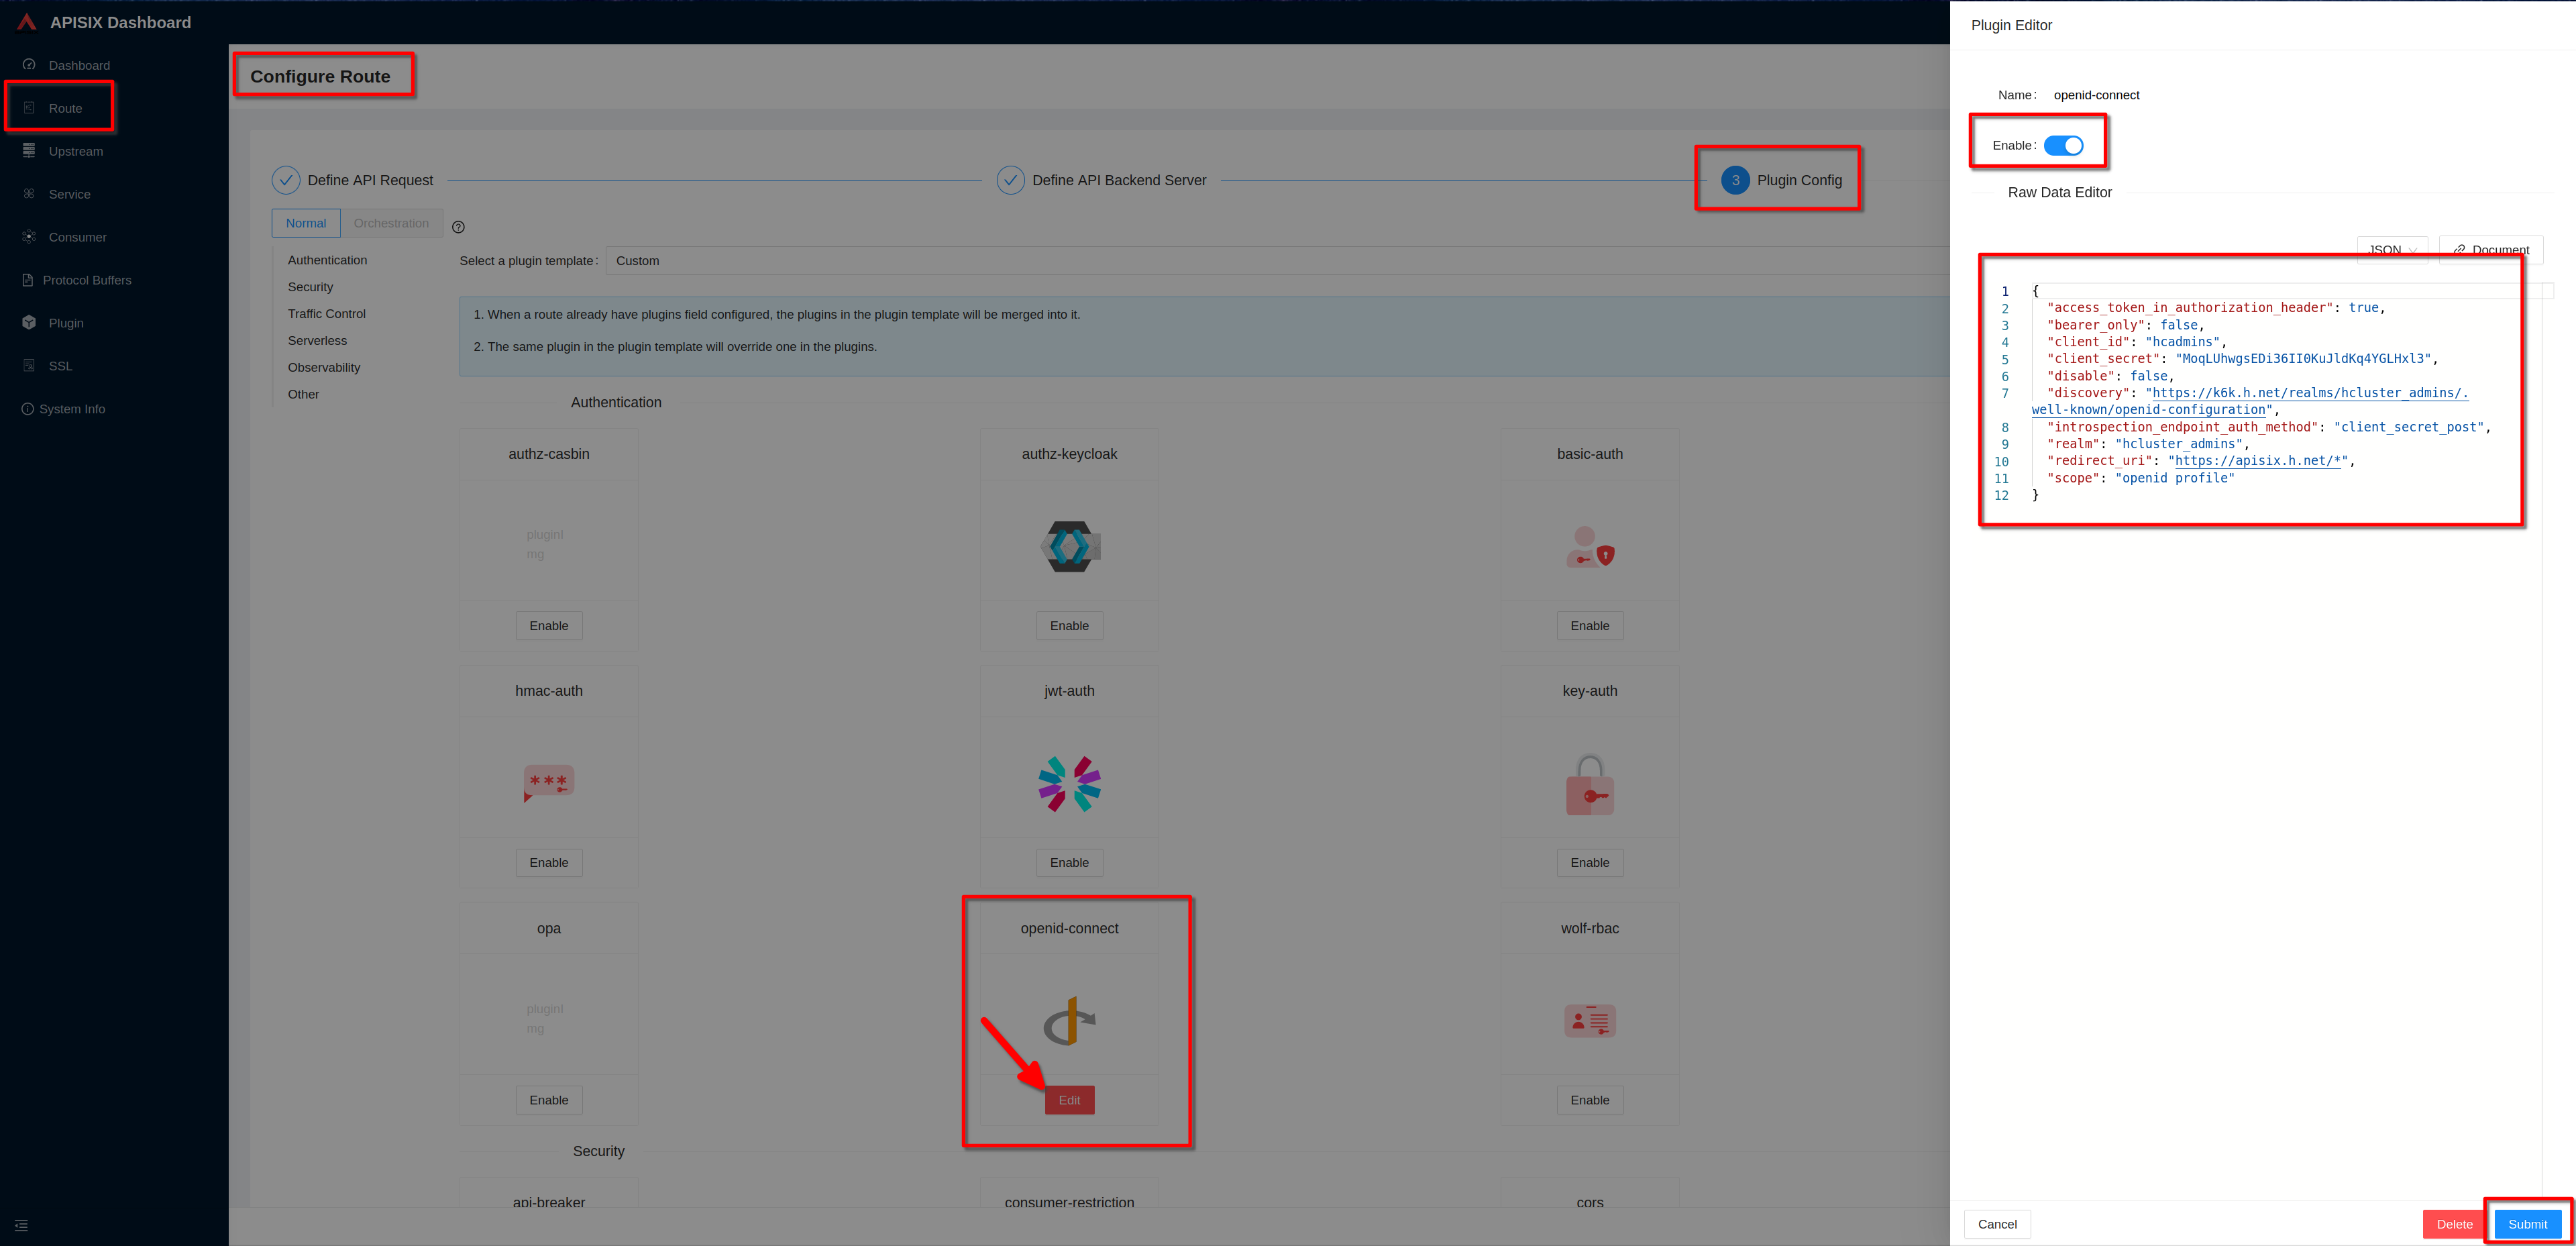
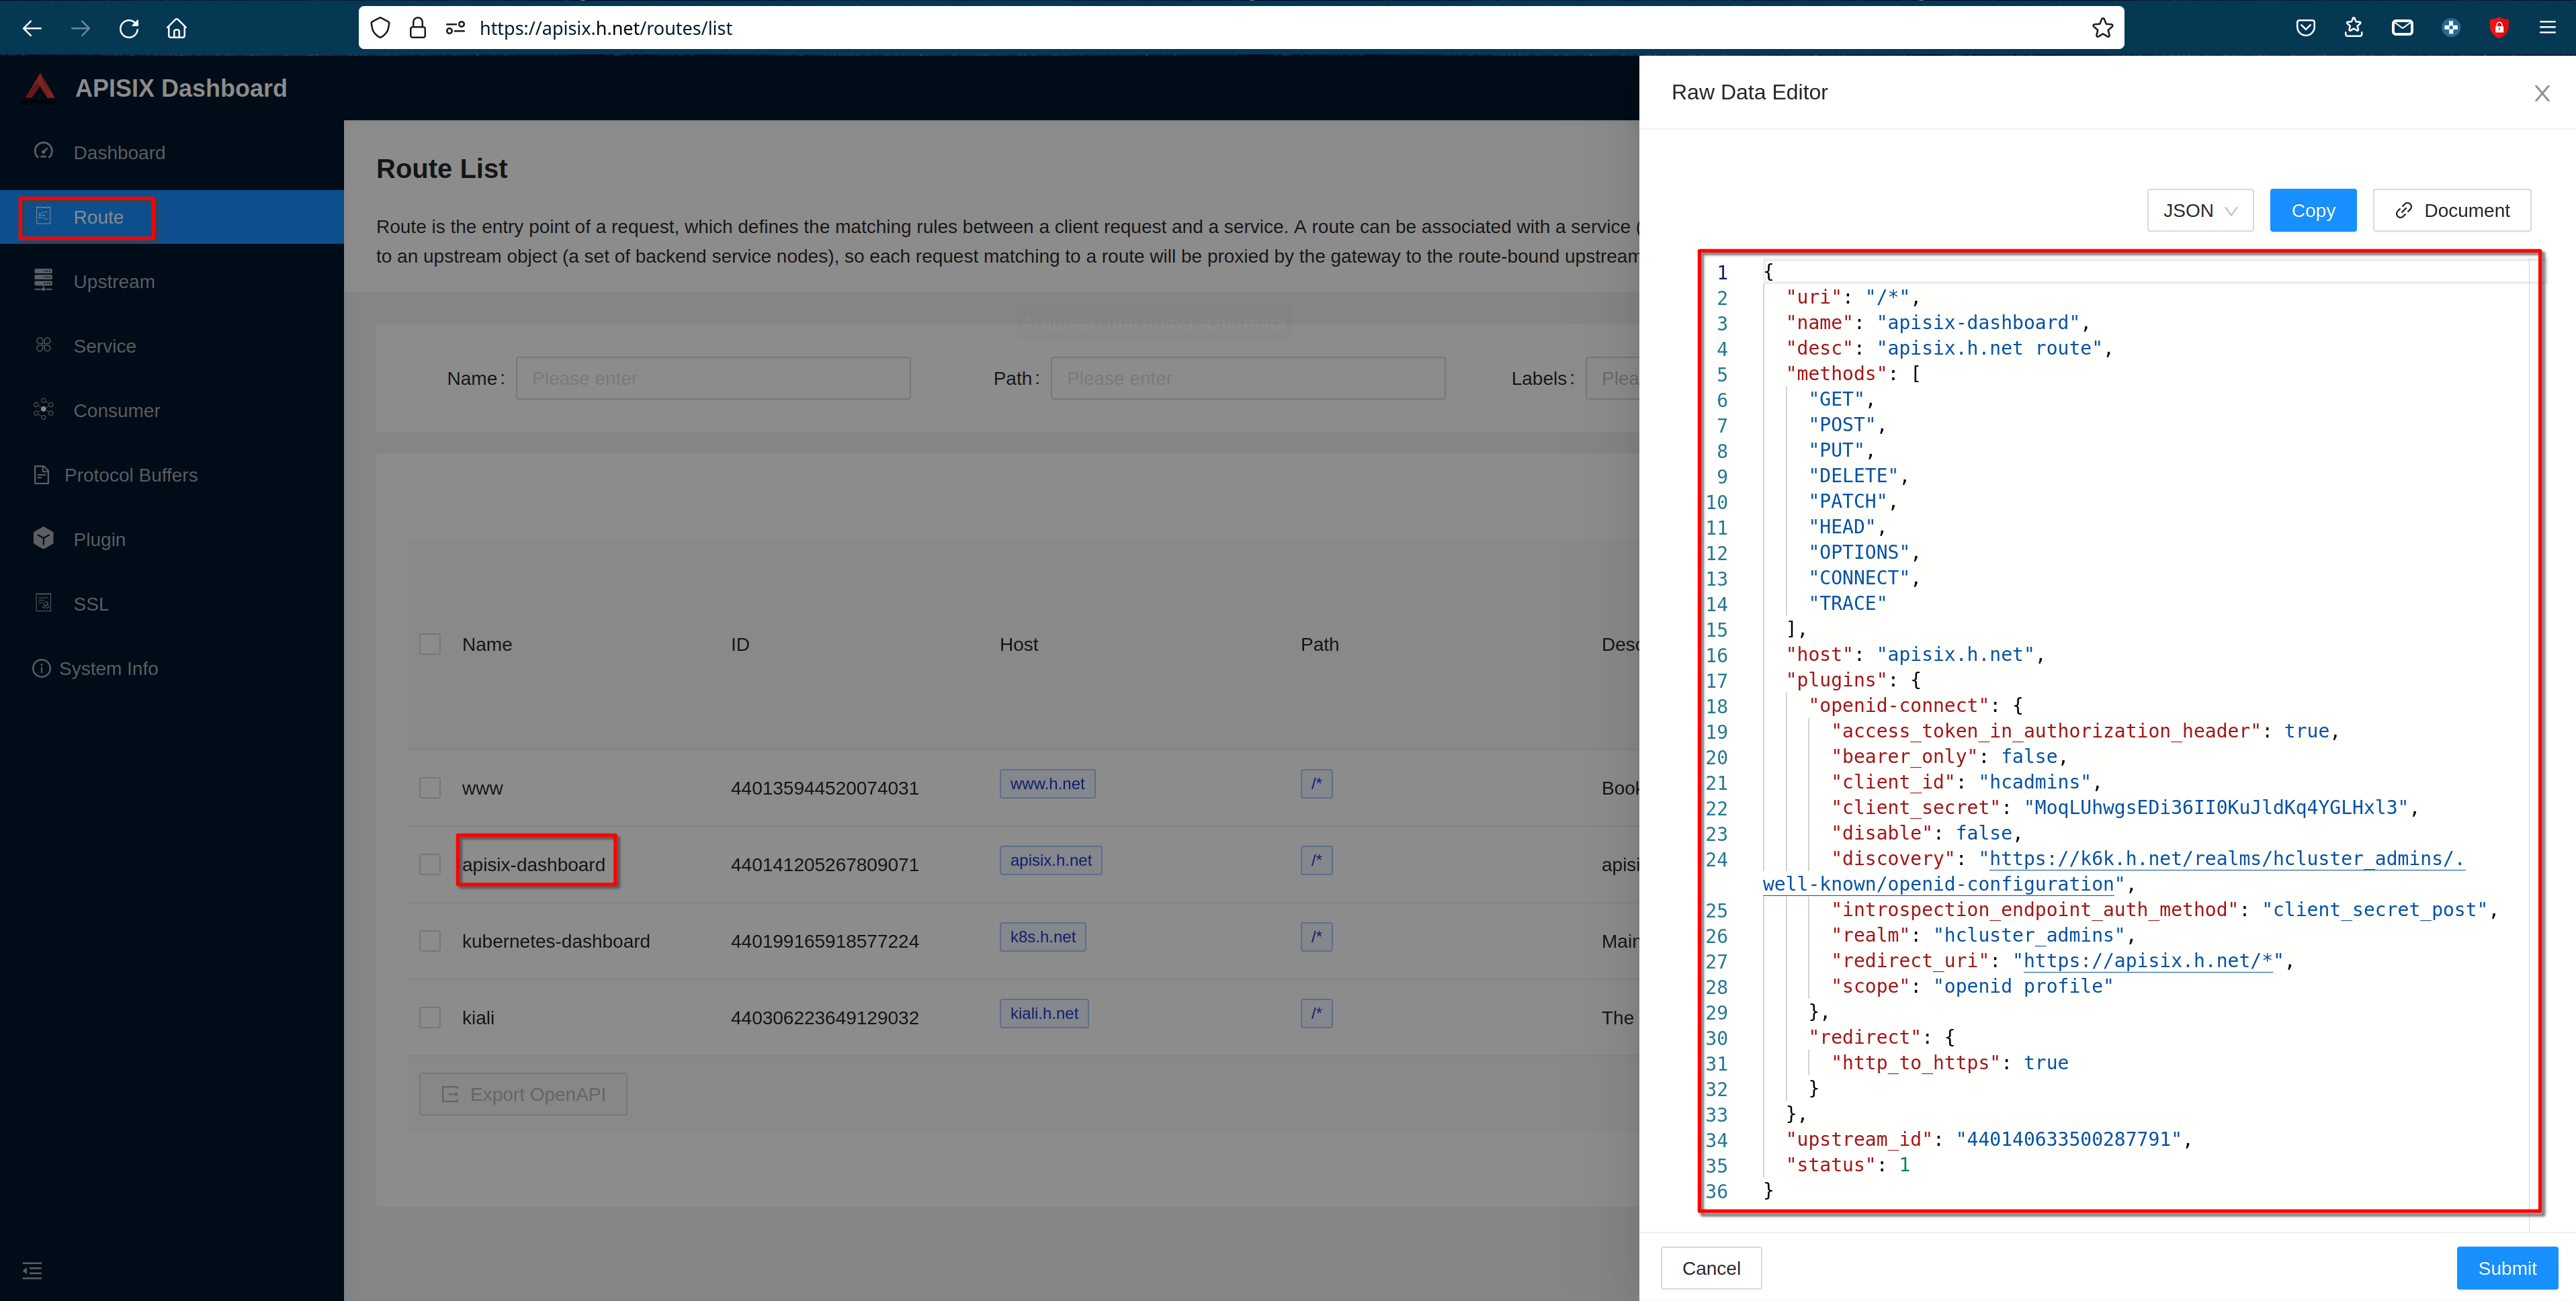
Clik "next" and then clik "Submit" to complete the route configuration
Then "view" the route to see the plugin configuration
-
+
### Accessing the Protected APISIX Dashboard Route
@@ -1125,15 +1125,15 @@ https://apisix.h.net
You will be redirected to the Keycloak login page for the "HCLUSTER_ADMINS"
realm.
Login with the previous defined user "hcadmin" / "hcadmin"
-
+
The apisix-dashboard login will be presented. Login with "admin" / "admin"
-
+
And now you can see the apisix dashboard
-
+
## Recap