This is an automated email from the ASF dual-hosted git repository.

juzhiyuan pushed a commit to branch master
in repository https://gitbox.apache.org/repos/asf/apisix-website.git
The following commit(s) were added to refs/heads/master by this push:
new ee4e349 docs: added Develop Ingress with Nocalhost (#760)
ee4e349 is described below
commit ee4e349a3cb19b704dade22cd07462ffd4e477f6
Author: Sylvia <[email protected]>
AuthorDate: Mon Nov 22 17:01:47 2021 +0800
docs: added Develop Ingress with Nocalhost (#760)
---
...-apisix-ingress-with-nocalhost-in-kubernetes.md | 129 ++++++++++++++++++++
...-apisix-ingress-with-nocalhost-in-kubernetes.md | 130 +++++++++++++++++++++
2 files changed, 259 insertions(+)
diff --git
a/website/blog/2021/11/22/develop-apisix-ingress-with-nocalhost-in-kubernetes.md
b/website/blog/2021/11/22/develop-apisix-ingress-with-nocalhost-in-kubernetes.md
new file mode 100644
index 0000000..1fd35db
--- /dev/null
+++
b/website/blog/2021/11/22/develop-apisix-ingress-with-nocalhost-in-kubernetes.md
@@ -0,0 +1,129 @@
+---
+title: "Developing APISIX Ingress Controller with Nocalhost in Kubernetes"
+author: "Garry Chen"
+authorURL: "https://github.com/neaped";
+authorImageURL: "https://avatars.githubusercontent.com/u/3713305?v=4";
+keywords:
+- Kubernetes
+- Apache APISIX Ingress
+- Nocalhost
+- Controller
+- Development
+description: This article walks you through using Nocalhost to seamlessly
connect your local development machine to a remote Kubernetes cluster, allowing
you to use IDE to develop and debug Apache APISIX Ingress Controller. Giving
you the ability to comfortably develop and debug your remote apps with your
existing skills.
+tags: [Technology]
+---
+
+> This article walks you through using Nocalhost to seamlessly connect your
local development machine to a remote Kubernetes cluster, allowing you to use
IDE to develop and debug Apache APISIX Ingress Controller. Giving you the
ability to comfortably develop and debug your remote apps with your existing
skills.
+
+<!--truncate-->
+
+## Prerequisites
+
+- Prepare an available Kubernetes cluster in your workstation. You can use any
Kubernetes clusters that you have namespace admin privilege.
+- [Helm v3.0+](https://helm.sh) installed
+- GoLand IDE 2020.03+ (Use GoLand 2021.2 in this article)
+- [Install Nocalhost JetBrains
plugin](https://nocalhost.dev/docs/installation#install-jetbrains-plugin)
+- Install [Go 1.13](https://golang.org/dl/) or later
+
+## Deploy Apache APISIX Ingress Controller
+
+I'm going to deploy Apache APISIX Ingress Controller by Nocalhost within
GoLand:
+
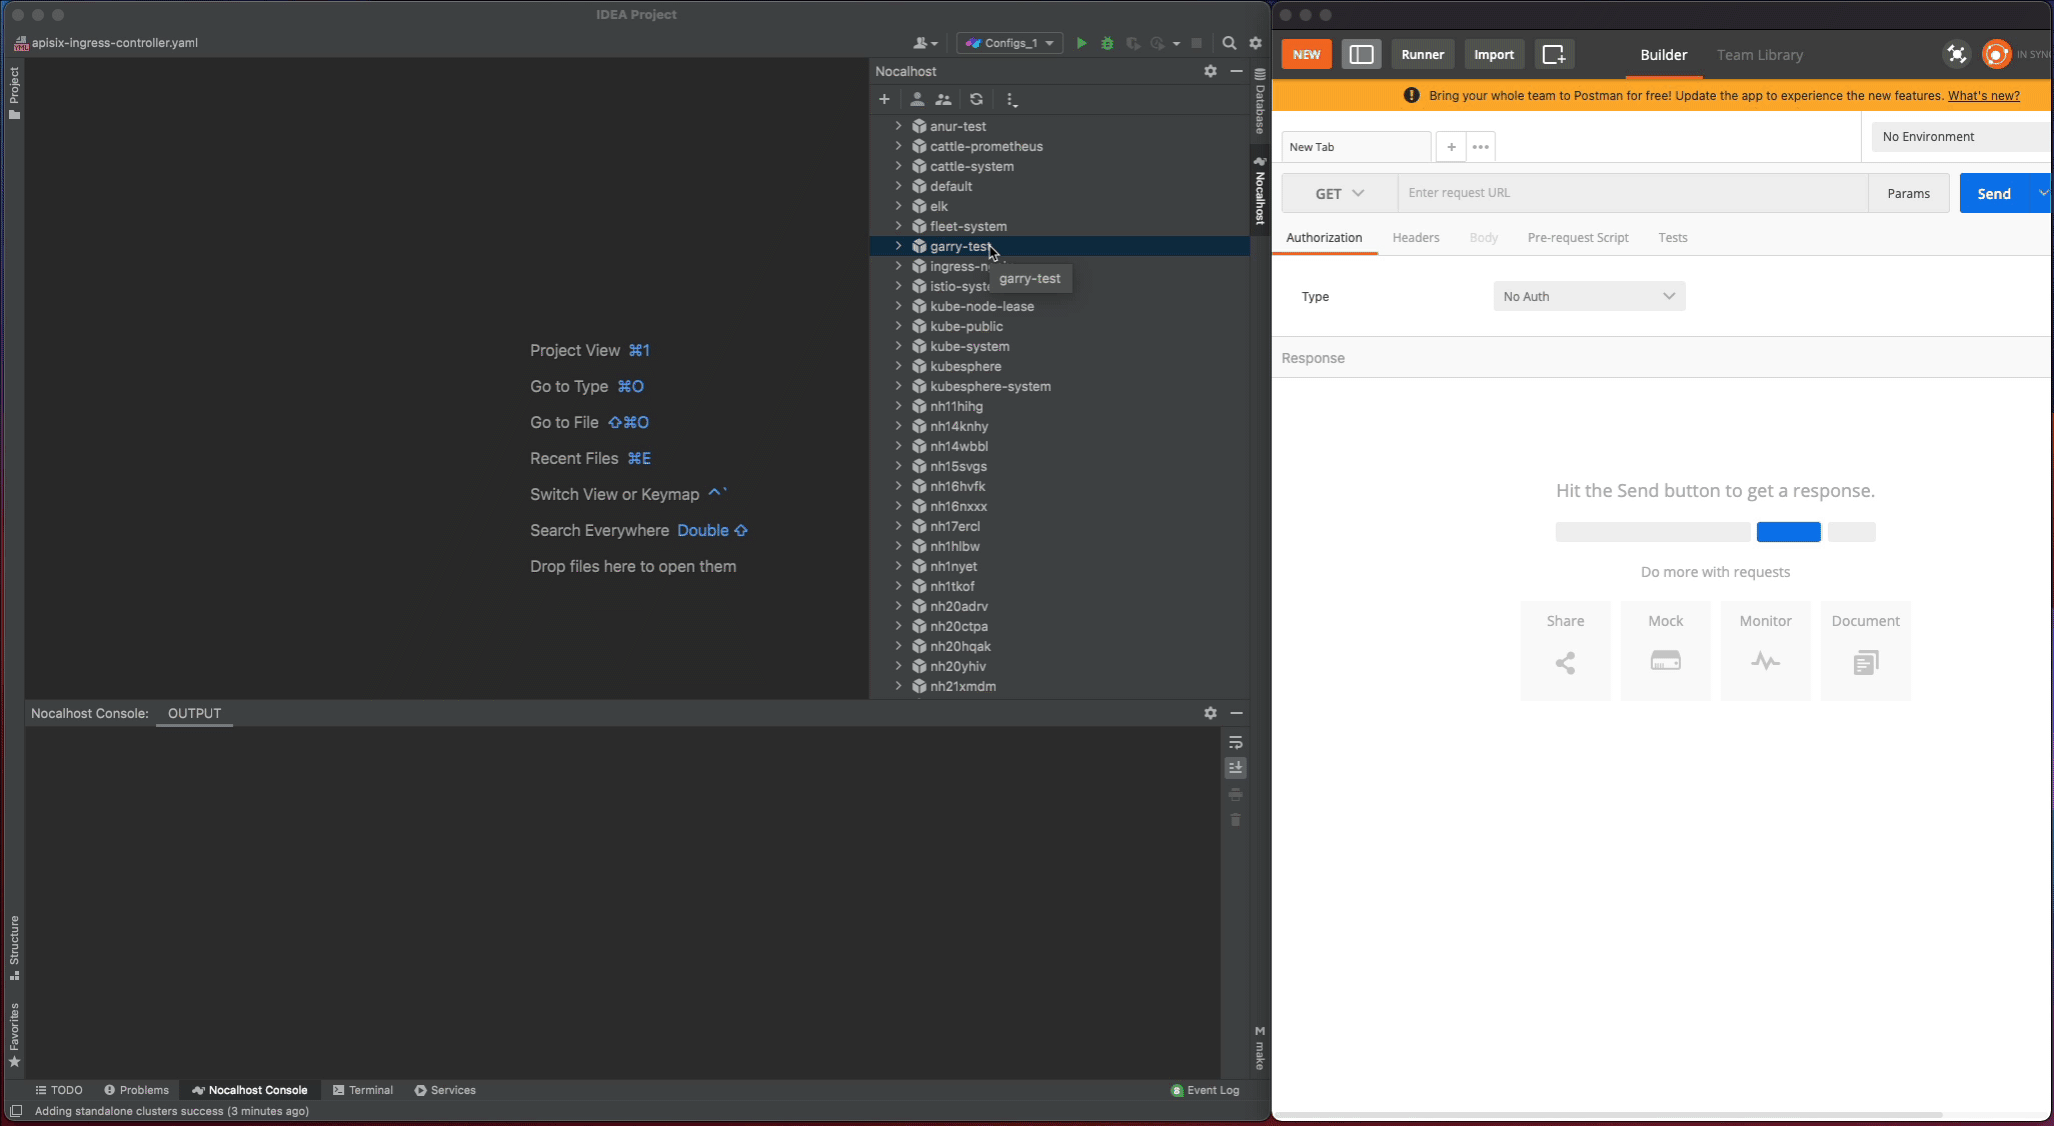
+1. Open the Nocalhost plugin within GoLand
+2. Use the cluster inspector to select the namespace that you want to deploy.
+3. Right-click the selected namespace, choose **`Deploy Application`**, and
select **`Helm Repo`** as installation method.
+4. In the following dialog box, input:
+
+ 1. `apisix-ingress-controller` as `Name`
+ 2. `https://charts.apiseven.com` as `Chart URL`
+
+
+
+Let's test the `apisix-ingress-controller` after deployment by enable the
port-forwarding within IDE:
+
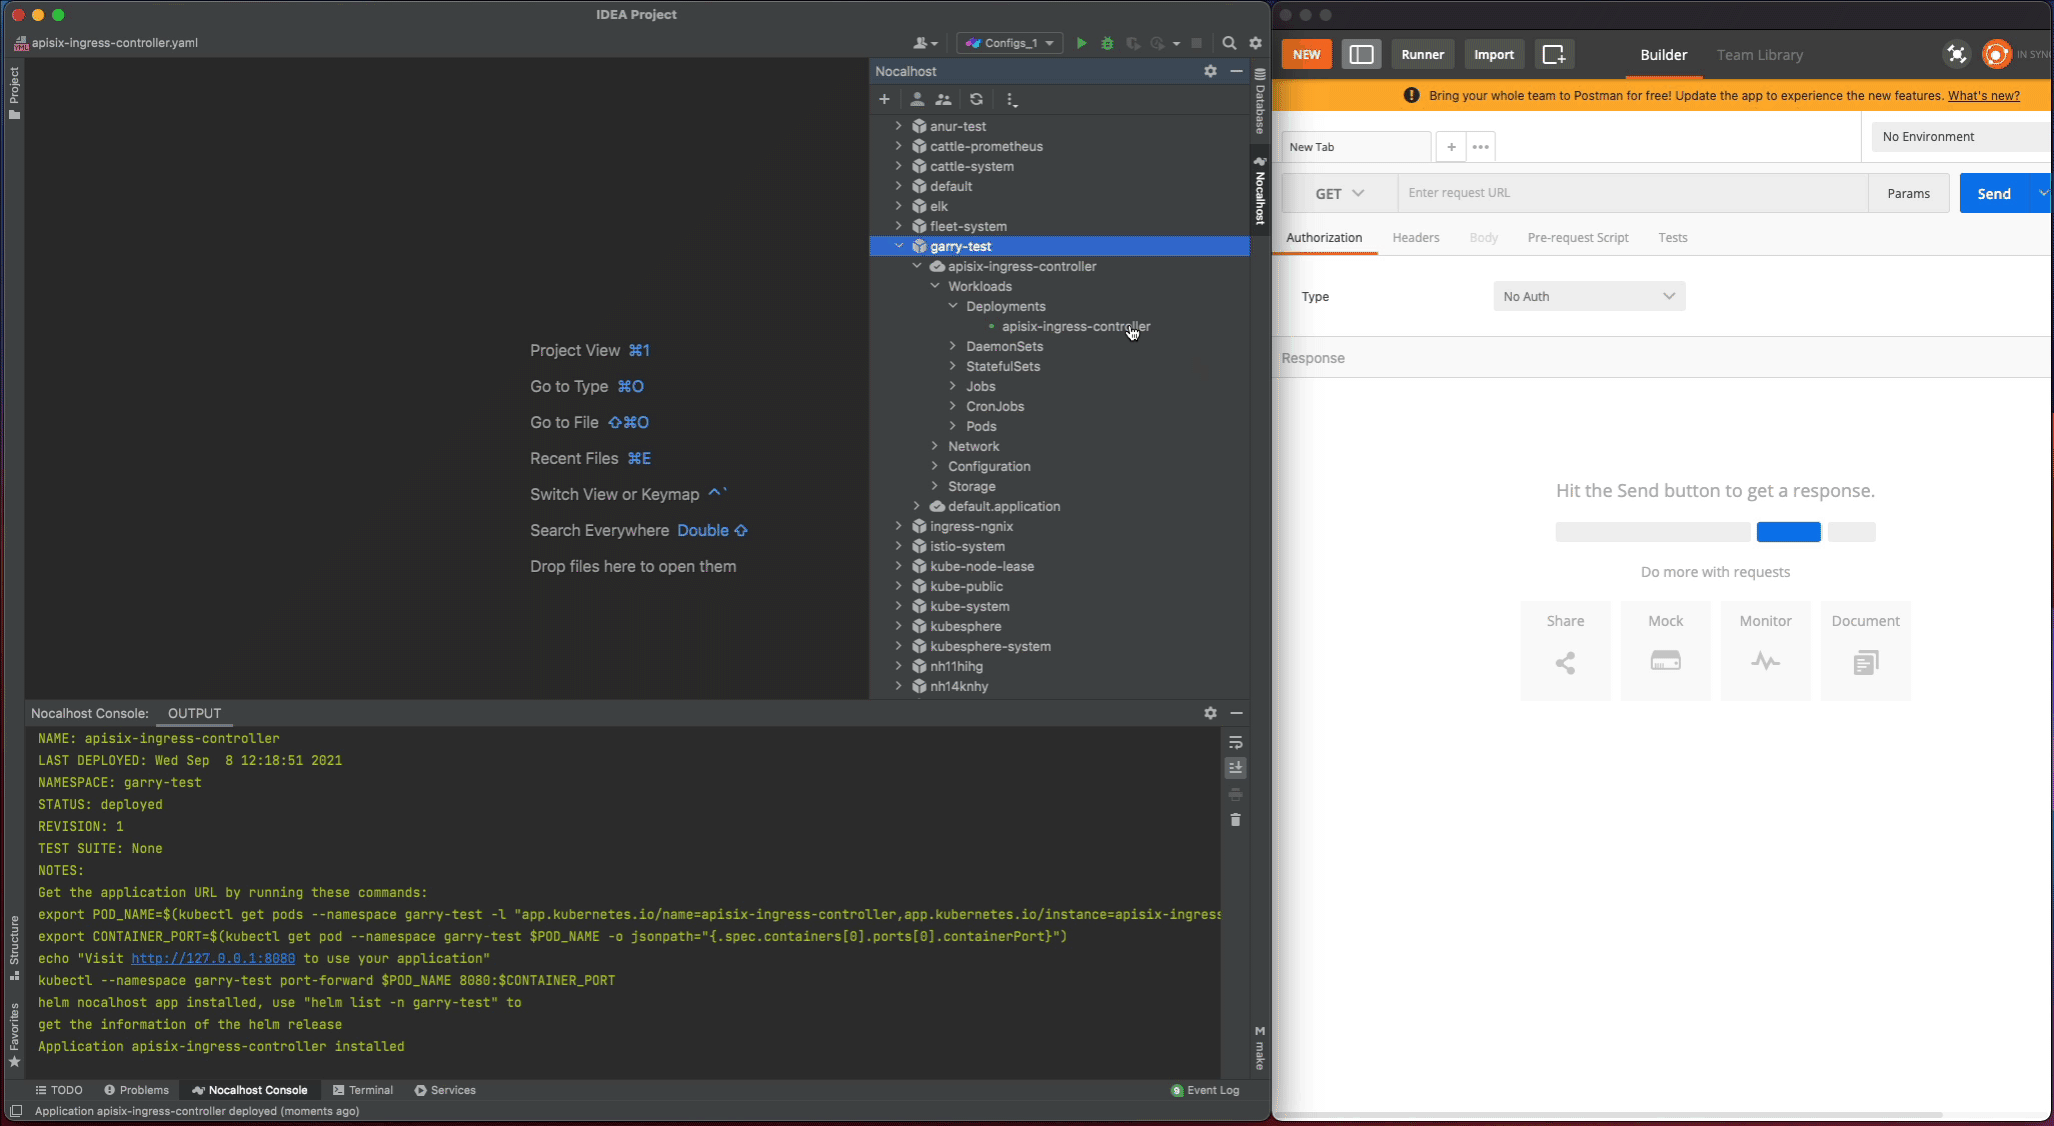
+1. Find the `apisix-ingress-controller` workload in the cluster inspector,
right-click and select the **`Port Forward`**
+2. Add the port-forwarding `8080:8080`
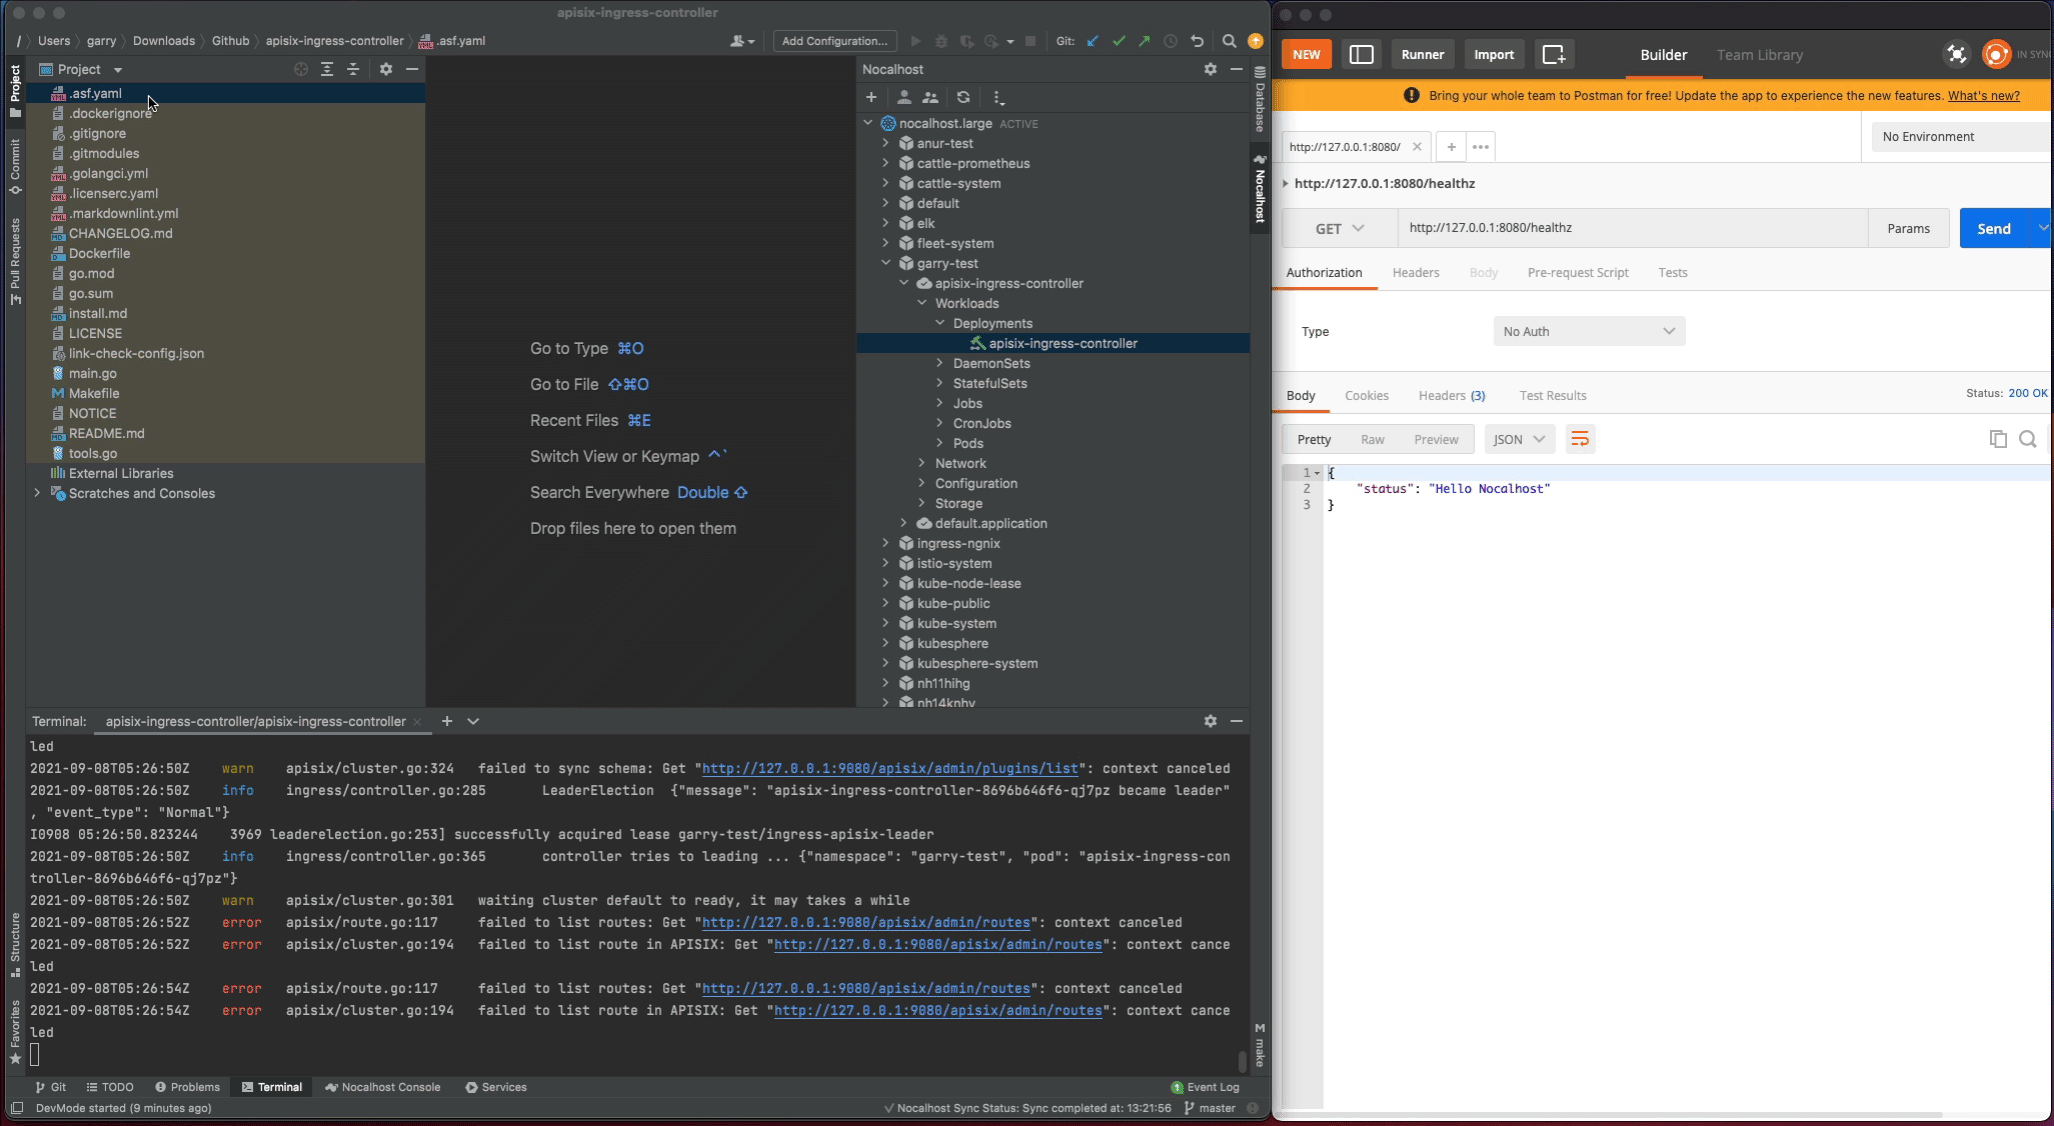
+3. Visiting the
[`http://127.0.0.1:8080/healthz`](http://127.0.0.1:8080/healthz) in local and
check the result
+
+
+
+## Developing
+
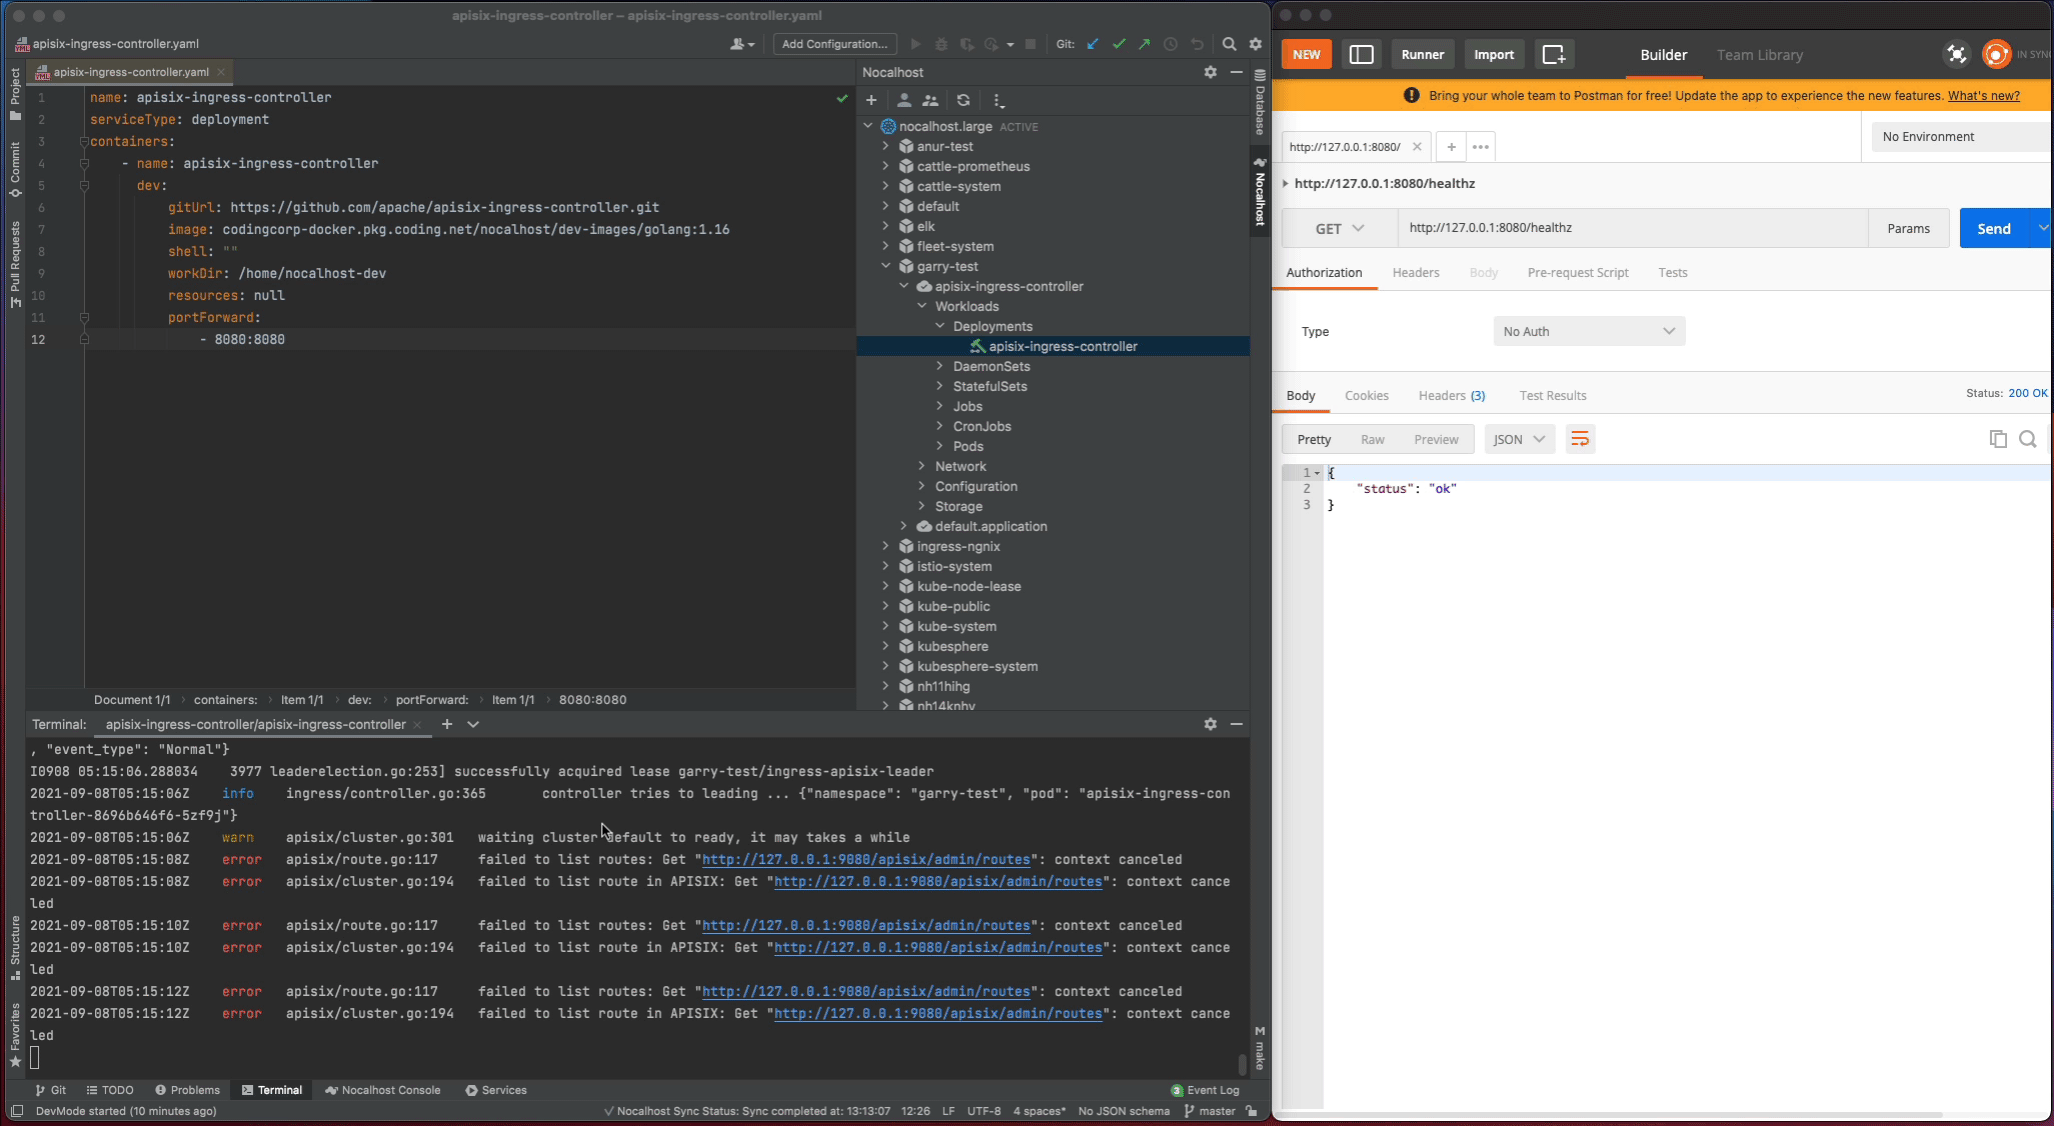
+### Step 1: Start DevMode
+
+1. Right-click the deployment `apisix-ingress-controller` in cluster
inspector, select **`Start DevMode`**
+2. Choose your source code directory if you have already cloned in local, or
let Nocalhost clone the source code for you by entering the
**apache/apisix-ingress-controller** [repository
URL](https://github.com/apache/apisix-ingress-controller.git)
+3. Wait for the operations, Nocalhost will open the remote terminal within IDE
after entering DevMode
+
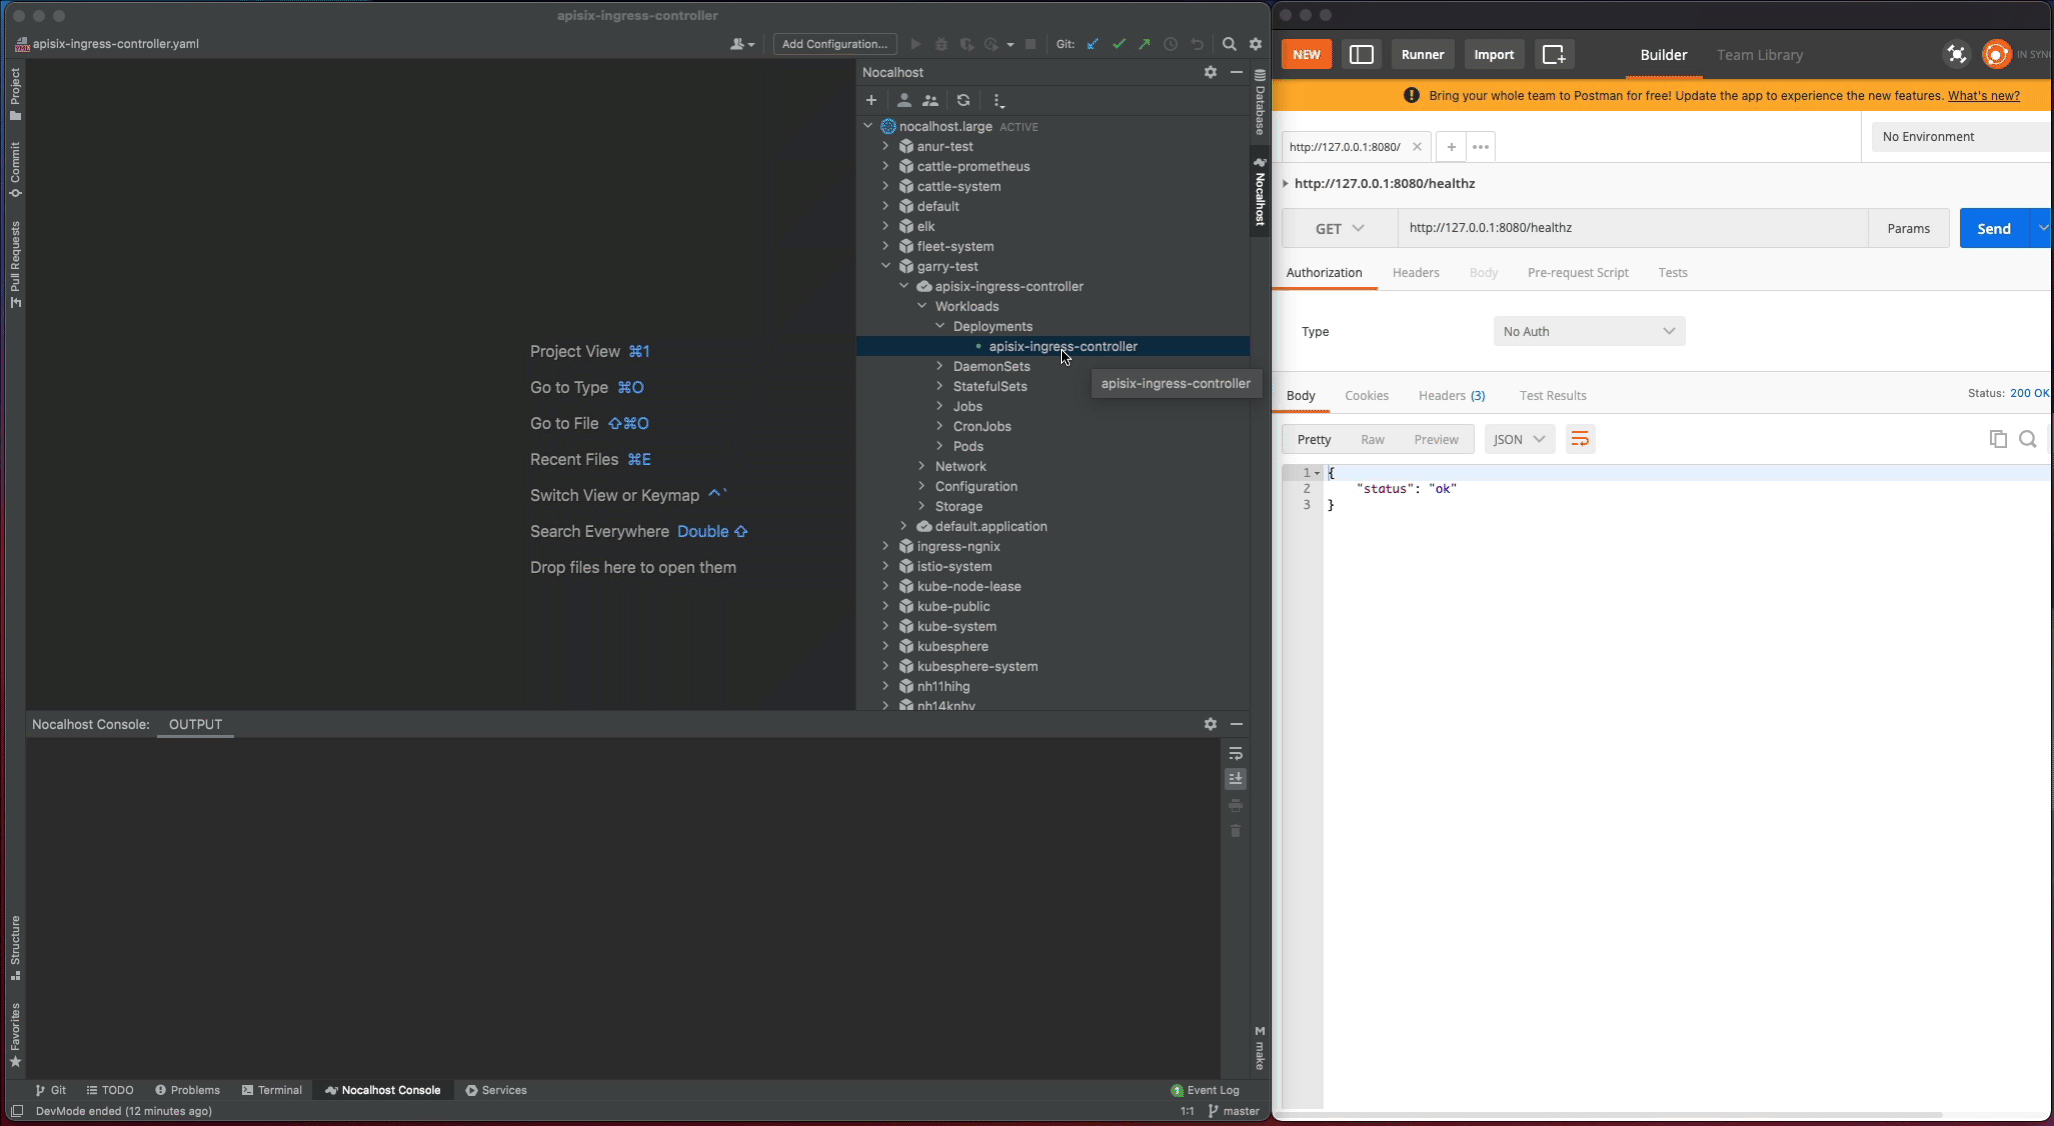
+Now start the `apisix-ingress-controller` process by entering the following
command in the remote terminal:
+
+```bash
+go run main.go ingress --config-path conf/config-default.yaml
+```
+
+After the `apisix-ingress-controller` has started, access the service by
visiting [`http://127.0.0.1:8080/healthz`](http://127.0.0.1:8080/healthz) on
local and check the result.
+
+
+
+### Step 2: Change code and check result
+
+Now I will make some code changes and check the result.
+
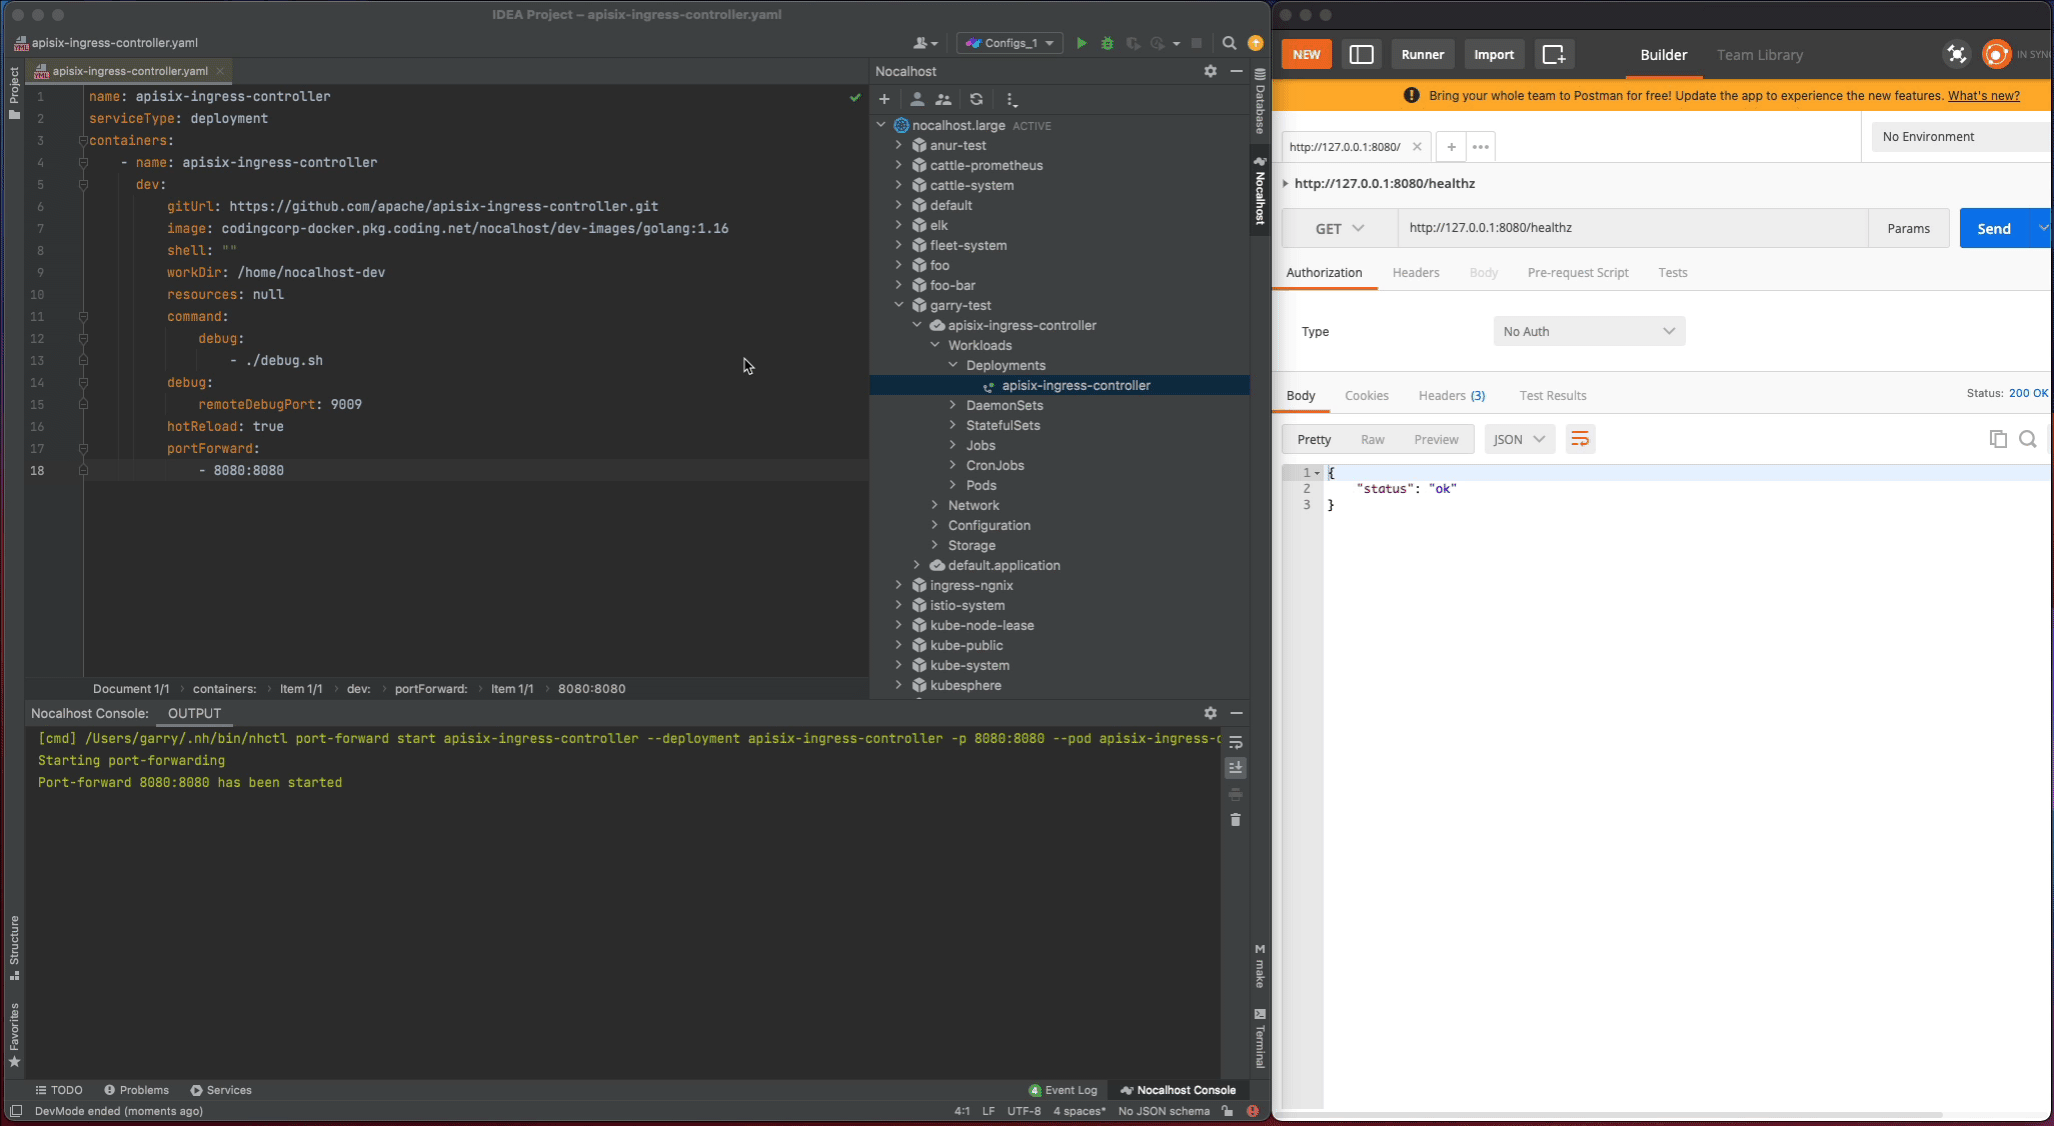
+1. Stop the `apisix-ingress-controller` process
+2. Search `healthz` and find the `router.go` file. Change the
`healthzResponse` status code from `ok` to `Hello Nocalhost`
+3. Start the process again and check the change result in local
+
+
+
+### Step 3. End DevMode
+
+Now close the development window and end DevMode.
+
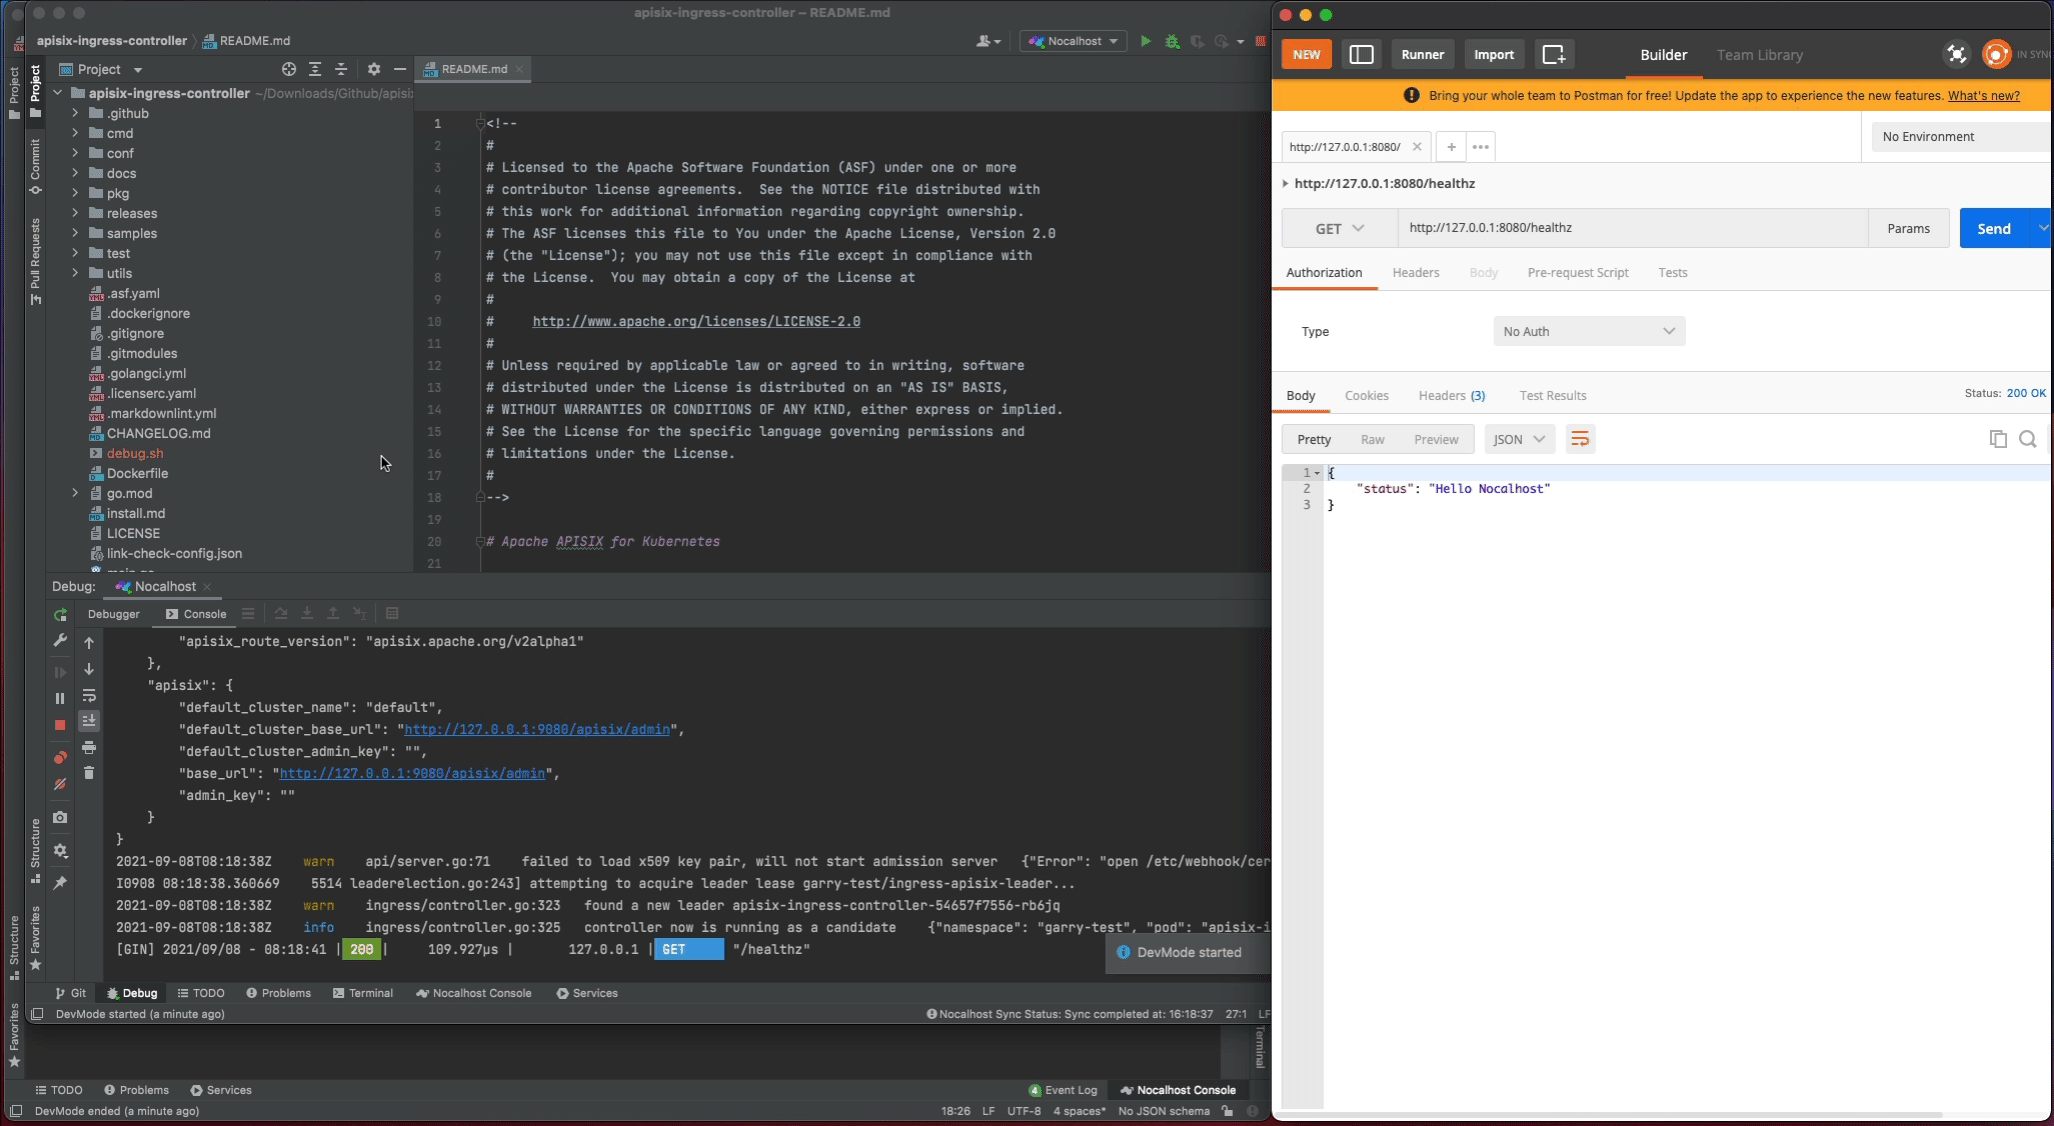
+1. Right-click the `apisix-ingress-controller` in the cluster inspector
+2. Select **`End DevMode`**
+
+Nocalhost will make `apisix-ingress-controller` end development mode, and
reset the `apisix-ingress-controller` Pod to its original version. Enable the
port-forwarding and check the result after ending DevMode.
+
+
+
+**Code Change**: All code changes in development mode will **only take
effect** in the development container.
+
+After exiting the development mode, Nocalhost will reset the remote container
to its original state (before the code is modified). In this way, after exiting
the development mode, the modification of the code will **not** cause any
changes or impact on the original environment.
+
+## Debugging
+
+Debugging an application is not easy, and debugging an application in the
Kubernetes cluster is even more difficult. Nocalhost is here to help by
providing the same debugging experience you're used in the IDE when debugging
in the remote Kubernetes cluster.
+
+### Step 1: Start remote debugging
+
+We can start remote debugging by:
+
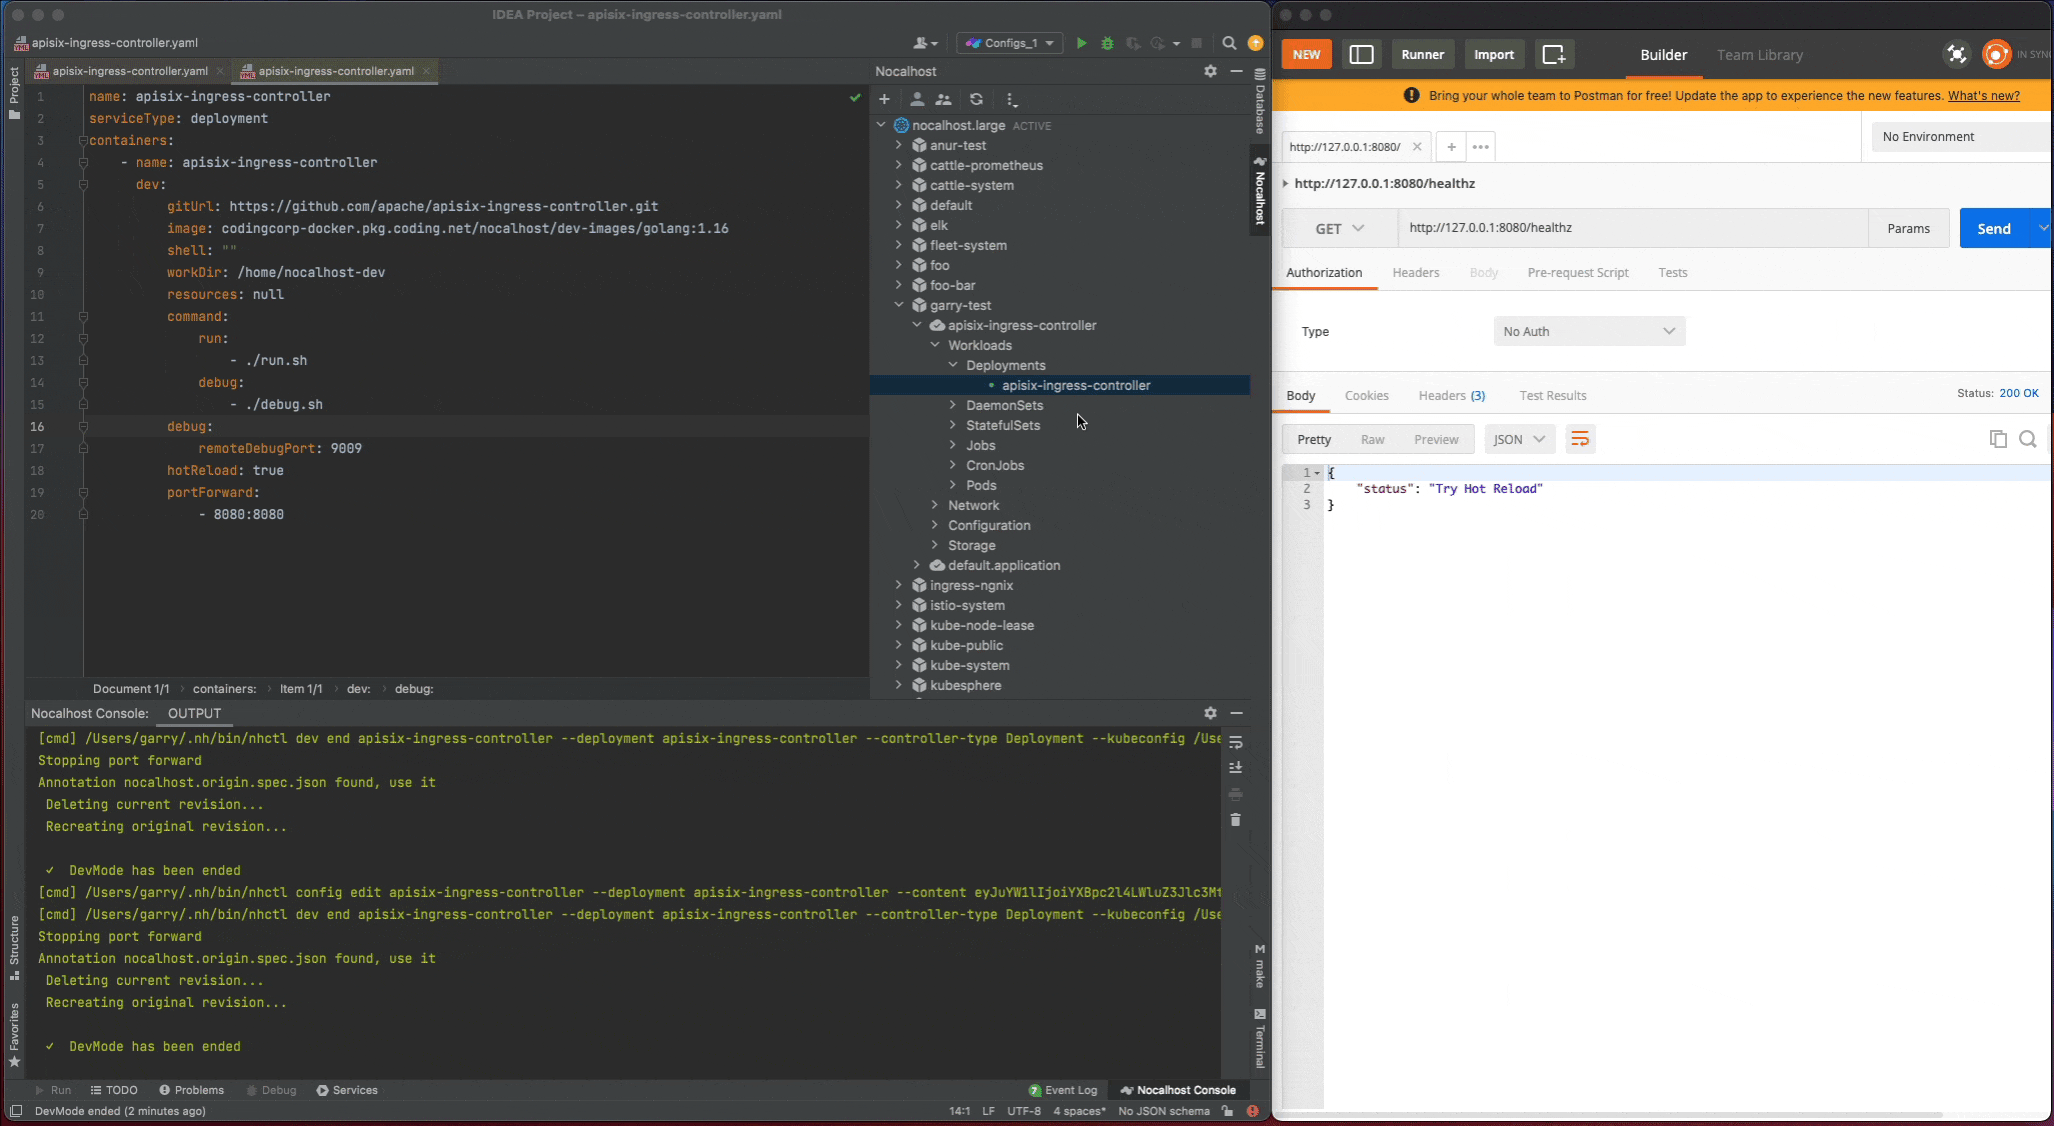
+1. Right-click `apisix-ingress-controller` and choose **`Remote Debug`**
+2. Nocalhost will put `apisix-ingress-controller` into DevMode and run debug
command defined in [`dev
config`](https://nocalhost.dev/zh-CN/docs/config/config-develop) automatically
+
+
+
+### Step 2: Step through breakpoints
+
+Now set a breakpoint on the `healthz` function. Hover over just to the left of
the line number and click on the red dot. Once it’s set, visit
[`http://127.0.0.1:8080/healthz`](http://127.0.0.1:8080/healthz) in your local
browser, GoLand should pop to the foreground. Click the play button to close
the request and the progress should continue loading.
+
+In addition, as I enable the `dev.hotReload`, so every time you make the code
change, Nocalhost will automatically re-run the debug command. This is very
useful when you make the code change and debug frequently.
+
+
+
+## Remote Run
+
+Not just remote debugging, Nocalhost also provides an easy way to run your Go
service in the Kubernetes cluster, plus hot reload!
+
+You can using the remote run feature by:
+
+1. Right-click `apisix-ingress-controller` in cluster inspector, choose
**`Remote Run`**
+2. Nocalhost will put `apisix-ingress-controller` into development mode and
and run start command defined in [`dev
config`](https://nocalhost.dev/zh-CN/docs/config/config-develop) automatically
+
+Now every time you make code changes, Nocalhost will automatically trigger the
run command. You can now enjoy the hot reload for Go without complex
configuration.
+
+
+
+## Conclusion
+
+We’ve learned how to use Nocalhost to develop and debug the APISIX Ingress
Controller in Kubernetes. Now, instead of waiting for slow local development
processes, we can iterate quickly with an instant feedback loop and a
productive cloud-native development environment.
diff --git
a/website/i18n/zh/docusaurus-plugin-content-blog/2021/11/22/develop-apisix-ingress-with-nocalhost-in-kubernetes.md
b/website/i18n/zh/docusaurus-plugin-content-blog/2021/11/22/develop-apisix-ingress-with-nocalhost-in-kubernetes.md
new file mode 100644
index 0000000..416a788
--- /dev/null
+++
b/website/i18n/zh/docusaurus-plugin-content-blog/2021/11/22/develop-apisix-ingress-with-nocalhost-in-kubernetes.md
@@ -0,0 +1,130 @@
+---
+title: "如何在 Kubernetes 集群中使用 Nocalhost 开发 Apache APISIX Ingress Controller"
+author: "Garry Chen"
+authorURL: "https://github.com/neaped";
+authorImageURL: "https://avatars.githubusercontent.com/u/3713305?v=4";
+keywords:
+- Kubernetes
+- Apache APISIX Ingress
+- Nocalhost
+- Controller
+- 部署开发
+description: 本文将为您介绍如何使用 Nocalhost 将本地开发机无缝连接到一个远程 Kubernetes 集群,同时配合 IDE
来开发和调试 Apache APISIX Ingress Controller。利用现有技术栈更顺畅地开发和调试远程应用。
+tags: [Technology]
+---
+
+> 本文将为您介绍如何使用 Nocalhost 将本地开发机无缝连接到一个远程 Kubernetes 集群,同时配合 IDE 来开发和调试 Apache
APISIX Ingress Controller。利用现有技术栈更顺畅地开发和调试远程应用。
+
+<!--truncate-->
+
+## 环境准备
+
+- 准备一个可用的 Kubernetes 集群。可使用任意拥有命名空间管理权限的 Kubernetes 集群
+- 本地已安装好 [Helm v3.0+](https://helm.sh)
+- 集群中已安装好 Apache APISIX
+- GoLand IDE 2020.03+ (本文应用的是 2021.2 版本)
+- 安装 [Nocalhost JetBrains
plugin](https://nocalhost.dev/zh-CN/docs/installation#install-jetbrains-plugin)
插件
+- 安装 [Go 1.13](https://golang.org/dl/) 或更高版本
+
+## 部署 Apache APISIX Ingress Controller
+
+在 GoLand 中通过 Nocalhost 部署 Apache APISIX Ingress Controller,操作如下:
+
+1. 在 GoLand 中打开 Nocalhost 插件
+2. 选择将要部署 APISIX Ingress Controller 的命名空间
+3. 右键点击选定的命名空间, 选择 **`Deploy Application`**, 然后选择 **`Helm Repo`** 作为安装方法
+4. 在下面的对话框中:
+
+ 1. 在 `Name` 中输入:`apisix-ingress-controller`
+ 2. 在 `Chart URL` 中输入:`https://charts.apiseven.com`
+
+
+
+部署完成后,我们通过在 IDE 内启用端口转发来测试 `apisix-ingress-controller`:
+
+1. 在 Nocalhost 插件的 Workloads 中找到 `apisix-ingress-controller`,右键点击并选择 **`Port
Forward`**
+2. 添加端口转发 `8080:8080`
+3. 在本地访问 [`http://127.0.0.1:8080/healthz`](http://127.0.0.1:8080/healthz) 并检查结果
+
+
+
+## 开发
+
+### 步骤一:进入开发模式
+
+1. 右键点击 `apisix-ingress-controller` 工作负载,选择 **`Start DevMode`**
+2. 如果您已经将源码克隆到本地,请选择您的源代码目录。否则通过输入仓库地址
https://github.com/apache/apisix-ingress-controller.git 来让 Nocalhost 克隆你的源代码到本地
+3. 等待操作完成,Nocalhost 将在进入 DevMode 后在 IDE 内打开远程终端
+
+现在通过在远程终端中输入以下命令来启动 `apisix-ingress-controller` 进程:
+
+```bash
+go run main.go ingress --config-path conf/config-default.yaml
+```
+
+`apisix-ingress-controller` 启动后,可通过
[`http://127.0.0.1:8080/healthz`](http://127.0.0.1:8080/healthz) 访问服务,并检查结果.
+
+
+
+### 步骤二:修改代码并检查结果
+
+现在我们来修改一下代码并看看效果:
+
+1. 停止 `apisix-ingress-controller` 进程
+2. 在 Goland 中搜索 `healthz` 并找到 `router.go` 文件。 将 `healthzResponse` 的状态代码从 `ok`
更改为 `Hello Nocalhost`
+3. 重新启动进程并在本地检查更改结果
+
+
+
+### 步骤三:结束开发模式
+
+现在关闭开发窗口并退出开发模式:
+
+1. 右键点击 `apisix-ingress-controller`
+2. 选择 **`End DevMode`**
+
+Nocalhost 将使 `apisix-ingress-controller` 结束 DevMode, 并重置
`apisix-ingress-controller` 到其原始版本。启用端口转发来看看退出开发模式后的结果。
+
+
+
+注意:在开发模式下修改代码时,所有代码更改都只在**开发容器**中生效。
+
+退出 DevMode 后,Nocalhost 将会将远程容器重置为原始状态(进入 DevMode 之前的版本)。这样,在退出 DevMode
后,对代码进行修改不会对原始环境造成任何更改或影响。
+
+## 调试
+
+调试应用程序是一件麻烦的事,在 Kubernetes 集群中调试应用程序则更加麻烦。但 Nocalhost 可以帮助我们在调试 Kubernetes
集群中的程序时获得和在 IDE 中直接调试本地程序同样的体验。
+
+### 步骤一:开启远程调试
+
+我们可以通过以下方式开启远程调试
+
+- 右键点击 `apisix-ingress-controller` 并选择 **`Remote Debug`**
+- Nocalhost 将会先让 `apisix-ingress-controller` 进入 DevMode,并运行在 [`dev
config`](https://nocalhost.dev/zh-CN/docs/config/config-develop) 定义的调试命令
+
+
+
+### 步骤二:设置断点
+
+在 `healthz` 函数上设置一个断点。悬停在行号左侧,然后点击红点。设置好断点后,在浏览器中访问
[`http://127.0.0.1:8080/healthz`](http://127.0.0.1:8080/healthz),会触发断点,GoLand
会跳到前台。点击调试相关按钮可对程序进行调试。
+
+此外,因为我们启用了 `dev.hotReload`,所以每次更改代码时,Nocalhost
将自动重新运行调试命令。这可以让我们频繁更改和调试代码时变得方便很多。
+
+
+
+## 远程运行
+
+Nocalhost 不仅仅可以远程调试,还为我们在 Kubernetes 集群中运行服务以及热加载提供了一种更简单的方式。
+
+我们可以通过以下步骤使用 Remote Run 功能:
+
+- 右键点击 `apisix-ingress-controller`,并选择 **`Remote Run`**
+- Nocalhost 将会先让 `apisix-ingress-controller` 进入 DevMode,并运行在 [`dev
config`](https://nocalhost.dev/zh-CN/docs/config/config-develop) 定义的运行命令
+
+每次更改代码完代码后,Nocalhost 都会自动触发运行命令,将程序运行起来。
+
+
+
+## 总结
+
+通过本文,我们为大家展示了如何使用 Nocalhost 来开发和调试 Kubernetes 集群中的 Apache APISIX Ingress
Controller。借助 Nocalhost 的能力,我们不再需要等待缓慢的本地开发过程,而是可以通过即时反馈和高效的云本地开发环境进行快速部署与迭代.