yzeng25 commented on a change in pull request #781:
URL: https://github.com/apache/apisix-website/pull/781#discussion_r759053377
########## File path: website/blog/2021/11/30/use-ingress-in-kubesphere.md ########## @@ -0,0 +1,439 @@ +--- +title: "Using Apache APISIX Ingress Gateway to access Custom Monitoring in KubeSphere" +author: "Haili Zhang" +authorURL: "https://github.com/webup"; +authorImageURL: "https://avatars.githubusercontent.com/u/2936504?v=4"; +keywords: +- KubeSphere +- Apache APISIX +- Kubenetes +- Ingress Controller +- Monitor +description: This article will take Apache APISIX Ingress Controller as an example to show you in detail how to quickly use different types of gateways and status monitoring for Kubernetes clusters through KubeSphere. +tags: [Technology] +--- + +> This article will take Apache APISIX Ingress Controller as an example to show you in detail how to quickly use different types of gateways and status monitoring for Kubernetes clusters through KubeSphere. + +<!--truncate--> + +In early November, KubeSphere released version 3.2.0, which added a full set of monitoring and management pages for project gateways, and introduced cluster gateways to provide global Ingress gateway capabilities at the cluster level. + +To help users better understand how to deploy and use third-party Ingress Controllers in the new version of KubeSphere, this article will use the [Apache APISIX Ingress Controller](https://apisix.apache.org/docs/ingress-controller/getting-started/) as an example to show you how to quickly use different types of gateways for Kubernetes clusters with KubeSphere and perform status monitoring. + +## Preparation + +### Installing KubeSphere + +There are two ways to install KubeSphere. + +1. Install directly on [Linux](https://kubesphere.com.cn/docs/quick-start/all-in-one-on-linux/) +2. Install on [existing Kubernetes](https://kubesphere.com.cn/docs/quick-start/minimal-kubesphere-on-k8s/) + +The monitoring module is already included in the minimal installation of KubeSphere, so there is no need to enable it additionally, and you can confirm the installation status via the Monitoring tab on the System Components page. + +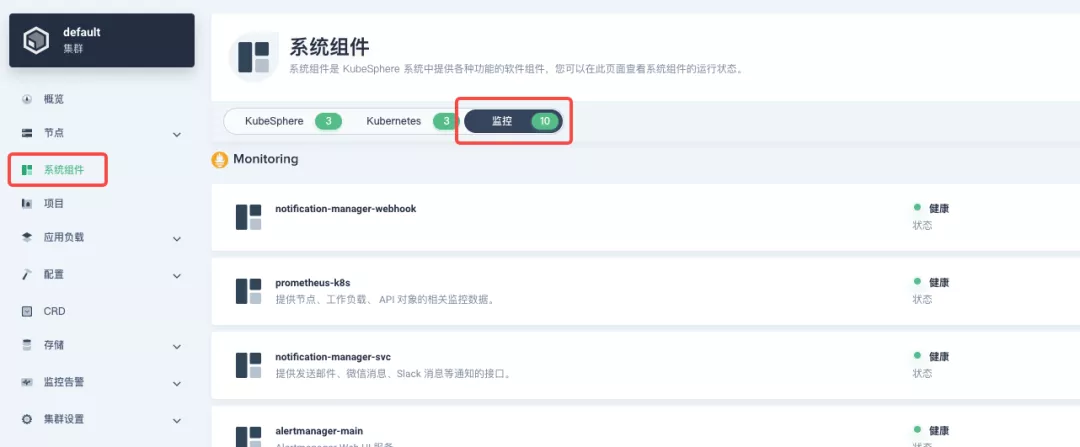 + +### Deploying the httpbin demo application + +Since we need to demonstrate the access control capabilities of the gateway, we must first have an accessible application as a backend service for the gateway. Here we use the [kennethreitz/httpbin](https://hub.docker.com/r/kennethreitz/httpbin/) container application provided by [httpbin.org](httpbin.org) as our demo application. + +In KubeSphere, we can either create a new project or use an existing one. After entering the project page, select "Services" under "Application Loads" to directly create a stateless workload and generate a companion service. + +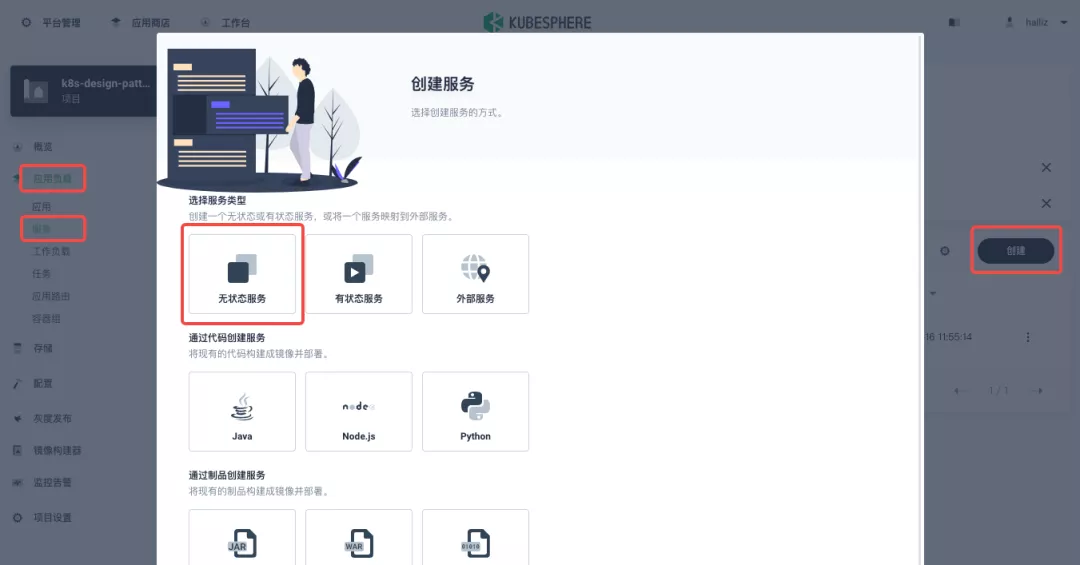 + +Use the default port `80` of the [kennethreitz/httpbin](https://hub.docker.com/r/kennethreitz/httpbin/) container as the service port, and make sure you can see the corresponding entry for `httpbin` under both the Workloads and Services pages after creation, as shown in the following image. + +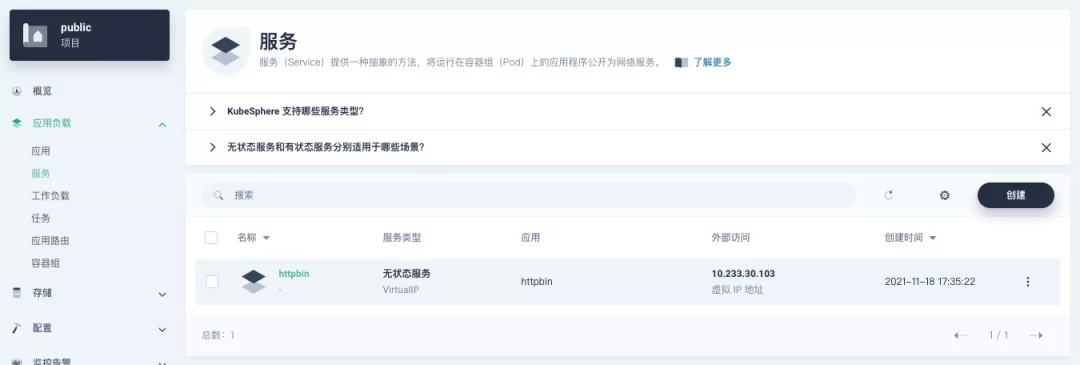 + +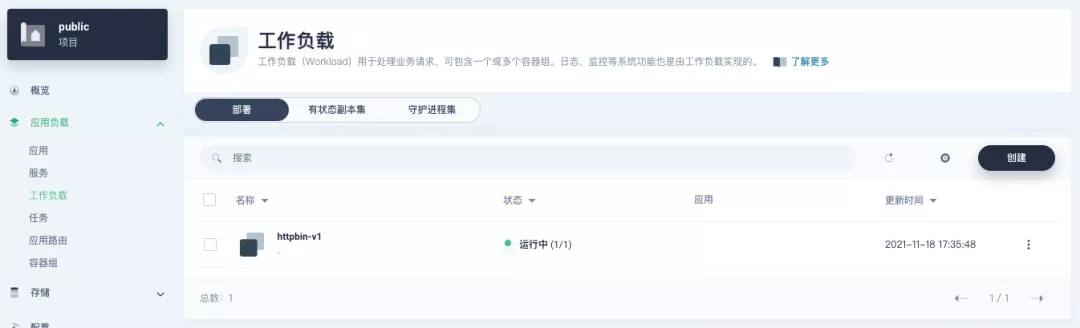 + +### Additional Project Gateway Details + +The **Project Gateway** is a feature that has been live since KubeSphere 3.0. The Gateway in the KubeSphere Project is an NGINX Ingress controller. The mechanism built into KubeSphere for HTTP load balancing is called **Application Routing**, which defines the rules for connecting from the outside to the clustered service. To allow access to services from the outside, users can create routing resources to define URI paths, back-end service names, and other information. + +Following the `httpbin` service project deployed above, open the Gateway Settings page in Project Settings and perform the "Enable Gateway" operation. For convenience, just select `NodePort` as the "Access Method". + +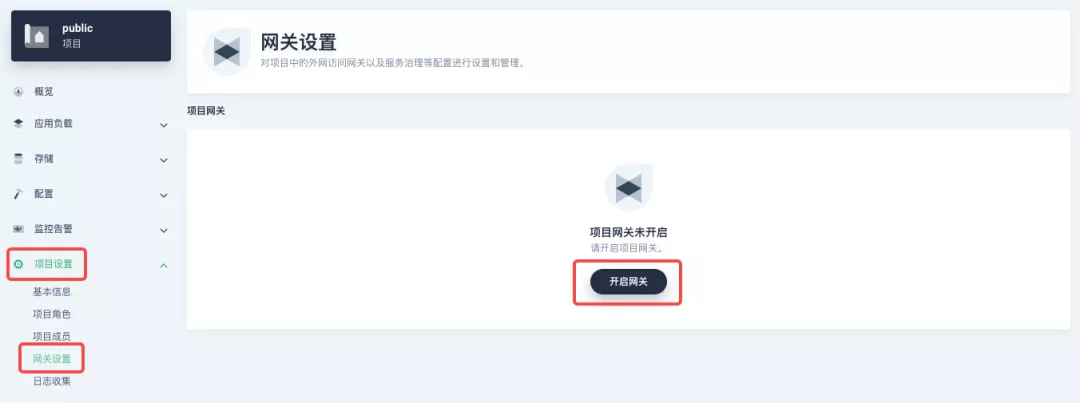 + +After OK, go back to the Gateway page, wait for a moment and refresh the page, you can get the deployment completion status as shown below, where you can see that NodePort is given two node ports by default. Next, we use the "Manage" button in the upper right corner to "View Details". + +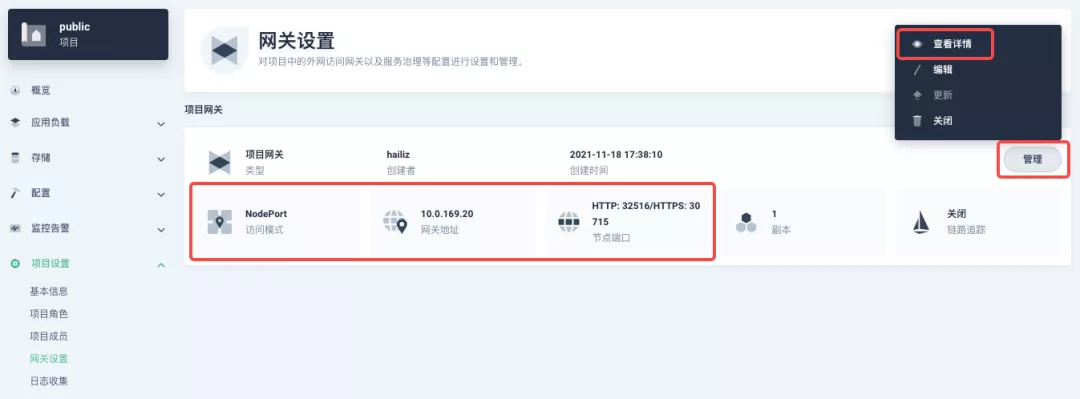 + +At this point we are looking at the new monitoring page for the project/cluster gateway in version 3.2.0. Next we need to create an application route for the httpbin service. + +Go to the Application Routing page from Application Load and start "creating" the route. After naming the route `httpbin`, we specify a domain name for testing purposes and set the "path" to `/`, select "service" `httpbin` and "port" `80`. + +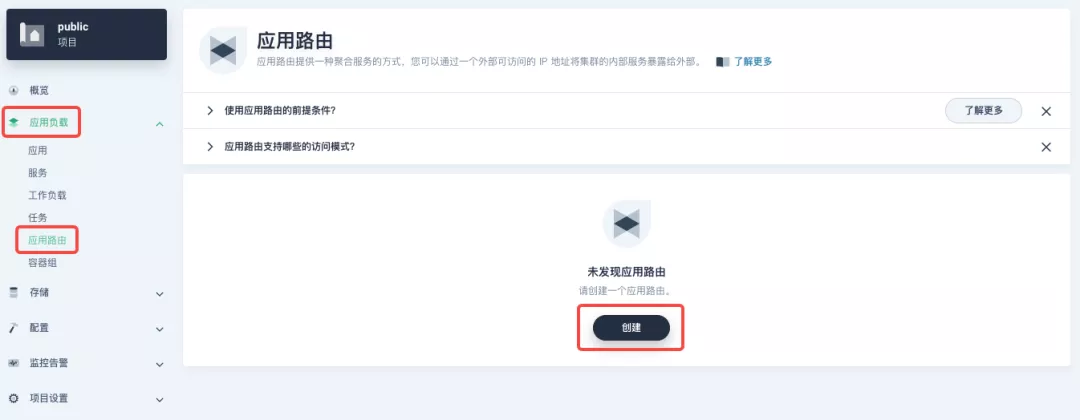 + + + +After skipping the advanced settings in the next step, the route creation is completed and you can get the `httpbin` application route entry as shown in the figure below. + +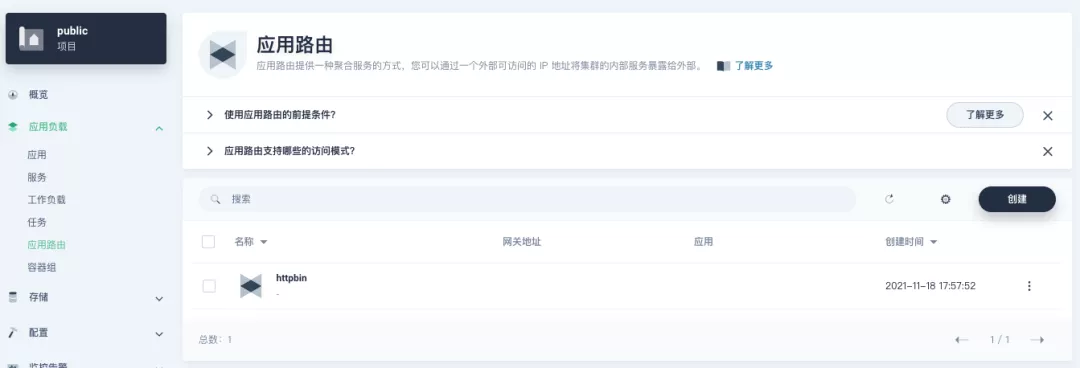 + +Next, we can access the httpbin application service through the NodePort address of the project gateway and the specified domain name (e.g., http://httpbin.ui:32516 here), refresh or manipulate the request generation function of the page at will, and then enter the details page of the gateway, you can see that the "Monitoring" panel has appeared some built-in monitoring indicators. + +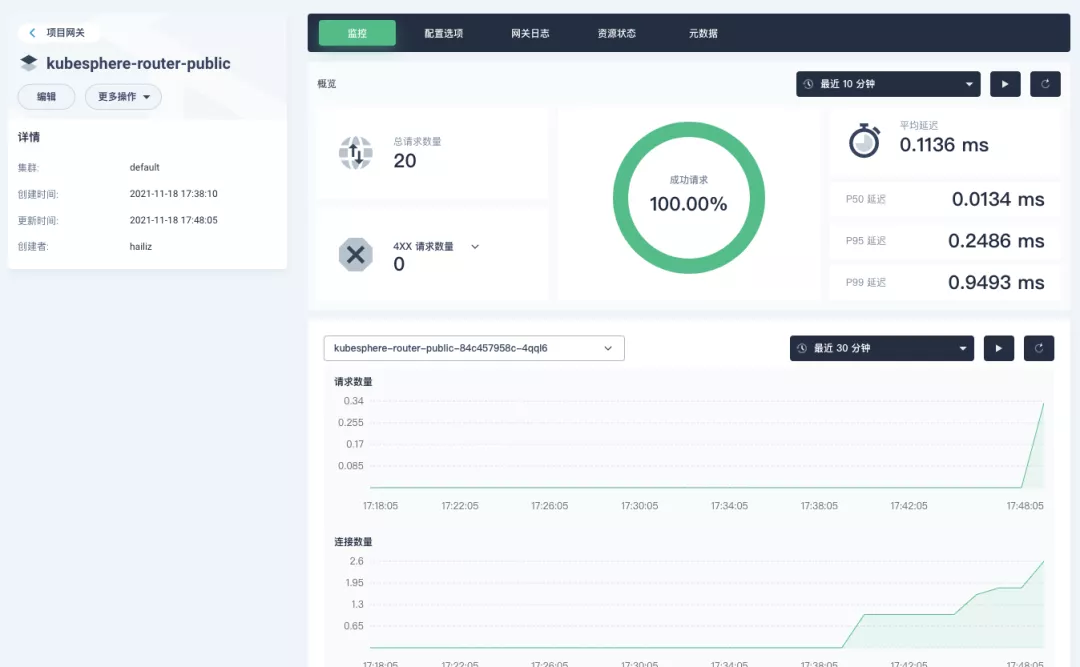 + +#### Specifying the NodePort Node Port + +For public cloud environments that use NodePort to expose access to the outside world, the open ports are usually limited and controlled, so we need to modify the NodePort used by the gateway. + +Since the gateway is managed by KubeSphere, to modify the NodePort of the gateway service, you need to have access to the `kubesphere-controls-system` project. Once inside the project, you can find the gateway service named `kubesphere-router-<project-namespace>` on the "Services" page under "Application Load", and the NodePort is open for external access. + +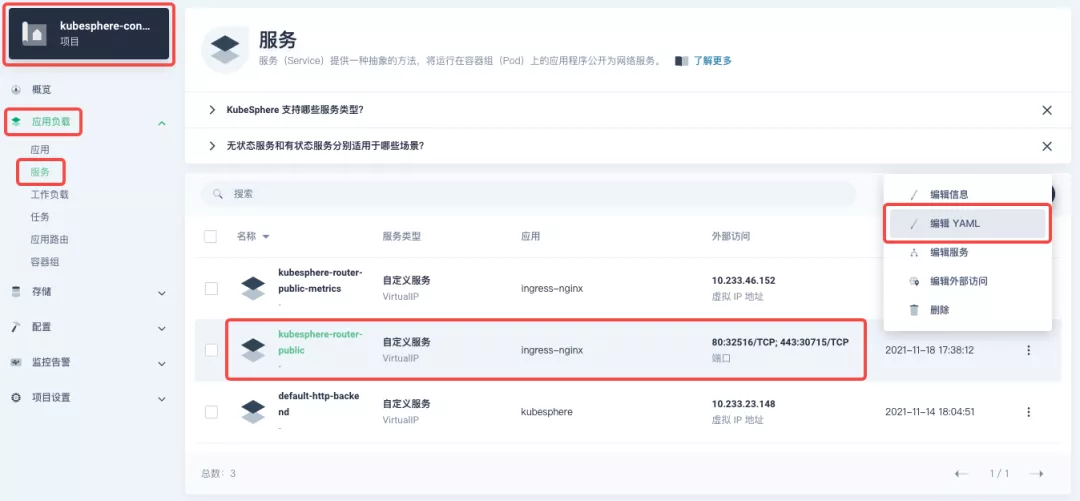 + +## Getting Started with Clustered Gateways + +>KubeSphere 3.2.0 supports global gateways at the cluster level, so all projects can share the same gateway, and previously created project gateways are not affected by the cluster gateway. Gateways for all projects can be managed and configured centrally, eliminating the need to switch to a different enterprise space to configure gateways. + +If you are using KubeSphere version 3.2.0, we recommend using the cluster gateway feature to unify the application routing across the cluster. To enable the cluster gateway, it's very simple: use an account with cluster management privileges to access one of the clusters you can manage (e.g. default cluster here), and under "Gateway Settings" in "Cluster Settings", you can "Enable Gateway" and view the "Project Gateway". + +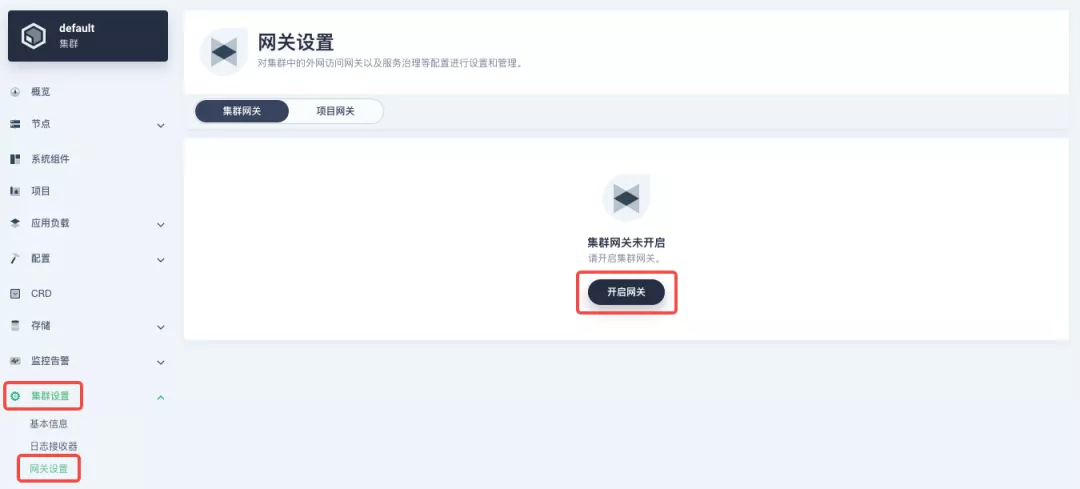 + +The way the cluster gateway is opened and the modification of the aligned NodePort access port are basically the same as the previous project gateway, so we won't go into details here. + +However, there is one point that needs special attention: after the cluster gateway is opened, the gateway of the project that has been opened will remain; however, the project that has not yet created a gateway cannot create a separate gateway, and will use the cluster gateway directly. + +The following figure shows the overview of all gateways in the "Gateway Settings" page for projects that have already created gateways, after having both project and cluster gateways. + +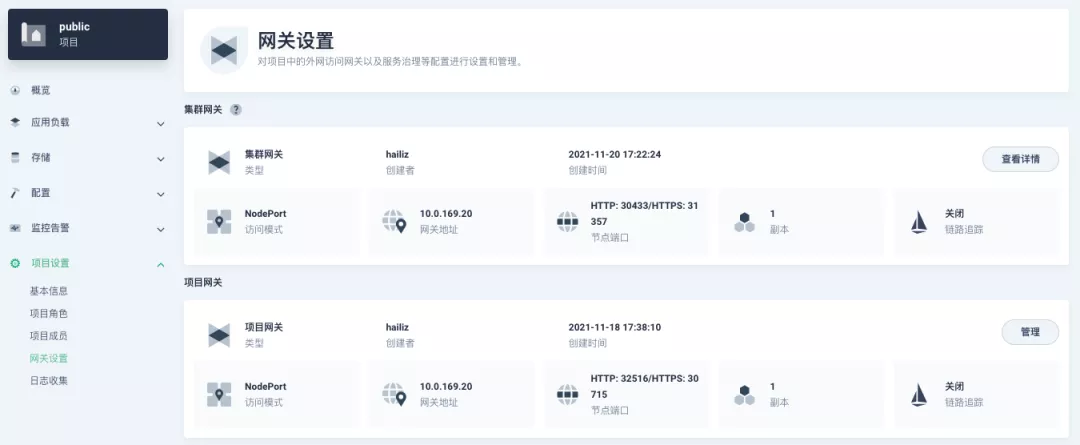 + +## A Quick Look at Apache APISIX Ingress Controller + +Apache APISIX is an open source, high-performance, dynamic cloud-native gateway donated to the Apache Foundation by Shenzhen Tributary Technology Co. in 2019, and is now the top open source project of the Apache Foundation and the most active gateway project on GitHub.Apache APISIX currently covers API gateways, LB Kubernetes Ingress, Service Mesh, and many other scenarios. + +### How to deploy + +First add the Apache APISIX Helm Chart repository. After that, select an enterprise space and add the following [Apache APISIX repository](https://charts.apiseven.com) via "Application Repository" under "Application Management". + +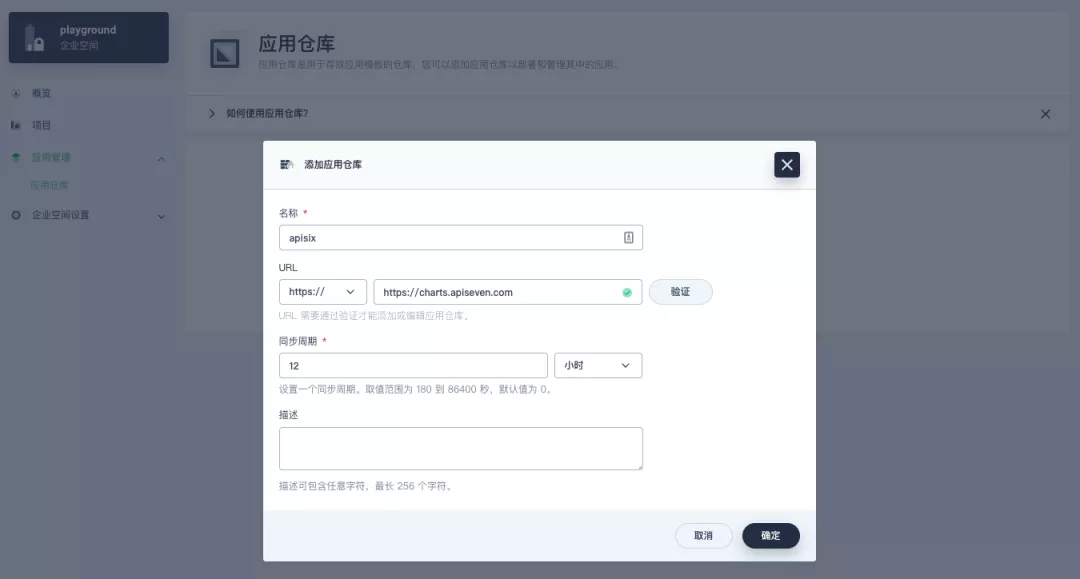 + +Next, create a project named `apisix-system`. Once you are on the project page, select the Create an Application in Application Load method to deploy Apache APISIX, and select the `apisix` application template to start the deployment. + +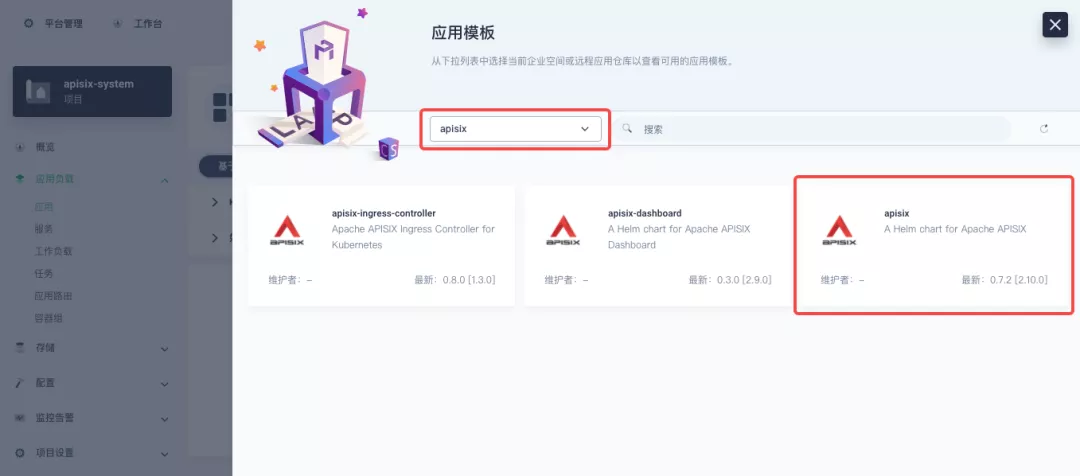 + +>Why deploy the Apache APISIX application Helm Chart directly instead of deploying the Apache APISIX Ingress Controller directly? + +This is because the Apache APISIX Ingress Controller is currently strongly associated with the Apache APISIX Gateway (as shown in the figure below), and it is currently most convenient to deploy Apache APISIX Gateway + Dashboard + Ingress Controller through Apache APISIX Helm Charts at the same time. Ingress Controller is the most convenient, so this article recommends using Apache APISIX Helm Charts directly for the deployment of the whole set of components. + +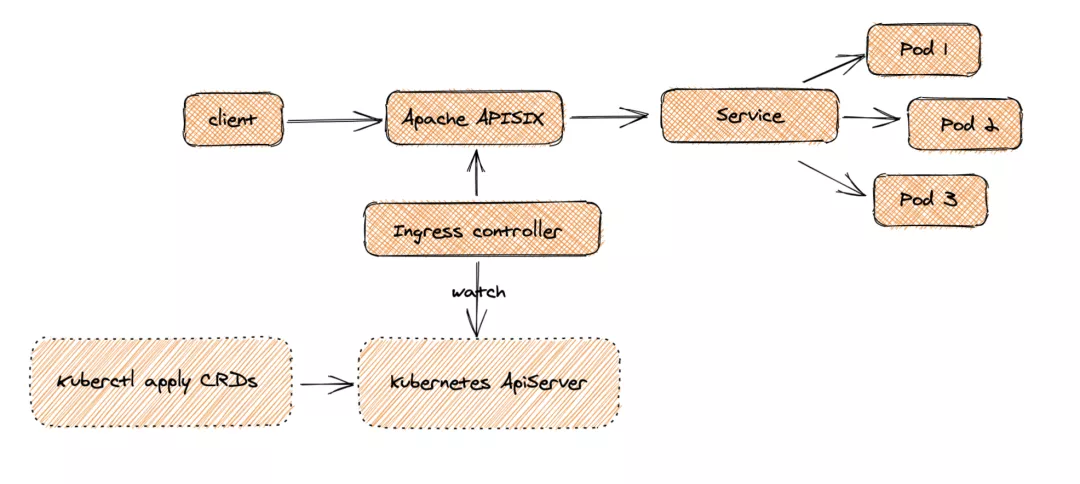 + +Name the application apisix to avoid mismatches between workloads and service names of multiple components (Gateway, Dashboard, Ingress Controller); in the "Application Settings" section edited in the installation steps, please fill in the following configuration (please pay special attention to the notes marked with [Note], the rest (The rest can be edited and modified by yourself as needed). + +```shell +global: Review comment: or yaml? -- This is an automated message from the Apache Git Service. To respond to the message, please log on to GitHub and use the URL above to go to the specific comment. To unsubscribe, e-mail: [email protected] For queries about this service, please contact Infrastructure at: [email protected]