juzhiyuan commented on a change in pull request #837:
URL: https://github.com/apache/apisix-website/pull/837#discussion_r781979083
########## File path: website/i18n/zh/docusaurus-plugin-content-blog/2022/01/11/building-apisix-in-ubuntu-for-arm.md ########## @@ -0,0 +1,247 @@ +--- +title: "在 arm 版 ubuntu 构建 APISIX" +authors: + - name: "郭奇" + title: "Author" + url: "https://github.com/guoqqqi"; + image_url: "https://avatars.githubusercontent.com/u/72343596?v=4"; +keywords: +- Apache APISIX +- arm +- ubuntu +- m1 +description: 本文为大家描述了在 M1 中启用 arm 版 ubuntu 通过源码构建 Apache APISIX 的详细操作步骤,通过阅读本文,大家对于在 arm ubuntu 上构建 Apache APISIX 更加快捷。 +tags: [Technology] +--- + +> 本篇文章记录了通过源码在 arm 版 ubuntu 中构建 Apache APISIX 的详细踩坑记录,ubuntu 环境使用的是 [https://multipass.run/](https://multipass.run/) 中的 Multipass 。因为它可以在 M1 上使用~ Review comment: ```suggestion > 笔者使用的是 M1 芯片的 Macbook Pro,借助 [https://multipass.run/](https://multipass.run/) 安装了 Ubuntu 系统,本文便记录了如何在此环境中通过源码构建 Apache APISIX。 ``` ########## File path: website/i18n/zh/docusaurus-plugin-content-blog/2022/01/11/building-apisix-in-ubuntu-for-arm.md ########## @@ -0,0 +1,247 @@ +--- +title: "在 arm 版 ubuntu 构建 APISIX" +authors: + - name: "郭奇" + title: "Author" + url: "https://github.com/guoqqqi"; + image_url: "https://avatars.githubusercontent.com/u/72343596?v=4"; +keywords: +- Apache APISIX +- arm +- ubuntu +- m1 +description: 本文为大家描述了在 M1 中启用 arm 版 ubuntu 通过源码构建 Apache APISIX 的详细操作步骤,通过阅读本文,大家对于在 arm ubuntu 上构建 Apache APISIX 更加快捷。 +tags: [Technology] +--- + +> 本篇文章记录了通过源码在 arm 版 ubuntu 中构建 Apache APISIX 的详细踩坑记录,ubuntu 环境使用的是 [https://multipass.run/](https://multipass.run/) 中的 Multipass 。因为它可以在 M1 上使用~ + +<!--truncate--> + +## 克隆源码 + +首先根据 [官方文档](https://apisix.apache.org/zh/docs/apisix/how-to-build#%E9%80%9A%E8%BF%87%E6%BA%90%E7%A0%81%E5%8C%85%E5%AE%89%E8%A3%85) 安装 APISIX 源码仓库。并且进入项目文件。 + +```shell +cd apisix-2.11.0 Review comment: I would prefer adding the full `git clone xxx` ########## File path: website/i18n/zh/docusaurus-plugin-content-blog/2022/01/11/building-apisix-in-ubuntu-for-arm.md ########## @@ -0,0 +1,247 @@ +--- +title: "在 arm 版 ubuntu 构建 APISIX" +authors: + - name: "郭奇" + title: "Author" + url: "https://github.com/guoqqqi"; + image_url: "https://avatars.githubusercontent.com/u/72343596?v=4"; +keywords: +- Apache APISIX +- arm +- ubuntu +- m1 +description: 本文为大家描述了在 M1 中启用 arm 版 ubuntu 通过源码构建 Apache APISIX 的详细操作步骤,通过阅读本文,大家对于在 arm ubuntu 上构建 Apache APISIX 更加快捷。 +tags: [Technology] +--- + +> 本篇文章记录了通过源码在 arm 版 ubuntu 中构建 Apache APISIX 的详细踩坑记录,ubuntu 环境使用的是 [https://multipass.run/](https://multipass.run/) 中的 Multipass 。因为它可以在 M1 上使用~ + +<!--truncate--> + +## 克隆源码 + +首先根据 [官方文档](https://apisix.apache.org/zh/docs/apisix/how-to-build#%E9%80%9A%E8%BF%87%E6%BA%90%E7%A0%81%E5%8C%85%E5%AE%89%E8%A3%85) 安装 APISIX 源码仓库。并且进入项目文件。 + +```shell +cd apisix-2.11.0 +``` + +## 安装项目依赖 + +1. 现在我们可以通过脚本一键安装项目所需要的依赖拉,在根目录下运行下面命令: + +```shell +bash utils/install-dependencies.sh +``` + +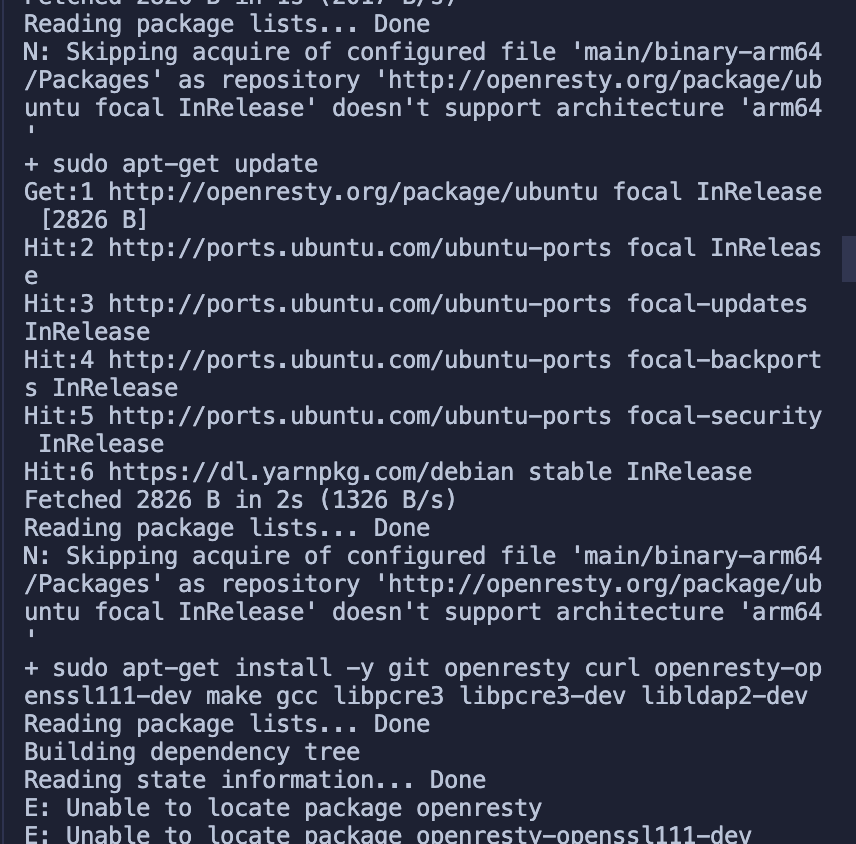 + +不出所料,没有成功跑完。通过错误提示我们知道,这里是未能成功安装 `OpenResty`。原因是默认没有 `arm 64` 平台的源。 + +2. 下面我们手动安装下 OpenResty:参考 [https://openresty.org/cn/linux-packages.html#ubuntu](https://openresty.org/cn/linux-packages.html#ubuntu) + +- 步骤一:安装导入 GPG 公钥时所需的几个依赖包(整个安装过程完成后可以随时删除它们): + +```shell +sudo apt-get -y install --no-install-recommends wget gnupg ca-certificates +``` + +- 步骤二:导入我们的 GPG 密钥: + +```shell +wget -O - https://openresty.org/package/pubkey.gpg | sudo apt-key add - +``` + +成功: + +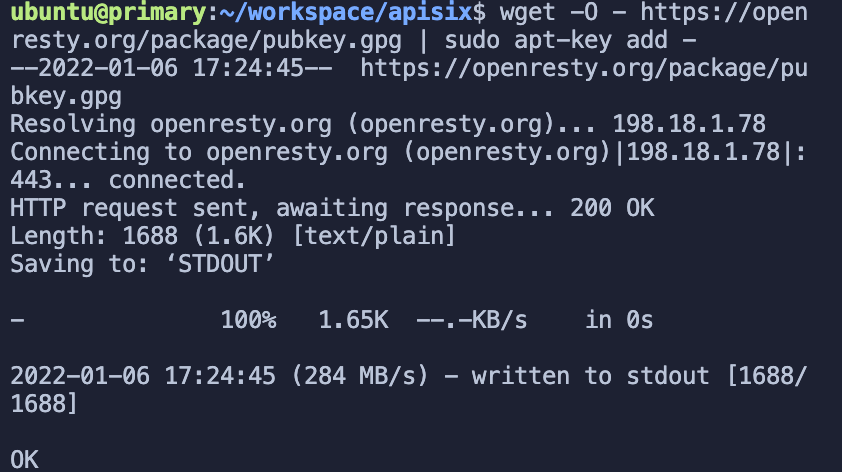 + +- 步骤三:添加 OpenResty 官方 APT 仓库。对于 x86_64 或 amd64 系统,可以使用下面的命令: + +```shell +echo "deb http://openresty.org/package/ubuntu $(lsb_release -sc) main" \ + | sudo tee /etc/apt/sources.list.d/openresty.list +``` + +- 而对于 arm64 或 aarch64 系统,则可以使用下面的命令:(我在 M1 上运行的是该命令,上个命令会报错) + +```shell +echo "deb http://openresty.org/package/arm64/ubuntu $(lsb_release -sc) main" \ + | sudo tee /etc/apt/sources.list.d/openresty.list +``` + +- 步骤四:更新 APT 索引: + +```shell +sudo apt-get update +``` + +然后就可以像下面这样安装软件包,比如 `OpenResty`: + +```shell +sudo apt-get -y install openresty +``` + +- 步骤五:(可选)可以通过下面命令删除该包和对应的关联包: + +```shell +sudo apt-get -y install --no-install-recommends software-properties-common +``` + +成功安装 `OpenResty` : + +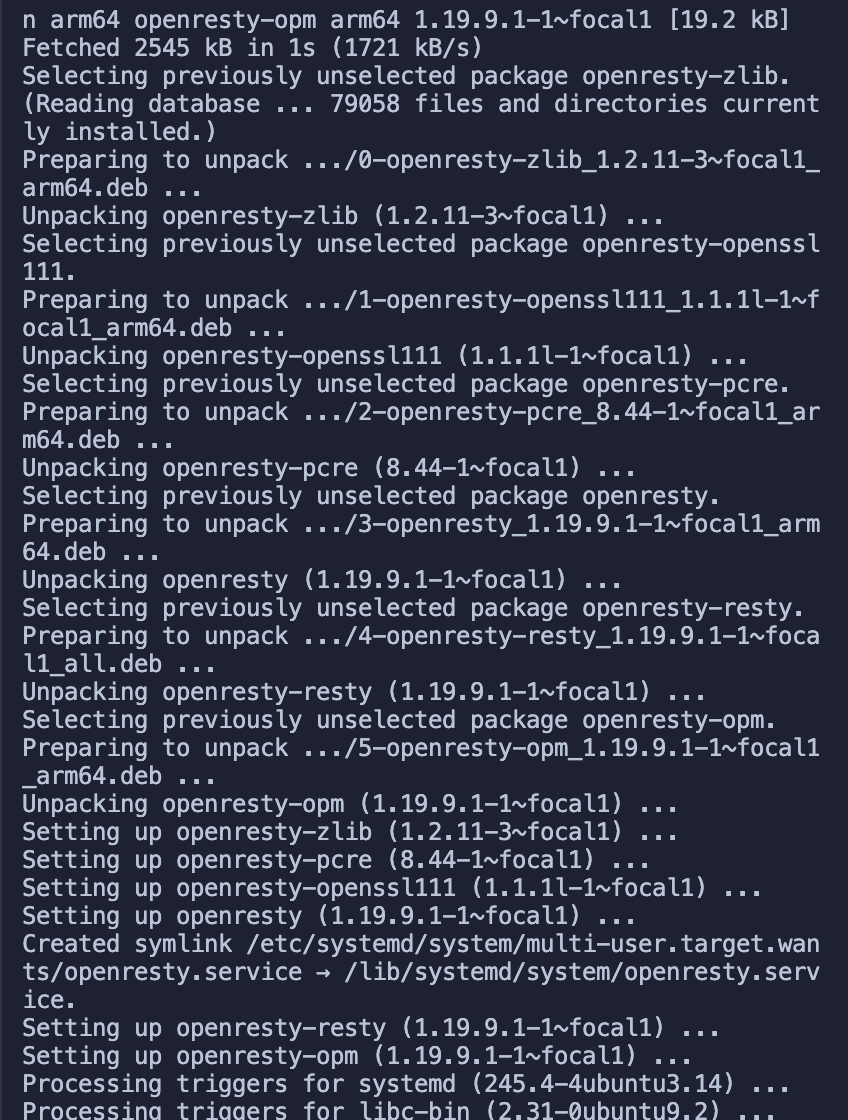 + +3. 重新运行安装依赖脚本 (参考上面 1. ) +4. 接着运行 `LUAROCKS_SERVER=https://luarocks.cn` 命令安装依赖: + +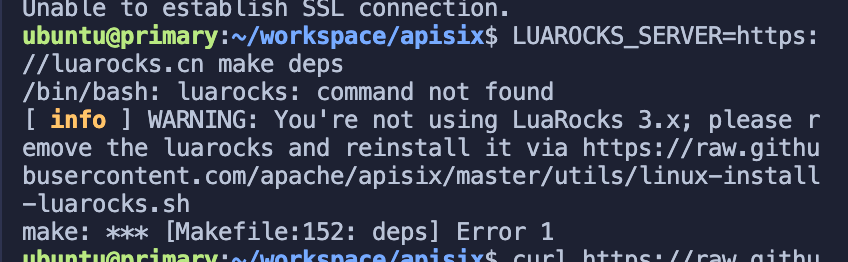 + +运行下面命令即可: + +```shell +curl https://raw.githubusercontent.com/apache/apisix/master/utils/linux-install-luarocks.sh -sL | bash - +``` + +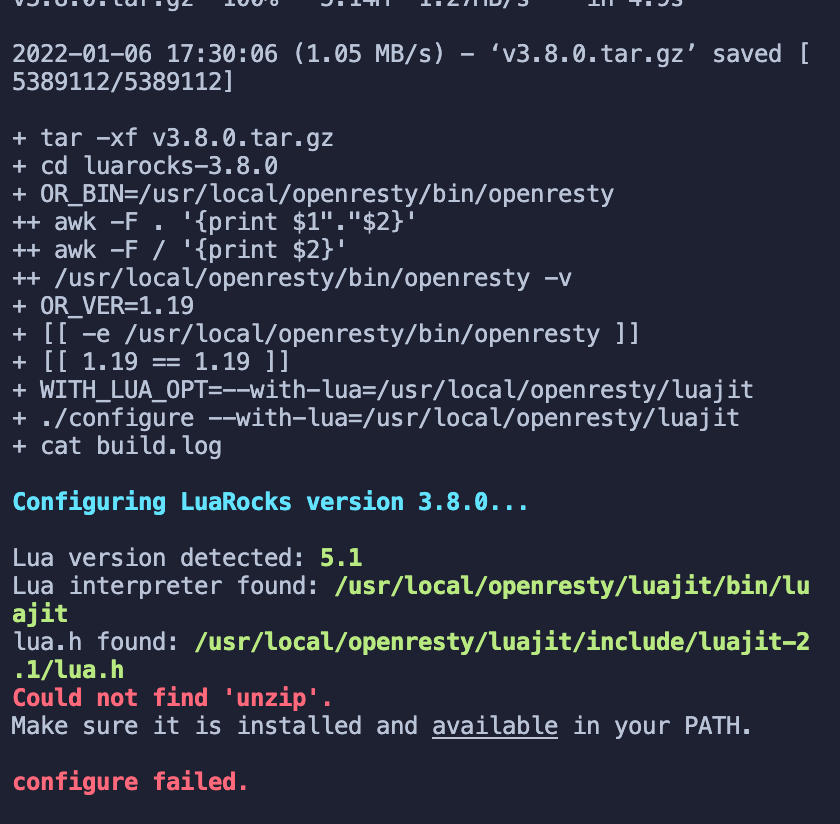 + +又出现错误提示了。。。接着运行下面命令: + +```shell +sudo apt install wget sudo unzip +``` + +接着我们重新运行一次: + +```shell +curl https://raw.githubusercontent.com/apache/apisix/master/utils/linux-install-luarocks.sh -sL | bash - +``` + +然后我们继续运行安装依赖的命令:`LUAROCKS_SERVER=https://luarocks.cn make deps` +终于成功了,哭了,坑确实太多了。 + +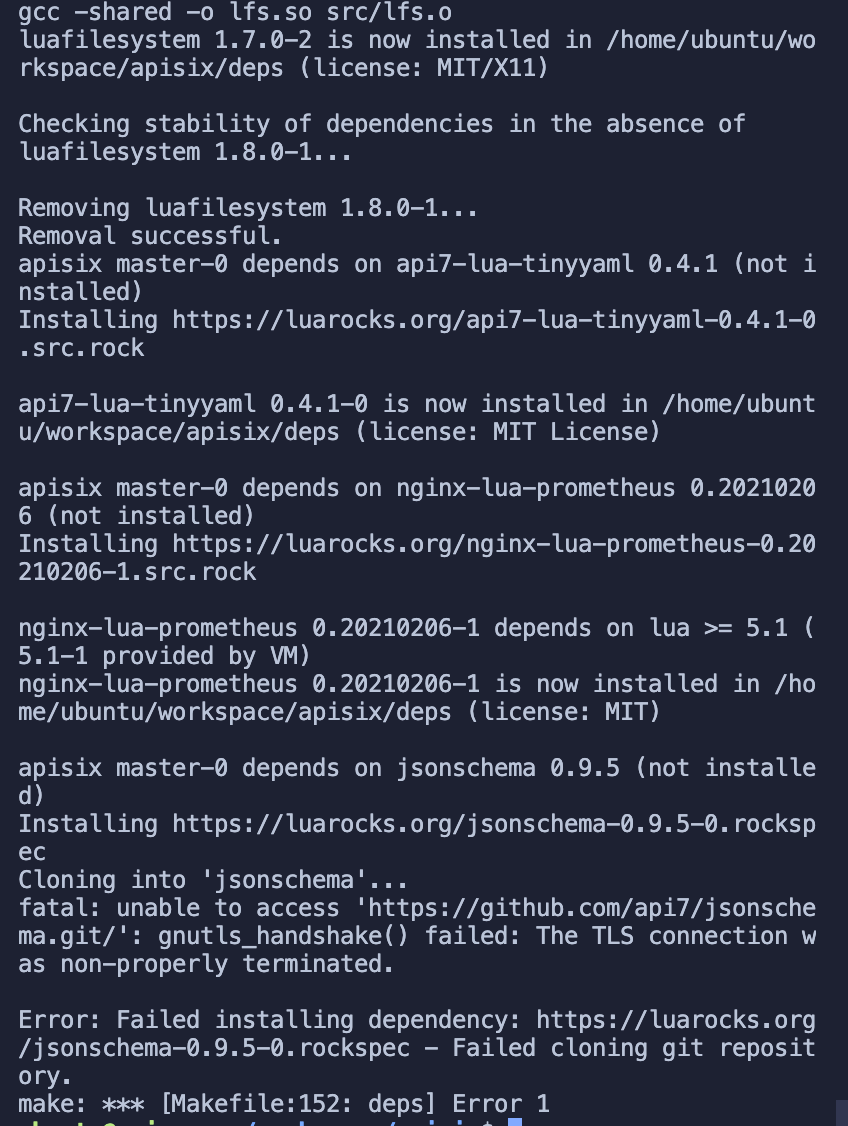 + +大部分依赖已经成功安装好,但是又有新的错误提示了。 +这里看起来是两个仓库未能成功克隆下来,没关系,先往后面运行试试: + +5. 安装 APISIX 命令 + +```shell +make install +// 如果出现权限不足的提示,用 sudo make install +``` + +成功: + +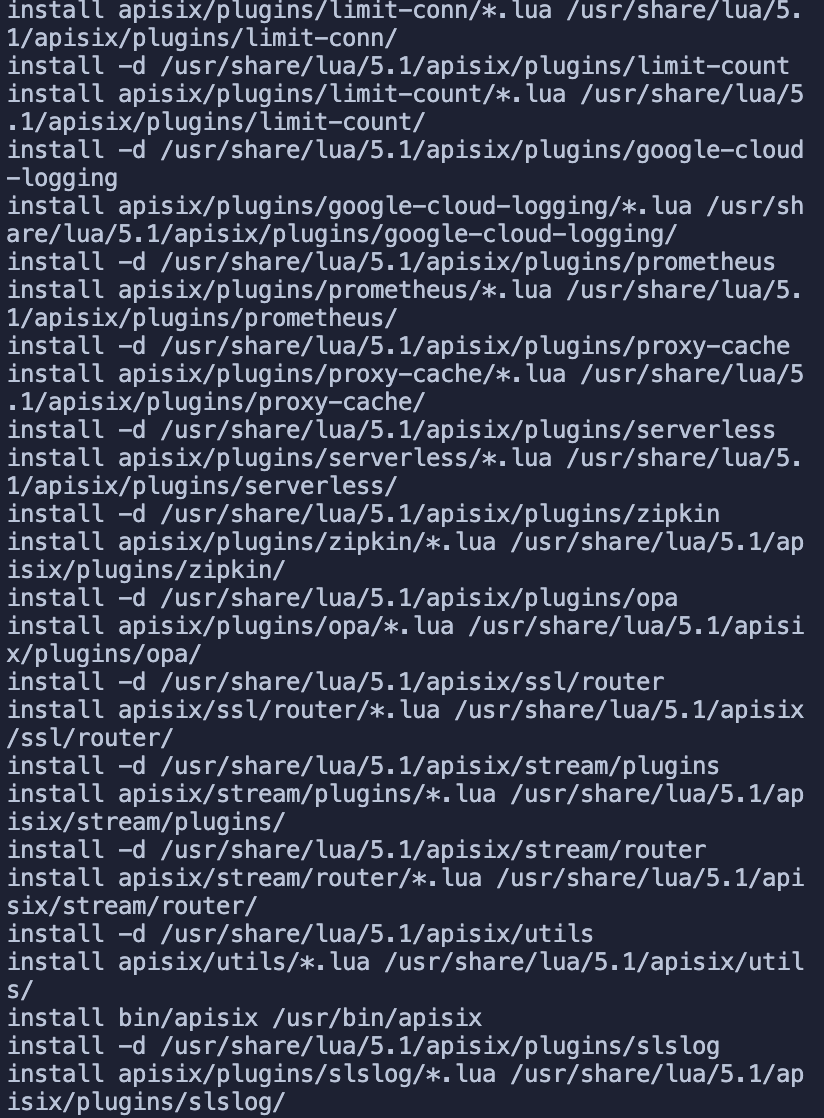 + +## 安装 etcd + +### 踩坑 etcd + +启动 APISIX 之前需要安装下 etcd,参考 [官方文档](https://apisix.apache.org/docs/apisix/2.10/install-dependencies/#ubuntu-1604--1804) + +>(由于该安装教程并不是针对 arm 写的,所以虽然成功安装了 etcd,但是未能成功将 etcd 运行起来,原因是因为默认使用的 x86 的二进制文件启动,所以无法运行。可以跳过该部分直接参考在 「docker 中运行 etcd 服务」部分) + +- 第一步运行: + +```shell +wget https://github.com/etcd-io/etcd/releases/download/v3.4.13/etcd-v3.4.13-linux-amd64.tar.gz +``` + +- 第二部运行: + +```shell +tar -xvf etcd-v3.4.13-linux-amd64.tar.gz && \ cd etcd-v3.4.13-linux-amd64 && \ sudo cp -a etcd etcdctl /usr/bin/ Review comment: ```suggestion tar -xvf etcd-v3.4.13-linux-amd64.tar.gz && cd etcd-v3.4.13-linux-amd64 && sudo cp -a etcd etcdctl /usr/bin/ ``` ########## File path: website/i18n/zh/docusaurus-plugin-content-blog/2022/01/11/building-apisix-in-ubuntu-for-arm.md ########## @@ -0,0 +1,247 @@ +--- +title: "在 arm 版 ubuntu 构建 APISIX" +authors: + - name: "郭奇" + title: "Author" + url: "https://github.com/guoqqqi"; + image_url: "https://avatars.githubusercontent.com/u/72343596?v=4"; +keywords: +- Apache APISIX +- arm +- ubuntu +- m1 +description: 本文为大家描述了在 M1 中启用 arm 版 ubuntu 通过源码构建 Apache APISIX 的详细操作步骤,通过阅读本文,大家对于在 arm ubuntu 上构建 Apache APISIX 更加快捷。 +tags: [Technology] +--- + +> 本篇文章记录了通过源码在 arm 版 ubuntu 中构建 Apache APISIX 的详细踩坑记录,ubuntu 环境使用的是 [https://multipass.run/](https://multipass.run/) 中的 Multipass 。因为它可以在 M1 上使用~ + +<!--truncate--> + +## 克隆源码 + +首先根据 [官方文档](https://apisix.apache.org/zh/docs/apisix/how-to-build#%E9%80%9A%E8%BF%87%E6%BA%90%E7%A0%81%E5%8C%85%E5%AE%89%E8%A3%85) 安装 APISIX 源码仓库。并且进入项目文件。 + +```shell +cd apisix-2.11.0 +``` + +## 安装项目依赖 + +1. 现在我们可以通过脚本一键安装项目所需要的依赖拉,在根目录下运行下面命令: + +```shell +bash utils/install-dependencies.sh +``` + + + +不出所料,没有成功跑完。通过错误提示我们知道,这里是未能成功安装 `OpenResty`。原因是默认没有 `arm 64` 平台的源。 + +2. 下面我们手动安装下 OpenResty:参考 [https://openresty.org/cn/linux-packages.html#ubuntu](https://openresty.org/cn/linux-packages.html#ubuntu) + +- 步骤一:安装导入 GPG 公钥时所需的几个依赖包(整个安装过程完成后可以随时删除它们): + +```shell +sudo apt-get -y install --no-install-recommends wget gnupg ca-certificates +``` + +- 步骤二:导入我们的 GPG 密钥: + +```shell +wget -O - https://openresty.org/package/pubkey.gpg | sudo apt-key add - +``` + +成功: + + + +- 步骤三:添加 OpenResty 官方 APT 仓库。对于 x86_64 或 amd64 系统,可以使用下面的命令: + +```shell +echo "deb http://openresty.org/package/ubuntu $(lsb_release -sc) main" \ + | sudo tee /etc/apt/sources.list.d/openresty.list +``` + +- 而对于 arm64 或 aarch64 系统,则可以使用下面的命令:(我在 M1 上运行的是该命令,上个命令会报错) + +```shell +echo "deb http://openresty.org/package/arm64/ubuntu $(lsb_release -sc) main" \ + | sudo tee /etc/apt/sources.list.d/openresty.list +``` + +- 步骤四:更新 APT 索引: + +```shell +sudo apt-get update +``` + +然后就可以像下面这样安装软件包,比如 `OpenResty`: + +```shell +sudo apt-get -y install openresty +``` + +- 步骤五:(可选)可以通过下面命令删除该包和对应的关联包: + +```shell +sudo apt-get -y install --no-install-recommends software-properties-common +``` + +成功安装 `OpenResty` : + + + +3. 重新运行安装依赖脚本 (参考上面 1. ) +4. 接着运行 `LUAROCKS_SERVER=https://luarocks.cn` 命令安装依赖: + + + +运行下面命令即可: + +```shell +curl https://raw.githubusercontent.com/apache/apisix/master/utils/linux-install-luarocks.sh -sL | bash - +``` + + + +又出现错误提示了。。。接着运行下面命令: + +```shell +sudo apt install wget sudo unzip +``` + +接着我们重新运行一次: + +```shell +curl https://raw.githubusercontent.com/apache/apisix/master/utils/linux-install-luarocks.sh -sL | bash - +``` + +然后我们继续运行安装依赖的命令:`LUAROCKS_SERVER=https://luarocks.cn make deps` +终于成功了,哭了,坑确实太多了。 + + + +大部分依赖已经成功安装好,但是又有新的错误提示了。 +这里看起来是两个仓库未能成功克隆下来,没关系,先往后面运行试试: + +5. 安装 APISIX 命令 + +```shell +make install +// 如果出现权限不足的提示,用 sudo make install +``` + +成功: + + + +## 安装 etcd + +### 踩坑 etcd + +启动 APISIX 之前需要安装下 etcd,参考 [官方文档](https://apisix.apache.org/docs/apisix/2.10/install-dependencies/#ubuntu-1604--1804) + +>(由于该安装教程并不是针对 arm 写的,所以虽然成功安装了 etcd,但是未能成功将 etcd 运行起来,原因是因为默认使用的 x86 的二进制文件启动,所以无法运行。可以跳过该部分直接参考在 「docker 中运行 etcd 服务」部分) + +- 第一步运行: + +```shell +wget https://github.com/etcd-io/etcd/releases/download/v3.4.13/etcd-v3.4.13-linux-amd64.tar.gz +``` + +- 第二部运行: + +```shell +tar -xvf etcd-v3.4.13-linux-amd64.tar.gz && \ cd etcd-v3.4.13-linux-amd64 && \ sudo cp -a etcd etcdctl /usr/bin/ +``` + +成功: + +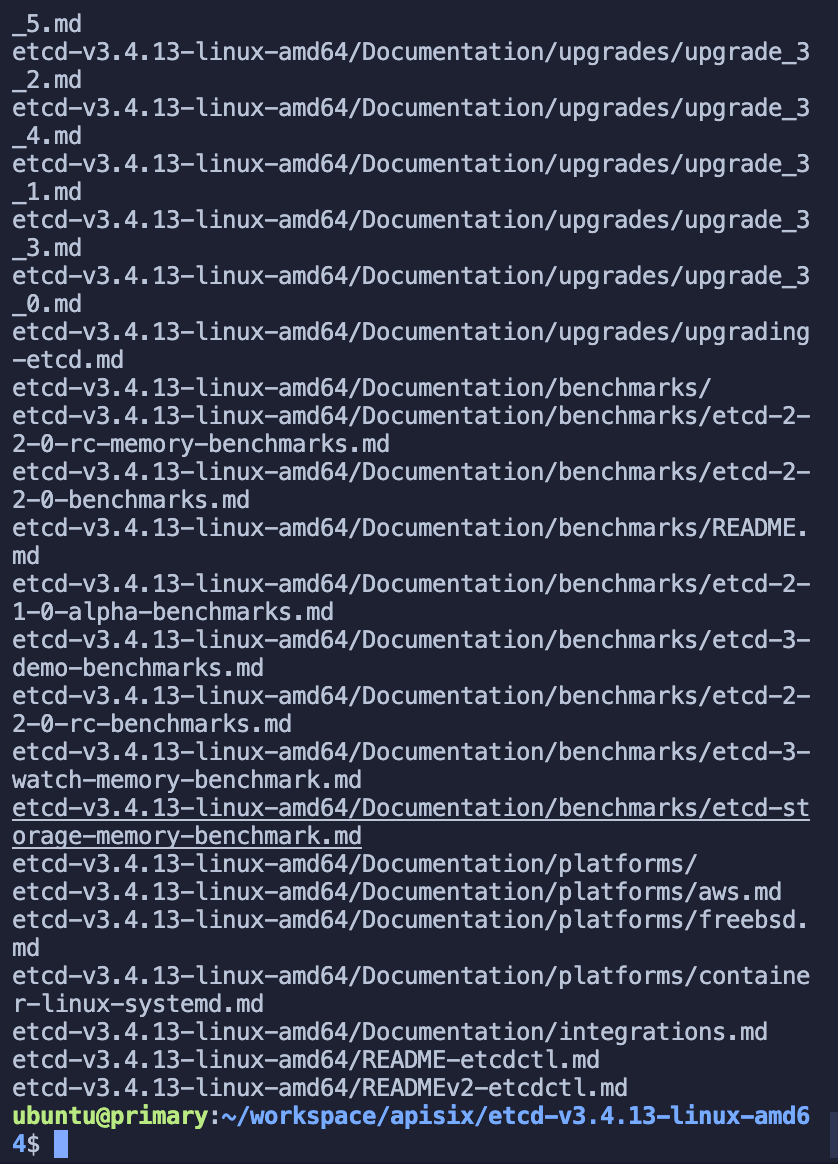 + +- 第三部启动 etcd 服务 Review comment: ```suggestion - 第三步启动 etcd 服务 ``` ########## File path: website/i18n/zh/docusaurus-plugin-content-blog/2022/01/11/building-apisix-in-ubuntu-for-arm.md ########## @@ -0,0 +1,247 @@ +--- +title: "在 arm 版 ubuntu 构建 APISIX" +authors: + - name: "郭奇" + title: "Author" + url: "https://github.com/guoqqqi"; + image_url: "https://avatars.githubusercontent.com/u/72343596?v=4"; +keywords: +- Apache APISIX +- arm +- ubuntu +- m1 +description: 本文为大家描述了在 M1 中启用 arm 版 ubuntu 通过源码构建 Apache APISIX 的详细操作步骤,通过阅读本文,大家对于在 arm ubuntu 上构建 Apache APISIX 更加快捷。 +tags: [Technology] +--- + +> 本篇文章记录了通过源码在 arm 版 ubuntu 中构建 Apache APISIX 的详细踩坑记录,ubuntu 环境使用的是 [https://multipass.run/](https://multipass.run/) 中的 Multipass 。因为它可以在 M1 上使用~ + +<!--truncate--> + +## 克隆源码 + +首先根据 [官方文档](https://apisix.apache.org/zh/docs/apisix/how-to-build#%E9%80%9A%E8%BF%87%E6%BA%90%E7%A0%81%E5%8C%85%E5%AE%89%E8%A3%85) 安装 APISIX 源码仓库。并且进入项目文件。 + +```shell +cd apisix-2.11.0 +``` + +## 安装项目依赖 + +1. 现在我们可以通过脚本一键安装项目所需要的依赖拉,在根目录下运行下面命令: + +```shell +bash utils/install-dependencies.sh +``` + + + +不出所料,没有成功跑完。通过错误提示我们知道,这里是未能成功安装 `OpenResty`。原因是默认没有 `arm 64` 平台的源。 + +2. 下面我们手动安装下 OpenResty:参考 [https://openresty.org/cn/linux-packages.html#ubuntu](https://openresty.org/cn/linux-packages.html#ubuntu) + +- 步骤一:安装导入 GPG 公钥时所需的几个依赖包(整个安装过程完成后可以随时删除它们): + +```shell +sudo apt-get -y install --no-install-recommends wget gnupg ca-certificates +``` + +- 步骤二:导入我们的 GPG 密钥: + +```shell +wget -O - https://openresty.org/package/pubkey.gpg | sudo apt-key add - +``` + +成功: + + + +- 步骤三:添加 OpenResty 官方 APT 仓库。对于 x86_64 或 amd64 系统,可以使用下面的命令: + +```shell +echo "deb http://openresty.org/package/ubuntu $(lsb_release -sc) main" \ + | sudo tee /etc/apt/sources.list.d/openresty.list +``` + +- 而对于 arm64 或 aarch64 系统,则可以使用下面的命令:(我在 M1 上运行的是该命令,上个命令会报错) + +```shell +echo "deb http://openresty.org/package/arm64/ubuntu $(lsb_release -sc) main" \ + | sudo tee /etc/apt/sources.list.d/openresty.list +``` + +- 步骤四:更新 APT 索引: + +```shell +sudo apt-get update +``` + +然后就可以像下面这样安装软件包,比如 `OpenResty`: + +```shell +sudo apt-get -y install openresty +``` + +- 步骤五:(可选)可以通过下面命令删除该包和对应的关联包: + +```shell +sudo apt-get -y install --no-install-recommends software-properties-common +``` + +成功安装 `OpenResty` : + + + +3. 重新运行安装依赖脚本 (参考上面 1. ) +4. 接着运行 `LUAROCKS_SERVER=https://luarocks.cn` 命令安装依赖: + + + +运行下面命令即可: + +```shell +curl https://raw.githubusercontent.com/apache/apisix/master/utils/linux-install-luarocks.sh -sL | bash - +``` + + + +又出现错误提示了。。。接着运行下面命令: + +```shell +sudo apt install wget sudo unzip +``` + +接着我们重新运行一次: + +```shell +curl https://raw.githubusercontent.com/apache/apisix/master/utils/linux-install-luarocks.sh -sL | bash - +``` + +然后我们继续运行安装依赖的命令:`LUAROCKS_SERVER=https://luarocks.cn make deps` +终于成功了,哭了,坑确实太多了。 + + + +大部分依赖已经成功安装好,但是又有新的错误提示了。 +这里看起来是两个仓库未能成功克隆下来,没关系,先往后面运行试试: + +5. 安装 APISIX 命令 + +```shell +make install +// 如果出现权限不足的提示,用 sudo make install +``` + +成功: + + + +## 安装 etcd + +### 踩坑 etcd + +启动 APISIX 之前需要安装下 etcd,参考 [官方文档](https://apisix.apache.org/docs/apisix/2.10/install-dependencies/#ubuntu-1604--1804) + +>(由于该安装教程并不是针对 arm 写的,所以虽然成功安装了 etcd,但是未能成功将 etcd 运行起来,原因是因为默认使用的 x86 的二进制文件启动,所以无法运行。可以跳过该部分直接参考在 「docker 中运行 etcd 服务」部分) + +- 第一步运行: + +```shell +wget https://github.com/etcd-io/etcd/releases/download/v3.4.13/etcd-v3.4.13-linux-amd64.tar.gz +``` + +- 第二部运行: + +```shell +tar -xvf etcd-v3.4.13-linux-amd64.tar.gz && \ cd etcd-v3.4.13-linux-amd64 && \ sudo cp -a etcd etcdctl /usr/bin/ +``` + +成功: + + + +- 第三部启动 etcd 服务 + +```shell +nohup etcd & +``` + +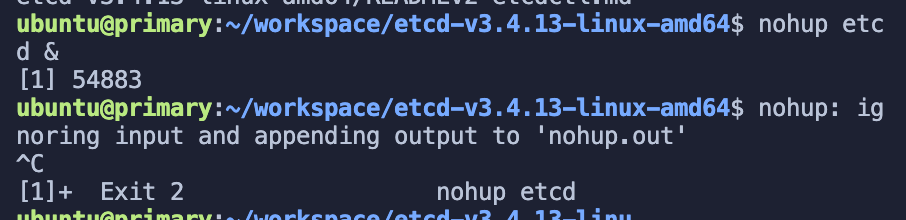 + +然后我在后面运行 APISIX 时发现 etcd 报错了: + +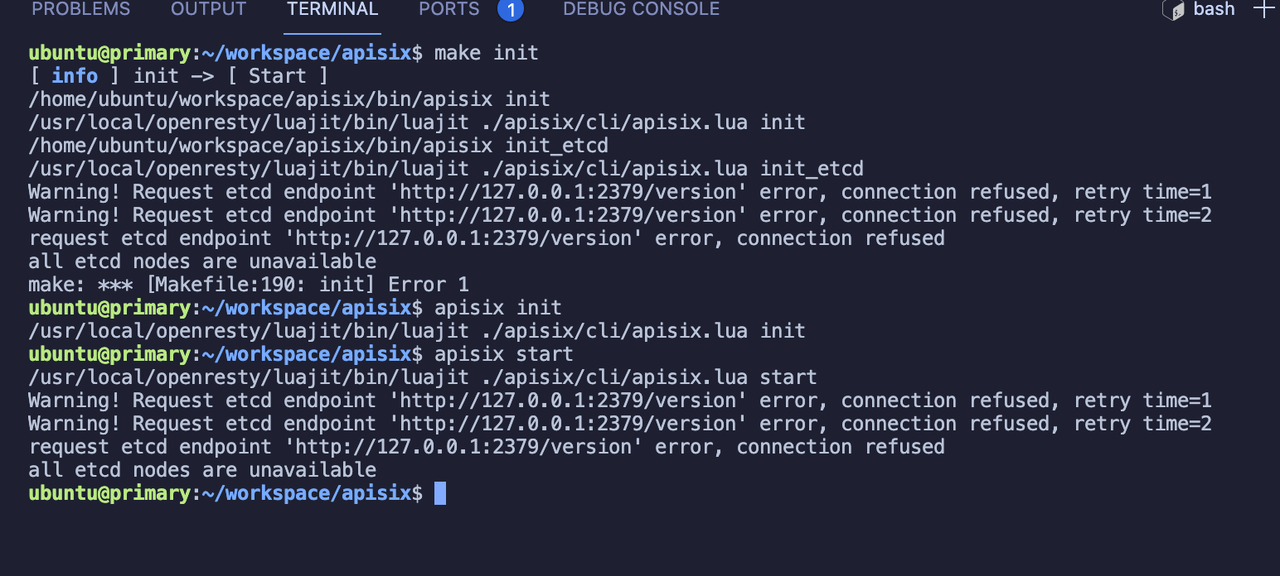 + +发现在 arm 上的 ubuntu 裸跑 etcd 坑太多了,各种各样的错误,后来决定还是跑 docker 吧~ + +### 在 docker 中运行 etcd 服务 + +1. 安装 docker + +```shell +sudo apt install docker.io +``` + +Tip: docker 常用的命令:(无权限错误在命令前添加 sudo) + +- 查看所有容器列表 docker ps -a +- 查看正在运行的容器列表 docker ps +- 查看镜像列表 docker image list +- 删除所有容器 docker container prune +- 删除所有镜像 docker image prune -f -a + +更多参考:[Docker 入门教程 - 阮一峰的网络日志](https://www.ruanyifeng.com/blog/2018/02/docker-tutorial.html) + +2. 拉取并运行 etcd + +```shell +sudo docker run -d --name etcd -p 2379:2379 -e ETCD_UNSUPPORTED_ARCH=arm64 -e ETCD_LISTEN_CLIENT_URLS=http://0.0.0.0:2379 -e ETCD_ADVERTISE_CLIENT_URLS=http://0.0.0.0:2379 gcr.io/etcd-development/etcd:v3.5.1-arm64 +``` + +注意:该镜像需要开代理。 +成功: + +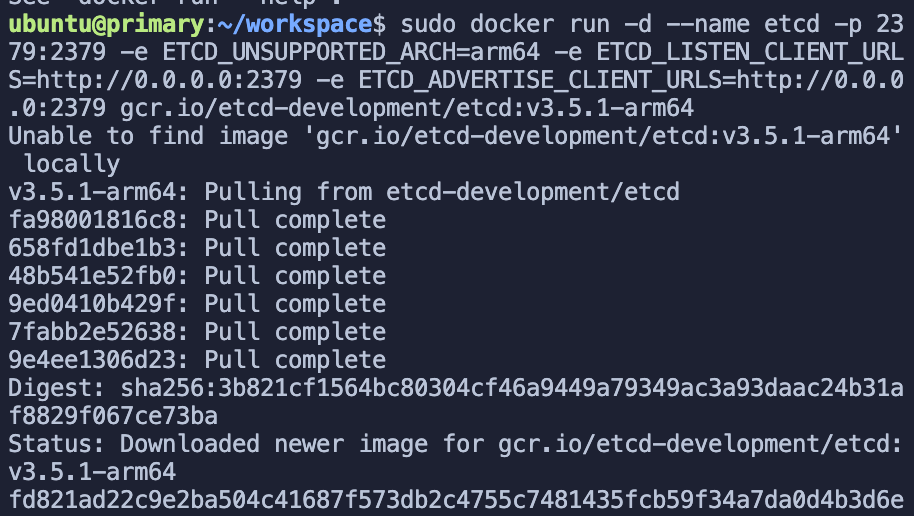 + +验证是否运行: + +```shell +sudo docker ps -a +``` + +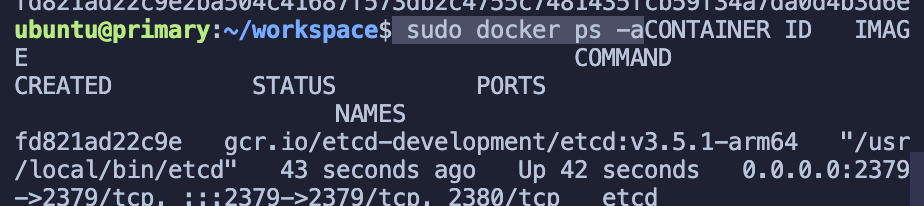 + +这样,etcd 已经成功启动了。 + +## 启动 APISIX Review comment: ```suggestion ## 启动 Apache APISIX ``` ########## File path: website/i18n/zh/docusaurus-plugin-content-blog/2022/01/11/building-apisix-in-ubuntu-for-arm.md ########## @@ -0,0 +1,247 @@ +--- +title: "在 arm 版 ubuntu 构建 APISIX" +authors: + - name: "郭奇" + title: "Author" + url: "https://github.com/guoqqqi"; + image_url: "https://avatars.githubusercontent.com/u/72343596?v=4"; +keywords: +- Apache APISIX +- arm +- ubuntu +- m1 +description: 本文为大家描述了在 M1 中启用 arm 版 ubuntu 通过源码构建 Apache APISIX 的详细操作步骤,通过阅读本文,大家对于在 arm ubuntu 上构建 Apache APISIX 更加快捷。 +tags: [Technology] +--- + +> 本篇文章记录了通过源码在 arm 版 ubuntu 中构建 Apache APISIX 的详细踩坑记录,ubuntu 环境使用的是 [https://multipass.run/](https://multipass.run/) 中的 Multipass 。因为它可以在 M1 上使用~ + +<!--truncate--> + +## 克隆源码 + +首先根据 [官方文档](https://apisix.apache.org/zh/docs/apisix/how-to-build#%E9%80%9A%E8%BF%87%E6%BA%90%E7%A0%81%E5%8C%85%E5%AE%89%E8%A3%85) 安装 APISIX 源码仓库。并且进入项目文件。 + +```shell +cd apisix-2.11.0 +``` + +## 安装项目依赖 + +1. 现在我们可以通过脚本一键安装项目所需要的依赖拉,在根目录下运行下面命令: + +```shell +bash utils/install-dependencies.sh +``` + + + +不出所料,没有成功跑完。通过错误提示我们知道,这里是未能成功安装 `OpenResty`。原因是默认没有 `arm 64` 平台的源。 + +2. 下面我们手动安装下 OpenResty:参考 [https://openresty.org/cn/linux-packages.html#ubuntu](https://openresty.org/cn/linux-packages.html#ubuntu) + +- 步骤一:安装导入 GPG 公钥时所需的几个依赖包(整个安装过程完成后可以随时删除它们): + +```shell +sudo apt-get -y install --no-install-recommends wget gnupg ca-certificates +``` + +- 步骤二:导入我们的 GPG 密钥: + +```shell +wget -O - https://openresty.org/package/pubkey.gpg | sudo apt-key add - +``` + +成功: + + + +- 步骤三:添加 OpenResty 官方 APT 仓库。对于 x86_64 或 amd64 系统,可以使用下面的命令: + +```shell +echo "deb http://openresty.org/package/ubuntu $(lsb_release -sc) main" \ + | sudo tee /etc/apt/sources.list.d/openresty.list +``` + +- 而对于 arm64 或 aarch64 系统,则可以使用下面的命令:(我在 M1 上运行的是该命令,上个命令会报错) + +```shell +echo "deb http://openresty.org/package/arm64/ubuntu $(lsb_release -sc) main" \ + | sudo tee /etc/apt/sources.list.d/openresty.list +``` + +- 步骤四:更新 APT 索引: + +```shell +sudo apt-get update +``` + +然后就可以像下面这样安装软件包,比如 `OpenResty`: + +```shell +sudo apt-get -y install openresty +``` + +- 步骤五:(可选)可以通过下面命令删除该包和对应的关联包: + +```shell +sudo apt-get -y install --no-install-recommends software-properties-common +``` + +成功安装 `OpenResty` : + + + +3. 重新运行安装依赖脚本 (参考上面 1. ) +4. 接着运行 `LUAROCKS_SERVER=https://luarocks.cn` 命令安装依赖: + + + +运行下面命令即可: + +```shell +curl https://raw.githubusercontent.com/apache/apisix/master/utils/linux-install-luarocks.sh -sL | bash - +``` + + + +又出现错误提示了。。。接着运行下面命令: + +```shell +sudo apt install wget sudo unzip +``` + +接着我们重新运行一次: + +```shell +curl https://raw.githubusercontent.com/apache/apisix/master/utils/linux-install-luarocks.sh -sL | bash - +``` + +然后我们继续运行安装依赖的命令:`LUAROCKS_SERVER=https://luarocks.cn make deps` +终于成功了,哭了,坑确实太多了。 + + + +大部分依赖已经成功安装好,但是又有新的错误提示了。 +这里看起来是两个仓库未能成功克隆下来,没关系,先往后面运行试试: + +5. 安装 APISIX 命令 + +```shell +make install +// 如果出现权限不足的提示,用 sudo make install +``` + +成功: + + + +## 安装 etcd + +### 踩坑 etcd + +启动 APISIX 之前需要安装下 etcd,参考 [官方文档](https://apisix.apache.org/docs/apisix/2.10/install-dependencies/#ubuntu-1604--1804) + +>(由于该安装教程并不是针对 arm 写的,所以虽然成功安装了 etcd,但是未能成功将 etcd 运行起来,原因是因为默认使用的 x86 的二进制文件启动,所以无法运行。可以跳过该部分直接参考在 「docker 中运行 etcd 服务」部分) + +- 第一步运行: + +```shell +wget https://github.com/etcd-io/etcd/releases/download/v3.4.13/etcd-v3.4.13-linux-amd64.tar.gz +``` + +- 第二部运行: + +```shell +tar -xvf etcd-v3.4.13-linux-amd64.tar.gz && \ cd etcd-v3.4.13-linux-amd64 && \ sudo cp -a etcd etcdctl /usr/bin/ +``` + +成功: + + + +- 第三部启动 etcd 服务 + +```shell +nohup etcd & +``` + + + +然后我在后面运行 APISIX 时发现 etcd 报错了: + + + +发现在 arm 上的 ubuntu 裸跑 etcd 坑太多了,各种各样的错误,后来决定还是跑 docker 吧~ + +### 在 docker 中运行 etcd 服务 + +1. 安装 docker + +```shell +sudo apt install docker.io +``` + +Tip: docker 常用的命令:(无权限错误在命令前添加 sudo) + +- 查看所有容器列表 docker ps -a +- 查看正在运行的容器列表 docker ps +- 查看镜像列表 docker image list +- 删除所有容器 docker container prune +- 删除所有镜像 docker image prune -f -a + +更多参考:[Docker 入门教程 - 阮一峰的网络日志](https://www.ruanyifeng.com/blog/2018/02/docker-tutorial.html) + +2. 拉取并运行 etcd + +```shell +sudo docker run -d --name etcd -p 2379:2379 -e ETCD_UNSUPPORTED_ARCH=arm64 -e ETCD_LISTEN_CLIENT_URLS=http://0.0.0.0:2379 -e ETCD_ADVERTISE_CLIENT_URLS=http://0.0.0.0:2379 gcr.io/etcd-development/etcd:v3.5.1-arm64 +``` + +注意:该镜像需要开代理。 +成功: + + + +验证是否运行: + +```shell +sudo docker ps -a +``` + + + +这样,etcd 已经成功启动了。 + +## 启动 APISIX + +所有的依赖项目已经准备完毕,现在我们可以启动 APISIX 拉~直接参考如何构建 APISIX [官方文档](https://apisix.apache.org/docs/apisix/how-to-build) + +- 第一步安装依赖 + +```shell +make deps +make install +``` + +- 第二部初始化依赖,启动 APISIX + +```shell +apisix init + +// start APISIX +apisix start + +// stop APISIX +apisix stop +``` + +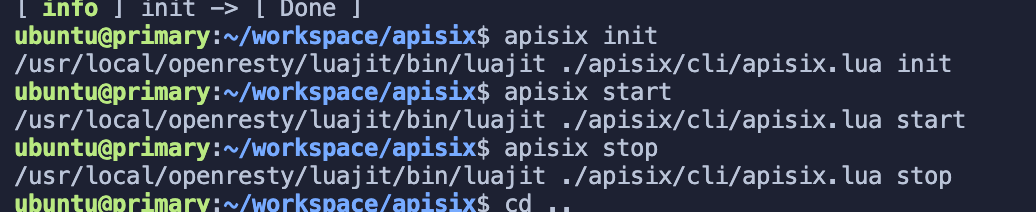 Review comment: ditto ########## File path: website/i18n/zh/docusaurus-plugin-content-blog/2022/01/11/building-apisix-in-ubuntu-for-arm.md ########## @@ -0,0 +1,247 @@ +--- +title: "在 arm 版 ubuntu 构建 APISIX" +authors: + - name: "郭奇" + title: "Author" + url: "https://github.com/guoqqqi"; + image_url: "https://avatars.githubusercontent.com/u/72343596?v=4"; +keywords: +- Apache APISIX +- arm +- ubuntu +- m1 +description: 本文为大家描述了在 M1 中启用 arm 版 ubuntu 通过源码构建 Apache APISIX 的详细操作步骤,通过阅读本文,大家对于在 arm ubuntu 上构建 Apache APISIX 更加快捷。 +tags: [Technology] +--- + +> 本篇文章记录了通过源码在 arm 版 ubuntu 中构建 Apache APISIX 的详细踩坑记录,ubuntu 环境使用的是 [https://multipass.run/](https://multipass.run/) 中的 Multipass 。因为它可以在 M1 上使用~ + +<!--truncate--> + +## 克隆源码 + +首先根据 [官方文档](https://apisix.apache.org/zh/docs/apisix/how-to-build#%E9%80%9A%E8%BF%87%E6%BA%90%E7%A0%81%E5%8C%85%E5%AE%89%E8%A3%85) 安装 APISIX 源码仓库。并且进入项目文件。 + +```shell +cd apisix-2.11.0 +``` + +## 安装项目依赖 + +1. 现在我们可以通过脚本一键安装项目所需要的依赖拉,在根目录下运行下面命令: Review comment: ```suggestion 1. 接着,我们通过项目内包含的脚本一键安装项目所需要的依赖,在**项目根目录**运行如下命令: ``` ########## File path: website/i18n/zh/docusaurus-plugin-content-blog/2022/01/11/building-apisix-in-ubuntu-for-arm.md ########## @@ -0,0 +1,247 @@ +--- +title: "在 arm 版 ubuntu 构建 APISIX" +authors: + - name: "郭奇" + title: "Author" + url: "https://github.com/guoqqqi"; + image_url: "https://avatars.githubusercontent.com/u/72343596?v=4"; +keywords: +- Apache APISIX +- arm +- ubuntu +- m1 +description: 本文为大家描述了在 M1 中启用 arm 版 ubuntu 通过源码构建 Apache APISIX 的详细操作步骤,通过阅读本文,大家对于在 arm ubuntu 上构建 Apache APISIX 更加快捷。 +tags: [Technology] +--- + +> 本篇文章记录了通过源码在 arm 版 ubuntu 中构建 Apache APISIX 的详细踩坑记录,ubuntu 环境使用的是 [https://multipass.run/](https://multipass.run/) 中的 Multipass 。因为它可以在 M1 上使用~ + +<!--truncate--> + +## 克隆源码 + +首先根据 [官方文档](https://apisix.apache.org/zh/docs/apisix/how-to-build#%E9%80%9A%E8%BF%87%E6%BA%90%E7%A0%81%E5%8C%85%E5%AE%89%E8%A3%85) 安装 APISIX 源码仓库。并且进入项目文件。 + +```shell +cd apisix-2.11.0 +``` + +## 安装项目依赖 + +1. 现在我们可以通过脚本一键安装项目所需要的依赖拉,在根目录下运行下面命令: + +```shell +bash utils/install-dependencies.sh +``` + + Review comment: Please use another CDN URL ########## File path: website/i18n/zh/docusaurus-plugin-content-blog/2022/01/11/building-apisix-in-ubuntu-for-arm.md ########## @@ -0,0 +1,247 @@ +--- +title: "在 arm 版 ubuntu 构建 APISIX" +authors: + - name: "郭奇" + title: "Author" + url: "https://github.com/guoqqqi"; + image_url: "https://avatars.githubusercontent.com/u/72343596?v=4"; +keywords: +- Apache APISIX +- arm +- ubuntu +- m1 +description: 本文为大家描述了在 M1 中启用 arm 版 ubuntu 通过源码构建 Apache APISIX 的详细操作步骤,通过阅读本文,大家对于在 arm ubuntu 上构建 Apache APISIX 更加快捷。 +tags: [Technology] +--- + +> 本篇文章记录了通过源码在 arm 版 ubuntu 中构建 Apache APISIX 的详细踩坑记录,ubuntu 环境使用的是 [https://multipass.run/](https://multipass.run/) 中的 Multipass 。因为它可以在 M1 上使用~ + +<!--truncate--> + +## 克隆源码 + +首先根据 [官方文档](https://apisix.apache.org/zh/docs/apisix/how-to-build#%E9%80%9A%E8%BF%87%E6%BA%90%E7%A0%81%E5%8C%85%E5%AE%89%E8%A3%85) 安装 APISIX 源码仓库。并且进入项目文件。 + +```shell +cd apisix-2.11.0 +``` + +## 安装项目依赖 + +1. 现在我们可以通过脚本一键安装项目所需要的依赖拉,在根目录下运行下面命令: + +```shell +bash utils/install-dependencies.sh +``` + + + +不出所料,没有成功跑完。通过错误提示我们知道,这里是未能成功安装 `OpenResty`。原因是默认没有 `arm 64` 平台的源。 + +2. 下面我们手动安装下 OpenResty:参考 [https://openresty.org/cn/linux-packages.html#ubuntu](https://openresty.org/cn/linux-packages.html#ubuntu) + +- 步骤一:安装导入 GPG 公钥时所需的几个依赖包(整个安装过程完成后可以随时删除它们): + +```shell +sudo apt-get -y install --no-install-recommends wget gnupg ca-certificates +``` + +- 步骤二:导入我们的 GPG 密钥: + +```shell +wget -O - https://openresty.org/package/pubkey.gpg | sudo apt-key add - +``` + +成功: + + + +- 步骤三:添加 OpenResty 官方 APT 仓库。对于 x86_64 或 amd64 系统,可以使用下面的命令: + +```shell +echo "deb http://openresty.org/package/ubuntu $(lsb_release -sc) main" \ + | sudo tee /etc/apt/sources.list.d/openresty.list +``` + +- 而对于 arm64 或 aarch64 系统,则可以使用下面的命令:(我在 M1 上运行的是该命令,上个命令会报错) Review comment: ```suggestion - 而对于 ARM64 或 aarch64 系统,则可以使用下面的命令:(我在 M1 上运行的是该命令,上个命令会报错) ``` ########## File path: website/i18n/zh/docusaurus-plugin-content-blog/2022/01/11/building-apisix-in-ubuntu-for-arm.md ########## @@ -0,0 +1,247 @@ +--- +title: "在 arm 版 ubuntu 构建 APISIX" +authors: + - name: "郭奇" + title: "Author" + url: "https://github.com/guoqqqi"; + image_url: "https://avatars.githubusercontent.com/u/72343596?v=4"; +keywords: +- Apache APISIX +- arm +- ubuntu +- m1 Review comment: ```suggestion - Apple Macbook Pro M1 ``` ########## File path: website/i18n/zh/docusaurus-plugin-content-blog/2022/01/11/building-apisix-in-ubuntu-for-arm.md ########## @@ -0,0 +1,247 @@ +--- +title: "在 arm 版 ubuntu 构建 APISIX" +authors: + - name: "郭奇" + title: "Author" + url: "https://github.com/guoqqqi"; + image_url: "https://avatars.githubusercontent.com/u/72343596?v=4"; +keywords: +- Apache APISIX +- arm +- ubuntu +- m1 +description: 本文为大家描述了在 M1 中启用 arm 版 ubuntu 通过源码构建 Apache APISIX 的详细操作步骤,通过阅读本文,大家对于在 arm ubuntu 上构建 Apache APISIX 更加快捷。 +tags: [Technology] +--- + +> 本篇文章记录了通过源码在 arm 版 ubuntu 中构建 Apache APISIX 的详细踩坑记录,ubuntu 环境使用的是 [https://multipass.run/](https://multipass.run/) 中的 Multipass 。因为它可以在 M1 上使用~ + +<!--truncate--> + +## 克隆源码 + +首先根据 [官方文档](https://apisix.apache.org/zh/docs/apisix/how-to-build#%E9%80%9A%E8%BF%87%E6%BA%90%E7%A0%81%E5%8C%85%E5%AE%89%E8%A3%85) 安装 APISIX 源码仓库。并且进入项目文件。 + +```shell +cd apisix-2.11.0 +``` + +## 安装项目依赖 + +1. 现在我们可以通过脚本一键安装项目所需要的依赖拉,在根目录下运行下面命令: + +```shell +bash utils/install-dependencies.sh +``` + + + +不出所料,没有成功跑完。通过错误提示我们知道,这里是未能成功安装 `OpenResty`。原因是默认没有 `arm 64` 平台的源。 + +2. 下面我们手动安装下 OpenResty:参考 [https://openresty.org/cn/linux-packages.html#ubuntu](https://openresty.org/cn/linux-packages.html#ubuntu) + +- 步骤一:安装导入 GPG 公钥时所需的几个依赖包(整个安装过程完成后可以随时删除它们): + +```shell +sudo apt-get -y install --no-install-recommends wget gnupg ca-certificates +``` + +- 步骤二:导入我们的 GPG 密钥: + +```shell +wget -O - https://openresty.org/package/pubkey.gpg | sudo apt-key add - +``` + +成功: + + Review comment: ditto ########## File path: website/i18n/zh/docusaurus-plugin-content-blog/2022/01/11/building-apisix-in-ubuntu-for-arm.md ########## @@ -0,0 +1,247 @@ +--- +title: "在 arm 版 ubuntu 构建 APISIX" +authors: + - name: "郭奇" + title: "Author" + url: "https://github.com/guoqqqi"; + image_url: "https://avatars.githubusercontent.com/u/72343596?v=4"; +keywords: +- Apache APISIX +- arm +- ubuntu +- m1 +description: 本文为大家描述了在 M1 中启用 arm 版 ubuntu 通过源码构建 Apache APISIX 的详细操作步骤,通过阅读本文,大家对于在 arm ubuntu 上构建 Apache APISIX 更加快捷。 +tags: [Technology] +--- + +> 本篇文章记录了通过源码在 arm 版 ubuntu 中构建 Apache APISIX 的详细踩坑记录,ubuntu 环境使用的是 [https://multipass.run/](https://multipass.run/) 中的 Multipass 。因为它可以在 M1 上使用~ + +<!--truncate--> + +## 克隆源码 + +首先根据 [官方文档](https://apisix.apache.org/zh/docs/apisix/how-to-build#%E9%80%9A%E8%BF%87%E6%BA%90%E7%A0%81%E5%8C%85%E5%AE%89%E8%A3%85) 安装 APISIX 源码仓库。并且进入项目文件。 + +```shell +cd apisix-2.11.0 +``` + +## 安装项目依赖 + +1. 现在我们可以通过脚本一键安装项目所需要的依赖拉,在根目录下运行下面命令: + +```shell +bash utils/install-dependencies.sh +``` + + + +不出所料,没有成功跑完。通过错误提示我们知道,这里是未能成功安装 `OpenResty`。原因是默认没有 `arm 64` 平台的源。 + +2. 下面我们手动安装下 OpenResty:参考 [https://openresty.org/cn/linux-packages.html#ubuntu](https://openresty.org/cn/linux-packages.html#ubuntu) + +- 步骤一:安装导入 GPG 公钥时所需的几个依赖包(整个安装过程完成后可以随时删除它们): + +```shell +sudo apt-get -y install --no-install-recommends wget gnupg ca-certificates +``` + +- 步骤二:导入我们的 GPG 密钥: + +```shell +wget -O - https://openresty.org/package/pubkey.gpg | sudo apt-key add - +``` + +成功: + + + +- 步骤三:添加 OpenResty 官方 APT 仓库。对于 x86_64 或 amd64 系统,可以使用下面的命令: + +```shell +echo "deb http://openresty.org/package/ubuntu $(lsb_release -sc) main" \ + | sudo tee /etc/apt/sources.list.d/openresty.list +``` + +- 而对于 arm64 或 aarch64 系统,则可以使用下面的命令:(我在 M1 上运行的是该命令,上个命令会报错) + +```shell +echo "deb http://openresty.org/package/arm64/ubuntu $(lsb_release -sc) main" \ + | sudo tee /etc/apt/sources.list.d/openresty.list +``` + +- 步骤四:更新 APT 索引: + +```shell +sudo apt-get update +``` + +然后就可以像下面这样安装软件包,比如 `OpenResty`: + +```shell +sudo apt-get -y install openresty +``` + +- 步骤五:(可选)可以通过下面命令删除该包和对应的关联包: + +```shell +sudo apt-get -y install --no-install-recommends software-properties-common +``` + +成功安装 `OpenResty` : + + + +3. 重新运行安装依赖脚本 (参考上面 1. ) Review comment: ```suggestion 3. 重新运行安装依赖脚本 (参考步骤一) ``` ########## File path: website/i18n/zh/docusaurus-plugin-content-blog/2022/01/11/building-apisix-in-ubuntu-for-arm.md ########## @@ -0,0 +1,247 @@ +--- +title: "在 arm 版 ubuntu 构建 APISIX" +authors: + - name: "郭奇" + title: "Author" + url: "https://github.com/guoqqqi"; + image_url: "https://avatars.githubusercontent.com/u/72343596?v=4"; +keywords: +- Apache APISIX +- arm +- ubuntu +- m1 +description: 本文为大家描述了在 M1 中启用 arm 版 ubuntu 通过源码构建 Apache APISIX 的详细操作步骤,通过阅读本文,大家对于在 arm ubuntu 上构建 Apache APISIX 更加快捷。 +tags: [Technology] +--- + +> 本篇文章记录了通过源码在 arm 版 ubuntu 中构建 Apache APISIX 的详细踩坑记录,ubuntu 环境使用的是 [https://multipass.run/](https://multipass.run/) 中的 Multipass 。因为它可以在 M1 上使用~ + +<!--truncate--> + +## 克隆源码 + +首先根据 [官方文档](https://apisix.apache.org/zh/docs/apisix/how-to-build#%E9%80%9A%E8%BF%87%E6%BA%90%E7%A0%81%E5%8C%85%E5%AE%89%E8%A3%85) 安装 APISIX 源码仓库。并且进入项目文件。 + +```shell +cd apisix-2.11.0 +``` + +## 安装项目依赖 + +1. 现在我们可以通过脚本一键安装项目所需要的依赖拉,在根目录下运行下面命令: + +```shell +bash utils/install-dependencies.sh +``` + + + +不出所料,没有成功跑完。通过错误提示我们知道,这里是未能成功安装 `OpenResty`。原因是默认没有 `arm 64` 平台的源。 + +2. 下面我们手动安装下 OpenResty:参考 [https://openresty.org/cn/linux-packages.html#ubuntu](https://openresty.org/cn/linux-packages.html#ubuntu) + +- 步骤一:安装导入 GPG 公钥时所需的几个依赖包(整个安装过程完成后可以随时删除它们): + +```shell +sudo apt-get -y install --no-install-recommends wget gnupg ca-certificates +``` + +- 步骤二:导入我们的 GPG 密钥: + +```shell +wget -O - https://openresty.org/package/pubkey.gpg | sudo apt-key add - +``` + +成功: + + + +- 步骤三:添加 OpenResty 官方 APT 仓库。对于 x86_64 或 amd64 系统,可以使用下面的命令: + +```shell +echo "deb http://openresty.org/package/ubuntu $(lsb_release -sc) main" \ + | sudo tee /etc/apt/sources.list.d/openresty.list +``` + +- 而对于 arm64 或 aarch64 系统,则可以使用下面的命令:(我在 M1 上运行的是该命令,上个命令会报错) + +```shell +echo "deb http://openresty.org/package/arm64/ubuntu $(lsb_release -sc) main" \ + | sudo tee /etc/apt/sources.list.d/openresty.list +``` + +- 步骤四:更新 APT 索引: + +```shell +sudo apt-get update +``` + +然后就可以像下面这样安装软件包,比如 `OpenResty`: + +```shell +sudo apt-get -y install openresty +``` + +- 步骤五:(可选)可以通过下面命令删除该包和对应的关联包: + +```shell +sudo apt-get -y install --no-install-recommends software-properties-common +``` + +成功安装 `OpenResty` : + + Review comment: ditto ########## File path: website/i18n/zh/docusaurus-plugin-content-blog/2022/01/11/building-apisix-in-ubuntu-for-arm.md ########## @@ -0,0 +1,247 @@ +--- +title: "在 arm 版 ubuntu 构建 APISIX" +authors: + - name: "郭奇" + title: "Author" + url: "https://github.com/guoqqqi"; + image_url: "https://avatars.githubusercontent.com/u/72343596?v=4"; +keywords: +- Apache APISIX +- arm +- ubuntu +- m1 +description: 本文为大家描述了在 M1 中启用 arm 版 ubuntu 通过源码构建 Apache APISIX 的详细操作步骤,通过阅读本文,大家对于在 arm ubuntu 上构建 Apache APISIX 更加快捷。 +tags: [Technology] +--- + +> 本篇文章记录了通过源码在 arm 版 ubuntu 中构建 Apache APISIX 的详细踩坑记录,ubuntu 环境使用的是 [https://multipass.run/](https://multipass.run/) 中的 Multipass 。因为它可以在 M1 上使用~ + +<!--truncate--> + +## 克隆源码 + +首先根据 [官方文档](https://apisix.apache.org/zh/docs/apisix/how-to-build#%E9%80%9A%E8%BF%87%E6%BA%90%E7%A0%81%E5%8C%85%E5%AE%89%E8%A3%85) 安装 APISIX 源码仓库。并且进入项目文件。 Review comment: ```suggestion 首先根据 [官方文档](https://apisix.apache.org/zh/docs/apisix/how-to-build#%E9%80%9A%E8%BF%87%E6%BA%90%E7%A0%81%E5%8C%85%E5%AE%89%E8%A3%85) 克隆 Apache APISIX 源码仓库,然后进入项目目录: ``` ########## File path: website/i18n/zh/docusaurus-plugin-content-blog/2022/01/11/building-apisix-in-ubuntu-for-arm.md ########## @@ -0,0 +1,247 @@ +--- +title: "在 arm 版 ubuntu 构建 APISIX" +authors: + - name: "郭奇" + title: "Author" + url: "https://github.com/guoqqqi"; + image_url: "https://avatars.githubusercontent.com/u/72343596?v=4"; +keywords: +- Apache APISIX +- arm +- ubuntu +- m1 +description: 本文为大家描述了在 M1 中启用 arm 版 ubuntu 通过源码构建 Apache APISIX 的详细操作步骤,通过阅读本文,大家对于在 arm ubuntu 上构建 Apache APISIX 更加快捷。 +tags: [Technology] +--- + +> 本篇文章记录了通过源码在 arm 版 ubuntu 中构建 Apache APISIX 的详细踩坑记录,ubuntu 环境使用的是 [https://multipass.run/](https://multipass.run/) 中的 Multipass 。因为它可以在 M1 上使用~ + +<!--truncate--> + +## 克隆源码 + +首先根据 [官方文档](https://apisix.apache.org/zh/docs/apisix/how-to-build#%E9%80%9A%E8%BF%87%E6%BA%90%E7%A0%81%E5%8C%85%E5%AE%89%E8%A3%85) 安装 APISIX 源码仓库。并且进入项目文件。 + +```shell +cd apisix-2.11.0 +``` + +## 安装项目依赖 + +1. 现在我们可以通过脚本一键安装项目所需要的依赖拉,在根目录下运行下面命令: + +```shell +bash utils/install-dependencies.sh +``` + + + +不出所料,没有成功跑完。通过错误提示我们知道,这里是未能成功安装 `OpenResty`。原因是默认没有 `arm 64` 平台的源。 + +2. 下面我们手动安装下 OpenResty:参考 [https://openresty.org/cn/linux-packages.html#ubuntu](https://openresty.org/cn/linux-packages.html#ubuntu) + +- 步骤一:安装导入 GPG 公钥时所需的几个依赖包(整个安装过程完成后可以随时删除它们): + +```shell +sudo apt-get -y install --no-install-recommends wget gnupg ca-certificates +``` + +- 步骤二:导入我们的 GPG 密钥: + +```shell +wget -O - https://openresty.org/package/pubkey.gpg | sudo apt-key add - +``` + +成功: + + + +- 步骤三:添加 OpenResty 官方 APT 仓库。对于 x86_64 或 amd64 系统,可以使用下面的命令: + +```shell +echo "deb http://openresty.org/package/ubuntu $(lsb_release -sc) main" \ + | sudo tee /etc/apt/sources.list.d/openresty.list +``` + +- 而对于 arm64 或 aarch64 系统,则可以使用下面的命令:(我在 M1 上运行的是该命令,上个命令会报错) + +```shell +echo "deb http://openresty.org/package/arm64/ubuntu $(lsb_release -sc) main" \ + | sudo tee /etc/apt/sources.list.d/openresty.list +``` + +- 步骤四:更新 APT 索引: + +```shell +sudo apt-get update +``` + +然后就可以像下面这样安装软件包,比如 `OpenResty`: + +```shell +sudo apt-get -y install openresty +``` + +- 步骤五:(可选)可以通过下面命令删除该包和对应的关联包: + +```shell +sudo apt-get -y install --no-install-recommends software-properties-common +``` + +成功安装 `OpenResty` : + + + +3. 重新运行安装依赖脚本 (参考上面 1. ) +4. 接着运行 `LUAROCKS_SERVER=https://luarocks.cn` 命令安装依赖: + + + +运行下面命令即可: + +```shell +curl https://raw.githubusercontent.com/apache/apisix/master/utils/linux-install-luarocks.sh -sL | bash - +``` + + + +又出现错误提示了。。。接着运行下面命令: + +```shell +sudo apt install wget sudo unzip +``` + +接着我们重新运行一次: + +```shell +curl https://raw.githubusercontent.com/apache/apisix/master/utils/linux-install-luarocks.sh -sL | bash - +``` + +然后我们继续运行安装依赖的命令:`LUAROCKS_SERVER=https://luarocks.cn make deps` +终于成功了,哭了,坑确实太多了。 + + Review comment: ditto ########## File path: website/i18n/zh/docusaurus-plugin-content-blog/2022/01/11/building-apisix-in-ubuntu-for-arm.md ########## @@ -0,0 +1,247 @@ +--- +title: "在 arm 版 ubuntu 构建 APISIX" +authors: + - name: "郭奇" + title: "Author" + url: "https://github.com/guoqqqi"; + image_url: "https://avatars.githubusercontent.com/u/72343596?v=4"; +keywords: +- Apache APISIX +- arm +- ubuntu +- m1 +description: 本文为大家描述了在 M1 中启用 arm 版 ubuntu 通过源码构建 Apache APISIX 的详细操作步骤,通过阅读本文,大家对于在 arm ubuntu 上构建 Apache APISIX 更加快捷。 +tags: [Technology] +--- + +> 本篇文章记录了通过源码在 arm 版 ubuntu 中构建 Apache APISIX 的详细踩坑记录,ubuntu 环境使用的是 [https://multipass.run/](https://multipass.run/) 中的 Multipass 。因为它可以在 M1 上使用~ + +<!--truncate--> + +## 克隆源码 + +首先根据 [官方文档](https://apisix.apache.org/zh/docs/apisix/how-to-build#%E9%80%9A%E8%BF%87%E6%BA%90%E7%A0%81%E5%8C%85%E5%AE%89%E8%A3%85) 安装 APISIX 源码仓库。并且进入项目文件。 + +```shell +cd apisix-2.11.0 +``` + +## 安装项目依赖 + +1. 现在我们可以通过脚本一键安装项目所需要的依赖拉,在根目录下运行下面命令: + +```shell +bash utils/install-dependencies.sh +``` + + + +不出所料,没有成功跑完。通过错误提示我们知道,这里是未能成功安装 `OpenResty`。原因是默认没有 `arm 64` 平台的源。 + +2. 下面我们手动安装下 OpenResty:参考 [https://openresty.org/cn/linux-packages.html#ubuntu](https://openresty.org/cn/linux-packages.html#ubuntu) + +- 步骤一:安装导入 GPG 公钥时所需的几个依赖包(整个安装过程完成后可以随时删除它们): + +```shell +sudo apt-get -y install --no-install-recommends wget gnupg ca-certificates +``` + +- 步骤二:导入我们的 GPG 密钥: + +```shell +wget -O - https://openresty.org/package/pubkey.gpg | sudo apt-key add - +``` + +成功: + + + +- 步骤三:添加 OpenResty 官方 APT 仓库。对于 x86_64 或 amd64 系统,可以使用下面的命令: + +```shell +echo "deb http://openresty.org/package/ubuntu $(lsb_release -sc) main" \ + | sudo tee /etc/apt/sources.list.d/openresty.list +``` + +- 而对于 arm64 或 aarch64 系统,则可以使用下面的命令:(我在 M1 上运行的是该命令,上个命令会报错) + +```shell +echo "deb http://openresty.org/package/arm64/ubuntu $(lsb_release -sc) main" \ + | sudo tee /etc/apt/sources.list.d/openresty.list +``` + +- 步骤四:更新 APT 索引: + +```shell +sudo apt-get update +``` + +然后就可以像下面这样安装软件包,比如 `OpenResty`: + +```shell +sudo apt-get -y install openresty +``` + +- 步骤五:(可选)可以通过下面命令删除该包和对应的关联包: + +```shell +sudo apt-get -y install --no-install-recommends software-properties-common +``` + +成功安装 `OpenResty` : + + + +3. 重新运行安装依赖脚本 (参考上面 1. ) +4. 接着运行 `LUAROCKS_SERVER=https://luarocks.cn` 命令安装依赖: + + Review comment: ditto ########## File path: website/i18n/zh/docusaurus-plugin-content-blog/2022/01/11/building-apisix-in-ubuntu-for-arm.md ########## @@ -0,0 +1,247 @@ +--- +title: "在 arm 版 ubuntu 构建 APISIX" +authors: + - name: "郭奇" + title: "Author" + url: "https://github.com/guoqqqi"; + image_url: "https://avatars.githubusercontent.com/u/72343596?v=4"; +keywords: +- Apache APISIX +- arm +- ubuntu +- m1 +description: 本文为大家描述了在 M1 中启用 arm 版 ubuntu 通过源码构建 Apache APISIX 的详细操作步骤,通过阅读本文,大家对于在 arm ubuntu 上构建 Apache APISIX 更加快捷。 +tags: [Technology] +--- + +> 本篇文章记录了通过源码在 arm 版 ubuntu 中构建 Apache APISIX 的详细踩坑记录,ubuntu 环境使用的是 [https://multipass.run/](https://multipass.run/) 中的 Multipass 。因为它可以在 M1 上使用~ + +<!--truncate--> + +## 克隆源码 + +首先根据 [官方文档](https://apisix.apache.org/zh/docs/apisix/how-to-build#%E9%80%9A%E8%BF%87%E6%BA%90%E7%A0%81%E5%8C%85%E5%AE%89%E8%A3%85) 安装 APISIX 源码仓库。并且进入项目文件。 + +```shell +cd apisix-2.11.0 +``` + +## 安装项目依赖 + +1. 现在我们可以通过脚本一键安装项目所需要的依赖拉,在根目录下运行下面命令: + +```shell +bash utils/install-dependencies.sh +``` + + + +不出所料,没有成功跑完。通过错误提示我们知道,这里是未能成功安装 `OpenResty`。原因是默认没有 `arm 64` 平台的源。 + +2. 下面我们手动安装下 OpenResty:参考 [https://openresty.org/cn/linux-packages.html#ubuntu](https://openresty.org/cn/linux-packages.html#ubuntu) + +- 步骤一:安装导入 GPG 公钥时所需的几个依赖包(整个安装过程完成后可以随时删除它们): + +```shell +sudo apt-get -y install --no-install-recommends wget gnupg ca-certificates +``` + +- 步骤二:导入我们的 GPG 密钥: + +```shell +wget -O - https://openresty.org/package/pubkey.gpg | sudo apt-key add - +``` + +成功: + + + +- 步骤三:添加 OpenResty 官方 APT 仓库。对于 x86_64 或 amd64 系统,可以使用下面的命令: + +```shell +echo "deb http://openresty.org/package/ubuntu $(lsb_release -sc) main" \ + | sudo tee /etc/apt/sources.list.d/openresty.list +``` + +- 而对于 arm64 或 aarch64 系统,则可以使用下面的命令:(我在 M1 上运行的是该命令,上个命令会报错) + +```shell +echo "deb http://openresty.org/package/arm64/ubuntu $(lsb_release -sc) main" \ + | sudo tee /etc/apt/sources.list.d/openresty.list +``` + +- 步骤四:更新 APT 索引: + +```shell +sudo apt-get update +``` + +然后就可以像下面这样安装软件包,比如 `OpenResty`: + +```shell +sudo apt-get -y install openresty +``` + +- 步骤五:(可选)可以通过下面命令删除该包和对应的关联包: + +```shell +sudo apt-get -y install --no-install-recommends software-properties-common +``` + +成功安装 `OpenResty` : + + + +3. 重新运行安装依赖脚本 (参考上面 1. ) +4. 接着运行 `LUAROCKS_SERVER=https://luarocks.cn` 命令安装依赖: + + + +运行下面命令即可: + +```shell +curl https://raw.githubusercontent.com/apache/apisix/master/utils/linux-install-luarocks.sh -sL | bash - +``` + + Review comment: ditto ########## File path: website/i18n/zh/docusaurus-plugin-content-blog/2022/01/11/building-apisix-in-ubuntu-for-arm.md ########## @@ -0,0 +1,247 @@ +--- +title: "在 arm 版 ubuntu 构建 APISIX" +authors: + - name: "郭奇" + title: "Author" + url: "https://github.com/guoqqqi"; + image_url: "https://avatars.githubusercontent.com/u/72343596?v=4"; +keywords: +- Apache APISIX +- arm +- ubuntu +- m1 +description: 本文为大家描述了在 M1 中启用 arm 版 ubuntu 通过源码构建 Apache APISIX 的详细操作步骤,通过阅读本文,大家对于在 arm ubuntu 上构建 Apache APISIX 更加快捷。 Review comment: ```suggestion description: 笔者使用的是 M1 芯片的 Macbook Pro,通过阅读本文,您将了解如何在 ARM Ubuntu 中通过源码构建 Apache APISIX。 ``` ########## File path: website/i18n/zh/docusaurus-plugin-content-blog/2022/01/11/building-apisix-in-ubuntu-for-arm.md ########## @@ -0,0 +1,247 @@ +--- +title: "在 arm 版 ubuntu 构建 APISIX" +authors: + - name: "郭奇" + title: "Author" + url: "https://github.com/guoqqqi"; + image_url: "https://avatars.githubusercontent.com/u/72343596?v=4"; +keywords: +- Apache APISIX +- arm +- ubuntu +- m1 +description: 本文为大家描述了在 M1 中启用 arm 版 ubuntu 通过源码构建 Apache APISIX 的详细操作步骤,通过阅读本文,大家对于在 arm ubuntu 上构建 Apache APISIX 更加快捷。 +tags: [Technology] +--- + +> 本篇文章记录了通过源码在 arm 版 ubuntu 中构建 Apache APISIX 的详细踩坑记录,ubuntu 环境使用的是 [https://multipass.run/](https://multipass.run/) 中的 Multipass 。因为它可以在 M1 上使用~ + +<!--truncate--> + +## 克隆源码 + +首先根据 [官方文档](https://apisix.apache.org/zh/docs/apisix/how-to-build#%E9%80%9A%E8%BF%87%E6%BA%90%E7%A0%81%E5%8C%85%E5%AE%89%E8%A3%85) 安装 APISIX 源码仓库。并且进入项目文件。 + +```shell +cd apisix-2.11.0 +``` + +## 安装项目依赖 + +1. 现在我们可以通过脚本一键安装项目所需要的依赖拉,在根目录下运行下面命令: + +```shell +bash utils/install-dependencies.sh +``` + + + +不出所料,没有成功跑完。通过错误提示我们知道,这里是未能成功安装 `OpenResty`。原因是默认没有 `arm 64` 平台的源。 + +2. 下面我们手动安装下 OpenResty:参考 [https://openresty.org/cn/linux-packages.html#ubuntu](https://openresty.org/cn/linux-packages.html#ubuntu) + +- 步骤一:安装导入 GPG 公钥时所需的几个依赖包(整个安装过程完成后可以随时删除它们): + +```shell +sudo apt-get -y install --no-install-recommends wget gnupg ca-certificates +``` + +- 步骤二:导入我们的 GPG 密钥: + +```shell +wget -O - https://openresty.org/package/pubkey.gpg | sudo apt-key add - +``` + +成功: + + + +- 步骤三:添加 OpenResty 官方 APT 仓库。对于 x86_64 或 amd64 系统,可以使用下面的命令: + +```shell +echo "deb http://openresty.org/package/ubuntu $(lsb_release -sc) main" \ + | sudo tee /etc/apt/sources.list.d/openresty.list +``` + +- 而对于 arm64 或 aarch64 系统,则可以使用下面的命令:(我在 M1 上运行的是该命令,上个命令会报错) + +```shell +echo "deb http://openresty.org/package/arm64/ubuntu $(lsb_release -sc) main" \ + | sudo tee /etc/apt/sources.list.d/openresty.list +``` + +- 步骤四:更新 APT 索引: + +```shell +sudo apt-get update +``` + +然后就可以像下面这样安装软件包,比如 `OpenResty`: + +```shell +sudo apt-get -y install openresty +``` + +- 步骤五:(可选)可以通过下面命令删除该包和对应的关联包: + +```shell +sudo apt-get -y install --no-install-recommends software-properties-common +``` + +成功安装 `OpenResty` : + + + +3. 重新运行安装依赖脚本 (参考上面 1. ) +4. 接着运行 `LUAROCKS_SERVER=https://luarocks.cn` 命令安装依赖: + + + +运行下面命令即可: + +```shell +curl https://raw.githubusercontent.com/apache/apisix/master/utils/linux-install-luarocks.sh -sL | bash - +``` + + + +又出现错误提示了。。。接着运行下面命令: + +```shell +sudo apt install wget sudo unzip +``` + +接着我们重新运行一次: + +```shell +curl https://raw.githubusercontent.com/apache/apisix/master/utils/linux-install-luarocks.sh -sL | bash - +``` + +然后我们继续运行安装依赖的命令:`LUAROCKS_SERVER=https://luarocks.cn make deps` +终于成功了,哭了,坑确实太多了。 Review comment: I would suggest backporting your fix or patches or methods to the official docs :) ########## File path: website/i18n/zh/docusaurus-plugin-content-blog/2022/01/11/building-apisix-in-ubuntu-for-arm.md ########## @@ -0,0 +1,247 @@ +--- +title: "在 arm 版 ubuntu 构建 APISIX" Review comment: ```suggestion title: "如何在 ARM Ubuntu 中构建 Apache APISIX" ``` ########## File path: website/i18n/zh/docusaurus-plugin-content-blog/2022/01/11/building-apisix-in-ubuntu-for-arm.md ########## @@ -0,0 +1,247 @@ +--- +title: "在 arm 版 ubuntu 构建 APISIX" +authors: + - name: "郭奇" + title: "Author" + url: "https://github.com/guoqqqi"; + image_url: "https://avatars.githubusercontent.com/u/72343596?v=4"; +keywords: +- Apache APISIX +- arm +- ubuntu +- m1 +description: 本文为大家描述了在 M1 中启用 arm 版 ubuntu 通过源码构建 Apache APISIX 的详细操作步骤,通过阅读本文,大家对于在 arm ubuntu 上构建 Apache APISIX 更加快捷。 +tags: [Technology] +--- + +> 本篇文章记录了通过源码在 arm 版 ubuntu 中构建 Apache APISIX 的详细踩坑记录,ubuntu 环境使用的是 [https://multipass.run/](https://multipass.run/) 中的 Multipass 。因为它可以在 M1 上使用~ + +<!--truncate--> + +## 克隆源码 + +首先根据 [官方文档](https://apisix.apache.org/zh/docs/apisix/how-to-build#%E9%80%9A%E8%BF%87%E6%BA%90%E7%A0%81%E5%8C%85%E5%AE%89%E8%A3%85) 安装 APISIX 源码仓库。并且进入项目文件。 + +```shell +cd apisix-2.11.0 +``` + +## 安装项目依赖 + +1. 现在我们可以通过脚本一键安装项目所需要的依赖拉,在根目录下运行下面命令: + +```shell +bash utils/install-dependencies.sh +``` + + + +不出所料,没有成功跑完。通过错误提示我们知道,这里是未能成功安装 `OpenResty`。原因是默认没有 `arm 64` 平台的源。 Review comment: ```suggestion 不出所料,没有成功跑完 🤔 通过错误提示我们知道,这里是未能成功安装 `OpenResty`,原因是:默认没有 `ARM 64` 平台的源。 ``` ########## File path: website/i18n/zh/docusaurus-plugin-content-blog/2022/01/11/building-apisix-in-ubuntu-for-arm.md ########## @@ -0,0 +1,247 @@ +--- +title: "在 arm 版 ubuntu 构建 APISIX" +authors: + - name: "郭奇" + title: "Author" + url: "https://github.com/guoqqqi"; + image_url: "https://avatars.githubusercontent.com/u/72343596?v=4"; +keywords: +- Apache APISIX +- arm +- ubuntu +- m1 +description: 本文为大家描述了在 M1 中启用 arm 版 ubuntu 通过源码构建 Apache APISIX 的详细操作步骤,通过阅读本文,大家对于在 arm ubuntu 上构建 Apache APISIX 更加快捷。 +tags: [Technology] +--- + +> 本篇文章记录了通过源码在 arm 版 ubuntu 中构建 Apache APISIX 的详细踩坑记录,ubuntu 环境使用的是 [https://multipass.run/](https://multipass.run/) 中的 Multipass 。因为它可以在 M1 上使用~ + +<!--truncate--> + +## 克隆源码 + +首先根据 [官方文档](https://apisix.apache.org/zh/docs/apisix/how-to-build#%E9%80%9A%E8%BF%87%E6%BA%90%E7%A0%81%E5%8C%85%E5%AE%89%E8%A3%85) 安装 APISIX 源码仓库。并且进入项目文件。 + +```shell +cd apisix-2.11.0 +``` + +## 安装项目依赖 + +1. 现在我们可以通过脚本一键安装项目所需要的依赖拉,在根目录下运行下面命令: + +```shell +bash utils/install-dependencies.sh +``` + + + +不出所料,没有成功跑完。通过错误提示我们知道,这里是未能成功安装 `OpenResty`。原因是默认没有 `arm 64` 平台的源。 + +2. 下面我们手动安装下 OpenResty:参考 [https://openresty.org/cn/linux-packages.html#ubuntu](https://openresty.org/cn/linux-packages.html#ubuntu) + +- 步骤一:安装导入 GPG 公钥时所需的几个依赖包(整个安装过程完成后可以随时删除它们): + +```shell +sudo apt-get -y install --no-install-recommends wget gnupg ca-certificates +``` + +- 步骤二:导入我们的 GPG 密钥: + +```shell +wget -O - https://openresty.org/package/pubkey.gpg | sudo apt-key add - +``` + +成功: + + + +- 步骤三:添加 OpenResty 官方 APT 仓库。对于 x86_64 或 amd64 系统,可以使用下面的命令: + +```shell +echo "deb http://openresty.org/package/ubuntu $(lsb_release -sc) main" \ + | sudo tee /etc/apt/sources.list.d/openresty.list +``` + +- 而对于 arm64 或 aarch64 系统,则可以使用下面的命令:(我在 M1 上运行的是该命令,上个命令会报错) + +```shell +echo "deb http://openresty.org/package/arm64/ubuntu $(lsb_release -sc) main" \ + | sudo tee /etc/apt/sources.list.d/openresty.list +``` + +- 步骤四:更新 APT 索引: + +```shell +sudo apt-get update +``` + +然后就可以像下面这样安装软件包,比如 `OpenResty`: + +```shell +sudo apt-get -y install openresty +``` + +- 步骤五:(可选)可以通过下面命令删除该包和对应的关联包: + +```shell +sudo apt-get -y install --no-install-recommends software-properties-common +``` + +成功安装 `OpenResty` : + + + +3. 重新运行安装依赖脚本 (参考上面 1. ) +4. 接着运行 `LUAROCKS_SERVER=https://luarocks.cn` 命令安装依赖: + + + +运行下面命令即可: + +```shell +curl https://raw.githubusercontent.com/apache/apisix/master/utils/linux-install-luarocks.sh -sL | bash - +``` + + + +又出现错误提示了。。。接着运行下面命令: + +```shell +sudo apt install wget sudo unzip +``` + +接着我们重新运行一次: + +```shell +curl https://raw.githubusercontent.com/apache/apisix/master/utils/linux-install-luarocks.sh -sL | bash - +``` + +然后我们继续运行安装依赖的命令:`LUAROCKS_SERVER=https://luarocks.cn make deps` +终于成功了,哭了,坑确实太多了。 + + + +大部分依赖已经成功安装好,但是又有新的错误提示了。 +这里看起来是两个仓库未能成功克隆下来,没关系,先往后面运行试试: + +5. 安装 APISIX 命令 + +```shell +make install +// 如果出现权限不足的提示,用 sudo make install +``` + +成功: + + Review comment: ditto ########## File path: website/i18n/zh/docusaurus-plugin-content-blog/2022/01/11/building-apisix-in-ubuntu-for-arm.md ########## @@ -0,0 +1,247 @@ +--- +title: "在 arm 版 ubuntu 构建 APISIX" +authors: + - name: "郭奇" + title: "Author" + url: "https://github.com/guoqqqi"; + image_url: "https://avatars.githubusercontent.com/u/72343596?v=4"; +keywords: +- Apache APISIX +- arm +- ubuntu +- m1 +description: 本文为大家描述了在 M1 中启用 arm 版 ubuntu 通过源码构建 Apache APISIX 的详细操作步骤,通过阅读本文,大家对于在 arm ubuntu 上构建 Apache APISIX 更加快捷。 +tags: [Technology] +--- + +> 本篇文章记录了通过源码在 arm 版 ubuntu 中构建 Apache APISIX 的详细踩坑记录,ubuntu 环境使用的是 [https://multipass.run/](https://multipass.run/) 中的 Multipass 。因为它可以在 M1 上使用~ + +<!--truncate--> + +## 克隆源码 + +首先根据 [官方文档](https://apisix.apache.org/zh/docs/apisix/how-to-build#%E9%80%9A%E8%BF%87%E6%BA%90%E7%A0%81%E5%8C%85%E5%AE%89%E8%A3%85) 安装 APISIX 源码仓库。并且进入项目文件。 + +```shell +cd apisix-2.11.0 +``` + +## 安装项目依赖 + +1. 现在我们可以通过脚本一键安装项目所需要的依赖拉,在根目录下运行下面命令: + +```shell +bash utils/install-dependencies.sh +``` + + + +不出所料,没有成功跑完。通过错误提示我们知道,这里是未能成功安装 `OpenResty`。原因是默认没有 `arm 64` 平台的源。 + +2. 下面我们手动安装下 OpenResty:参考 [https://openresty.org/cn/linux-packages.html#ubuntu](https://openresty.org/cn/linux-packages.html#ubuntu) + +- 步骤一:安装导入 GPG 公钥时所需的几个依赖包(整个安装过程完成后可以随时删除它们): + +```shell +sudo apt-get -y install --no-install-recommends wget gnupg ca-certificates +``` + +- 步骤二:导入我们的 GPG 密钥: + +```shell +wget -O - https://openresty.org/package/pubkey.gpg | sudo apt-key add - +``` + +成功: + + + +- 步骤三:添加 OpenResty 官方 APT 仓库。对于 x86_64 或 amd64 系统,可以使用下面的命令: + +```shell +echo "deb http://openresty.org/package/ubuntu $(lsb_release -sc) main" \ + | sudo tee /etc/apt/sources.list.d/openresty.list +``` + +- 而对于 arm64 或 aarch64 系统,则可以使用下面的命令:(我在 M1 上运行的是该命令,上个命令会报错) + +```shell +echo "deb http://openresty.org/package/arm64/ubuntu $(lsb_release -sc) main" \ + | sudo tee /etc/apt/sources.list.d/openresty.list +``` + +- 步骤四:更新 APT 索引: + +```shell +sudo apt-get update +``` + +然后就可以像下面这样安装软件包,比如 `OpenResty`: + +```shell +sudo apt-get -y install openresty +``` + +- 步骤五:(可选)可以通过下面命令删除该包和对应的关联包: + +```shell +sudo apt-get -y install --no-install-recommends software-properties-common +``` + +成功安装 `OpenResty` : + + + +3. 重新运行安装依赖脚本 (参考上面 1. ) +4. 接着运行 `LUAROCKS_SERVER=https://luarocks.cn` 命令安装依赖: + + + +运行下面命令即可: + +```shell +curl https://raw.githubusercontent.com/apache/apisix/master/utils/linux-install-luarocks.sh -sL | bash - +``` + + + +又出现错误提示了。。。接着运行下面命令: + +```shell +sudo apt install wget sudo unzip +``` + +接着我们重新运行一次: + +```shell +curl https://raw.githubusercontent.com/apache/apisix/master/utils/linux-install-luarocks.sh -sL | bash - +``` + +然后我们继续运行安装依赖的命令:`LUAROCKS_SERVER=https://luarocks.cn make deps` +终于成功了,哭了,坑确实太多了。 + + + +大部分依赖已经成功安装好,但是又有新的错误提示了。 +这里看起来是两个仓库未能成功克隆下来,没关系,先往后面运行试试: + +5. 安装 APISIX 命令 + +```shell +make install +// 如果出现权限不足的提示,用 sudo make install +``` + +成功: + + + +## 安装 etcd + +### 踩坑 etcd + +启动 APISIX 之前需要安装下 etcd,参考 [官方文档](https://apisix.apache.org/docs/apisix/2.10/install-dependencies/#ubuntu-1604--1804) + +>(由于该安装教程并不是针对 arm 写的,所以虽然成功安装了 etcd,但是未能成功将 etcd 运行起来,原因是因为默认使用的 x86 的二进制文件启动,所以无法运行。可以跳过该部分直接参考在 「docker 中运行 etcd 服务」部分) Review comment: ```suggestion >(由于该安装教程并不是针对 arm 写的,所以虽然成功安装了 etcd,但是未能成功将 etcd 运行起来,原因是因为默认使用的 x86 的二进制文件启动,所以无法运行。可以跳过该部分直接参考在 「Docker 中运行 etcd 服务」部分) ``` ########## File path: website/i18n/zh/docusaurus-plugin-content-blog/2022/01/11/building-apisix-in-ubuntu-for-arm.md ########## @@ -0,0 +1,247 @@ +--- +title: "在 arm 版 ubuntu 构建 APISIX" +authors: + - name: "郭奇" + title: "Author" + url: "https://github.com/guoqqqi"; + image_url: "https://avatars.githubusercontent.com/u/72343596?v=4"; +keywords: +- Apache APISIX +- arm +- ubuntu +- m1 +description: 本文为大家描述了在 M1 中启用 arm 版 ubuntu 通过源码构建 Apache APISIX 的详细操作步骤,通过阅读本文,大家对于在 arm ubuntu 上构建 Apache APISIX 更加快捷。 +tags: [Technology] +--- + +> 本篇文章记录了通过源码在 arm 版 ubuntu 中构建 Apache APISIX 的详细踩坑记录,ubuntu 环境使用的是 [https://multipass.run/](https://multipass.run/) 中的 Multipass 。因为它可以在 M1 上使用~ + +<!--truncate--> + +## 克隆源码 + +首先根据 [官方文档](https://apisix.apache.org/zh/docs/apisix/how-to-build#%E9%80%9A%E8%BF%87%E6%BA%90%E7%A0%81%E5%8C%85%E5%AE%89%E8%A3%85) 安装 APISIX 源码仓库。并且进入项目文件。 + +```shell +cd apisix-2.11.0 +``` + +## 安装项目依赖 + +1. 现在我们可以通过脚本一键安装项目所需要的依赖拉,在根目录下运行下面命令: + +```shell +bash utils/install-dependencies.sh +``` + + + +不出所料,没有成功跑完。通过错误提示我们知道,这里是未能成功安装 `OpenResty`。原因是默认没有 `arm 64` 平台的源。 + +2. 下面我们手动安装下 OpenResty:参考 [https://openresty.org/cn/linux-packages.html#ubuntu](https://openresty.org/cn/linux-packages.html#ubuntu) + +- 步骤一:安装导入 GPG 公钥时所需的几个依赖包(整个安装过程完成后可以随时删除它们): + +```shell +sudo apt-get -y install --no-install-recommends wget gnupg ca-certificates +``` + +- 步骤二:导入我们的 GPG 密钥: + +```shell +wget -O - https://openresty.org/package/pubkey.gpg | sudo apt-key add - +``` + +成功: + + + +- 步骤三:添加 OpenResty 官方 APT 仓库。对于 x86_64 或 amd64 系统,可以使用下面的命令: + +```shell +echo "deb http://openresty.org/package/ubuntu $(lsb_release -sc) main" \ + | sudo tee /etc/apt/sources.list.d/openresty.list +``` + +- 而对于 arm64 或 aarch64 系统,则可以使用下面的命令:(我在 M1 上运行的是该命令,上个命令会报错) + +```shell +echo "deb http://openresty.org/package/arm64/ubuntu $(lsb_release -sc) main" \ + | sudo tee /etc/apt/sources.list.d/openresty.list +``` + +- 步骤四:更新 APT 索引: + +```shell +sudo apt-get update +``` + +然后就可以像下面这样安装软件包,比如 `OpenResty`: + +```shell +sudo apt-get -y install openresty +``` + +- 步骤五:(可选)可以通过下面命令删除该包和对应的关联包: + +```shell +sudo apt-get -y install --no-install-recommends software-properties-common +``` + +成功安装 `OpenResty` : + + + +3. 重新运行安装依赖脚本 (参考上面 1. ) +4. 接着运行 `LUAROCKS_SERVER=https://luarocks.cn` 命令安装依赖: + + + +运行下面命令即可: + +```shell +curl https://raw.githubusercontent.com/apache/apisix/master/utils/linux-install-luarocks.sh -sL | bash - +``` + + + +又出现错误提示了。。。接着运行下面命令: + +```shell +sudo apt install wget sudo unzip +``` + +接着我们重新运行一次: + +```shell +curl https://raw.githubusercontent.com/apache/apisix/master/utils/linux-install-luarocks.sh -sL | bash - +``` + +然后我们继续运行安装依赖的命令:`LUAROCKS_SERVER=https://luarocks.cn make deps` +终于成功了,哭了,坑确实太多了。 + + + +大部分依赖已经成功安装好,但是又有新的错误提示了。 +这里看起来是两个仓库未能成功克隆下来,没关系,先往后面运行试试: + +5. 安装 APISIX 命令 + +```shell +make install +// 如果出现权限不足的提示,用 sudo make install +``` + +成功: + + + +## 安装 etcd + +### 踩坑 etcd + +启动 APISIX 之前需要安装下 etcd,参考 [官方文档](https://apisix.apache.org/docs/apisix/2.10/install-dependencies/#ubuntu-1604--1804) + +>(由于该安装教程并不是针对 arm 写的,所以虽然成功安装了 etcd,但是未能成功将 etcd 运行起来,原因是因为默认使用的 x86 的二进制文件启动,所以无法运行。可以跳过该部分直接参考在 「docker 中运行 etcd 服务」部分) + +- 第一步运行: + +```shell +wget https://github.com/etcd-io/etcd/releases/download/v3.4.13/etcd-v3.4.13-linux-amd64.tar.gz +``` + +- 第二部运行: + +```shell +tar -xvf etcd-v3.4.13-linux-amd64.tar.gz && \ cd etcd-v3.4.13-linux-amd64 && \ sudo cp -a etcd etcdctl /usr/bin/ +``` + +成功: + + + +- 第三部启动 etcd 服务 + +```shell +nohup etcd & +``` + + + +然后我在后面运行 APISIX 时发现 etcd 报错了: Review comment: ```suggestion 然后我在后面运行 Apache APISIX 时发现 etcd 报错了: ``` ########## File path: website/i18n/zh/docusaurus-plugin-content-blog/2022/01/11/building-apisix-in-ubuntu-for-arm.md ########## @@ -0,0 +1,247 @@ +--- +title: "在 arm 版 ubuntu 构建 APISIX" +authors: + - name: "郭奇" + title: "Author" + url: "https://github.com/guoqqqi"; + image_url: "https://avatars.githubusercontent.com/u/72343596?v=4"; +keywords: +- Apache APISIX +- arm +- ubuntu +- m1 +description: 本文为大家描述了在 M1 中启用 arm 版 ubuntu 通过源码构建 Apache APISIX 的详细操作步骤,通过阅读本文,大家对于在 arm ubuntu 上构建 Apache APISIX 更加快捷。 +tags: [Technology] +--- + +> 本篇文章记录了通过源码在 arm 版 ubuntu 中构建 Apache APISIX 的详细踩坑记录,ubuntu 环境使用的是 [https://multipass.run/](https://multipass.run/) 中的 Multipass 。因为它可以在 M1 上使用~ + +<!--truncate--> + +## 克隆源码 + +首先根据 [官方文档](https://apisix.apache.org/zh/docs/apisix/how-to-build#%E9%80%9A%E8%BF%87%E6%BA%90%E7%A0%81%E5%8C%85%E5%AE%89%E8%A3%85) 安装 APISIX 源码仓库。并且进入项目文件。 + +```shell +cd apisix-2.11.0 +``` + +## 安装项目依赖 + +1. 现在我们可以通过脚本一键安装项目所需要的依赖拉,在根目录下运行下面命令: + +```shell +bash utils/install-dependencies.sh +``` + + + +不出所料,没有成功跑完。通过错误提示我们知道,这里是未能成功安装 `OpenResty`。原因是默认没有 `arm 64` 平台的源。 + +2. 下面我们手动安装下 OpenResty:参考 [https://openresty.org/cn/linux-packages.html#ubuntu](https://openresty.org/cn/linux-packages.html#ubuntu) + +- 步骤一:安装导入 GPG 公钥时所需的几个依赖包(整个安装过程完成后可以随时删除它们): + +```shell +sudo apt-get -y install --no-install-recommends wget gnupg ca-certificates +``` + +- 步骤二:导入我们的 GPG 密钥: + +```shell +wget -O - https://openresty.org/package/pubkey.gpg | sudo apt-key add - +``` + +成功: + + + +- 步骤三:添加 OpenResty 官方 APT 仓库。对于 x86_64 或 amd64 系统,可以使用下面的命令: + +```shell +echo "deb http://openresty.org/package/ubuntu $(lsb_release -sc) main" \ + | sudo tee /etc/apt/sources.list.d/openresty.list +``` + +- 而对于 arm64 或 aarch64 系统,则可以使用下面的命令:(我在 M1 上运行的是该命令,上个命令会报错) + +```shell +echo "deb http://openresty.org/package/arm64/ubuntu $(lsb_release -sc) main" \ + | sudo tee /etc/apt/sources.list.d/openresty.list +``` + +- 步骤四:更新 APT 索引: + +```shell +sudo apt-get update +``` + +然后就可以像下面这样安装软件包,比如 `OpenResty`: + +```shell +sudo apt-get -y install openresty +``` + +- 步骤五:(可选)可以通过下面命令删除该包和对应的关联包: + +```shell +sudo apt-get -y install --no-install-recommends software-properties-common +``` + +成功安装 `OpenResty` : + + + +3. 重新运行安装依赖脚本 (参考上面 1. ) +4. 接着运行 `LUAROCKS_SERVER=https://luarocks.cn` 命令安装依赖: + + + +运行下面命令即可: + +```shell +curl https://raw.githubusercontent.com/apache/apisix/master/utils/linux-install-luarocks.sh -sL | bash - +``` + + + +又出现错误提示了。。。接着运行下面命令: + +```shell +sudo apt install wget sudo unzip +``` + +接着我们重新运行一次: + +```shell +curl https://raw.githubusercontent.com/apache/apisix/master/utils/linux-install-luarocks.sh -sL | bash - +``` + +然后我们继续运行安装依赖的命令:`LUAROCKS_SERVER=https://luarocks.cn make deps` +终于成功了,哭了,坑确实太多了。 + + + +大部分依赖已经成功安装好,但是又有新的错误提示了。 +这里看起来是两个仓库未能成功克隆下来,没关系,先往后面运行试试: + +5. 安装 APISIX 命令 + +```shell +make install +// 如果出现权限不足的提示,用 sudo make install +``` + +成功: + + + +## 安装 etcd + +### 踩坑 etcd + +启动 APISIX 之前需要安装下 etcd,参考 [官方文档](https://apisix.apache.org/docs/apisix/2.10/install-dependencies/#ubuntu-1604--1804) + +>(由于该安装教程并不是针对 arm 写的,所以虽然成功安装了 etcd,但是未能成功将 etcd 运行起来,原因是因为默认使用的 x86 的二进制文件启动,所以无法运行。可以跳过该部分直接参考在 「docker 中运行 etcd 服务」部分) + +- 第一步运行: + +```shell +wget https://github.com/etcd-io/etcd/releases/download/v3.4.13/etcd-v3.4.13-linux-amd64.tar.gz +``` + +- 第二部运行: + +```shell +tar -xvf etcd-v3.4.13-linux-amd64.tar.gz && \ cd etcd-v3.4.13-linux-amd64 && \ sudo cp -a etcd etcdctl /usr/bin/ +``` + +成功: + + Review comment: ditto ########## File path: website/i18n/zh/docusaurus-plugin-content-blog/2022/01/11/building-apisix-in-ubuntu-for-arm.md ########## @@ -0,0 +1,247 @@ +--- +title: "在 arm 版 ubuntu 构建 APISIX" +authors: + - name: "郭奇" + title: "Author" + url: "https://github.com/guoqqqi"; + image_url: "https://avatars.githubusercontent.com/u/72343596?v=4"; +keywords: +- Apache APISIX +- arm +- ubuntu +- m1 +description: 本文为大家描述了在 M1 中启用 arm 版 ubuntu 通过源码构建 Apache APISIX 的详细操作步骤,通过阅读本文,大家对于在 arm ubuntu 上构建 Apache APISIX 更加快捷。 +tags: [Technology] +--- + +> 本篇文章记录了通过源码在 arm 版 ubuntu 中构建 Apache APISIX 的详细踩坑记录,ubuntu 环境使用的是 [https://multipass.run/](https://multipass.run/) 中的 Multipass 。因为它可以在 M1 上使用~ + +<!--truncate--> + +## 克隆源码 + +首先根据 [官方文档](https://apisix.apache.org/zh/docs/apisix/how-to-build#%E9%80%9A%E8%BF%87%E6%BA%90%E7%A0%81%E5%8C%85%E5%AE%89%E8%A3%85) 安装 APISIX 源码仓库。并且进入项目文件。 + +```shell +cd apisix-2.11.0 +``` + +## 安装项目依赖 + +1. 现在我们可以通过脚本一键安装项目所需要的依赖拉,在根目录下运行下面命令: + +```shell +bash utils/install-dependencies.sh +``` + + + +不出所料,没有成功跑完。通过错误提示我们知道,这里是未能成功安装 `OpenResty`。原因是默认没有 `arm 64` 平台的源。 + +2. 下面我们手动安装下 OpenResty:参考 [https://openresty.org/cn/linux-packages.html#ubuntu](https://openresty.org/cn/linux-packages.html#ubuntu) + +- 步骤一:安装导入 GPG 公钥时所需的几个依赖包(整个安装过程完成后可以随时删除它们): + +```shell +sudo apt-get -y install --no-install-recommends wget gnupg ca-certificates +``` + +- 步骤二:导入我们的 GPG 密钥: + +```shell +wget -O - https://openresty.org/package/pubkey.gpg | sudo apt-key add - +``` + +成功: + + + +- 步骤三:添加 OpenResty 官方 APT 仓库。对于 x86_64 或 amd64 系统,可以使用下面的命令: + +```shell +echo "deb http://openresty.org/package/ubuntu $(lsb_release -sc) main" \ + | sudo tee /etc/apt/sources.list.d/openresty.list +``` + +- 而对于 arm64 或 aarch64 系统,则可以使用下面的命令:(我在 M1 上运行的是该命令,上个命令会报错) + +```shell +echo "deb http://openresty.org/package/arm64/ubuntu $(lsb_release -sc) main" \ + | sudo tee /etc/apt/sources.list.d/openresty.list +``` + +- 步骤四:更新 APT 索引: + +```shell +sudo apt-get update +``` + +然后就可以像下面这样安装软件包,比如 `OpenResty`: + +```shell +sudo apt-get -y install openresty +``` + +- 步骤五:(可选)可以通过下面命令删除该包和对应的关联包: + +```shell +sudo apt-get -y install --no-install-recommends software-properties-common +``` + +成功安装 `OpenResty` : + + + +3. 重新运行安装依赖脚本 (参考上面 1. ) +4. 接着运行 `LUAROCKS_SERVER=https://luarocks.cn` 命令安装依赖: + + + +运行下面命令即可: + +```shell +curl https://raw.githubusercontent.com/apache/apisix/master/utils/linux-install-luarocks.sh -sL | bash - +``` + + + +又出现错误提示了。。。接着运行下面命令: + +```shell +sudo apt install wget sudo unzip +``` + +接着我们重新运行一次: + +```shell +curl https://raw.githubusercontent.com/apache/apisix/master/utils/linux-install-luarocks.sh -sL | bash - +``` + +然后我们继续运行安装依赖的命令:`LUAROCKS_SERVER=https://luarocks.cn make deps` +终于成功了,哭了,坑确实太多了。 + + + +大部分依赖已经成功安装好,但是又有新的错误提示了。 +这里看起来是两个仓库未能成功克隆下来,没关系,先往后面运行试试: + +5. 安装 APISIX 命令 + +```shell +make install +// 如果出现权限不足的提示,用 sudo make install +``` + +成功: + + + +## 安装 etcd + +### 踩坑 etcd + +启动 APISIX 之前需要安装下 etcd,参考 [官方文档](https://apisix.apache.org/docs/apisix/2.10/install-dependencies/#ubuntu-1604--1804) + +>(由于该安装教程并不是针对 arm 写的,所以虽然成功安装了 etcd,但是未能成功将 etcd 运行起来,原因是因为默认使用的 x86 的二进制文件启动,所以无法运行。可以跳过该部分直接参考在 「docker 中运行 etcd 服务」部分) + +- 第一步运行: + +```shell +wget https://github.com/etcd-io/etcd/releases/download/v3.4.13/etcd-v3.4.13-linux-amd64.tar.gz +``` + +- 第二部运行: + +```shell +tar -xvf etcd-v3.4.13-linux-amd64.tar.gz && \ cd etcd-v3.4.13-linux-amd64 && \ sudo cp -a etcd etcdctl /usr/bin/ +``` + +成功: + + + +- 第三部启动 etcd 服务 + +```shell +nohup etcd & +``` + + + +然后我在后面运行 APISIX 时发现 etcd 报错了: + + Review comment: ditto ########## File path: website/i18n/zh/docusaurus-plugin-content-blog/2022/01/11/building-apisix-in-ubuntu-for-arm.md ########## @@ -0,0 +1,247 @@ +--- +title: "在 arm 版 ubuntu 构建 APISIX" +authors: + - name: "郭奇" + title: "Author" + url: "https://github.com/guoqqqi"; + image_url: "https://avatars.githubusercontent.com/u/72343596?v=4"; +keywords: +- Apache APISIX +- arm +- ubuntu +- m1 +description: 本文为大家描述了在 M1 中启用 arm 版 ubuntu 通过源码构建 Apache APISIX 的详细操作步骤,通过阅读本文,大家对于在 arm ubuntu 上构建 Apache APISIX 更加快捷。 +tags: [Technology] +--- + +> 本篇文章记录了通过源码在 arm 版 ubuntu 中构建 Apache APISIX 的详细踩坑记录,ubuntu 环境使用的是 [https://multipass.run/](https://multipass.run/) 中的 Multipass 。因为它可以在 M1 上使用~ + +<!--truncate--> + +## 克隆源码 + +首先根据 [官方文档](https://apisix.apache.org/zh/docs/apisix/how-to-build#%E9%80%9A%E8%BF%87%E6%BA%90%E7%A0%81%E5%8C%85%E5%AE%89%E8%A3%85) 安装 APISIX 源码仓库。并且进入项目文件。 + +```shell +cd apisix-2.11.0 +``` + +## 安装项目依赖 + +1. 现在我们可以通过脚本一键安装项目所需要的依赖拉,在根目录下运行下面命令: + +```shell +bash utils/install-dependencies.sh +``` + + + +不出所料,没有成功跑完。通过错误提示我们知道,这里是未能成功安装 `OpenResty`。原因是默认没有 `arm 64` 平台的源。 + +2. 下面我们手动安装下 OpenResty:参考 [https://openresty.org/cn/linux-packages.html#ubuntu](https://openresty.org/cn/linux-packages.html#ubuntu) + +- 步骤一:安装导入 GPG 公钥时所需的几个依赖包(整个安装过程完成后可以随时删除它们): + +```shell +sudo apt-get -y install --no-install-recommends wget gnupg ca-certificates +``` + +- 步骤二:导入我们的 GPG 密钥: + +```shell +wget -O - https://openresty.org/package/pubkey.gpg | sudo apt-key add - +``` + +成功: + + + +- 步骤三:添加 OpenResty 官方 APT 仓库。对于 x86_64 或 amd64 系统,可以使用下面的命令: + +```shell +echo "deb http://openresty.org/package/ubuntu $(lsb_release -sc) main" \ + | sudo tee /etc/apt/sources.list.d/openresty.list +``` + +- 而对于 arm64 或 aarch64 系统,则可以使用下面的命令:(我在 M1 上运行的是该命令,上个命令会报错) + +```shell +echo "deb http://openresty.org/package/arm64/ubuntu $(lsb_release -sc) main" \ + | sudo tee /etc/apt/sources.list.d/openresty.list +``` + +- 步骤四:更新 APT 索引: + +```shell +sudo apt-get update +``` + +然后就可以像下面这样安装软件包,比如 `OpenResty`: + +```shell +sudo apt-get -y install openresty +``` + +- 步骤五:(可选)可以通过下面命令删除该包和对应的关联包: + +```shell +sudo apt-get -y install --no-install-recommends software-properties-common +``` + +成功安装 `OpenResty` : + + + +3. 重新运行安装依赖脚本 (参考上面 1. ) +4. 接着运行 `LUAROCKS_SERVER=https://luarocks.cn` 命令安装依赖: + + + +运行下面命令即可: + +```shell +curl https://raw.githubusercontent.com/apache/apisix/master/utils/linux-install-luarocks.sh -sL | bash - +``` + + + +又出现错误提示了。。。接着运行下面命令: + +```shell +sudo apt install wget sudo unzip +``` + +接着我们重新运行一次: + +```shell +curl https://raw.githubusercontent.com/apache/apisix/master/utils/linux-install-luarocks.sh -sL | bash - +``` + +然后我们继续运行安装依赖的命令:`LUAROCKS_SERVER=https://luarocks.cn make deps` +终于成功了,哭了,坑确实太多了。 + + + +大部分依赖已经成功安装好,但是又有新的错误提示了。 +这里看起来是两个仓库未能成功克隆下来,没关系,先往后面运行试试: + +5. 安装 APISIX 命令 + +```shell +make install +// 如果出现权限不足的提示,用 sudo make install +``` + +成功: + + + +## 安装 etcd + +### 踩坑 etcd + +启动 APISIX 之前需要安装下 etcd,参考 [官方文档](https://apisix.apache.org/docs/apisix/2.10/install-dependencies/#ubuntu-1604--1804) + +>(由于该安装教程并不是针对 arm 写的,所以虽然成功安装了 etcd,但是未能成功将 etcd 运行起来,原因是因为默认使用的 x86 的二进制文件启动,所以无法运行。可以跳过该部分直接参考在 「docker 中运行 etcd 服务」部分) + +- 第一步运行: + +```shell +wget https://github.com/etcd-io/etcd/releases/download/v3.4.13/etcd-v3.4.13-linux-amd64.tar.gz +``` + +- 第二部运行: + +```shell +tar -xvf etcd-v3.4.13-linux-amd64.tar.gz && \ cd etcd-v3.4.13-linux-amd64 && \ sudo cp -a etcd etcdctl /usr/bin/ +``` + +成功: + + + +- 第三部启动 etcd 服务 + +```shell +nohup etcd & +``` + + Review comment: ditto ########## File path: website/i18n/zh/docusaurus-plugin-content-blog/2022/01/11/building-apisix-in-ubuntu-for-arm.md ########## @@ -0,0 +1,247 @@ +--- +title: "在 arm 版 ubuntu 构建 APISIX" +authors: + - name: "郭奇" + title: "Author" + url: "https://github.com/guoqqqi"; + image_url: "https://avatars.githubusercontent.com/u/72343596?v=4"; +keywords: +- Apache APISIX +- arm +- ubuntu +- m1 +description: 本文为大家描述了在 M1 中启用 arm 版 ubuntu 通过源码构建 Apache APISIX 的详细操作步骤,通过阅读本文,大家对于在 arm ubuntu 上构建 Apache APISIX 更加快捷。 +tags: [Technology] +--- + +> 本篇文章记录了通过源码在 arm 版 ubuntu 中构建 Apache APISIX 的详细踩坑记录,ubuntu 环境使用的是 [https://multipass.run/](https://multipass.run/) 中的 Multipass 。因为它可以在 M1 上使用~ + +<!--truncate--> + +## 克隆源码 + +首先根据 [官方文档](https://apisix.apache.org/zh/docs/apisix/how-to-build#%E9%80%9A%E8%BF%87%E6%BA%90%E7%A0%81%E5%8C%85%E5%AE%89%E8%A3%85) 安装 APISIX 源码仓库。并且进入项目文件。 + +```shell +cd apisix-2.11.0 +``` + +## 安装项目依赖 + +1. 现在我们可以通过脚本一键安装项目所需要的依赖拉,在根目录下运行下面命令: + +```shell +bash utils/install-dependencies.sh +``` + + + +不出所料,没有成功跑完。通过错误提示我们知道,这里是未能成功安装 `OpenResty`。原因是默认没有 `arm 64` 平台的源。 + +2. 下面我们手动安装下 OpenResty:参考 [https://openresty.org/cn/linux-packages.html#ubuntu](https://openresty.org/cn/linux-packages.html#ubuntu) + +- 步骤一:安装导入 GPG 公钥时所需的几个依赖包(整个安装过程完成后可以随时删除它们): + +```shell +sudo apt-get -y install --no-install-recommends wget gnupg ca-certificates +``` + +- 步骤二:导入我们的 GPG 密钥: + +```shell +wget -O - https://openresty.org/package/pubkey.gpg | sudo apt-key add - +``` + +成功: + + + +- 步骤三:添加 OpenResty 官方 APT 仓库。对于 x86_64 或 amd64 系统,可以使用下面的命令: + +```shell +echo "deb http://openresty.org/package/ubuntu $(lsb_release -sc) main" \ + | sudo tee /etc/apt/sources.list.d/openresty.list +``` + +- 而对于 arm64 或 aarch64 系统,则可以使用下面的命令:(我在 M1 上运行的是该命令,上个命令会报错) + +```shell +echo "deb http://openresty.org/package/arm64/ubuntu $(lsb_release -sc) main" \ + | sudo tee /etc/apt/sources.list.d/openresty.list +``` + +- 步骤四:更新 APT 索引: + +```shell +sudo apt-get update +``` + +然后就可以像下面这样安装软件包,比如 `OpenResty`: + +```shell +sudo apt-get -y install openresty +``` + +- 步骤五:(可选)可以通过下面命令删除该包和对应的关联包: + +```shell +sudo apt-get -y install --no-install-recommends software-properties-common +``` + +成功安装 `OpenResty` : + + + +3. 重新运行安装依赖脚本 (参考上面 1. ) +4. 接着运行 `LUAROCKS_SERVER=https://luarocks.cn` 命令安装依赖: + + + +运行下面命令即可: + +```shell +curl https://raw.githubusercontent.com/apache/apisix/master/utils/linux-install-luarocks.sh -sL | bash - +``` + + + +又出现错误提示了。。。接着运行下面命令: + +```shell +sudo apt install wget sudo unzip +``` + +接着我们重新运行一次: + +```shell +curl https://raw.githubusercontent.com/apache/apisix/master/utils/linux-install-luarocks.sh -sL | bash - +``` + +然后我们继续运行安装依赖的命令:`LUAROCKS_SERVER=https://luarocks.cn make deps` +终于成功了,哭了,坑确实太多了。 + + + +大部分依赖已经成功安装好,但是又有新的错误提示了。 +这里看起来是两个仓库未能成功克隆下来,没关系,先往后面运行试试: + +5. 安装 APISIX 命令 + +```shell +make install +// 如果出现权限不足的提示,用 sudo make install +``` + +成功: + + + +## 安装 etcd + +### 踩坑 etcd + +启动 APISIX 之前需要安装下 etcd,参考 [官方文档](https://apisix.apache.org/docs/apisix/2.10/install-dependencies/#ubuntu-1604--1804) + +>(由于该安装教程并不是针对 arm 写的,所以虽然成功安装了 etcd,但是未能成功将 etcd 运行起来,原因是因为默认使用的 x86 的二进制文件启动,所以无法运行。可以跳过该部分直接参考在 「docker 中运行 etcd 服务」部分) + +- 第一步运行: + +```shell +wget https://github.com/etcd-io/etcd/releases/download/v3.4.13/etcd-v3.4.13-linux-amd64.tar.gz +``` + +- 第二部运行: + +```shell +tar -xvf etcd-v3.4.13-linux-amd64.tar.gz && \ cd etcd-v3.4.13-linux-amd64 && \ sudo cp -a etcd etcdctl /usr/bin/ +``` + +成功: + + + +- 第三部启动 etcd 服务 + +```shell +nohup etcd & +``` + + + +然后我在后面运行 APISIX 时发现 etcd 报错了: + + + +发现在 arm 上的 ubuntu 裸跑 etcd 坑太多了,各种各样的错误,后来决定还是跑 docker 吧~ + +### 在 docker 中运行 etcd 服务 + +1. 安装 docker Review comment: ```suggestion 1. 安装 Docker ``` ########## File path: website/i18n/zh/docusaurus-plugin-content-blog/2022/01/11/building-apisix-in-ubuntu-for-arm.md ########## @@ -0,0 +1,247 @@ +--- +title: "在 arm 版 ubuntu 构建 APISIX" +authors: + - name: "郭奇" + title: "Author" + url: "https://github.com/guoqqqi"; + image_url: "https://avatars.githubusercontent.com/u/72343596?v=4"; +keywords: +- Apache APISIX +- arm +- ubuntu +- m1 +description: 本文为大家描述了在 M1 中启用 arm 版 ubuntu 通过源码构建 Apache APISIX 的详细操作步骤,通过阅读本文,大家对于在 arm ubuntu 上构建 Apache APISIX 更加快捷。 +tags: [Technology] +--- + +> 本篇文章记录了通过源码在 arm 版 ubuntu 中构建 Apache APISIX 的详细踩坑记录,ubuntu 环境使用的是 [https://multipass.run/](https://multipass.run/) 中的 Multipass 。因为它可以在 M1 上使用~ + +<!--truncate--> + +## 克隆源码 + +首先根据 [官方文档](https://apisix.apache.org/zh/docs/apisix/how-to-build#%E9%80%9A%E8%BF%87%E6%BA%90%E7%A0%81%E5%8C%85%E5%AE%89%E8%A3%85) 安装 APISIX 源码仓库。并且进入项目文件。 + +```shell +cd apisix-2.11.0 +``` + +## 安装项目依赖 + +1. 现在我们可以通过脚本一键安装项目所需要的依赖拉,在根目录下运行下面命令: + +```shell +bash utils/install-dependencies.sh +``` + + + +不出所料,没有成功跑完。通过错误提示我们知道,这里是未能成功安装 `OpenResty`。原因是默认没有 `arm 64` 平台的源。 + +2. 下面我们手动安装下 OpenResty:参考 [https://openresty.org/cn/linux-packages.html#ubuntu](https://openresty.org/cn/linux-packages.html#ubuntu) + +- 步骤一:安装导入 GPG 公钥时所需的几个依赖包(整个安装过程完成后可以随时删除它们): + +```shell +sudo apt-get -y install --no-install-recommends wget gnupg ca-certificates +``` + +- 步骤二:导入我们的 GPG 密钥: + +```shell +wget -O - https://openresty.org/package/pubkey.gpg | sudo apt-key add - +``` + +成功: + + + +- 步骤三:添加 OpenResty 官方 APT 仓库。对于 x86_64 或 amd64 系统,可以使用下面的命令: + +```shell +echo "deb http://openresty.org/package/ubuntu $(lsb_release -sc) main" \ + | sudo tee /etc/apt/sources.list.d/openresty.list +``` + +- 而对于 arm64 或 aarch64 系统,则可以使用下面的命令:(我在 M1 上运行的是该命令,上个命令会报错) + +```shell +echo "deb http://openresty.org/package/arm64/ubuntu $(lsb_release -sc) main" \ + | sudo tee /etc/apt/sources.list.d/openresty.list +``` + +- 步骤四:更新 APT 索引: + +```shell +sudo apt-get update +``` + +然后就可以像下面这样安装软件包,比如 `OpenResty`: + +```shell +sudo apt-get -y install openresty +``` + +- 步骤五:(可选)可以通过下面命令删除该包和对应的关联包: + +```shell +sudo apt-get -y install --no-install-recommends software-properties-common +``` + +成功安装 `OpenResty` : + + + +3. 重新运行安装依赖脚本 (参考上面 1. ) +4. 接着运行 `LUAROCKS_SERVER=https://luarocks.cn` 命令安装依赖: + + + +运行下面命令即可: + +```shell +curl https://raw.githubusercontent.com/apache/apisix/master/utils/linux-install-luarocks.sh -sL | bash - +``` + + + +又出现错误提示了。。。接着运行下面命令: + +```shell +sudo apt install wget sudo unzip +``` + +接着我们重新运行一次: + +```shell +curl https://raw.githubusercontent.com/apache/apisix/master/utils/linux-install-luarocks.sh -sL | bash - +``` + +然后我们继续运行安装依赖的命令:`LUAROCKS_SERVER=https://luarocks.cn make deps` +终于成功了,哭了,坑确实太多了。 + + + +大部分依赖已经成功安装好,但是又有新的错误提示了。 +这里看起来是两个仓库未能成功克隆下来,没关系,先往后面运行试试: + +5. 安装 APISIX 命令 + +```shell +make install +// 如果出现权限不足的提示,用 sudo make install +``` + +成功: + + + +## 安装 etcd + +### 踩坑 etcd + +启动 APISIX 之前需要安装下 etcd,参考 [官方文档](https://apisix.apache.org/docs/apisix/2.10/install-dependencies/#ubuntu-1604--1804) + +>(由于该安装教程并不是针对 arm 写的,所以虽然成功安装了 etcd,但是未能成功将 etcd 运行起来,原因是因为默认使用的 x86 的二进制文件启动,所以无法运行。可以跳过该部分直接参考在 「docker 中运行 etcd 服务」部分) + +- 第一步运行: + +```shell +wget https://github.com/etcd-io/etcd/releases/download/v3.4.13/etcd-v3.4.13-linux-amd64.tar.gz +``` + +- 第二部运行: + +```shell +tar -xvf etcd-v3.4.13-linux-amd64.tar.gz && \ cd etcd-v3.4.13-linux-amd64 && \ sudo cp -a etcd etcdctl /usr/bin/ +``` + +成功: + + + +- 第三部启动 etcd 服务 + +```shell +nohup etcd & +``` + + + +然后我在后面运行 APISIX 时发现 etcd 报错了: + + + +发现在 arm 上的 ubuntu 裸跑 etcd 坑太多了,各种各样的错误,后来决定还是跑 docker 吧~ Review comment: ```suggestion 发现在 ARM Ubuntu 裸跑 etcd 坑太多了,各种各样的错误,后来决定还是跑 docker 吧~ ``` ########## File path: website/i18n/zh/docusaurus-plugin-content-blog/2022/01/11/building-apisix-in-ubuntu-for-arm.md ########## @@ -0,0 +1,247 @@ +--- +title: "在 arm 版 ubuntu 构建 APISIX" +authors: + - name: "郭奇" + title: "Author" + url: "https://github.com/guoqqqi"; + image_url: "https://avatars.githubusercontent.com/u/72343596?v=4"; +keywords: +- Apache APISIX +- arm +- ubuntu +- m1 +description: 本文为大家描述了在 M1 中启用 arm 版 ubuntu 通过源码构建 Apache APISIX 的详细操作步骤,通过阅读本文,大家对于在 arm ubuntu 上构建 Apache APISIX 更加快捷。 +tags: [Technology] +--- + +> 本篇文章记录了通过源码在 arm 版 ubuntu 中构建 Apache APISIX 的详细踩坑记录,ubuntu 环境使用的是 [https://multipass.run/](https://multipass.run/) 中的 Multipass 。因为它可以在 M1 上使用~ + +<!--truncate--> + +## 克隆源码 + +首先根据 [官方文档](https://apisix.apache.org/zh/docs/apisix/how-to-build#%E9%80%9A%E8%BF%87%E6%BA%90%E7%A0%81%E5%8C%85%E5%AE%89%E8%A3%85) 安装 APISIX 源码仓库。并且进入项目文件。 + +```shell +cd apisix-2.11.0 +``` + +## 安装项目依赖 + +1. 现在我们可以通过脚本一键安装项目所需要的依赖拉,在根目录下运行下面命令: + +```shell +bash utils/install-dependencies.sh +``` + + + +不出所料,没有成功跑完。通过错误提示我们知道,这里是未能成功安装 `OpenResty`。原因是默认没有 `arm 64` 平台的源。 + +2. 下面我们手动安装下 OpenResty:参考 [https://openresty.org/cn/linux-packages.html#ubuntu](https://openresty.org/cn/linux-packages.html#ubuntu) + +- 步骤一:安装导入 GPG 公钥时所需的几个依赖包(整个安装过程完成后可以随时删除它们): + +```shell +sudo apt-get -y install --no-install-recommends wget gnupg ca-certificates +``` + +- 步骤二:导入我们的 GPG 密钥: + +```shell +wget -O - https://openresty.org/package/pubkey.gpg | sudo apt-key add - +``` + +成功: + + + +- 步骤三:添加 OpenResty 官方 APT 仓库。对于 x86_64 或 amd64 系统,可以使用下面的命令: + +```shell +echo "deb http://openresty.org/package/ubuntu $(lsb_release -sc) main" \ + | sudo tee /etc/apt/sources.list.d/openresty.list +``` + +- 而对于 arm64 或 aarch64 系统,则可以使用下面的命令:(我在 M1 上运行的是该命令,上个命令会报错) + +```shell +echo "deb http://openresty.org/package/arm64/ubuntu $(lsb_release -sc) main" \ + | sudo tee /etc/apt/sources.list.d/openresty.list +``` + +- 步骤四:更新 APT 索引: + +```shell +sudo apt-get update +``` + +然后就可以像下面这样安装软件包,比如 `OpenResty`: + +```shell +sudo apt-get -y install openresty +``` + +- 步骤五:(可选)可以通过下面命令删除该包和对应的关联包: + +```shell +sudo apt-get -y install --no-install-recommends software-properties-common +``` + +成功安装 `OpenResty` : + + + +3. 重新运行安装依赖脚本 (参考上面 1. ) +4. 接着运行 `LUAROCKS_SERVER=https://luarocks.cn` 命令安装依赖: + + + +运行下面命令即可: + +```shell +curl https://raw.githubusercontent.com/apache/apisix/master/utils/linux-install-luarocks.sh -sL | bash - +``` + + + +又出现错误提示了。。。接着运行下面命令: + +```shell +sudo apt install wget sudo unzip +``` + +接着我们重新运行一次: + +```shell +curl https://raw.githubusercontent.com/apache/apisix/master/utils/linux-install-luarocks.sh -sL | bash - +``` + +然后我们继续运行安装依赖的命令:`LUAROCKS_SERVER=https://luarocks.cn make deps` +终于成功了,哭了,坑确实太多了。 + + + +大部分依赖已经成功安装好,但是又有新的错误提示了。 +这里看起来是两个仓库未能成功克隆下来,没关系,先往后面运行试试: + +5. 安装 APISIX 命令 + +```shell +make install +// 如果出现权限不足的提示,用 sudo make install +``` + +成功: + + + +## 安装 etcd + +### 踩坑 etcd + +启动 APISIX 之前需要安装下 etcd,参考 [官方文档](https://apisix.apache.org/docs/apisix/2.10/install-dependencies/#ubuntu-1604--1804) + +>(由于该安装教程并不是针对 arm 写的,所以虽然成功安装了 etcd,但是未能成功将 etcd 运行起来,原因是因为默认使用的 x86 的二进制文件启动,所以无法运行。可以跳过该部分直接参考在 「docker 中运行 etcd 服务」部分) + +- 第一步运行: + +```shell +wget https://github.com/etcd-io/etcd/releases/download/v3.4.13/etcd-v3.4.13-linux-amd64.tar.gz +``` + +- 第二部运行: + +```shell +tar -xvf etcd-v3.4.13-linux-amd64.tar.gz && \ cd etcd-v3.4.13-linux-amd64 && \ sudo cp -a etcd etcdctl /usr/bin/ +``` + +成功: + + + +- 第三部启动 etcd 服务 + +```shell +nohup etcd & +``` + + + +然后我在后面运行 APISIX 时发现 etcd 报错了: + + + +发现在 arm 上的 ubuntu 裸跑 etcd 坑太多了,各种各样的错误,后来决定还是跑 docker 吧~ + +### 在 docker 中运行 etcd 服务 + +1. 安装 docker + +```shell +sudo apt install docker.io +``` + +Tip: docker 常用的命令:(无权限错误在命令前添加 sudo) + +- 查看所有容器列表 docker ps -a +- 查看正在运行的容器列表 docker ps +- 查看镜像列表 docker image list +- 删除所有容器 docker container prune +- 删除所有镜像 docker image prune -f -a + +更多参考:[Docker 入门教程 - 阮一峰的网络日志](https://www.ruanyifeng.com/blog/2018/02/docker-tutorial.html) + +2. 拉取并运行 etcd + +```shell +sudo docker run -d --name etcd -p 2379:2379 -e ETCD_UNSUPPORTED_ARCH=arm64 -e ETCD_LISTEN_CLIENT_URLS=http://0.0.0.0:2379 -e ETCD_ADVERTISE_CLIENT_URLS=http://0.0.0.0:2379 gcr.io/etcd-development/etcd:v3.5.1-arm64 +``` + +注意:该镜像需要开代理。 +成功: + + + +验证是否运行: + +```shell +sudo docker ps -a +``` + + Review comment: ditto ########## File path: website/i18n/zh/docusaurus-plugin-content-blog/2022/01/11/building-apisix-in-ubuntu-for-arm.md ########## @@ -0,0 +1,247 @@ +--- +title: "在 arm 版 ubuntu 构建 APISIX" +authors: + - name: "郭奇" + title: "Author" + url: "https://github.com/guoqqqi"; + image_url: "https://avatars.githubusercontent.com/u/72343596?v=4"; +keywords: +- Apache APISIX +- arm +- ubuntu +- m1 +description: 本文为大家描述了在 M1 中启用 arm 版 ubuntu 通过源码构建 Apache APISIX 的详细操作步骤,通过阅读本文,大家对于在 arm ubuntu 上构建 Apache APISIX 更加快捷。 +tags: [Technology] +--- + +> 本篇文章记录了通过源码在 arm 版 ubuntu 中构建 Apache APISIX 的详细踩坑记录,ubuntu 环境使用的是 [https://multipass.run/](https://multipass.run/) 中的 Multipass 。因为它可以在 M1 上使用~ + +<!--truncate--> + +## 克隆源码 + +首先根据 [官方文档](https://apisix.apache.org/zh/docs/apisix/how-to-build#%E9%80%9A%E8%BF%87%E6%BA%90%E7%A0%81%E5%8C%85%E5%AE%89%E8%A3%85) 安装 APISIX 源码仓库。并且进入项目文件。 + +```shell +cd apisix-2.11.0 +``` + +## 安装项目依赖 + +1. 现在我们可以通过脚本一键安装项目所需要的依赖拉,在根目录下运行下面命令: + +```shell +bash utils/install-dependencies.sh +``` + + + +不出所料,没有成功跑完。通过错误提示我们知道,这里是未能成功安装 `OpenResty`。原因是默认没有 `arm 64` 平台的源。 + +2. 下面我们手动安装下 OpenResty:参考 [https://openresty.org/cn/linux-packages.html#ubuntu](https://openresty.org/cn/linux-packages.html#ubuntu) + +- 步骤一:安装导入 GPG 公钥时所需的几个依赖包(整个安装过程完成后可以随时删除它们): + +```shell +sudo apt-get -y install --no-install-recommends wget gnupg ca-certificates +``` + +- 步骤二:导入我们的 GPG 密钥: + +```shell +wget -O - https://openresty.org/package/pubkey.gpg | sudo apt-key add - +``` + +成功: + + + +- 步骤三:添加 OpenResty 官方 APT 仓库。对于 x86_64 或 amd64 系统,可以使用下面的命令: + +```shell +echo "deb http://openresty.org/package/ubuntu $(lsb_release -sc) main" \ + | sudo tee /etc/apt/sources.list.d/openresty.list +``` + +- 而对于 arm64 或 aarch64 系统,则可以使用下面的命令:(我在 M1 上运行的是该命令,上个命令会报错) + +```shell +echo "deb http://openresty.org/package/arm64/ubuntu $(lsb_release -sc) main" \ + | sudo tee /etc/apt/sources.list.d/openresty.list +``` + +- 步骤四:更新 APT 索引: + +```shell +sudo apt-get update +``` + +然后就可以像下面这样安装软件包,比如 `OpenResty`: + +```shell +sudo apt-get -y install openresty +``` + +- 步骤五:(可选)可以通过下面命令删除该包和对应的关联包: + +```shell +sudo apt-get -y install --no-install-recommends software-properties-common +``` + +成功安装 `OpenResty` : + + + +3. 重新运行安装依赖脚本 (参考上面 1. ) +4. 接着运行 `LUAROCKS_SERVER=https://luarocks.cn` 命令安装依赖: + + + +运行下面命令即可: + +```shell +curl https://raw.githubusercontent.com/apache/apisix/master/utils/linux-install-luarocks.sh -sL | bash - +``` + + + +又出现错误提示了。。。接着运行下面命令: + +```shell +sudo apt install wget sudo unzip +``` + +接着我们重新运行一次: + +```shell +curl https://raw.githubusercontent.com/apache/apisix/master/utils/linux-install-luarocks.sh -sL | bash - +``` + +然后我们继续运行安装依赖的命令:`LUAROCKS_SERVER=https://luarocks.cn make deps` +终于成功了,哭了,坑确实太多了。 + + + +大部分依赖已经成功安装好,但是又有新的错误提示了。 +这里看起来是两个仓库未能成功克隆下来,没关系,先往后面运行试试: + +5. 安装 APISIX 命令 + +```shell +make install +// 如果出现权限不足的提示,用 sudo make install +``` + +成功: + + + +## 安装 etcd + +### 踩坑 etcd + +启动 APISIX 之前需要安装下 etcd,参考 [官方文档](https://apisix.apache.org/docs/apisix/2.10/install-dependencies/#ubuntu-1604--1804) + +>(由于该安装教程并不是针对 arm 写的,所以虽然成功安装了 etcd,但是未能成功将 etcd 运行起来,原因是因为默认使用的 x86 的二进制文件启动,所以无法运行。可以跳过该部分直接参考在 「docker 中运行 etcd 服务」部分) + +- 第一步运行: + +```shell +wget https://github.com/etcd-io/etcd/releases/download/v3.4.13/etcd-v3.4.13-linux-amd64.tar.gz +``` + +- 第二部运行: + +```shell +tar -xvf etcd-v3.4.13-linux-amd64.tar.gz && \ cd etcd-v3.4.13-linux-amd64 && \ sudo cp -a etcd etcdctl /usr/bin/ +``` + +成功: + + + +- 第三部启动 etcd 服务 + +```shell +nohup etcd & +``` + + + +然后我在后面运行 APISIX 时发现 etcd 报错了: + + + +发现在 arm 上的 ubuntu 裸跑 etcd 坑太多了,各种各样的错误,后来决定还是跑 docker 吧~ + +### 在 docker 中运行 etcd 服务 + +1. 安装 docker + +```shell +sudo apt install docker.io +``` + +Tip: docker 常用的命令:(无权限错误在命令前添加 sudo) + +- 查看所有容器列表 docker ps -a +- 查看正在运行的容器列表 docker ps +- 查看镜像列表 docker image list +- 删除所有容器 docker container prune +- 删除所有镜像 docker image prune -f -a + +更多参考:[Docker 入门教程 - 阮一峰的网络日志](https://www.ruanyifeng.com/blog/2018/02/docker-tutorial.html) + +2. 拉取并运行 etcd + +```shell +sudo docker run -d --name etcd -p 2379:2379 -e ETCD_UNSUPPORTED_ARCH=arm64 -e ETCD_LISTEN_CLIENT_URLS=http://0.0.0.0:2379 -e ETCD_ADVERTISE_CLIENT_URLS=http://0.0.0.0:2379 gcr.io/etcd-development/etcd:v3.5.1-arm64 +``` + +注意:该镜像需要开代理。 +成功: + + Review comment: ditto ########## File path: website/i18n/zh/docusaurus-plugin-content-blog/2022/01/11/building-apisix-in-ubuntu-for-arm.md ########## @@ -0,0 +1,247 @@ +--- +title: "在 arm 版 ubuntu 构建 APISIX" +authors: + - name: "郭奇" + title: "Author" + url: "https://github.com/guoqqqi"; + image_url: "https://avatars.githubusercontent.com/u/72343596?v=4"; +keywords: +- Apache APISIX +- arm +- ubuntu +- m1 +description: 本文为大家描述了在 M1 中启用 arm 版 ubuntu 通过源码构建 Apache APISIX 的详细操作步骤,通过阅读本文,大家对于在 arm ubuntu 上构建 Apache APISIX 更加快捷。 +tags: [Technology] +--- + +> 本篇文章记录了通过源码在 arm 版 ubuntu 中构建 Apache APISIX 的详细踩坑记录,ubuntu 环境使用的是 [https://multipass.run/](https://multipass.run/) 中的 Multipass 。因为它可以在 M1 上使用~ + +<!--truncate--> + +## 克隆源码 + +首先根据 [官方文档](https://apisix.apache.org/zh/docs/apisix/how-to-build#%E9%80%9A%E8%BF%87%E6%BA%90%E7%A0%81%E5%8C%85%E5%AE%89%E8%A3%85) 安装 APISIX 源码仓库。并且进入项目文件。 + +```shell +cd apisix-2.11.0 +``` + +## 安装项目依赖 + +1. 现在我们可以通过脚本一键安装项目所需要的依赖拉,在根目录下运行下面命令: + +```shell +bash utils/install-dependencies.sh +``` + + + +不出所料,没有成功跑完。通过错误提示我们知道,这里是未能成功安装 `OpenResty`。原因是默认没有 `arm 64` 平台的源。 + +2. 下面我们手动安装下 OpenResty:参考 [https://openresty.org/cn/linux-packages.html#ubuntu](https://openresty.org/cn/linux-packages.html#ubuntu) + +- 步骤一:安装导入 GPG 公钥时所需的几个依赖包(整个安装过程完成后可以随时删除它们): + +```shell +sudo apt-get -y install --no-install-recommends wget gnupg ca-certificates +``` + +- 步骤二:导入我们的 GPG 密钥: + +```shell +wget -O - https://openresty.org/package/pubkey.gpg | sudo apt-key add - +``` + +成功: + + + +- 步骤三:添加 OpenResty 官方 APT 仓库。对于 x86_64 或 amd64 系统,可以使用下面的命令: + +```shell +echo "deb http://openresty.org/package/ubuntu $(lsb_release -sc) main" \ + | sudo tee /etc/apt/sources.list.d/openresty.list +``` + +- 而对于 arm64 或 aarch64 系统,则可以使用下面的命令:(我在 M1 上运行的是该命令,上个命令会报错) + +```shell +echo "deb http://openresty.org/package/arm64/ubuntu $(lsb_release -sc) main" \ + | sudo tee /etc/apt/sources.list.d/openresty.list +``` + +- 步骤四:更新 APT 索引: + +```shell +sudo apt-get update +``` + +然后就可以像下面这样安装软件包,比如 `OpenResty`: + +```shell +sudo apt-get -y install openresty +``` + +- 步骤五:(可选)可以通过下面命令删除该包和对应的关联包: + +```shell +sudo apt-get -y install --no-install-recommends software-properties-common +``` + +成功安装 `OpenResty` : + + + +3. 重新运行安装依赖脚本 (参考上面 1. ) +4. 接着运行 `LUAROCKS_SERVER=https://luarocks.cn` 命令安装依赖: + + + +运行下面命令即可: + +```shell +curl https://raw.githubusercontent.com/apache/apisix/master/utils/linux-install-luarocks.sh -sL | bash - +``` + + + +又出现错误提示了。。。接着运行下面命令: + +```shell +sudo apt install wget sudo unzip +``` + +接着我们重新运行一次: + +```shell +curl https://raw.githubusercontent.com/apache/apisix/master/utils/linux-install-luarocks.sh -sL | bash - +``` + +然后我们继续运行安装依赖的命令:`LUAROCKS_SERVER=https://luarocks.cn make deps` +终于成功了,哭了,坑确实太多了。 + + + +大部分依赖已经成功安装好,但是又有新的错误提示了。 +这里看起来是两个仓库未能成功克隆下来,没关系,先往后面运行试试: + +5. 安装 APISIX 命令 + +```shell +make install +// 如果出现权限不足的提示,用 sudo make install +``` + +成功: + + + +## 安装 etcd + +### 踩坑 etcd + +启动 APISIX 之前需要安装下 etcd,参考 [官方文档](https://apisix.apache.org/docs/apisix/2.10/install-dependencies/#ubuntu-1604--1804) + +>(由于该安装教程并不是针对 arm 写的,所以虽然成功安装了 etcd,但是未能成功将 etcd 运行起来,原因是因为默认使用的 x86 的二进制文件启动,所以无法运行。可以跳过该部分直接参考在 「docker 中运行 etcd 服务」部分) + +- 第一步运行: + +```shell +wget https://github.com/etcd-io/etcd/releases/download/v3.4.13/etcd-v3.4.13-linux-amd64.tar.gz +``` + +- 第二部运行: + +```shell +tar -xvf etcd-v3.4.13-linux-amd64.tar.gz && \ cd etcd-v3.4.13-linux-amd64 && \ sudo cp -a etcd etcdctl /usr/bin/ +``` + +成功: + + + +- 第三部启动 etcd 服务 + +```shell +nohup etcd & +``` + + + +然后我在后面运行 APISIX 时发现 etcd 报错了: + + + +发现在 arm 上的 ubuntu 裸跑 etcd 坑太多了,各种各样的错误,后来决定还是跑 docker 吧~ + +### 在 docker 中运行 etcd 服务 + +1. 安装 docker + +```shell +sudo apt install docker.io +``` + +Tip: docker 常用的命令:(无权限错误在命令前添加 sudo) + +- 查看所有容器列表 docker ps -a +- 查看正在运行的容器列表 docker ps +- 查看镜像列表 docker image list +- 删除所有容器 docker container prune +- 删除所有镜像 docker image prune -f -a + +更多参考:[Docker 入门教程 - 阮一峰的网络日志](https://www.ruanyifeng.com/blog/2018/02/docker-tutorial.html) + +2. 拉取并运行 etcd + +```shell +sudo docker run -d --name etcd -p 2379:2379 -e ETCD_UNSUPPORTED_ARCH=arm64 -e ETCD_LISTEN_CLIENT_URLS=http://0.0.0.0:2379 -e ETCD_ADVERTISE_CLIENT_URLS=http://0.0.0.0:2379 gcr.io/etcd-development/etcd:v3.5.1-arm64 +``` + +注意:该镜像需要开代理。 +成功: + + + +验证是否运行: + +```shell +sudo docker ps -a +``` + + + +这样,etcd 已经成功启动了。 + +## 启动 APISIX + +所有的依赖项目已经准备完毕,现在我们可以启动 APISIX 拉~直接参考如何构建 APISIX [官方文档](https://apisix.apache.org/docs/apisix/how-to-build) + +- 第一步安装依赖 + +```shell +make deps +make install +``` + +- 第二部初始化依赖,启动 APISIX + +```shell +apisix init + +// start APISIX +apisix start + +// stop APISIX Review comment: ```suggestion # stop APISIX ``` ########## File path: website/i18n/zh/docusaurus-plugin-content-blog/2022/01/11/building-apisix-in-ubuntu-for-arm.md ########## @@ -0,0 +1,247 @@ +--- +title: "在 arm 版 ubuntu 构建 APISIX" +authors: + - name: "郭奇" + title: "Author" + url: "https://github.com/guoqqqi"; + image_url: "https://avatars.githubusercontent.com/u/72343596?v=4"; +keywords: +- Apache APISIX +- arm +- ubuntu +- m1 +description: 本文为大家描述了在 M1 中启用 arm 版 ubuntu 通过源码构建 Apache APISIX 的详细操作步骤,通过阅读本文,大家对于在 arm ubuntu 上构建 Apache APISIX 更加快捷。 +tags: [Technology] +--- + +> 本篇文章记录了通过源码在 arm 版 ubuntu 中构建 Apache APISIX 的详细踩坑记录,ubuntu 环境使用的是 [https://multipass.run/](https://multipass.run/) 中的 Multipass 。因为它可以在 M1 上使用~ + +<!--truncate--> + +## 克隆源码 + +首先根据 [官方文档](https://apisix.apache.org/zh/docs/apisix/how-to-build#%E9%80%9A%E8%BF%87%E6%BA%90%E7%A0%81%E5%8C%85%E5%AE%89%E8%A3%85) 安装 APISIX 源码仓库。并且进入项目文件。 + +```shell +cd apisix-2.11.0 +``` + +## 安装项目依赖 + +1. 现在我们可以通过脚本一键安装项目所需要的依赖拉,在根目录下运行下面命令: + +```shell +bash utils/install-dependencies.sh +``` + + + +不出所料,没有成功跑完。通过错误提示我们知道,这里是未能成功安装 `OpenResty`。原因是默认没有 `arm 64` 平台的源。 + +2. 下面我们手动安装下 OpenResty:参考 [https://openresty.org/cn/linux-packages.html#ubuntu](https://openresty.org/cn/linux-packages.html#ubuntu) + +- 步骤一:安装导入 GPG 公钥时所需的几个依赖包(整个安装过程完成后可以随时删除它们): + +```shell +sudo apt-get -y install --no-install-recommends wget gnupg ca-certificates +``` + +- 步骤二:导入我们的 GPG 密钥: + +```shell +wget -O - https://openresty.org/package/pubkey.gpg | sudo apt-key add - +``` + +成功: + + + +- 步骤三:添加 OpenResty 官方 APT 仓库。对于 x86_64 或 amd64 系统,可以使用下面的命令: + +```shell +echo "deb http://openresty.org/package/ubuntu $(lsb_release -sc) main" \ + | sudo tee /etc/apt/sources.list.d/openresty.list +``` + +- 而对于 arm64 或 aarch64 系统,则可以使用下面的命令:(我在 M1 上运行的是该命令,上个命令会报错) + +```shell +echo "deb http://openresty.org/package/arm64/ubuntu $(lsb_release -sc) main" \ + | sudo tee /etc/apt/sources.list.d/openresty.list +``` + +- 步骤四:更新 APT 索引: + +```shell +sudo apt-get update +``` + +然后就可以像下面这样安装软件包,比如 `OpenResty`: + +```shell +sudo apt-get -y install openresty +``` + +- 步骤五:(可选)可以通过下面命令删除该包和对应的关联包: + +```shell +sudo apt-get -y install --no-install-recommends software-properties-common +``` + +成功安装 `OpenResty` : + + + +3. 重新运行安装依赖脚本 (参考上面 1. ) +4. 接着运行 `LUAROCKS_SERVER=https://luarocks.cn` 命令安装依赖: + + + +运行下面命令即可: + +```shell +curl https://raw.githubusercontent.com/apache/apisix/master/utils/linux-install-luarocks.sh -sL | bash - +``` + + + +又出现错误提示了。。。接着运行下面命令: + +```shell +sudo apt install wget sudo unzip +``` + +接着我们重新运行一次: + +```shell +curl https://raw.githubusercontent.com/apache/apisix/master/utils/linux-install-luarocks.sh -sL | bash - +``` + +然后我们继续运行安装依赖的命令:`LUAROCKS_SERVER=https://luarocks.cn make deps` +终于成功了,哭了,坑确实太多了。 + + + +大部分依赖已经成功安装好,但是又有新的错误提示了。 +这里看起来是两个仓库未能成功克隆下来,没关系,先往后面运行试试: + +5. 安装 APISIX 命令 + +```shell +make install +// 如果出现权限不足的提示,用 sudo make install +``` + +成功: + + + +## 安装 etcd + +### 踩坑 etcd + +启动 APISIX 之前需要安装下 etcd,参考 [官方文档](https://apisix.apache.org/docs/apisix/2.10/install-dependencies/#ubuntu-1604--1804) + +>(由于该安装教程并不是针对 arm 写的,所以虽然成功安装了 etcd,但是未能成功将 etcd 运行起来,原因是因为默认使用的 x86 的二进制文件启动,所以无法运行。可以跳过该部分直接参考在 「docker 中运行 etcd 服务」部分) + +- 第一步运行: + +```shell +wget https://github.com/etcd-io/etcd/releases/download/v3.4.13/etcd-v3.4.13-linux-amd64.tar.gz +``` + +- 第二部运行: + +```shell +tar -xvf etcd-v3.4.13-linux-amd64.tar.gz && \ cd etcd-v3.4.13-linux-amd64 && \ sudo cp -a etcd etcdctl /usr/bin/ +``` + +成功: + + + +- 第三部启动 etcd 服务 + +```shell +nohup etcd & +``` + + + +然后我在后面运行 APISIX 时发现 etcd 报错了: + + + +发现在 arm 上的 ubuntu 裸跑 etcd 坑太多了,各种各样的错误,后来决定还是跑 docker 吧~ + +### 在 docker 中运行 etcd 服务 + +1. 安装 docker + +```shell +sudo apt install docker.io +``` + +Tip: docker 常用的命令:(无权限错误在命令前添加 sudo) + +- 查看所有容器列表 docker ps -a +- 查看正在运行的容器列表 docker ps +- 查看镜像列表 docker image list +- 删除所有容器 docker container prune +- 删除所有镜像 docker image prune -f -a + +更多参考:[Docker 入门教程 - 阮一峰的网络日志](https://www.ruanyifeng.com/blog/2018/02/docker-tutorial.html) + +2. 拉取并运行 etcd + +```shell +sudo docker run -d --name etcd -p 2379:2379 -e ETCD_UNSUPPORTED_ARCH=arm64 -e ETCD_LISTEN_CLIENT_URLS=http://0.0.0.0:2379 -e ETCD_ADVERTISE_CLIENT_URLS=http://0.0.0.0:2379 gcr.io/etcd-development/etcd:v3.5.1-arm64 +``` + +注意:该镜像需要开代理。 +成功: + + + +验证是否运行: + +```shell +sudo docker ps -a +``` + + + +这样,etcd 已经成功启动了。 + +## 启动 APISIX + +所有的依赖项目已经准备完毕,现在我们可以启动 APISIX 拉~直接参考如何构建 APISIX [官方文档](https://apisix.apache.org/docs/apisix/how-to-build) Review comment: ```suggestion 所有的依赖项目已经准备完毕,现在我们可以启动 Apache APISIX~直接参考如何构建 APISIX [官方文档](https://apisix.apache.org/docs/apisix/how-to-build) ``` ########## File path: website/i18n/zh/docusaurus-plugin-content-blog/2022/01/11/building-apisix-in-ubuntu-for-arm.md ########## @@ -0,0 +1,247 @@ +--- +title: "在 arm 版 ubuntu 构建 APISIX" +authors: + - name: "郭奇" + title: "Author" + url: "https://github.com/guoqqqi"; + image_url: "https://avatars.githubusercontent.com/u/72343596?v=4"; +keywords: +- Apache APISIX +- arm +- ubuntu +- m1 +description: 本文为大家描述了在 M1 中启用 arm 版 ubuntu 通过源码构建 Apache APISIX 的详细操作步骤,通过阅读本文,大家对于在 arm ubuntu 上构建 Apache APISIX 更加快捷。 +tags: [Technology] +--- + +> 本篇文章记录了通过源码在 arm 版 ubuntu 中构建 Apache APISIX 的详细踩坑记录,ubuntu 环境使用的是 [https://multipass.run/](https://multipass.run/) 中的 Multipass 。因为它可以在 M1 上使用~ + +<!--truncate--> + +## 克隆源码 + +首先根据 [官方文档](https://apisix.apache.org/zh/docs/apisix/how-to-build#%E9%80%9A%E8%BF%87%E6%BA%90%E7%A0%81%E5%8C%85%E5%AE%89%E8%A3%85) 安装 APISIX 源码仓库。并且进入项目文件。 + +```shell +cd apisix-2.11.0 +``` + +## 安装项目依赖 + +1. 现在我们可以通过脚本一键安装项目所需要的依赖拉,在根目录下运行下面命令: + +```shell +bash utils/install-dependencies.sh +``` + + + +不出所料,没有成功跑完。通过错误提示我们知道,这里是未能成功安装 `OpenResty`。原因是默认没有 `arm 64` 平台的源。 Review comment: AMD64 or ARM 64? -- This is an automated message from the Apache Git Service. To respond to the message, please log on to GitHub and use the URL above to go to the specific comment. To unsubscribe, e-mail: [email protected] For queries about this service, please contact Infrastructure at: [email protected]