Administrator Administrator [http://community.jboss.org/people/admin] modified
the document:
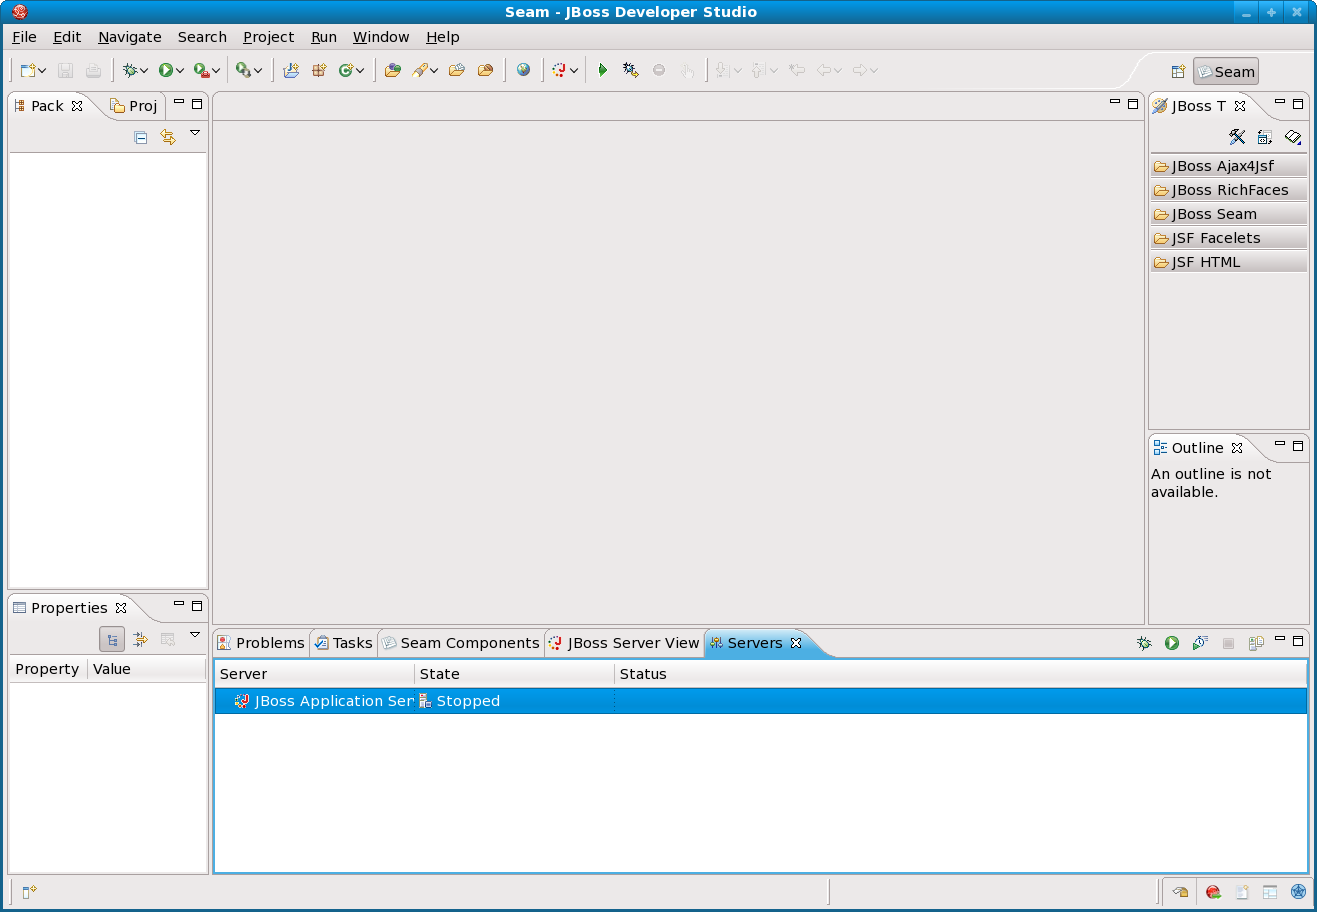
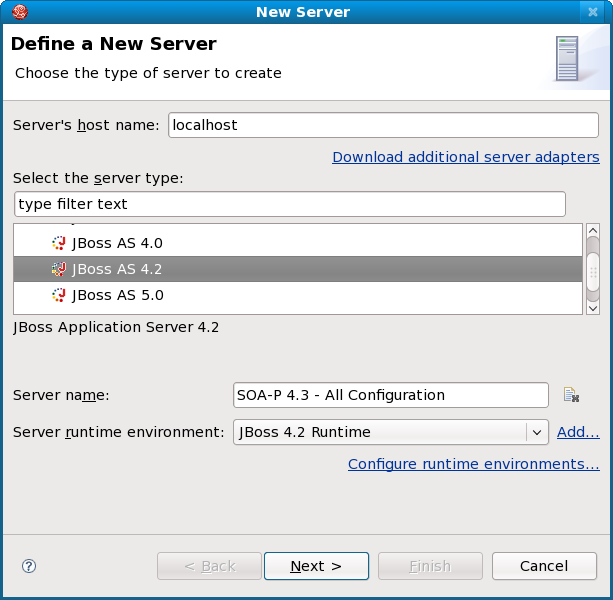
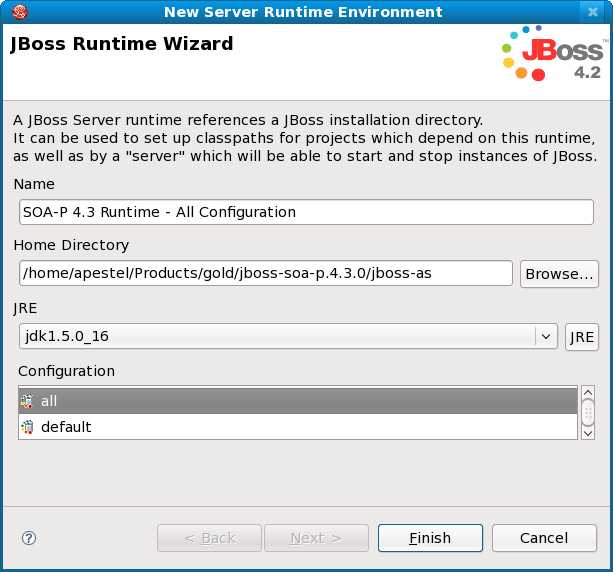
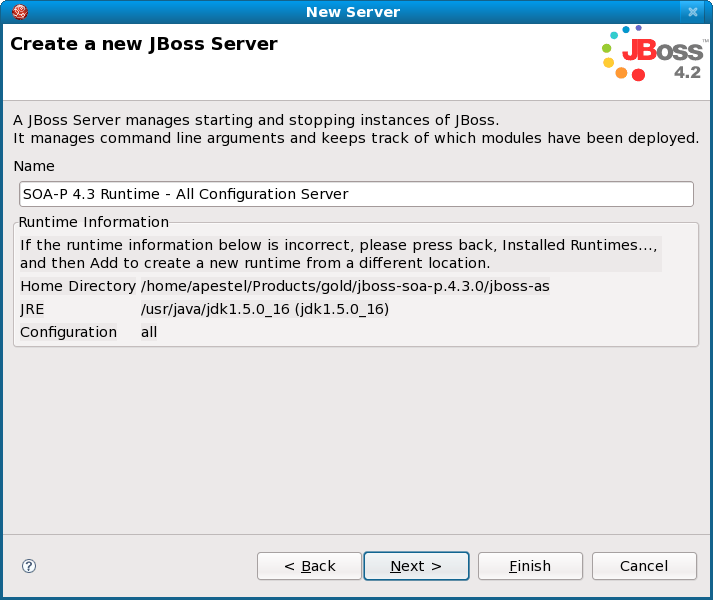
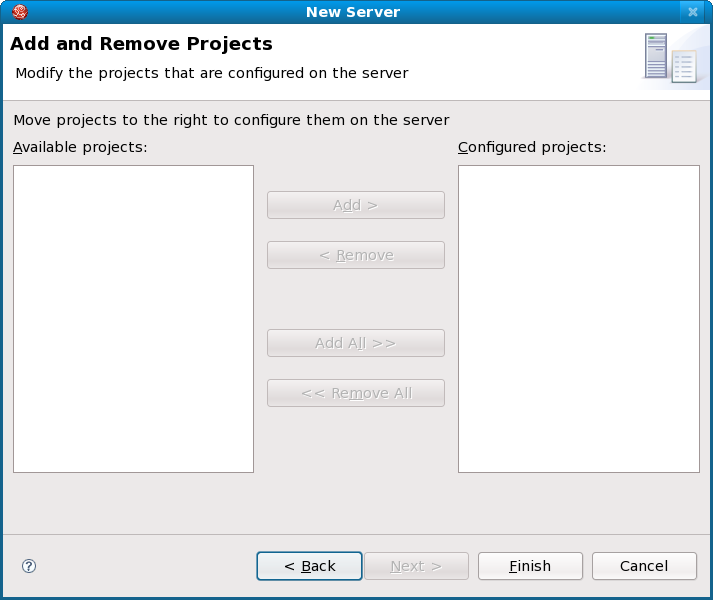
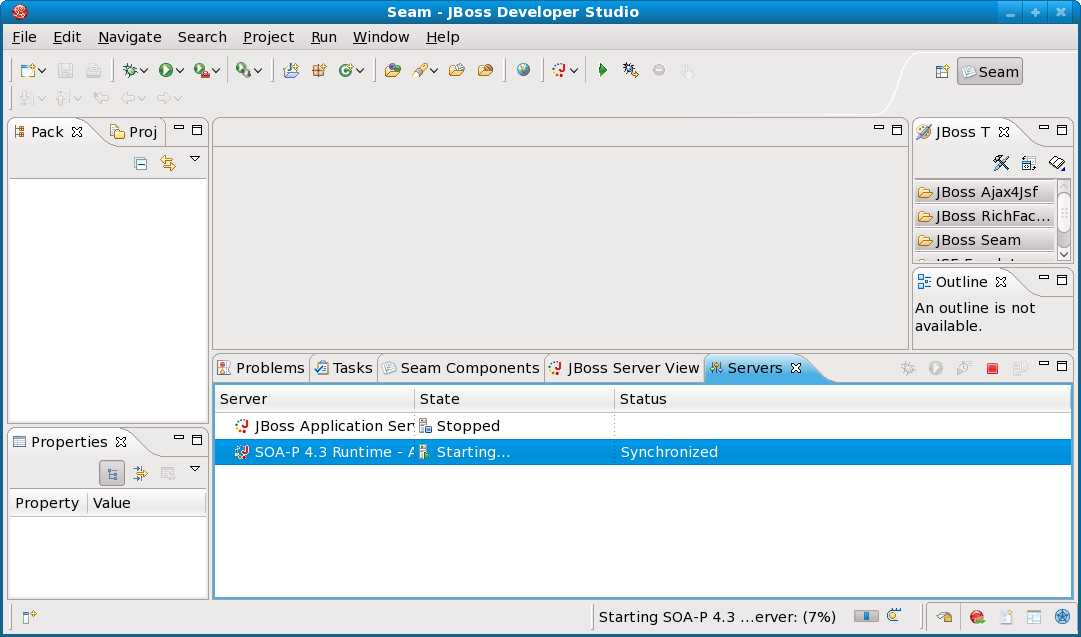
"SOA-P 4.3 Configuration with JBDS 2.0"

To view the document, visit: http://community.jboss.org/docs/DOC-13380

--------------------------------------------------------------
With the excellent new SOA-P 4.3 tooling in JBDS 2.0 (ESB project wizard,
jboss-esb.xml file editor, ESB quickstart example importer, jBPM project
creator, and jBPM JPDL editor), creating SOA-P 4.3 applications has become much
easier.

The first step to using these new features is to configure JBDS 2.0 to use a
SOA-P 4.3 server instance.  This wiki will demonstrate how to do that.

Prerequisites:
Install Java 1.5
Install SOA-P 4.3 GA
Install JBDS 2.0.0.CR1

First, we can just start the default JBDS 2.0 IDE.


http://community.jboss.org/servlet/JiveServlet/showImage/102-13380-1-1218/jbds_1.png

http://community.jboss.org/servlet/JiveServlet/downloadImage/102-13380-1-1218/362-251/jbds_1.png


Now, we need to right-click in the "Servers" tab and add a new server.


http://community.jboss.org/servlet/JiveServlet/showImage/102-13380-1-1219/jbds2.png

http://community.jboss.org/servlet/JiveServlet/downloadImage/102-13380-1-1219/317-311/jbds2.png


We'll change the server name to SOA-P as shown above and then need to add a new
server runtime environment by clicking the "Add..." link.


http://community.jboss.org/servlet/JiveServlet/showImage/102-13380-1-1220/jbds3.png

http://community.jboss.org/servlet/JiveServlet/downloadImage/102-13380-1-1220/306-286/jbds3.png


As shown above, we can give it a descriptive name, set the home directory to be
the "jboss-as" directory in SOA-P 4.3, and pick our server configuration (I
usually use the "all" configuration).  Now click the "Finish" button to get
back to the New Server dialog.


http://community.jboss.org/servlet/JiveServlet/showImage/102-13380-1-1222/jbds9.png

http://community.jboss.org/servlet/JiveServlet/downloadImage/102-13380-1-1222/282-283/jbds9.png


We can select our new Server runtime environment as shown above and click the
"Next" button.


http://community.jboss.org/servlet/JiveServlet/showImage/102-13380-1-1221/jbds5.png

http://community.jboss.org/servlet/JiveServlet/downloadImage/102-13380-1-1221/374-315/jbds5.png


Again, we just click the "Next" button.


http://community.jboss.org/servlet/JiveServlet/showImage/102-13380-1-1223/jbds6.png

http://community.jboss.org/servlet/JiveServlet/downloadImage/102-13380-1-1223/358-301/jbds6.png


If we had existing project to add to the SOA-P server, we could do that now,
but we don't, so just click "Finish".


http://community.jboss.org/servlet/JiveServlet/showImage/102-13380-1-1224/jbds7.png

http://community.jboss.org/servlet/JiveServlet/downloadImage/102-13380-1-1224/393-231/jbds7.png


That's it!  Now we can just right-click on the server and start it and/or add
projects to it like we would any other server.
--------------------------------------------------------------

Comment by going to Community
[http://community.jboss.org/docs/DOC-13380]

Create a new document in JBoss Tools at Community
[http://community.jboss.org/choose-container!input.jspa?contentType=102&containerType=14&container=2128]
_______________________________________________
jboss-user mailing list
[email protected]
https://lists.jboss.org/mailman/listinfo/jboss-user