SylviaBABY commented on a change in pull request #837:
URL: https://github.com/apache/apisix-website/pull/837#discussion_r783569374
########## File path: website/i18n/zh/docusaurus-plugin-content-blog/2022/01/11/building-apisix-in-ubuntu-for-arm.md ########## @@ -0,0 +1,249 @@ +--- +title: "如何在 ARM Ubuntu 中构建 Apache APISIX" +authors: + - name: "郭奇" + title: "Author" + url: "https://github.com/guoqqqi"; + image_url: "https://avatars.githubusercontent.com/u/72343596?v=4"; +keywords: +- Apache APISIX +- arm +- ubuntu +- Apple Macbook Pro M1 +description: 笔者使用的是 M1 芯片的 Macbook Pro,通过阅读本文,您将了解如何在 ARM Ubuntu 中通过源码构建 Apache APISIX。 +tags: [Technology] +--- + +> 笔者使用的是 M1 芯片的 Macbook Pro,借助 [https://multipass.run/](https://multipass.run/) 安装了 Ubuntu 系统,本文记录了如何在此环境中通过源码构建 Apache APISIX。 + +<!--truncate--> + +## 克隆源码 + +首先根据 [官方文档](https://apisix.apache.org/zh/docs/apisix/how-to-build#%E9%80%9A%E8%BF%87%E6%BA%90%E7%A0%81%E5%8C%85%E5%AE%89%E8%A3%85) 克隆 APISIX 源码仓库,然后进入项目目录。 + +```shell +git clone https://github.com/apache/apisix.git +cd apisix +git checkout release/2.11 +``` + +## 安装项目依赖 + +1. 接着,我们通过脚本一键安装项目所需要的依赖,在**项目根目录**运行如下命令: + +```shell +bash utils/install-dependencies.sh +``` + +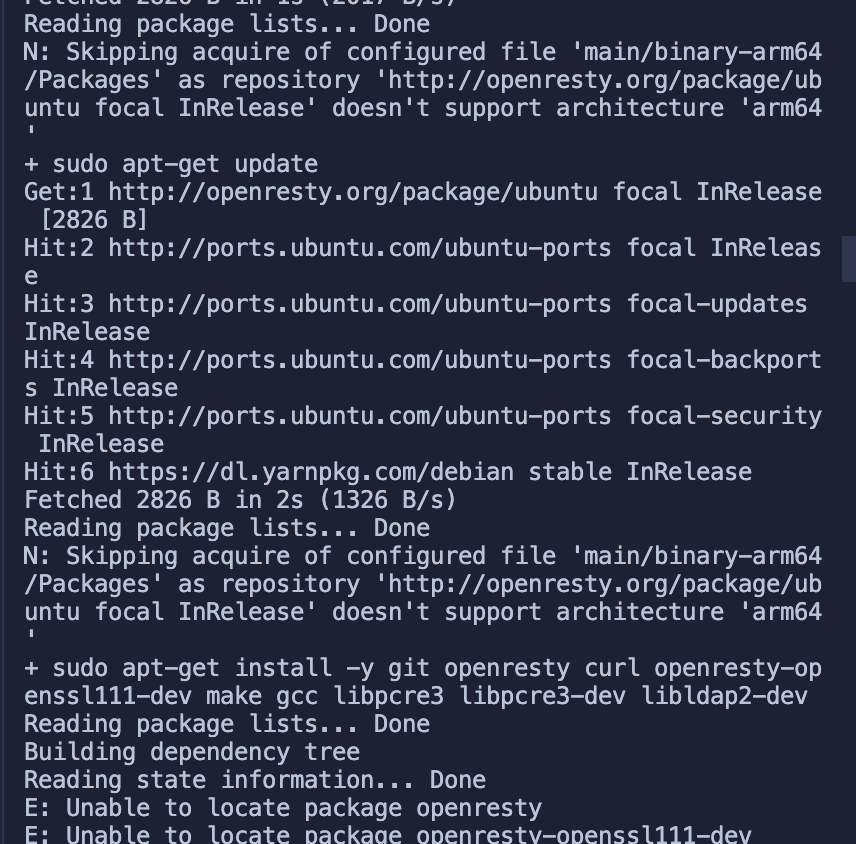 + +不出所料,没有成功跑完 🤔 通过错误提示我们知道,这里是未能成功安装 `OpenResty`。原因是默认没有 `ARM 64` 平台的源。 Review comment: ```suggestion 通过错误提示可知,是由于未能成功安装 `OpenResty` 导致。根本原因是默认没有 `ARM 64` 平台的源。 ``` -- This is an automated message from the Apache Git Service. To respond to the message, please log on to GitHub and use the URL above to go to the specific comment. To unsubscribe, e-mail: [email protected] For queries about this service, please contact Infrastructure at: [email protected]